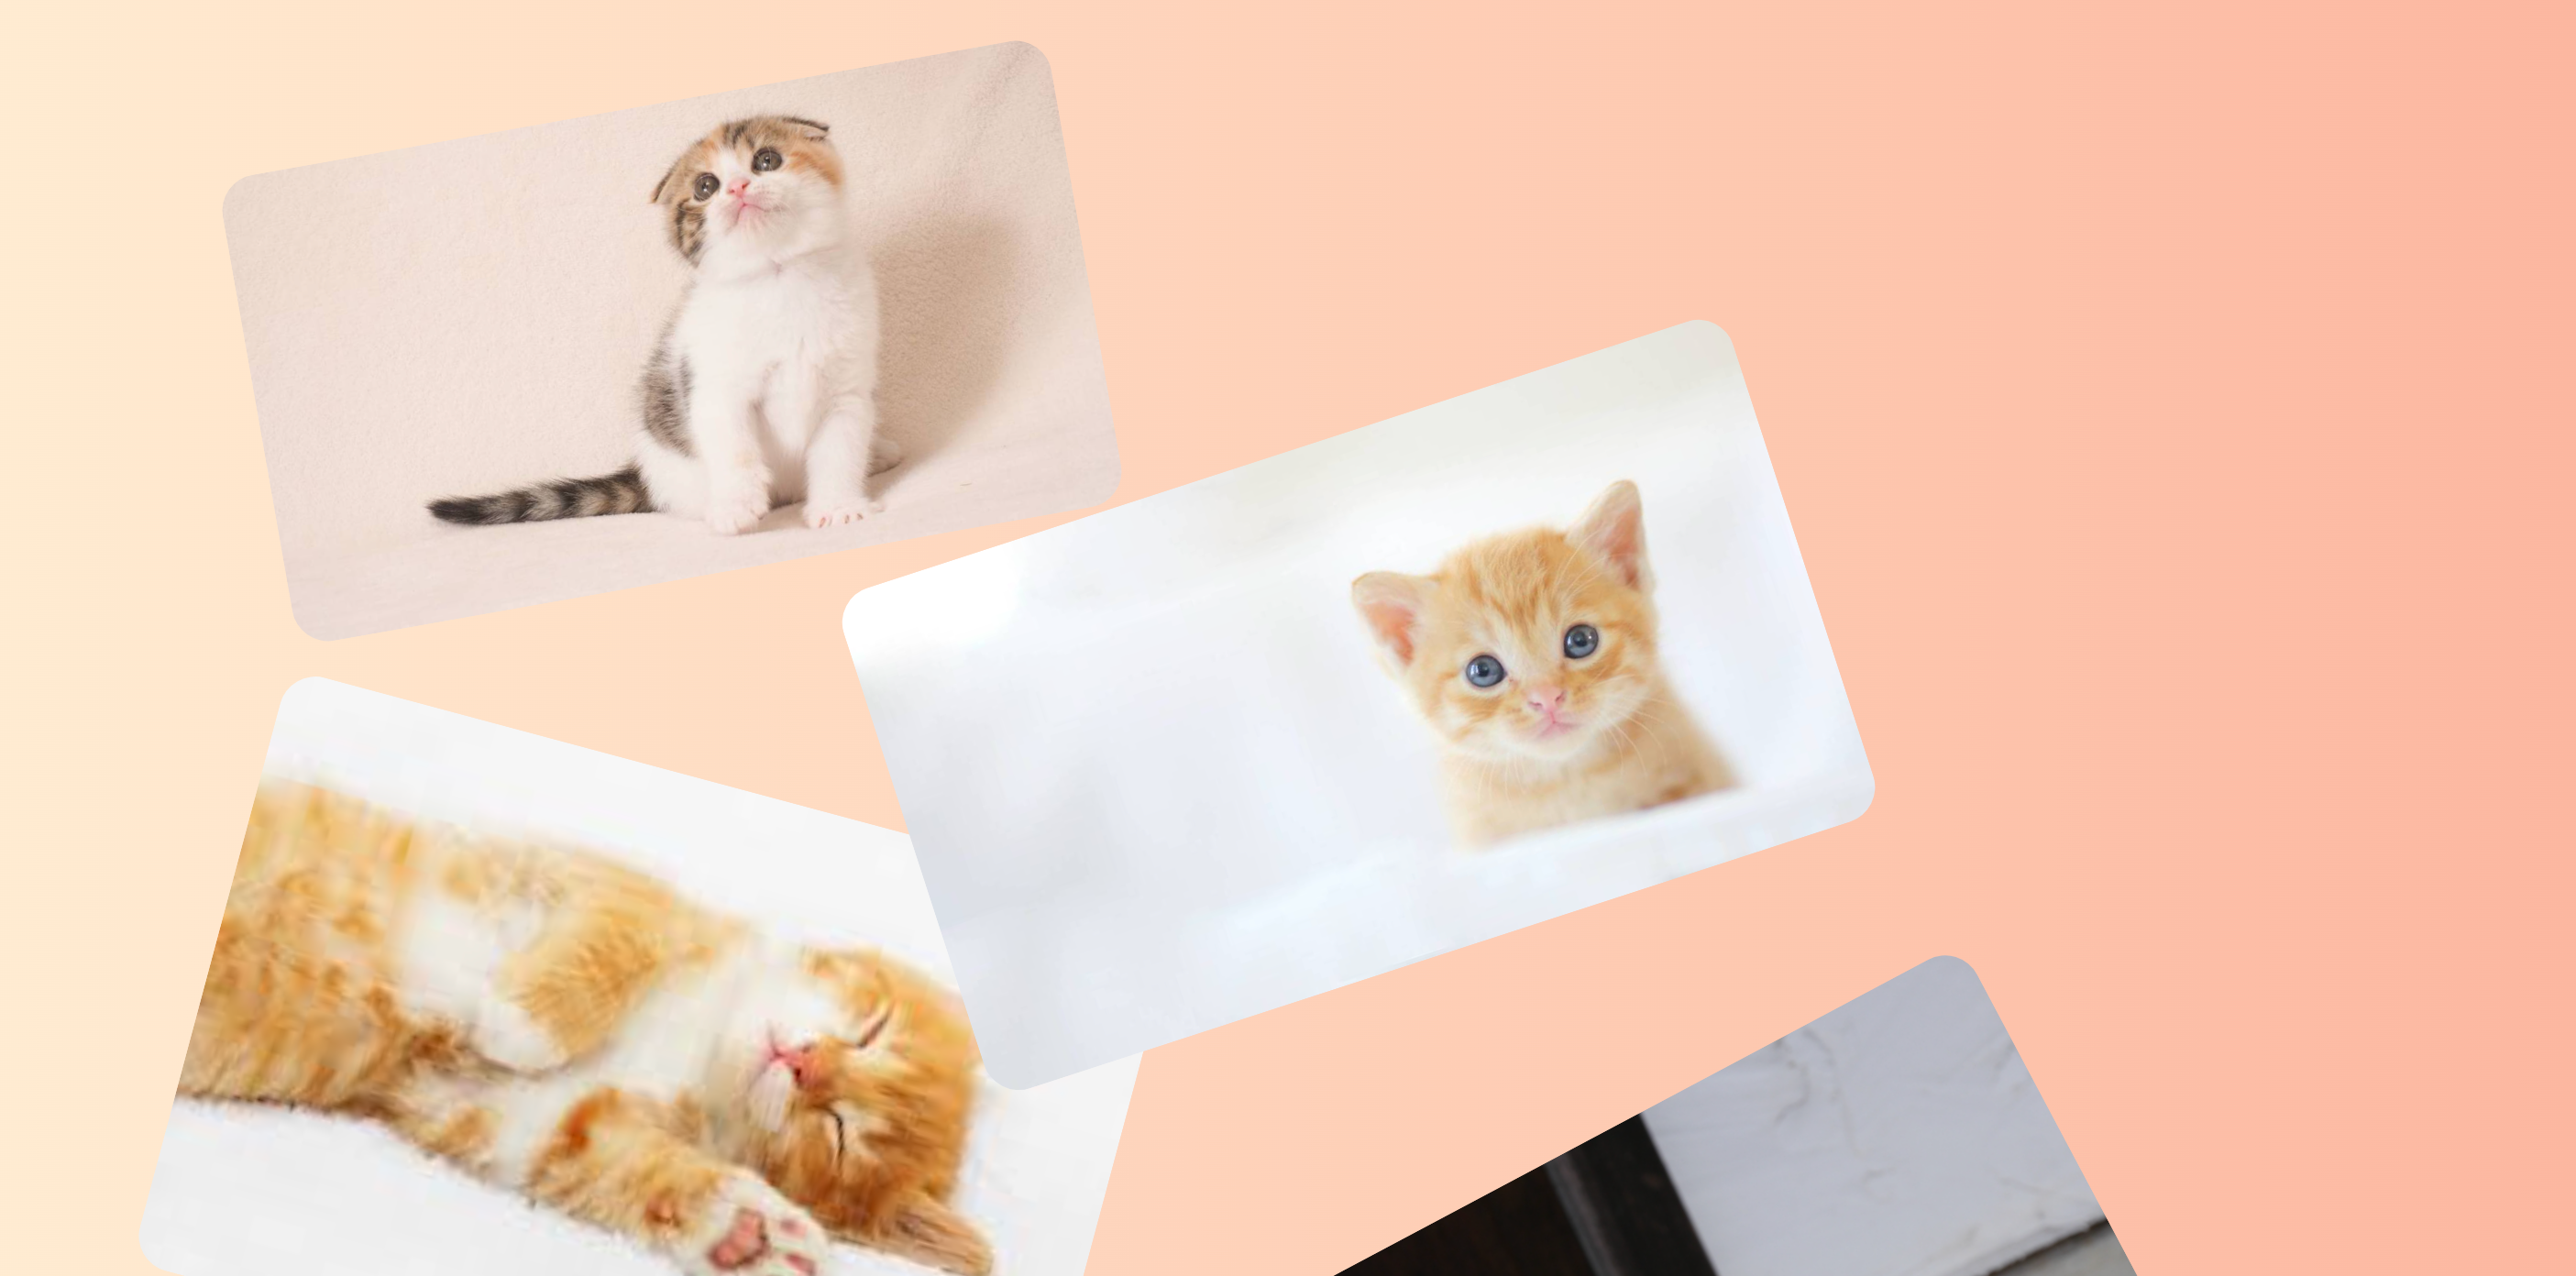
動機
・フォトシャワーはなんかいい感じに写真がスクリーンの上から降ってくるみたいな演出です。
・結婚式の披露宴のときに、披露宴でとった写真がリアルタイムでフォトシャワーで表示されたらおもしろそうだなあと思って結婚式の披露宴のために作りました。
S3は関係なくとりあえずローカルでも動くコードをかく
・この下のコードをコピペしてimage_list内の写真をそれぞれの環境の写真に変更すれば、とりあえずこんな感じで写真が上から下に降りてくるみたいな感じのことができてイメージができるはず。
・image_list内の写真を全部表示したら、S3からAPIであらたに写真をとってきて、image_listを作り直すという感じです。(S3からの写真の取得は別記事にします)
・披露宴中にどんどん写真がS3の方にたまっていくので、ちょこちょこ写真を取りに行くスタイルにしました。
<!DOCTYPE html>
<html lang="ja">
<head>
    <meta charset="UTF-8">
    <meta http-equiv="X-UA-Compatible" content="IE=edge">
    <meta name="viewport" content="width=device-width, initial-scale=1.0">
    <title>Wedding_photo_shower</title>
    <link rel="stylesheet" href="https://stackpath.bootstrapcdn.com/bootstrap/4.3.1/css/bootstrap.min.css" integrity="sha384-ggOyR0iXCbMQv3Xipma34MD+dH/1fQ784/j6cY/iJTQUOhcWr7x9JvoRxT2MZw1T" crossorigin="anonymous">
    <style>
        .photo-shower-container {
            position: relative;
            height: 100vh; /* コンテナの高さ */
            width: 100%; /* コンテナの横幅 */
            overflow: hidden; /* コンテナからはみ出した要素を隠す */
            background-image: linear-gradient(to right, #FFECD2 0%, #FCB69F 100%);
        }
        /* 写真のスタイル */
        .picture {
            position: absolute;
            animation: animate-picture 10s linear;
        }
        .pic {
            max-width: 600px;
            max-height: 600px;
        }
        /* 写真のアニメーション */
        @keyframes animate-picture {
            0% {
                top: 0;
                opacity: 0;
            }
            10% {
                opacity: 1;
            }
            90% {
                opacity: 1;
            }
            100% {
                opacity: 0;
                top: 100vh;
            }
        }
        .content {
            position: relative;
        }
    </style>
</head>
<body>
    <main class='content'>
        <div class='photo-shower-container'></div>
    </main>
</body>
<script src="https://code.jquery.com/jquery-3.6.0.min.js"></script>
<script>
window.addEventListener('DOMContentLoaded', () => {
    // はじめに表示される写真たち。ここのファイル指定をそれぞれの環境に合わせるととりあえずうごく
    let image_list = [
        'image_cat/cat1.jpeg',
        'image_cat/cat2.jpeg',
        'image_cat/cat3.jpeg',
        'image_cat/cat4.jpeg',
        'image_cat/cat5.jpeg',
        'image_cat/cat6.jpeg',
        'image_cat/cat7.jpeg',
        'image_cat/cat8.jpeg',
        'image_cat/cat9.jpeg',
        'image_cat/cat10.jpeg'
    ];

    const section = document.querySelector('.photo-shower-container');
    let field = 'right'; // 左右交互に写真を表示させるため
    let count = 0;

    // 写真を生成する関数
    function createPic() {
        const pictureEl = document.createElement('span');
        pictureEl.className = 'picture';
        let image = document.createElement('img');
        image.className = 'pic';
        image.src = image_list[count];
        image.style.borderRadius = '20px';

        // 写真の傾き具合を-30〜30degでランダムに
        let min = 0 ;
        let max = 60 ;
        let rotate_num = Math.floor( Math.random() * (max + 1 - min) ) + min - 30;
        image.style.transform = 'rotate(' + rotate_num + 'deg)';

        // 写真の長辺の長さを指定
        const minSize = 400;
        const maxSize = 600;
        let size = Math.random() * (maxSize + 1 - minSize) + minSize;

        // ここで写真のむきを取得。
        getPictureDirection(image.src)
            // dataにはwidthかheight。長い方がstringで入っている。
            .then((data) => {
                if(data === 'width') {
                    image.style.width = size + 'px';
                    image.style.height = 'auto';
                } else {
                    image.style.height = size + 'px';
                    image.style.weight = 'auto';
                }
                pictureEl.appendChild(image);
                // 左右の順番に写真が表示されるように
                if (field === 'right') {
                    pictureEl.style.left = Math.random() * 300 + 'px';
                    field = 'left';
                } else {
                    pictureEl.style.left = Math.random() * 475  + 475 + 'px';
                    field = 'right'
                }
                section.appendChild(pictureEl);
            })
            .catch((err) => {
                console.log("error", err);
            });

        // 一定時間が経てば写真を消す
        setTimeout(() => {
          pictureEl.remove();
        }, 10000);
        count += 1;

        // image_listを全て表示したら、APIで次に表示させる写真を取得しimage_listを作成。
        if ( count >= image_list.length ) {
            // APIに関しては別記事参照。
            changePicture(modify_time).done(function(data,textStatus,jqXHR) {
                console.log("成功:" + jqXHR.status);
                image_list = [];
                // 取得したファイル名を表示するimage_listに入れる
                $.each(data,(index,value) => {
                  image_list.push(value.filename);
                  modify_time = value.last_modified;
                });
            }).fail(function(jqXHR, textStatus, errorThrown) {
                console.log("ajax失敗:" + jqXHR.status);
                console.log(textStatus, errorThrown);
            });
            count = 0;
        }
    }

  // 写真を生成する間隔をミリ秒で指定
    setInterval(function () {
        createPic()
    }, 2500);
});

// APIでimage_listの中身を取得。別記事参照。
function changePicture(modify_time){
    return $.ajax({
        url:'*****',
        type:'POST',
        data:{body:modify_time},
        dataType:'json', // 応答のデータの種類 (xml/html/script/json/jsonp/text)
        contentType: "application/json;charset=UTF-",
        accessControlAllowOrigin: '*',
        headers:{
            'x-api-key': '*****'
        }
    })
}


// 写真を読み込んでから向きの判定
const loadImg = function(src){
    return new Promise(function(resolve, reject){
        const image = new Image();
        image.src = src;
        image.onload = function(){
            resolve(image);
        }
        image.onerror = function(error){
            reject(error);
        }
    });
}

// 写真の向きを取得
let getPictureDirection = function getDirection(src) {
    return new Promise(function(resolve, reject){
        loadImg(src)
    //読み込みが完了した(画像が設定された)Imageオブジェクトを受け取って処理
    .then(function(res){
        if (res.width > res.height) {
            resolve('width');
        } else {
            resolve('height');
        }
    })
    //読み込みエラー時の処理
    .catch(function(error){
        console.log(error);
    });
  });
}

</script>
補足
・結婚式では自分のmacと会場のスクリーンをつなぐ感じだったので、自分のmacでいい感じに表示されればよいかなというcssです。
・写真の大きさは最初はmax-heightとmax-widthを指定するだけだったのですが、いまいちだったので、ちゃんと写真の向きを取得してから、maxの値を決めました。写真をロードするのをまたないといけなかったので、ここでコードが結構増えてしまった。。
・実際に会場でリハーサルをしたときに写真が見にくかったので、本番は背景を黒にしました。実際表示してみないと分からない部分だなあと思いました。
・ひとまず結婚式は良い感じだったのでよし!
