はじめに
Zephyrは、2015年から開発されている組込み向けRTOSです。The Linux Foundationのプロジェクトでもあります。
ソースコードはzephyrproject-rtos/zephyr、ドキュメントはZephyr Documentationにあります。
ライセンスはApache 2.0で、Intel, Nordic, NXPがプラチナスポンサー、SiFive, TI, Synopsysなどがシルバースポンサーです。
OSのソースコードリーディングする分には、Linuxよりかなりハードルが低く感じました。
起源
VxWorksのmicrokernelからforkしたようです。
The Zephyr kernel is derived from Wind River’s commercial VxWorks Microkernel Profile for VxWorks.
インテルの枷が外れたウインドリバー、組み込みOSの老舗はIoTで本気を出せるか、を見ると、Wind River Rocketというプロジェクトをやっていて、それがZephyr Projectに統合されたようですね。
first commitを見ると、intelからコミットされています (Wind Riverは2009年にintelに買収され、2018年に売却しています)。
commit 8ddf82cf70dc6f951ab477f325dee0efde3ec589
Author: Inaky Perez-Gonzalez <inaky.perez-gonzalez@intel.com>
Date:   Fri Apr 10 16:44:37 2015 -0700

    First commit

    Signed-off-by:  <inaky.perez-gonzalez@intel.com>
アーキテクチャ、ボードサポート
様々なプロセッサアーキテクチャがサポートされています。
ARM Cortex-M, Intel x86, ARC, Nios II, Tensilica Xtensa, and RISC-V
サポートされているボードのリストは、下のページで見ることができます。
よく見ると、Zedborad Pulpinoのサポートがあります。
Pulpinoは、PULPが開発しているRISC-Vの実装で、OSSとして公開されています。
Zedboardは、Zynqの評価ボードの1つで、FPGAを積んでいます。PulpinoはZedboard上で動作させることができます。
つまり、Zedboard (6万円くらい)があれば、FPGAにRISC-V構築して、Zephyr動かすことができます。
CPUからペリフェラル、OSまで全てOSSで、好きにカスタマイズできる環境の完成です!
ビルドツール
モダンです。
- cmake + ninja
- テストがあって、カバレッジ測定しています。
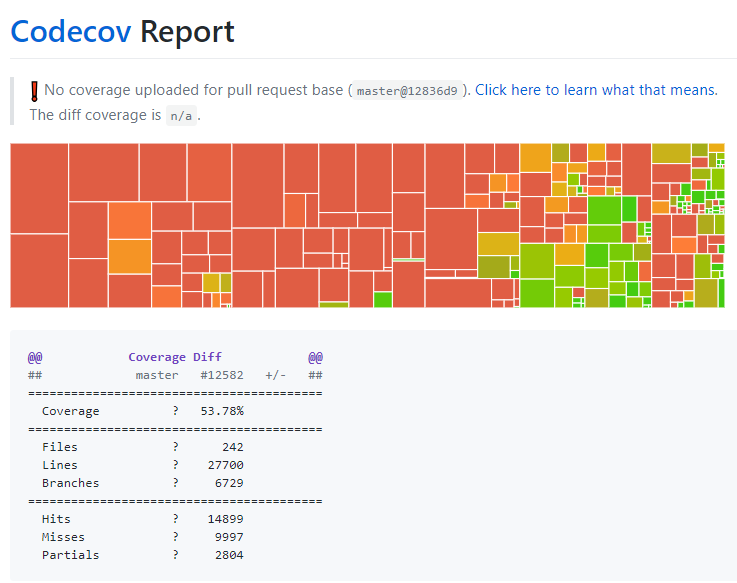
- マージ時にカバレッジレポートが上がってくるようになっています。GitHubで適当なpull requestを覗いてみて下さい。
- マージ時にカバレッジレポートが上がってくるようになっています。GitHubで適当なpull requestを覗いてみて下さい。
- 一部設定ファイルはyaml
- コンパイル時にpythonで解析して、ヘッダファイル作ったりしています
- ドキュメントはSphinx
デバイス記述方法
Linuxと同様にdevice treeを使用します。
ただし、内部での使い方はかなり異なります。
特徴
Zephyr Doc Introductionから、気になった機能を紹介します。
Device Tree Support
Use of Device Tree (DTS) to describe hardware and configuration information for boards. The DTS information will be used only during compile time. Information about the system is extracted from the compiled DTS and used to create the application image.
Linuxと違って、コンパイル時にだけ情報を抜き出して、使用するみたいです。
driverのロードを動的にやったりしないでしょうから、妥当な感じがします。
Native Linux, macOS, and Windows Development
A command-line CMake build environment runs on popular developer OS systems. A native POSIX port, lets you build and run Zephyr as a native application on Linux and other OSes, aiding development and testing.
POSIX互換のOSがホストの場合、Zephyrをネイティブアプリケーションとして動作させることができるようです。
これは、かなり便利そうですね。
軽く動かしてみる
環境はUbuntu 16.04です。
とりあえず、ARM Cortex-M3 Emulation (QEMU)をターゲットにhello worldしてみます。
Getting Started Guideをもとに軽く動かしていきます。
ツールチェイン、cmake、ninjaはインストールしておいてください。
QEMUのインストールも必要です。
sudo apt install qemu-system-arm
~/.zephyrrcに、ビルドツールチェイン環境変数を設定します。
例えば、次のような感じです。
$ cat .zephyrrc
export ZEPHYR_TOOLCHAIN_VARIANT=gnuarmemb
export GNUARMEMB_TOOLCHAIN_PATH="/opt/gnuarmemb"
zephyrのソースコードを入手して、環境設定用のシェルスクリプトを実行します。
git clone https://github.com/zephyrproject-rtos/zephyr
cd zephyr
source zephyr-env.sh
zephyrレポジトリ内にサンプルが提供されているので、hello_worldのサンプルをビルドして、実行します。
cd $ZEPHYR_BASE/samples/hello_world
mkdir build && cd build

# Use cmake to configure a Ninja-based build system:
cmake -GNinja -DBOARD=qemu_cortex_m3 ..

# Now run ninja on the generated build system:
ninja run
下のように、無事、Hello Worldが表示されました。
超お手軽です!
***** Booting Zephyr OS v1.13.99-ncs2 *****
Hello World! qemu_cortex_m3
軽くバイナリハック
動くバイナリが手に入ったので、軽く見てみます。
buildディレクトリ下のzephyrディレクトリにビルド生成物があります。
$ cd zephyr
$ ls
arch                 kernel                     qemu_cortex_m3.dts_compiled
boards               lib                        qemu_cortex_m3.dts.pre.tmp
cmake                liboffsets.a               soc
CMakeFiles           libzephyr.a                subsys
cmake_install.cmake  linker.cmd                 tests
drivers              linker.cmd.dep             zephyr.elf
ext                  linker_pass_final.cmd      zephyr.lst
include              linker_pass_final.cmd.dep  zephyr.map
isrList.bin          misc                       zephyr_prebuilt.elf
isr_tables.c         nrf                        zephyr.stat
kconfig              nrfxlib
zephyr.elfが最終成果物です。
確かに、ARMのバイナリができています。
$ file zephyr.elf
zephyr.elf: ELF 32-bit LSB executable, ARM, EABI5 version 1 (SYSV), statically linked, not stripped
最終的なバイナリサイズとしては、11KBくらいのようです。超コンパクトです。
$ arm-none-eabi-size zephyr.elf
   text	   data	    bss	    dec	    hex	filename
   6962	    588	   3872	  11422	   2c9e	zephyr.elf
セクション情報を見てみると、コードと初期値ありのデータは、Flash領域(0x0000_0000)に、初期値なしのデータはRAM領域(0x2000_0000)に配置されています。
エントリポイントは0xc11です。
$ arm-none-eabi-readelf -l zephyr.elf

Elf file type is EXEC (Executable file)
Entry point 0xc11
There are 3 program headers, starting at offset 52

Program Headers:
  Type           Offset   VirtAddr   PhysAddr   FileSiz MemSiz  Flg Align
  LOAD           0x000094 0x00000000 0x00000000 0x01cec 0x01cec RWE 0x4
  LOAD           0x001d80 0x20000f20 0x00001cec 0x00094 0x00094 RW  0x4
  LOAD           0x001e18 0x20000000 0x20000000 0x00000 0x00f20 RW  0x8

 Section to Segment mapping:
  Segment Sections...
   00     text sw_isr_table devconfig rodata
   01     datas initlevel _k_mutex_area
   02     bss noinit
qemu_cortex_m3.dts_compiledがあります。最終的にzephyrに組み込まれたdevice treeが簡単に見れるのは、ありがたいですね。
$ cat qemu_cortex_m3.dts_com
piled
/dts-v1/;

/ {
	#address-cells = < 0x01 >;
	#size-cells = < 0x01 >;
	model = "QEMU Cortex-M3";
	compatible = "ti,lm3s6965evb-qemu", "ti,lm3s6965";
...
	sram0: memory@20000000 {
		device_type = "memory";
		compatible = "mmio-sram";
		reg = < 0x20000000 0x10000 >;
	};

	flash0: flash@0 {
		compatible = "soc-nv-flash";
		reg = < 0x00 0x40000 >;
	};
};
linker.cmdの中身はリンカスクリプトです。
$ head -n 10 linker.cmd
 OUTPUT_FORMAT("elf32-littlearm")
_region_min_align = 4;
MEMORY
    {
    FLASH (rx) : ORIGIN = (0x0 + 0), LENGTH = (256*1K - 0)
    SRAM (wx) : ORIGIN = 0x20000000, LENGTH = (64 * 1K)
    IDT_LIST (wx) : ORIGIN = (0x20000000 + (64 * 1K)), LENGTH = 2K
    }
ENTRY("__start")
SECTIONS
zephyr.lst, zephyr.map, zephyr.statというファイルがあって、何者か気になります。
zephyr.lstは、バイナリをディスアセンブリしたファイルでした。
zephyr.elf:     file format elf32-littlearm


Disassembly of section text:

00000000 <_vector_table>: // 0x0000_0000番地はベクタテーブルのアドレス

	return fd_entry->obj;
}
...
        // 0x0000_000x番地はエントリポイントのアドレス
       4:       00000c11        .word   0x00000c11
...
000000ec <main>:
# include <zephyr.h>
# include <misc/printk.h>

void main(void)
{
        printk("Hello World! %s\n", CONFIG_BOARD);
      ec:       4901            ldr     r1, [pc, #4]    ; (f4 <main+0x8>)
      ee:       4802            ldr     r0, [pc, #8]    ; (f8 <main+0xc>)
      f0:       f000 ba0a       b.w     508 <printk>
      f4:       0000184c        .word   0x0000184c
      f8:       0000185b        .word   0x0000185b
親切です。11KBくらいなら、頑張ってハックしよう、という気になりますね。
zephyr.mapは、リンカが生成するマップファイルです。
シンボル情報などが出力されています。
Archive member included to satisfy reference by file (symbol)

libapp.a(main.c.obj)          (--whole-archive)
zephyr/libzephyr.a(isr_tables.c.obj)
                              (--whole-archive)
...
                0x0000000000000000                _image_rom_start = 0x0

text            0x0000000000000000     0x1692
                0x0000000000000000                . = 0x0
                0x0000000000000000                _vector_start = .
 *(.exc_vector_table)
 *(.exc_vector_table.*)
 .exc_vector_table._vector_table_section
                0x0000000000000000       0x40 zephyr/arch/arm/core/cortex_m/libarch__arm__core__cortex_m.a(vector_table.S.obj)
                0x0000000000000000                _vector_table
 *(.gnu.linkonce.irq_vector_table)
 .gnu.linkonce.irq_vector_table
                0x0000000000000040       0xac zephyr/CMakeFiles/kernel_elf.dir/isr_tables.c.obj
                0x0000000000000040                _irq_vector_table
...
zephyr.statは、readelfの実行結果のようですね。
$ cat zephyr.stat
ELF Header:
  Magic:   7f 45 4c 46 01 01 01 00 00 00 00 00 00 00 00 00
  Class:                             ELF32
  Data:                              2's complement, little endian
...
Program Headers:
  Type           Offset   VirtAddr   PhysAddr   FileSiz MemSiz  Flg Align
  LOAD           0x000094 0x00000000 0x00000000 0x01cec 0x01cec RWE 0x4
  LOAD           0x001d80 0x20000f20 0x00001cec 0x00094 0x00094 RW  0x4
  LOAD           0x001e18 0x20000000 0x20000000 0x00000 0x00f20 RW  0x8

 Section to Segment mapping:
  Segment Sections...
   00     text sw_isr_table devconfig rodata
   01     datas initlevel _k_mutex_area
   02     bss noinit
実は、自分でreadelfする必要はありませんでした。
軽くソース解析
masterの0906a51を解析します。
1.13と比較するとトップレベルのディレクトリ構造が変化していました。
全体像
ディレクトリ構造は、Linuxと比較するとシンプルです。
boardsとかsocとかdtsとかがトップレベルにあるのが、組込みっぽさを醸し出しています。
tree -L 1
.
├── arch
├── boards
├── cmake
├── CMakeLists.txt
├── CODEOWNERS
├── CONTRIBUTING.rst
├── doc
├── drivers
├── dts
├── ext
├── include
├── Kconfig
├── Kconfig.zephyr
├── kernel
├── lib
├── LICENSE
├── Makefile
├── misc
├── README.rst
├── samples
├── scripts
├── soc
├── subsys
├── tests
├── VERSION
├── version.h.in
├── zephyr-env.cmd
└── zephyr-env.sh
Kconfigあたりを見ていると、Wind RiverとIntelのcopyright表記があります。
$ cat Kconfig
# Kconfig - general configuration options

#
# Copyright (c) 2014-2015 Wind River Systems, Inc.
#
# SPDX-License-Identifier: Apache-2.0
#
mainmenu "Zephyr Kernel Configuration"

source "Kconfig.zephyr"
scripts下を見ると大量のpythonファイルがあります。
$ ls scripts/
checkpatch         coccicheck               gen_relocate_app.py
ci                 dir_is_writeable.py      gen_syscall_header.py
coccinelle         elf_helper.py            gen_syscalls.py
cross_compiler     file2hex.py              mergehex.py
dts                filter-known-issues.py   parse_syscalls.py
footprint          gen_alignment_script.py  process_gperf.py
gitlint            gen_app_partitions.py    qemu-machine-hack.py
kconfig            gen_cfb_font_header.py   requirements.txt
meta               gen_gcov_files.py        sanitycheck
__pycache__        gen_gdt.py               spelling.txt
sanity_chk         gen_idt.py               subfolder_list.py
support            gen_kobject_list.py      tags.sh
check_link_map.py  gen_mmu_x86.py           valgrind.supp
checkpatch.pl      gen_offset_header.py     waitpid
checkstack.pl      gen_priv_stacks.py       west
Sample application解析
zephyr/samples/hello_world/src/main.c
/*
 * Copyright (c) 2012-2014 Wind River Systems, Inc.
 *
 * SPDX-License-Identifier: Apache-2.0
 */

# include <zephyr.h>
# include <misc/printk.h>

void main(void)
{
	printk("Hello World! %s\n", CONFIG_ARCH);
}
printkしているだけで、めっちゃシンプルです。
設定ファイルっぽいyamlです。
sample:
  description: Hello World sample, the simplest Zephyr
    application
  name: hello world
  platforms: all
common:
    tags: samples
    harness: console
    harness_config:
      type: one_line
      regex:
        - "Hello World! (.*)"
tests:
  sample.helloworld.multithread:
    tags: samples
platformsで、ビルド可能なプラットフォームを指定できるようです。harnessとかこのあたりは、何でしょうね?
まだ、謎は多いです。
Device Driver
やはり、device driverがどうなっているのか気になります。
Zephyr Doc Device and Driver Support
特に、Device Treeをどのように利用しているか、を見ていきます。
Zephyr Device Tree
After compilation, a python script extracts information from the compiled device tree file using a set of rules specified in YAML files. The extracted information is placed in a header file that is used by the rest of the code as the project is compiled.
device tree sourceをコンパイルした後、pythonスクリプトでyamlファイルのルールに則って情報を抜き出し、ヘッダファイルを作るようです。
Zephyrのdevice tree bindingは、yamlファイルで定義されており、ドキュメントを兼ねているようです。地味に良いです。
UARTの例を示します。
zephyr/dts/bindings/serial/ti,stellaris-uart.yaml
---
title: TI Stellaris UART
version: 0.1

description: >
    This binding gives a base representation of the TI Stellaris UART

inherits:
    !include uart.yaml

properties:
    compatible:
      constraint: "ti,stellaris-uart"

    reg:
      type: array
      description: mmio register space
      generation: define
      category: required

    interrupts:
      type: array
      category: required
      description: required interrupts
      generation: define
...
uart.yamlをinheritしています。
uart.yamlはuartデバイスに共通のプロパティが定義されています。
---
title: Uart Base Structure
version: 0.1

description: >
    This binding gives the base structures for all UART devices

child:
    bus: uart

properties:
    compatible:
      type: string
      category: required
      description: compatible strings
      generation: define
...
    current-speed:
      type: int
      category: required
      description: Initial baud rate setting for UART
      generation: define
...
current-speedはUARTのボーレートですね。この後順番に見ていきます。
device tree sourceは、2つに分割されています。複数のボードで共通して使えるものは、dts下に置きます。
zephyr/dts/arm/ti/lm3s6965.dtsi
# include <arm/armv7-m.dtsi>

/ {
	cpus {
		#address-cells = <1>;
		#size-cells = <0>;

		cpu@0 {
			device_type = "cpu";
			compatible = "arm,cortex-m3";
			reg = <0>;
		};
	};
...
	soc {
		uart0: uart@4000c000 {
			compatible = "ti,stellaris-uart";
			reg = <0x4000c000 0x4c>;
			interrupts = <5 3>;
			status = "disabled";
			label = "UART_0";
		};
...
ボード固有の設定は、board下に置きます。
boards/arm/qemu_cortex_m3/qemu_cortex_m3.dts
/dts-v1/;

# include <ti/lm3s6965.dtsi>

/ {
	model = "QEMU Cortex-M3";
	compatible = "ti,lm3s6965evb-qemu", "ti,lm3s6965";
...
&uart0 {
	status = "ok";
	current-speed = <115200>;
};
...
uart0を有効にして、ボーレートは115200に設定しています。
driverでどのようにプロパティが使われているか、見てみます。
zephyr/drivers/serial/uart_stellaris.c
static struct uart_stellaris_dev_data_t uart_stellaris_dev_data_0 = {
	.baud_rate = DT_TI_STELLARIS_UART_4000C000_CURRENT_SPEED,
};
一見、知っていないと分からないのですが、上のマクロが、device treeで設定したボーレートです。
device tree sourceからマクロの設定値を生成します。
ビルドディレクトリにdtsから生成されたヘッダファイルがあります。一度アプリケーションをビルドすると入手できます。
build/zephyr/include/generated/generated_dts_board.h
DT_のプレフィックスが付いているものを、device treeから生成しているようです。
上のdriverで使用されていた、DT_TI_STELLARIS_UART_4000C000_CURRENT_SPEEDも定義されていますね。
/**************************************************
 * Generated include file for ti,lm3s6965evb-qemu
 *               DO NOT MODIFY
 */

# ifndef DEVICE_TREE_BOARD_H
# define DEVICE_TREE_BOARD_H
...
/* uart@4000c000 */
# define CONFIG_UART_CONSOLE_ON_DEV_NAME                 "UART_0"
# define CONFIG_UART_SHELL_ON_DEV_NAME                   "UART_0"
# define DT_TI_STELLARIS_UART_0                          1
# define DT_TI_STELLARIS_UART_4000C000_BASE_ADDRESS      0x4000c000
# define DT_TI_STELLARIS_UART_4000C000_CURRENT_SPEED     115200  // これ
# define DT_TI_STELLARIS_UART_4000C000_IRQ_0             5
# define DT_TI_STELLARIS_UART_4000C000_IRQ_0_PRIORITY    3
# define DT_TI_STELLARIS_UART_4000C000_LABEL             "UART_0"
# define DT_TI_STELLARIS_UART_4000C000_SIZE              76
...
また、device tree sourceから生成したヘッダファイルの設定値を取り込むために、fixupファイルが用意されています。
Fixup files contain mappings from existing Kconfig options to the actual underlying DTS derived configuration #defines. Fixup files are temporary artifacts until additional DTS changes are made to make them unnecessary.
fixupファイルは、Kconfigのオプション値をdevice tree sourceから生成したマクロにマッピングしたり、マクロ名をリネームするのに使うようです。
リネームしている使用方法しか見つかりませんでした。
zephyr/soc/arm/ti_lm3s6965/dts_fixup.h
/* SoC level DTS fixup file */
...
# define DT_GPIO_A_BASE_ADDRESS  DT_TI_STELLARIS_GPIO_40004000_BASE_ADDRESS
# define DT_GPIO_A_LABEL         DT_TI_STELLARIS_GPIO_40004000_LABEL
# define DT_GPIO_A_IRQ           DT_TI_STELLARIS_GPIO_40004000_IRQ_0
# define DT_GPIO_A_IRQ_PRIO      DT_TI_STELLARIS_GPIO_40004000_IRQ_0_PRIORITY
...
このように、Device Treeをコンパイル時に解析して、kernelに埋め込むことで、実行時の負荷を減らすような使い方をしています。
さいごに
OSSのRTOS、Zephyrについて簡単に紹介しました。
私も触り始めたばかりなので、もっと触ってみて、情報を共有していこうと思います。