Kubernetesクラスタ上の認証をGoogleをID ProviderとするOIDCにより行います.
KubernetesのRBACについては以下のスライドが参考になります.
Kubernetes の認証・認可と RBAC - Speaker Deck
検証環境
- Kubernetesクラスタ
- k3s v1.18.8+k3s1 (6b595318)
- スペック
- vCPU: 2 [core]
- RAM: 2 [GB]
- Storage: 30 [GB]
- クライアント
- kubectl v1.18.8
手順
[1] Google API ConsoleでTokenを発行
以下のURLにアクセスします.
[1.1] プロジェクトの作成
新たに「プロジェクトを作成」します.既存プロジェクトをつかう場合はこの手順をスキップしてください.
プロジェクト名を入力して「作成」を押します.
[1.2] OAuth同意画面の作成
メニューの「APIとサービス」から「OAuth同意画面」を選択します.
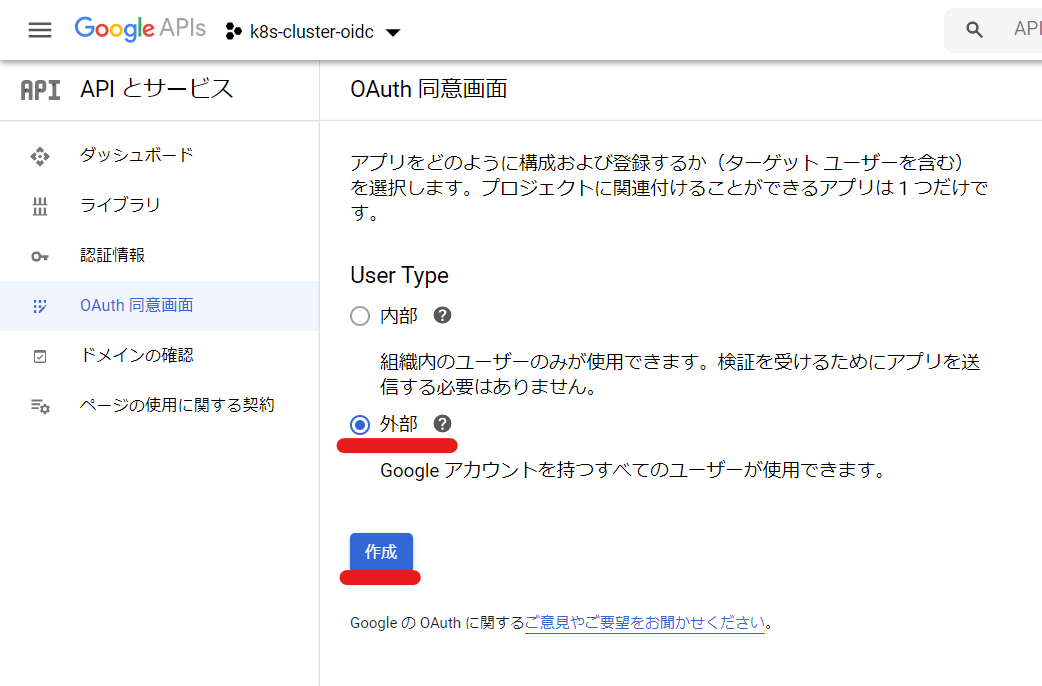
UserTypeを選択して「作成」を押します.利用者が組織内に限定される場合は「内部」を選択してください.
アプリケーション名を入力して,下部にある「保存」を選択します.
[1.3] OAuthクライアントIDの発行
メニューの「認証情報」を選び,「認証情報を作成」から「OauthクライアントID」を選択します.
アプリケーションの種類から「テレビと入力が限られたデバイス」を選択し,名前を入力してください.そして,「作成」を押します.
過去の資料では「その他/Other」でしたが,最新のメニュー項目名は変更されているので注意が必要です.
[1.4] クライアントIDの取得とJSONのダウンロード
トークン一覧から作成したトークンの詳細を確認します.
メニューの「JSONをダウンロード」からJSON形式の認証情報をダウンロードします.
クライアントIDをメモしておきます.
[2] Kubernetesクラスタの設定を変更
[2.1] K3sのマスターノードの起動オプションを変更
k3sのserviceファイルをバックアップします.
sudo cp /etc/systemd/system/k3s.service /etc/systemd/system/k3s.service.org
k3sのserviceファイルを変更します.
sudo vi /etc/systemd/system/k3s.service
起動オプションに以下を追加してください.
oidc-client-idはGoogle API Consoleで取得したクライアントIDを付与してください.
ExecStart=/usr/local/bin/k3s \
    server \
    --kube-apiserver-arg oidc-issuer-url=https://accounts.google.com \
    --kube-apiserver-arg oidc-client-id=97...55ft9k.apps.googleusercontent.com \
    --kube-apiserver-arg oidc-username-claim=email \
    --kube-apiserver-arg authorization-mode=RBAC
systemdに変更を適用させます.
sudo systemctl daemon-reload
k3sを再起動します.
sudo systemctl restart k3s
[3] .kube/configの設定を生成
k8s-oidc-helperで.kube/configのユーザ情報を生成します.
go get github.com/micahhausler/k8s-oidc-helper
Google API ConsoleでダウンロードしたJSONファイルを引数に渡して,k8s-oidc-helperを実行します.
k8s-oidc-helper -c client_secret_977...655ft9k.apps.googleusercontent.com.json
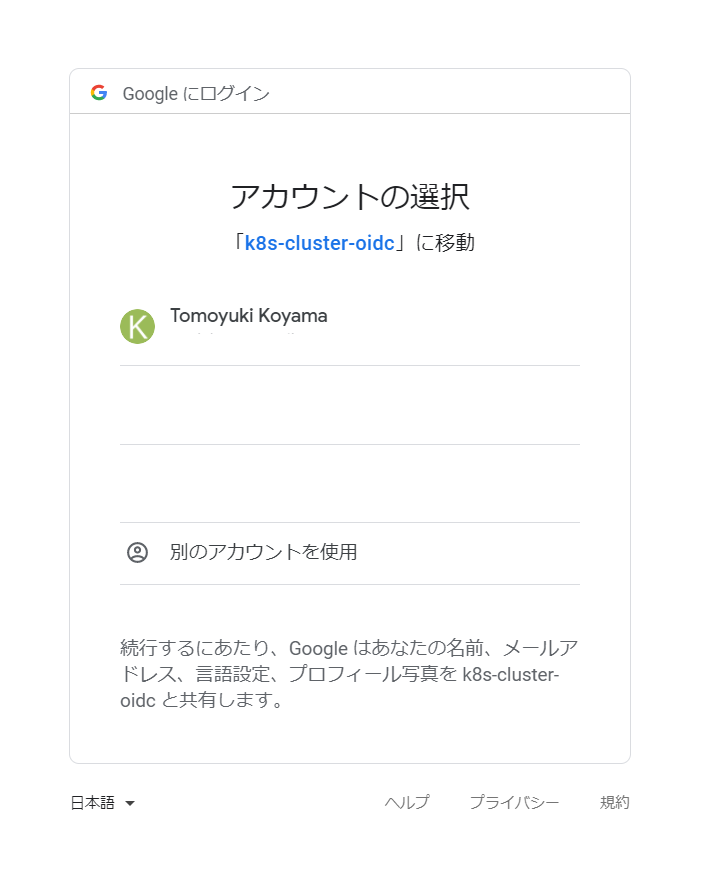
ブラウザが起動してGoogleアカウントの選択を求められるので,認証したいアカウントを選択します.
コードが表示されるので,コピーしてターミナルに貼り付けてEnterを押します.
# 以下はGoogleから取得したコードを貼り付けた結果
4/3wG2PbYtYzJ65pgniwcxxxxxxxxxxxxxxxxxxxxxxxxxxxxxxxxx

# Add the following to your ~/.kube/config
apiVersion: v1
clusters: []
contexts: []
current-context: ""
kind: Config
preferences: {}
users:
- name: example@gmail.com
  user:
    auth-provider:
      config:
        client-id: 977........55ft9k.apps.googleusercontent.com
        client-secret: 2...............46
        id-token: eyJhbGciOiJSUzI1NiIsxxxxxxxxxxxxxxx
        idp-issuer-url: https://accounts.google.com
        refresh-token: 1//0eqiWaqVoq7cTCxxxxxxxxxxxxxxxxxxx
      name: oidc
.kube/configが生成されるので,ローカルの.kube/configに追記します.
[4] KubernetesクラスタにCustomRoleとClusterRoleBindingの作成
CustomRoleとCustomRoleBindingを作成します. example@gmail.com をGoogleアカウントのアドレスに置き換えてください.
$ kubectl apply -f role.yaml
clusterrole.rbac.authorization.k8s.io/admin-role created
clusterrolebinding.rbac.authorization.k8s.io/admin-binding created
kind: ClusterRole
apiVersion: rbac.authorization.k8s.io/v1alpha1
metadata:
    name: admin-role
rules:
    - apiGroups: ["*"]
      resources: ["*"]
      verbs: ["*"]
---
kind: ClusterRoleBinding
apiVersion: rbac.authorization.k8s.io/v1alpha1
metadata:
    name: admin-binding
subjects:
    - kind: User
      name: example@gmail.com
roleRef:
    kind: ClusterRole
    name: admin-role
<補足> ここではClusterRoleのrulesにあるverbsやresoucesを * で設定していますが,実際には適切なアクセス制御を記述してください.
[5] kubectlで確認
kubectlで --user をオプションにつけてKubernetesクラスタへアクセスできるか確認します.
$ kubectl --user=example@gmail.com get nodes
NAME       STATUS     ROLES    AGE     VERSION
k3s-test   NotReady   master   3h49m   v1.18.8+k3s1
参考資料
- Kubernetes 1.6.1 authentication by using Google OpenID
- Using RBAC Authorization | Kubernetes
- youtube data api - The Option to select 'Other' for a client ID in the OAuth in the Google APIs is not available - Stack Overflow
追記 2020/09/10
トークンの有効期限が切れた場合,トークンの再設定が必要になるはずなので今後は以下の方法を試してみたいと思います.


