netlifycliを利用する
インストール
を参考にインストール。
アカウント認証
$ netlifyctl login
netlifyのauth画面が出てくるので、netlifyにログインして承諾。
デプロイ設定
deploy対象のプロジェクトに移動する。
このとき自分のいる origin の branch名が、deployのトリガになるbranchになる。
準備ができたら、以下のコマンドで手動で設定していく。
$ netlifyctl init --manual
Create a new site? (yes/no) yes
Site created  ✔
Directory to deploy (blank for current dir): (default: .)
デプロイするディレクトリを指定する。ビルドする場合は、ビルド後に生成されるディレクトリ名を指定
Your build command (hugo build/yarn run build/etc):
ビルドコマンドを記載する
Configuration:

    Repository: xxxxxxxxxxxxxxxxxxxx
    Production branch: master
    Publishing directory: ./build
    Build command: yarn build

Continue? (yes/no) yes
Configuring Continuous Deployment ...

Give this Netlify SSH public key access to your repository:

ssh-rsa AAAAB3NzaC1yc2EAAAADAQABAAABAQDbZgBoposL3iW3qhw5i1EI4wNrJFUq...
ビルドサーバからgit cloneするために、sshキーをgitlabに登録する。
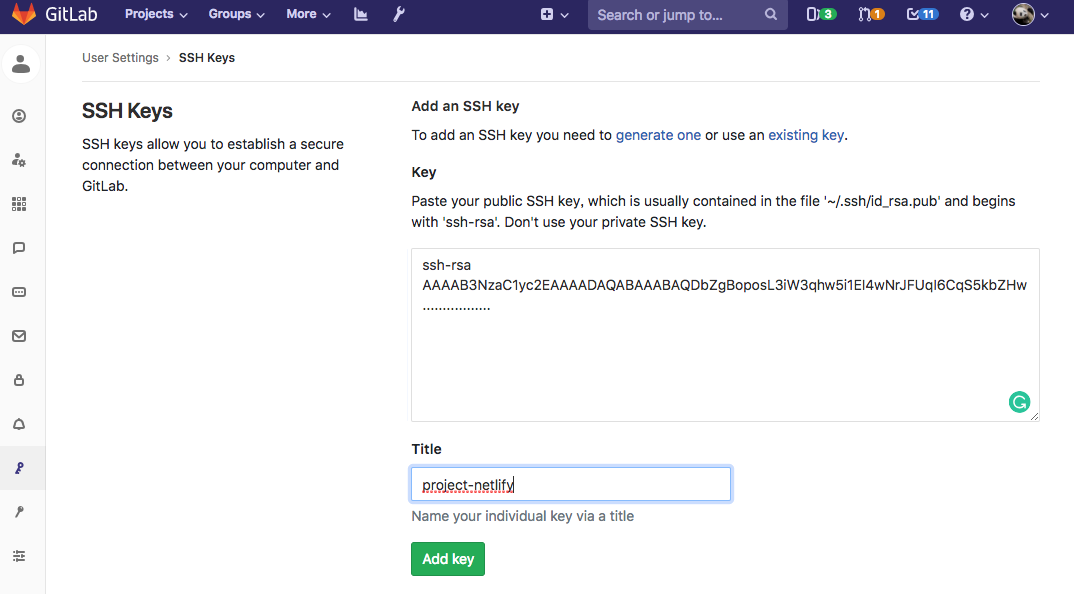
ログインした状態で https://gitlab.sample.domain/profile/keys に行き、鍵を登録したらOK.
Continue? (yes/no) yes
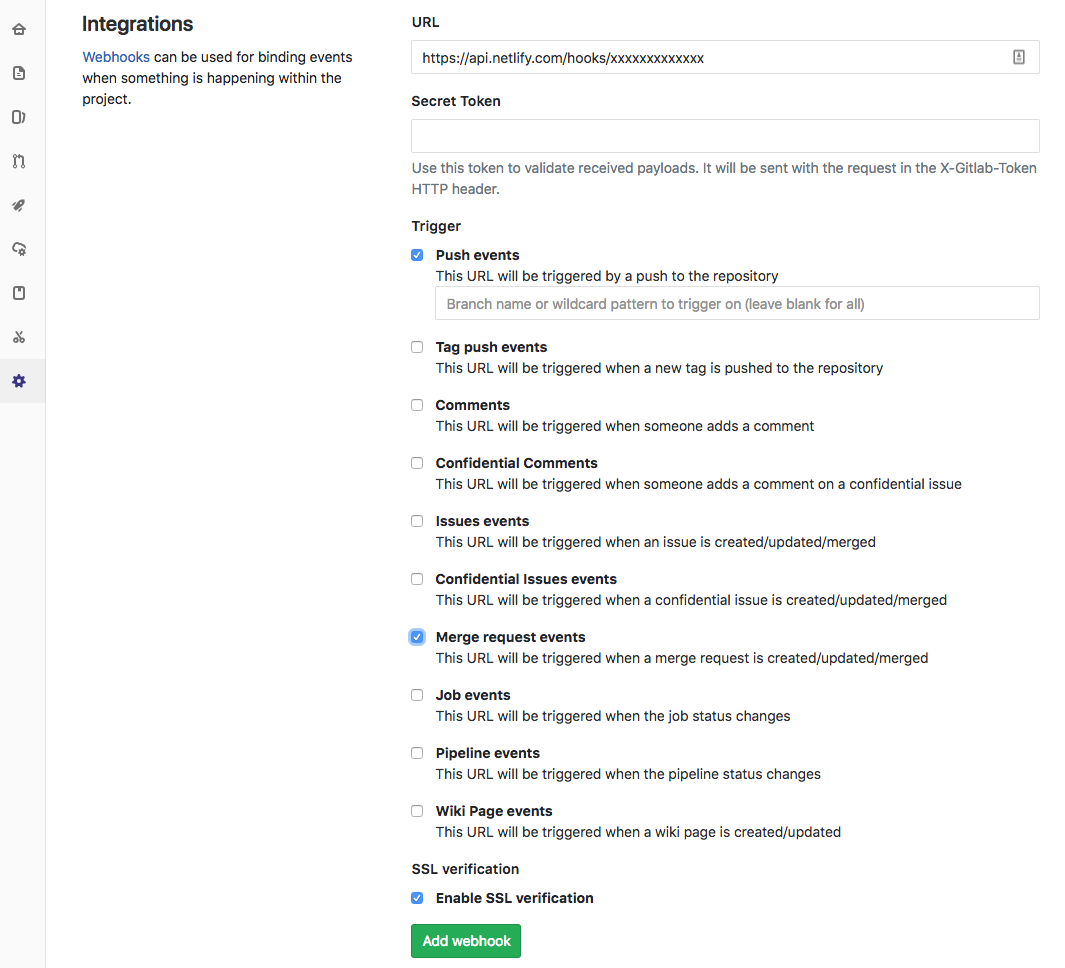
Configure the following webhook for your repository:
https://api.netlify.com/hooks/xxxxxxxxxxxxxxx
gitlab上のレポジトリに何かがあったときに、gitlabからnetlifyに通知をするためにwebhookを追加する。
とりあえずコードに変更があれば検知したい場合は、以下のように Push eventとMerge request eventにチェックしておけばOK.
Continue? (yes/no) yes
Success! Whenever you push to git, Netlify will build and deploy your site  ✔

    https://xxxxxxx-xxxxxx-xxxxx.netlify.com
これでOK.
あとはdeployされるのを待てばいい。