自己紹介
- tomoya0x00
- GitHub/Twitter/Qiita/mstdn.jp
- 車載関係→IoT系の小規模ベンチャー
- 組み込み/Android/iOS
Kiosk端末とは?

https://en.wikipedia.org/wiki/Interactive_kiosk
つまり
- 特定用途に特化した情報端末
Androidでどうやって実現するのか?
こんなことをやりたい
- 通常操作では、専用アプリ(Kioskアプリ)以外の画面には遷移できない
- 端末を再起動しても、強制的にKioskアプリが立ち上がる
- 特定の手順を踏むと、Kioskアプリ以外の画面に遷移できる
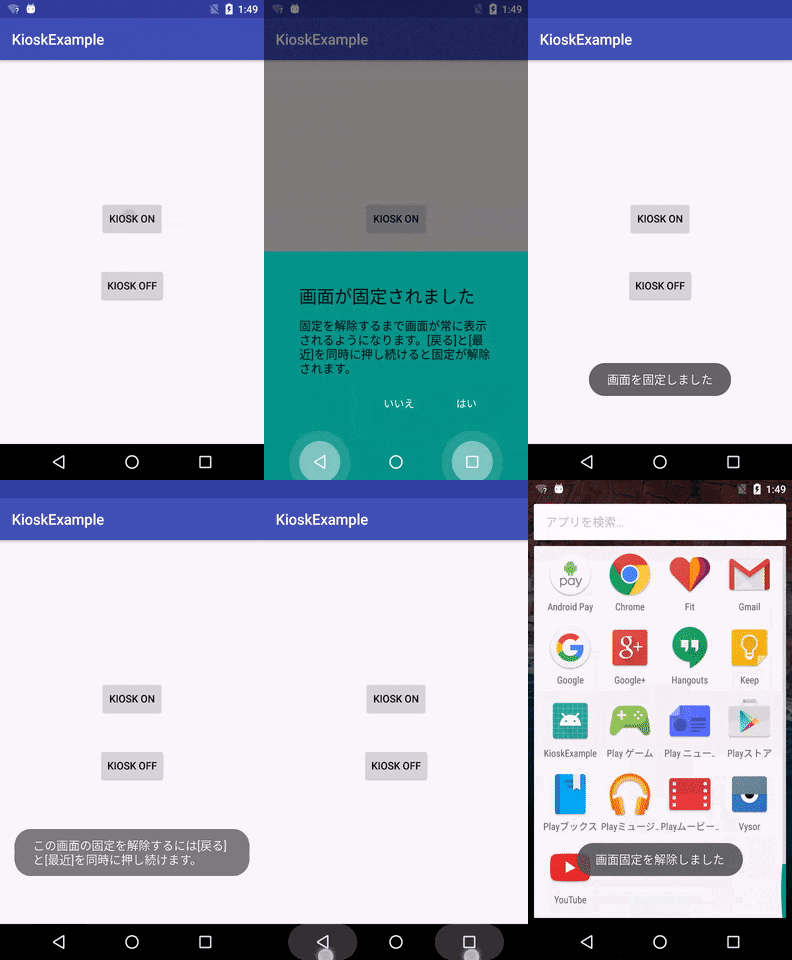
Screen Pinning
Screen Pinningとは
- Android 5.0から追加された機能
- 特定アプリから他画面への遷移を制限する
- ただし、Pinning開始時にユーザーの合意が必要
- 解除方法を知っていれば誰でも解除できてしまう
そこでDevice Owner
Device Ownerとは
- Android 5.0で追加された、Android端末に様々な制約を課すことが出来る特別な管理者
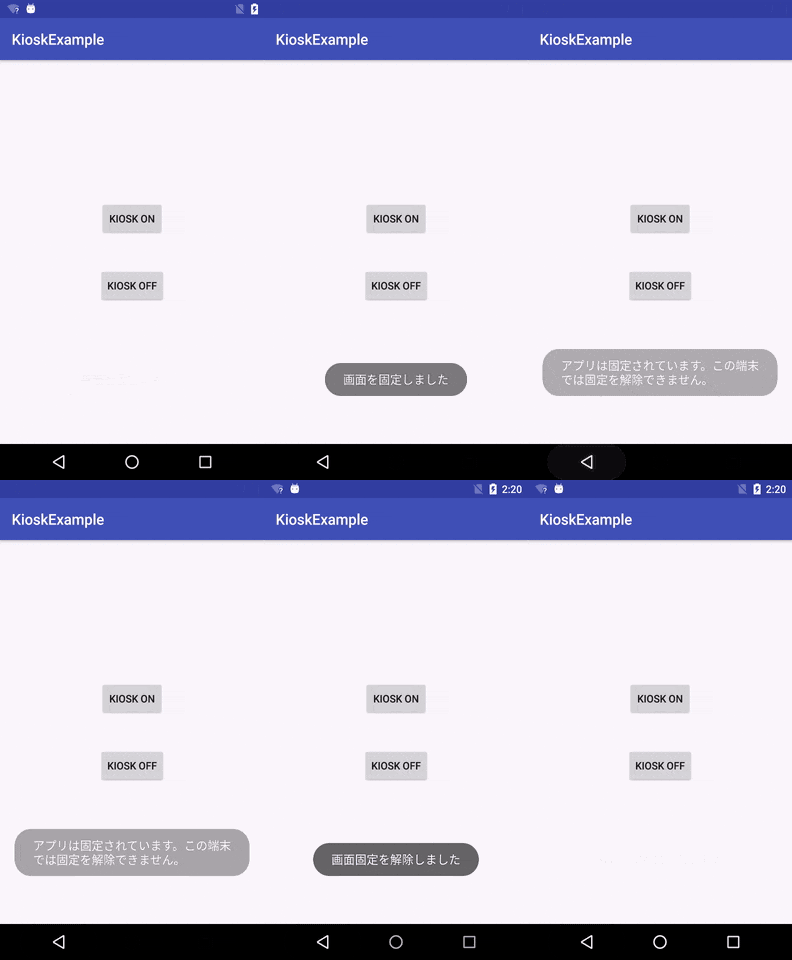
- Device OwnerをAndroid端末に設定すると、ユーザーの合意無しにPinningを開始できる
- Device Ownerに指定できるのは、DeviceAdminReceiverを継承したクラスを実装したアプリ
- 通常のユーザー操作では解除できないPinningも実現可能
- ただし、基本は端末初期化が必要
Kiosk端末化の流れ
- Device Ownerアプリの準備
- 端末の初期化
- Device Ownerアプリのインストール
- Device Ownerの指定
Device Ownerアプリの準備
- DeviceAdminReceiver継承クラスの実装
- AndroidManifestにReceiver登録
- Pinning開始/終了を実装
DeviceAdminReceiver継承クラスの実装
DeviceAdminReceiver.kt
class AdminReceiver: DeviceAdminReceiver() {
    override fun onEnabled(context: Context?, intent: Intent?) {
        super.onEnabled(context, intent)
        context?.run {
            val deviceAdmin = ComponentName(this, AdminReceiver::class.java)
            val dpm = this.getSystemService(Context.DEVICE_POLICY_SERVICE) as DevicePolicyManager
            dpm.setLockTaskPackages(deviceAdmin, arrayOf(this.packageName))
        }
    }
}
- Device Owner指定時、ユーザー合意無しにPinningを開始できるアプリとして自分を登録する
AndroidManifestにReceiver登録
AndroidManifest.xml
        <receiver
            android:name=".AdminReceiver"
            android:label="device admin"
            android:permission="android.permission.BIND_DEVICE_ADMIN">
            <meta-data
                android:name="android.app.device_admin"
                android:resource="@xml/device_admin"/>

            <intent-filter>
                <action android:name="android.app.action.DEVICE_ADMIN_ENABLED"/>
            </intent-filter>
        </receiver>
res/xml/device_admin.xml
<?xml version="1.0" encoding="utf-8"?>
<device-admin xmlns:android="http://schemas.android.com/apk/res/android">
    <uses-policies>
    </uses-policies>
</device-admin>
-
android:resource="@xml/device_admin"はReceiver登録に必須 - uses-policiesにカメラ無効など追加できるが、Screen Pinningには不要なので省略
Pinning開始/終了を実装
MainActivity.kt
class MainActivity : AppCompatActivity() {
    private lateinit var binding: ActivityMainBinding

    override fun onCreate(savedInstanceState: Bundle?) {
        super.onCreate(savedInstanceState)
        binding = DataBindingUtil.setContentView(this, R.layout.activity_main)

        binding.kioskOnButton.setOnClickListener {
            this.startLockTask()
        }

        binding.kioskOffButton.setOnClickListener {
            this.stopLockTask()
        }
    }
}
端末の初期化
- ファクトリーリセットする
- WiFi設定はスキップすること
- 端末によってはDevice Owner指定不可となる
- MediaPad M2ではNG
- 端末によってはDevice Owner指定不可となる
Device Ownerアプリのインストール
NFC
- あらかじめアプリをサーバーにアップロードし、これのURLやWiFi情報などをNFCで転送する
adb
- 案件で指定された端末がNFC非対応だったので、adbでインストール
Device Ownerの指定
NFC
- 案件で指定された端末がNFC非対応だったので、詳しくは調べていない
- 前述のandroid-NfcProvisioningで同時にできるっぽい
adb shell
- 今回の案件ではこちらを採用
adb shellでDeviceOwnerを指定
インストールしたアプリをDeviceOwnerとして指定。
adb shell dpm set-device-owner jp.gr.java_conf.miwax.kioskexample/.AdminReceiver
成功すると、下記が表示される。
Success: Device owner set to package jp.gr.java_conf.miwax.kioskexample
Active admin set to component {jp.gr.java_conf.miwax.kioskexample/jp.gr.java_conf.miwax.kioskexample.AdminReceiver}
デモ
あとやること
- 端末を再起動しても、強制的にKioskアプリが立ち上がる
- 特定の手順を踏むと、Kioskアプリ以外の画面に遷移できる
- バッテリー残量と電波強度の表示
- Kioskアプリが落ちても、自動で再度立ち上がる
完全版はDroidKaigi or RejectKaigiで!
まとめ
- Android 5.0以降なら、Device Owner + Screen Pinningで他画面への遷移を制限できる
- Device OwnerとなるアプリにはDeviceAdminReceiver継承したクラスの実装が必要
- Device Ownerを指定するには端末の初期化が必要
- 今回使用したソースは tomoya0x00/KioskExample

