この記事はtomowarkar ひとりAdvent Calendar 2019の23日目の記事です。
はじめに
中学で習う点と直線の距離を駆使して円や直線の描画を実装していこうという記事になります。
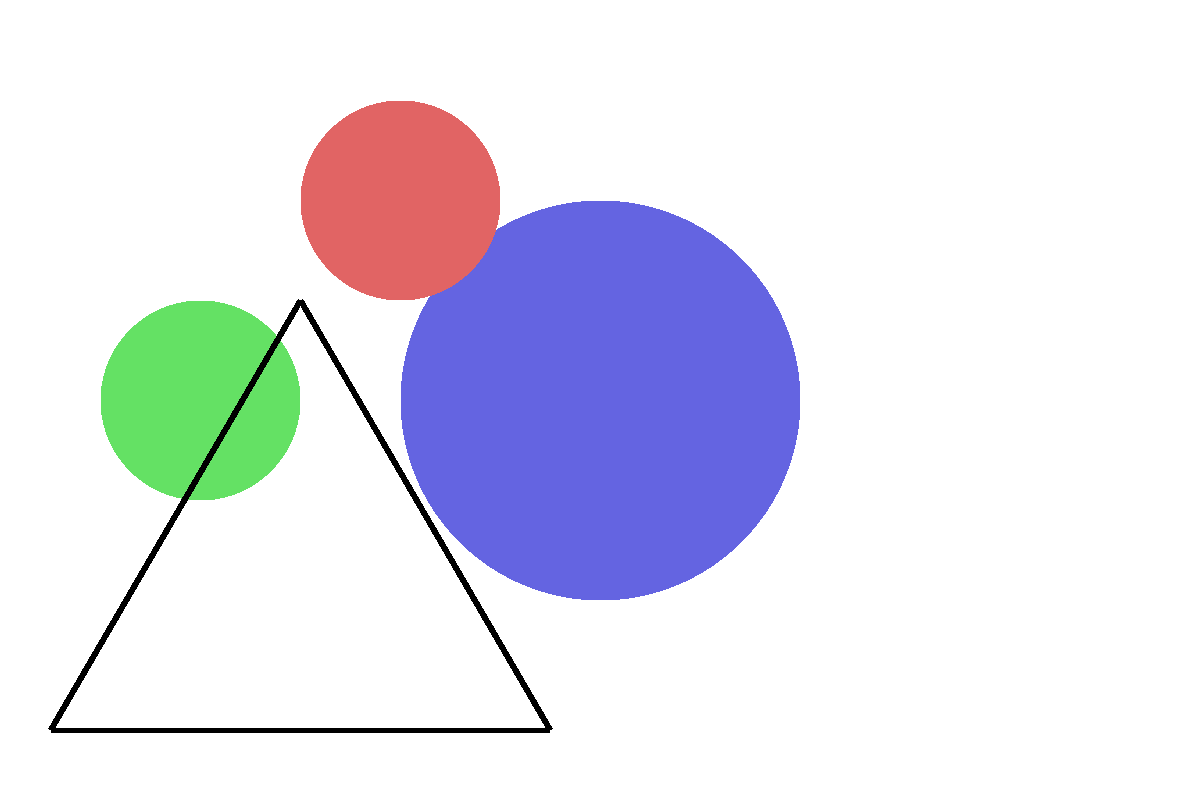
以下のような画像をフレームワークなどは使わずに生成していきましょう!!

コード
メイン関数(抜粋)
type canvas struct {
	height int
	width  int
	data   []int
}

type point struct {
	x, y, r float64
}

type line struct {
	begin, end point
}

func main() {
	width, height := 1200, 800
	cnv := canvas{height, width, make([]int, width*height)}
	dot1 := point{600, 400, 200}
	dot2 := point{200, 400, 100}
	dot3 := point{400, 200, 100}
	cnv.dot(dot1, blue)
	cnv.dot(dot2, green)
	cnv.dot(dot3, red)

	line1 := line{point{300, 300, 3}, point{550, 730, 1}}
	line2 := line{point{50, 730, 3}, point{550, 730, 1}}
	line3 := line{point{50, 730, 3}, point{300, 300, 1}}
	cnv.line(line1, black)
	cnv.line(line2, black)
	cnv.line(line3, black)
	toPng("name", width, height, 1, palette, cnv.data)
}
やっていることといえば描画範囲であるcanvasと点pointと直線lineをそれぞれ定義して、
任意のポイントにプロットするという作業です。
現状レイヤー分けはしないので、後から描画したものがどんどん上書きされていく形になります。
コード全文
package main

import (
	"image"
	"image/color"
	"image/png"
	"math"
	"os"
)

type canvas struct {
	height int
	width  int
	data   []int
}

type point struct {
	x, y, r float64
}

type line struct {
	begin, end point
}

const (
	white = 0
	black = 1
	blue  = 2
	green = 3
	red   = 4
)

var palette = []color.Color{
	color.RGBA{255, 255, 255, 255},
	color.RGBA{0, 0, 0, 255},
	color.RGBA{100, 100, 225, 255},
	color.RGBA{100, 225, 100, 255},
	color.RGBA{225, 100, 100, 255},
}

func main() {
	width, height := 1200, 800
	cnv := canvas{height, width, make([]int, width*height)}
	dot1 := point{600, 400, 200}
	dot2 := point{200, 400, 100}
	dot3 := point{400, 200, 100}
	cnv.dot(dot1, blue)
	cnv.dot(dot2, green)
	cnv.dot(dot3, red)

	line1 := line{point{300, 300, 3}, point{550, 730, 1}}
	line2 := line{point{50, 730, 3}, point{550, 730, 1}}
	line3 := line{point{50, 730, 3}, point{300, 300, 1}}
	cnv.line(line1, black)
	cnv.line(line2, black)
	cnv.line(line3, black)
	toPng("name", width, height, 1, palette, cnv.data)
}

func max(a, b float64) float64 {
	if a < b {
		return b
	}
	return a
}

func distL(x, y int, l line) bool {
	var xx, yy = float64(x), float64(y)
	var mx, my = (l.begin.x + l.end.x) / 2, (l.begin.y + l.end.y) / 2
	var dx, dy = l.end.x - l.begin.x, l.end.y - l.begin.y
	var b1, b2 = -dy / dx, dx / dy
	var c1, c2 = -(b1*mx + my), -(b2*mx + my)
	var r1, r2 = max(l.begin.r, l.end.r), math.Sqrt(dx*dx+dy*dy) / 2
	var d1, d2 float64
	if dx == 0 || dy == 0 {
		d1 = math.Abs(yy - my)
		d2 = math.Abs(xx - mx)
	} else {
		d1 = math.Abs(yy+b1*xx+c1) / math.Sqrt(1+b1*b1)
		d2 = math.Abs(yy+b2*xx+c2) / math.Sqrt(1+b2*b2)
	}
	if d1 < r1 && d2 < r2 {
		return true
	}
	return false
}

func (c canvas) line(l line, obj int) {
	for y := 0; y < c.height; y++ {
		for x := 0; x < c.width; x++ {
			if distL(x, y, l) {
				c.data[y*c.width+x] = obj
			}
		}
	}
}

func distP(x, y int, p point) bool {
	var dx, dy = p.x - float64(x), p.y - float64(y)
	d := math.Sqrt(dx*dx+dy*dy) / p.r
	if d < 1 {
		return true
	}
	return false
}

func (c canvas) dot(p point, obj int) {
	for y := 0; y < c.height; y++ {
		for x := 0; x < c.width; x++ {
			if distP(x, y, p) {
				c.data[y*c.width+x] = obj
			}
		}
	}
}

func toPng(filename string, width, height, scale int, palette []color.Color, data []int) {
	img := image.NewRGBA(image.Rect(0, 0, width*scale, height*scale))
	for x := 0; x < width*scale; x++ {
		for y := 0; y < height*scale; y++ {
			img.Set(x, y, palette[data[y/scale*width+x/scale]%len(palette)])
		}
	}
	encodePng(img, filename)
}

func encodePng(img *image.RGBA, path string) {
	f, err := os.Create(path + ".png")
	if err != nil {
		panic("encode failed")
	}
	defer f.Close()
	png.Encode(f, img)
}
二点から接戦と法線を導出し、その距離によって描画定義をしたのですが、見ての通りに計算が細かくケアレスミスで小一時間詰まってしまいました。
もう少し粒度を細かく実装すればハマりにくくなるので詰まったら粒度を下げることを意識していきたいです。
(今回でいえば法線や接戦を導出する関数を作るなど)
終わりに
まだまだ甘い部分もありますが、もう少しGoでの画像生成で遊んでいけたらと思います。
以上明日も頑張ります!!
tomowarkar ひとりAdvent Calendar Advent Calendar 2019