はじめに
本記事では、スターとコメントを用いてレビュー機能のみためを実装していきます。
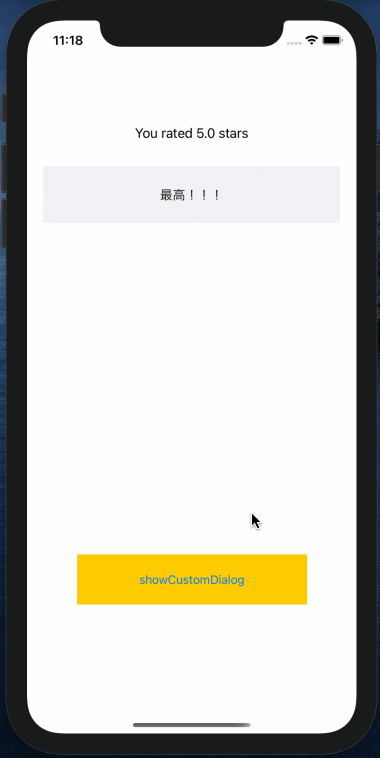
作るもの
本記事を見れば、下記のようにスターとコメントを用いたレビュー機能のみためを実装することができます。
対象読者
- Swiftを用いてiPhoneアプリを開発したいプログラミング初心者
- レビュー機能を実装したい方
開発環境
- Xcode 12.3
- Swift 5
目次
- 実装方法
- ライブラリのインストール(pod install)
-
Main.storyboardの作成 -
RatingViewController.xibの作成 - コーディング
- 関連付け
- 参考サイト
実装方法
では、実際に実装していきます。
1. ライブラリのインストール(pod install)
Podfileに下記のように記入し、2つのライブラリをインストールします。
pod 'PopupDialog', '~> 1.1'
pod 'Cosmos', '~> 23.0'
2. Main.storyboardの作成
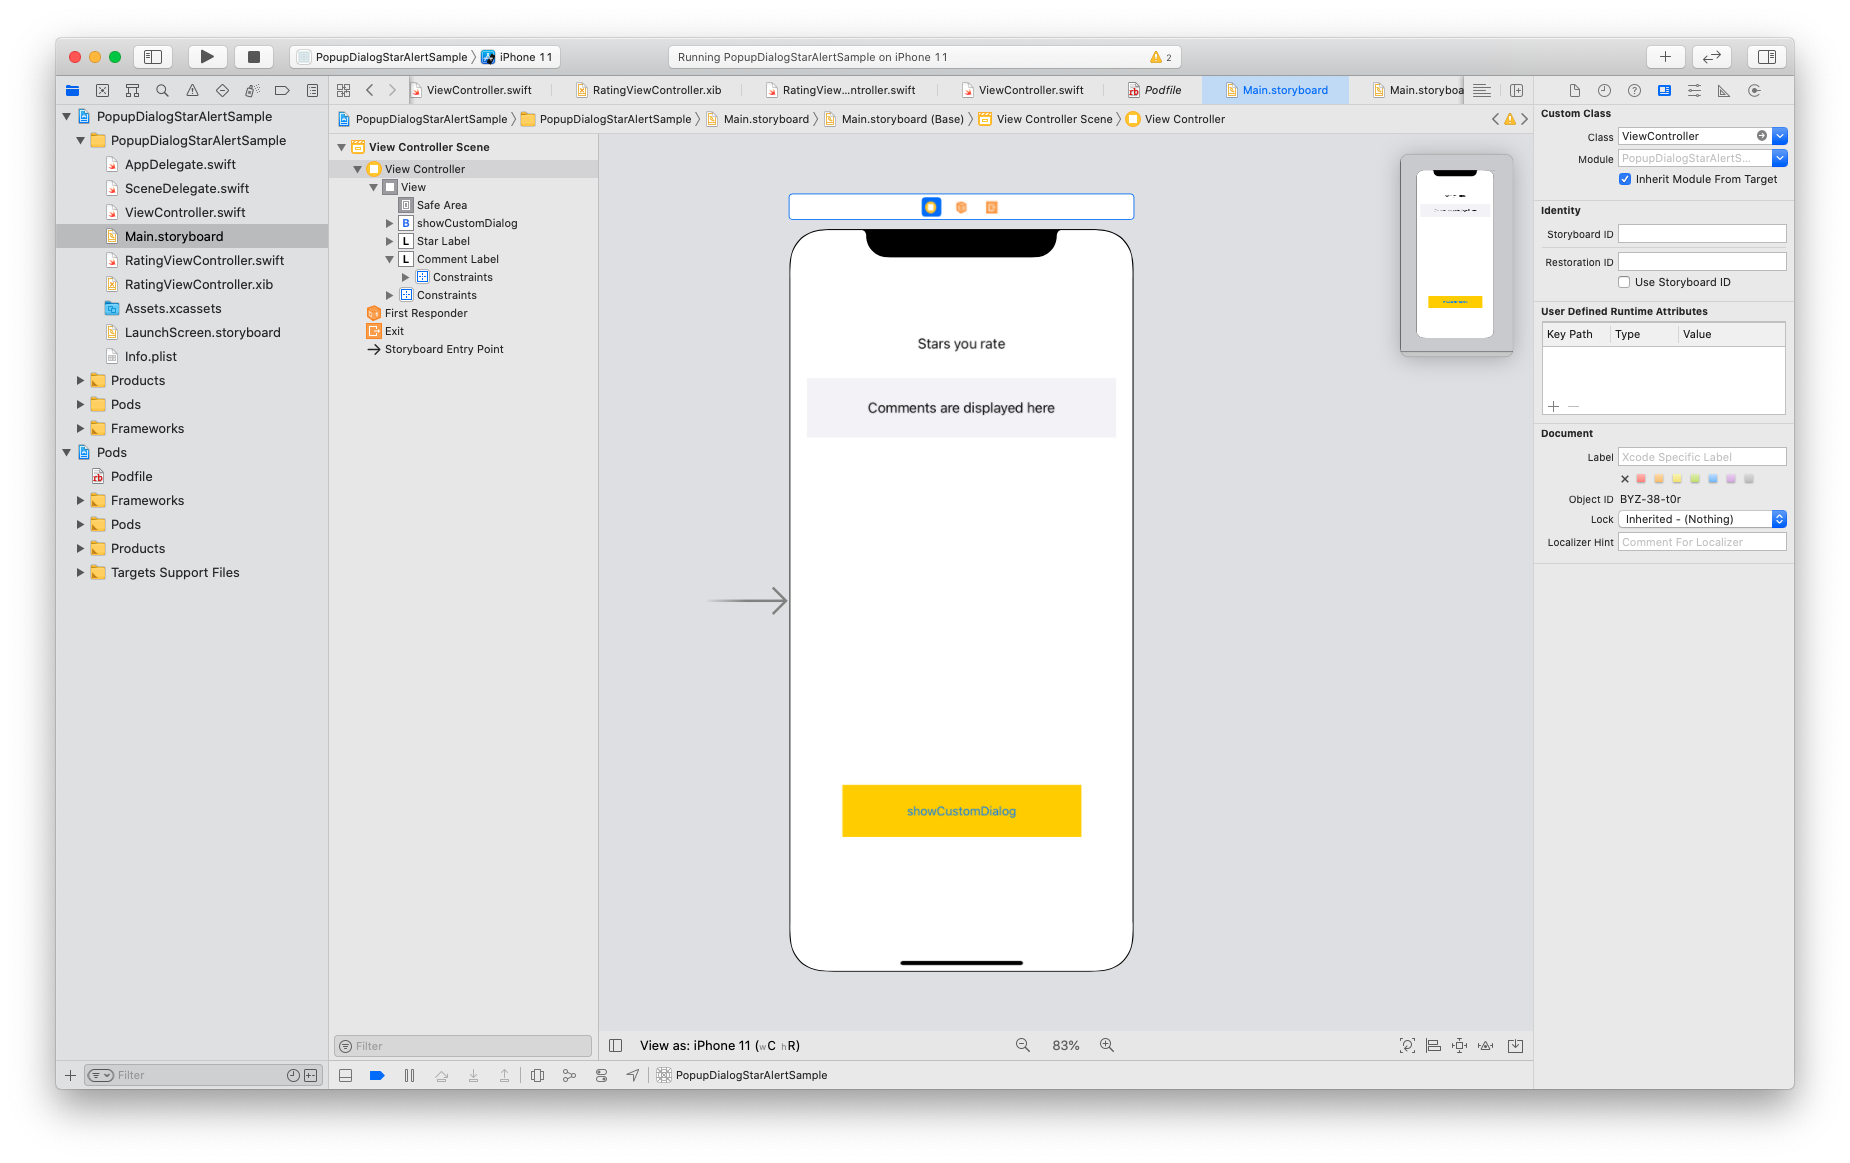
上記の画像のように、Main.storyboardに必要なパーツを配置します。
- スターの数を表示するための__Label__
- コメントを表示するための__Label__
- レビューを実行するための__Button__
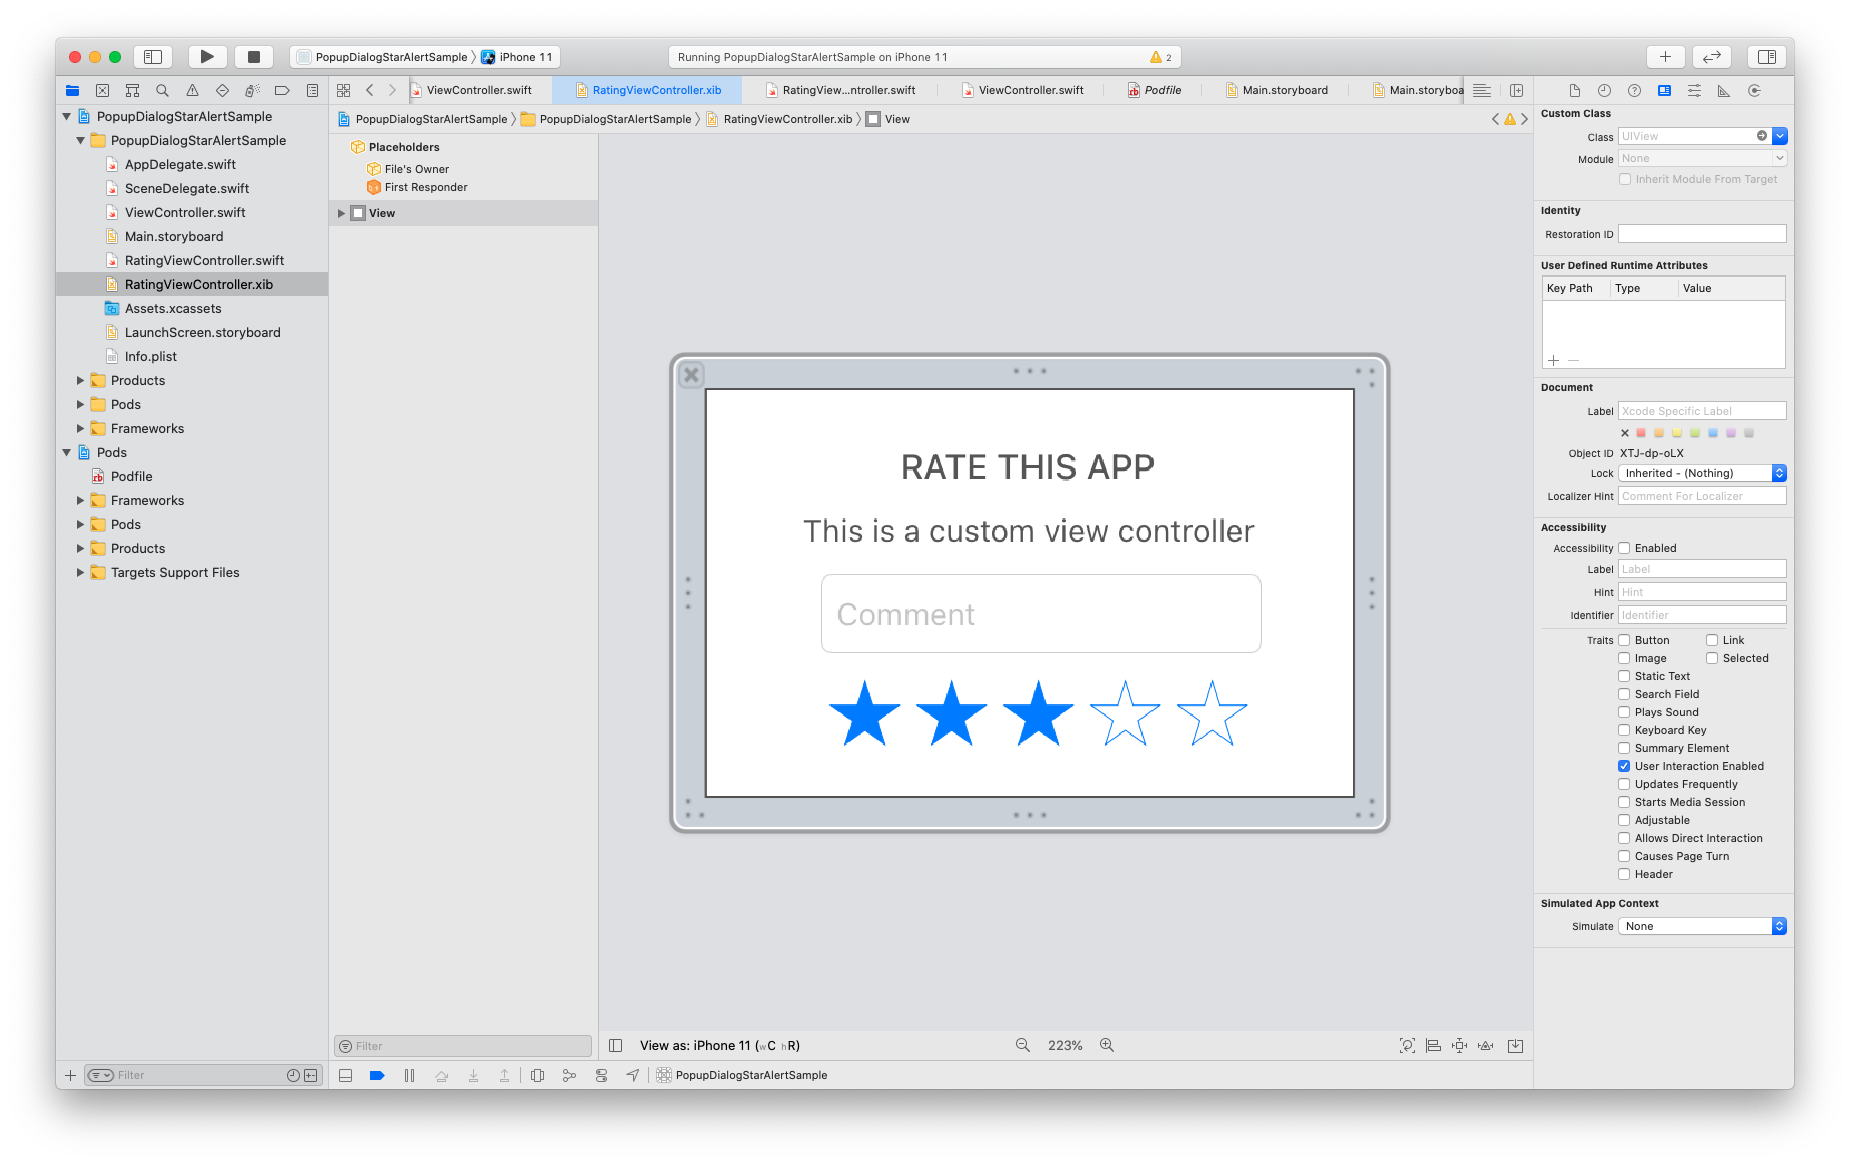
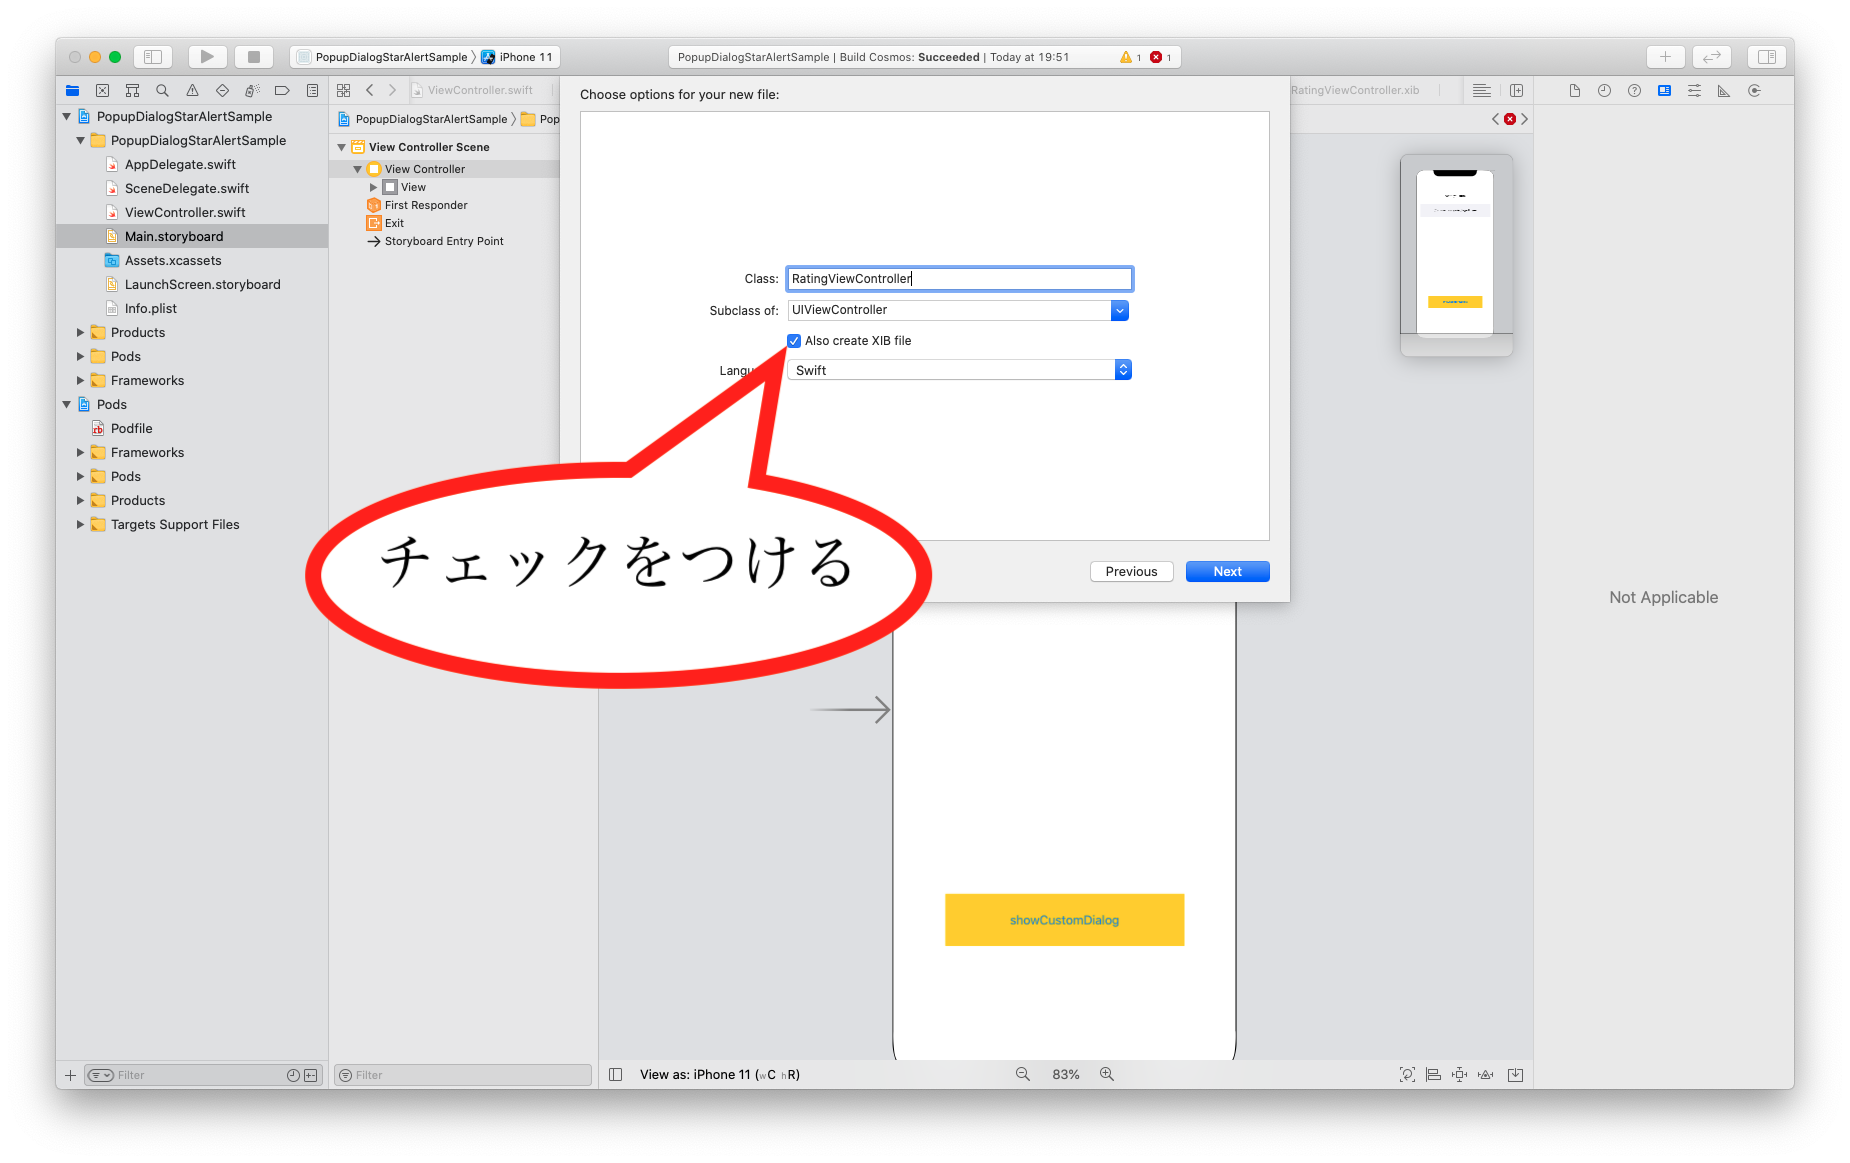
3. RatingViewController.xibの作成
3. 1. RatingViewController.xibの完成形
以下の画像のようにUIを作っていきます。
3. 2. RatingViewController.xibファイルの作成
3. 3. RatingViewController.xibのUIViewのSizeをFreeformに変更

3. 4. RatingViewController.xibに必要なパーツを配置
必要なパーツ
- 2つの__Label__
- コメントするための__TextField__
- スターを選択するための__UIView__(以下の画像のように__CosmosView__をClassに設定)

4. コーディング
4. 1. ViewController.swiftのコーディング
ViewController.swift
import UIKit
import PopupDialog

class ViewController: UIViewController {

    @IBOutlet weak var starLabel: UILabel!
    @IBOutlet weak var commentLabel: UILabel!

    override func viewDidLoad() {
        super.viewDidLoad()
    }

    func showCustomDialog(animated: Bool = true) {

        // Create a custom view controller
        let ratingVC = RatingViewController(nibName: "RatingViewController", bundle: nil)

        // Create the dialog
        let popup = PopupDialog(viewController: ratingVC,
                                buttonAlignment: .horizontal,
                                transitionStyle: .bounceDown,
                                tapGestureDismissal: true,
                                panGestureDismissal: false)

        // Create first button
        let buttonOne = CancelButton(title: "CANCEL", height: 60) {
            self.starLabel.text = "You canceled the rating dialog"
        }

        // Create second button
        let buttonTwo = DefaultButton(title: "RATE", height: 60) {
            self.starLabel.text = "You rated \(ratingVC.cosmosStarRating.rating) stars"
            self.commentLabel.text = ratingVC.commentTextField.text
        }

        // Add buttons to dialog
        popup.addButtons([buttonOne, buttonTwo])

        // Present dialog
        present(popup, animated: animated, completion: nil)
    }


    @IBAction func showCustomDialogTapped(_ sender: UIButton) {
        showCustomDialog()
    }

}
4. 2. RatingViewController.swiftのコーディング
RatingViewController.swift
import UIKit
import Cosmos

class RatingViewController: UIViewController {

    @IBOutlet weak var cosmosStarRating: CosmosView!
    @IBOutlet weak var commentTextField: UITextField!

    override func viewDidLoad() {
        super.viewDidLoad()

        // star数のデフォルトを3.0に設定
        cosmosStarRating.rating = 3.0

        commentTextField.delegate = self
        view.addGestureRecognizer(UITapGestureRecognizer(target: self, action: #selector(endEditing)))
    }

    @objc func endEditing() {
        view.endEditing(true)
    }
}

// textFieldに関する処理
extension RatingViewController: UITextFieldDelegate {

    func textFieldShouldReturn(_ textField: UITextField) -> Bool {
        endEditing()
        return true
    }
}
5. 関連付け
最後に関連付けを忘れずに行いましょう。
これで完成です!