本記事では、オシャレなNavigationBarの作成の仕方(色・フォント・アイテムのアレンジの仕方)を紹介します!
とても簡単に実装可能なのでぜひ試してみてください!
Before

After
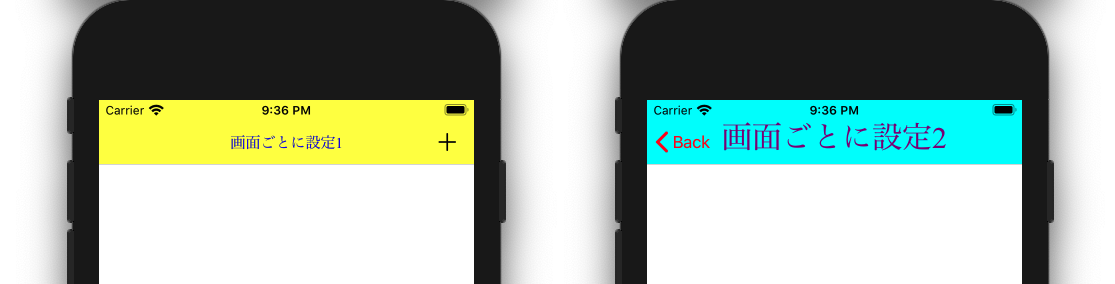
上記のように、NavigationBarをアレンジするだけでオシャレになりましたね!
※ 本記事では、画面ごとにNavigationBarをアレンジしていますが、全体を同じデザインでアレンジしたい場合は下記の記事を参考にしてみてください。
・[Swift]オシャレなNavigationBar(色・フォント・アイテムのアレンジ)の作成
では、下記のように実装していきましょう!
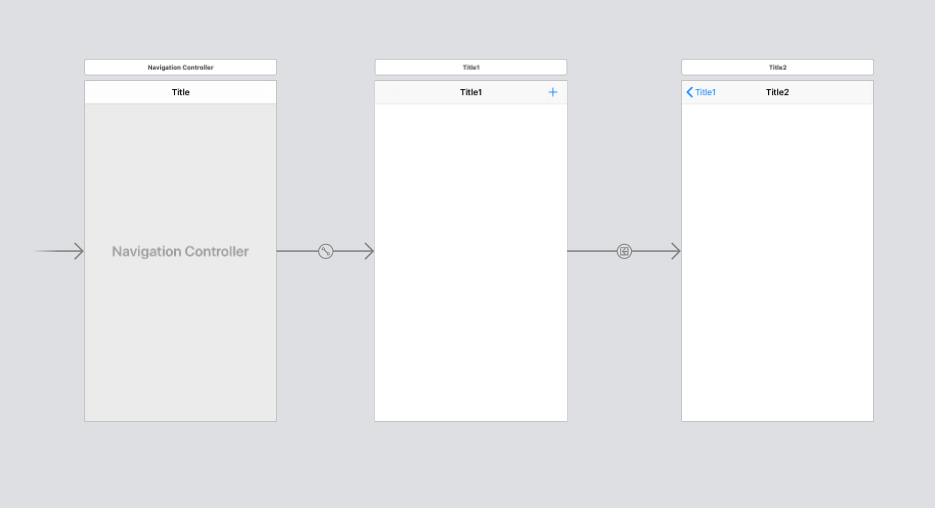
1. Main.storyboardの準備
まず、Main.storyboardに下記の写真のようにNavigationControllerを作成します。
これで、Beforeの部分は完成です!
2. それぞれのViewController.swiftにデザインをアレンジするためのコーディング
それでは、Afterのようにオシャレにデザインしていきましょう!
とても簡単で、画面ごと(ViewController.swiftごと)に下記のように、viewWillAppearにコードを書くことで実装できます!
下記のコードはAfterの画面ごとに設定1にあたります。
ViewController.swift
import UIKit

class ViewController: UIViewController {

    override func viewDidLoad() {
        super.viewDidLoad()
    }

    override func viewWillAppear(_ animated: Bool) {
        self.navigationItem.title = "画面ごとに設定1"

        // ナビゲーションバーの背景色
        self.navigationController?.navigationBar.barTintColor = UIColor.yellow

        self.navigationController?.navigationBar.titleTextAttributes =
            // フォントカラー
            [NSAttributedString.Key.foregroundColor: UIColor.blue,
             // フォントの種類
                NSAttributedString.Key.font: UIFont(name: "Times New Roman",
                    // フォントサイズ
                    size: 15)!]

        // ナビゲーションバー上のアイテムの色
        self.navigationController?.navigationBar.tintColor = UIColor.black
    }
}
下記のコードはAfterの画面ごとに設定2にあたります。
SecondViewController.swift
import UIKit

class SecondViewController: UIViewController {

    override func viewDidLoad() {
        super.viewDidLoad()
    }

    override func viewWillAppear(_ animated: Bool) {
        self.navigationItem.title = "画面ごとに設定2"

        // ナビゲーションバーの背景色
        self.navigationController?.navigationBar.barTintColor = UIColor.cyan

        self.navigationController?.navigationBar.titleTextAttributes =
            // フォントカラー
            [NSAttributedString.Key.foregroundColor: UIColor.purple,
             // フォントの種類
                NSAttributedString.Key.font: UIFont(name: "Times New Roman",
                    // フォントサイズ
                    size: 30)!]

        // ナビゲーションバー上のアイテムの色
        self.navigationController?.navigationBar.tintColor = UIColor.red
    }
}
参考
NavigationBarを全て同じデザインでアレンジしたい場合はこちらの記事を参考にしてみてください。