この記事はM5Stack Advent Calendar 2022の17日目の記事です。
作ろうと思ったきっかけ
もともとはMONOISTの「モールス信号キーボード」の記事を読んで、「M5StickCだとボタンも大きいしハード追加もしで作れるし、モールス符号の勉強もできそう」と思ったのがきっかけです。(ちなみに筆者は電信級は持っていません)
これ、#M5StickC で無線キーボード化してみようかと。https://t.co/EEeEwYXQFY
— tomorrow56@モモモフ済 (@tomorrow56) December 6, 2022
作ったもの
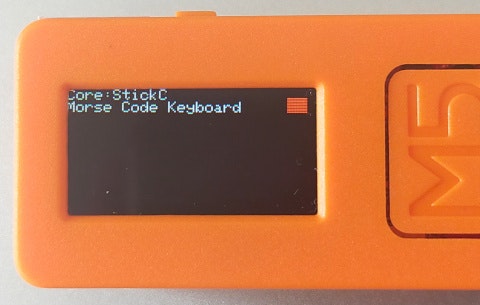
BLEキーボードとして機能する1キーのモールス符号デコーダー(CW Decode Keyboard)です。
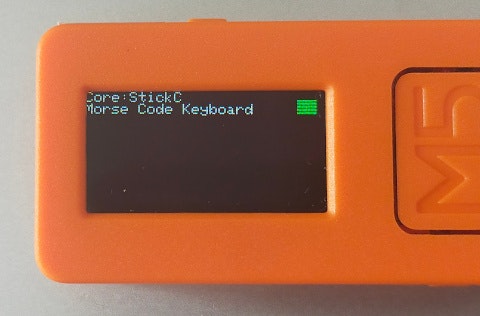
Bluetoothの接続状態は画面右上のマークで表示しています。ホストと接続する前は、マークが赤くなります。
ホストと接続すると、マークが緑になります。
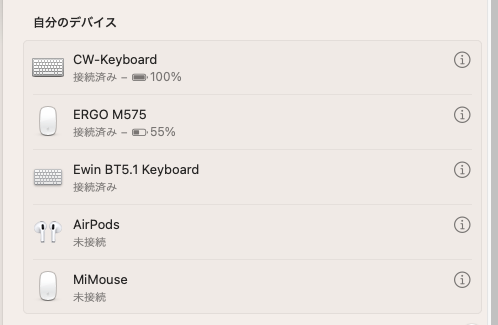
ホスト(PC)からは"CW-Keyboard"という名前のBluetoothキーボードとして認識されます。
サンプルコード
作成したコード(Arduino IDE用スケッチ)はgithubにアップしています。
https://github.com/tomorrow56/CW_BLEKeyboard
スケッチはM5StickCを使って動作させていますが、M5Unifiedライブラリを使用していますので、入力ピンの設定を変更すれば他のM5Stackシリーズでも動作するはずです。
コードの説明
モールス信号をデコードする部分の基本のアルゴリズムは MONOISTの記事に掲載されていたコード を使わせていただきました。
プログラムの見通しを良くするためパラメータの変数化と一部コードの修正を行っています。
BLEキーボードのインスタンス
M5Stack(ESP32)用のBluetoothライブラリは"NimBLE"を使用します。
インスタンスするときの引数で"deviceName","deviceManufacturer","batteryLevel"を設定します。
// for BLE Keyboard
#include <BleKeyboard.h>
BleKeyboard bleKeyboard("CW-Keyboard", "M5Stack", 100);
モールス信号デコード用の各種パラメータの設定
M5StickCのボタンが押された長さから短点(・)と長点(-)の判定をするための各種パラメータです。
inputPinはM5StickCの液晶と同じ面にあるボタンA(G37)を指定しています。
// for Morse Decode
unsigned long signal_len,t1,t2,t0;  //time for which button is pressed
String code = "";                   //string in which one alphabet is stored
const int spacePeriod = 2000;       //Waiting period until a space is entered
const int debouncingPeriod = 20;    //switch debouncing
const int longpressLimit = 500;     //Limit of long Press time
boolean connectDotDash = true;     //Code connect flag
int inputPin = G37;                 //M5StickC BtnA for input
setup関数
setup関数の最初に各種設定を行います。ボードタイプの判別は関数化(boardType())しています。
void setup(void)
{
  auto cfg = M5.config();

#if defined ( ARDUINO )
  cfg.serial_baudrate = 115200;   // default=115200. if "Serial" is not needed, set it to 0.
#endif
  cfg.clear_display = true;  // default=true. clear the screen when begin.
  cfg.output_power  = false;  // default=true. use external port 5V output.
  cfg.internal_imu  = false;  // default=true. use internal IMU.
  cfg.internal_rtc  = false;  // default=true. use internal RTC.
  cfg.internal_spk  = false;  // default=true. use internal speaker.
  cfg.internal_mic  = false;  // default=true. use internal microphone.

  M5.begin(cfg);

  M5.Display.setBrightness(64);

  if (M5.Display.width() < M5.Display.height())
  { /// Landscape mode.
    M5.Display.setRotation(M5.Display.getRotation() ^ 1);
  }

  int textsize = M5.Display.height() / 160;
  if (textsize == 0)
  {
    textsize = 1;
  }
  M5.Display.setTextSize(textsize);

  // hardware model check
  char* boardName = boardType();
  M5.Display.startWrite();
  M5.Display.print("Core:");
  M5.Display.println(boardName);
  ESP_LOGI("setup", "core:%s", boardName);
  M5.Display.println("Morse Code Keyboard");
inputPinをプルアップ入力に設定し、BLEキーボードを開始します。
  // Key setting internal pullup
  pinMode(inputPin, INPUT_PULLUP);

  // start BLE Keyboard
  Serial.println("Starting BLE work!");
  bleKeyboard.begin();
}
loop関数
入力したモールスコードをデコードして画面に表示する位置とサイズを指定します。
void loop(void)
{
  vTaskDelay(1);
  int h = M5.Display.height() / 8;
  int w = M5.Display.width() / 12;

//  M5.update();

  M5.Display.setCursor(w*5, h*3);
  M5.Display.setTextSize(3);
ホストに接続されたら入力判別処理に入り、マークを緑にしてボタンが押されるのを待ちます。ボタンが押されたことを検出したら、t1に現在の時間を代入します。押されていなかった期間が"spacePeriod"より長い場合はスペースを入力します。
  if(bleKeyboard.isConnected())
  {
    M5.Display.fillRect(w*11, h/2, w, h, TFT_GREEN);
    while (connectDotDash == true)
    {
      t0 = millis();
      // waiting for button press
      while (digitalRead(inputPin) == HIGH)
      {
      }
      // Enter a space if no key is pressed for a certain period of time
      if (millis()-t0 > spacePeriod)
      {
        bleKeyboard.print(' ');
        Serial.print(' ');
      }
      t1 = millis();                            //time at button press
次にボタンが離されるのを待ちます。ボタンが離されたら押されていた期間を"signal_len"に代入し、チャタリング防止期間(debouncingPeriod)より長い場合は、readio()関数を呼び出して、押された期間によって短点・長点を判定して"code"変数に追加します。
"longpressLimit"の期間でループを回し、この間にキーが押されたら、入力判別処理のループを繰り返します。
キーが押されなかったら、文字区切りと判断しループを抜けます。
      // waiting for button released
      while (digitalRead(inputPin) == LOW)
      {
      }
      t2 = millis();                            //time at button release
      signal_len = t2 - t1;                     //time for which button is pressed
      if (signal_len > debouncingPeriod)        //to account for switch debouncing
      {
        code += readio();                       //function to read dot or dash
      }
      //limit of long press
      //if time between button press greater than 0.5sec, skip loop and go to next alphabet
      while ((millis() - t2) < longpressLimit)
      {
        if (digitalRead(inputPin) == LOW)
        {
          connectDotDash = true;
          break;
        }else
        {
          connectDotDash = false;
        }
      }
    }
入力判別処理のループを抜けたら"convertor()"関数で"code"変数をデコードし、結果を"keyin"変数に代入し、LCD表示とホストへの送信を行います。
    char keyin = convertor();       //function to decipher code into alphabet
    Serial.print(keyin);
    M5.Display.print(keyin);
    bleKeyboard.print(keyin);
    connectDotDash = true;
  }
  else
  {
    M5.Display.fillRect(w*11, h/2, w, h, TFT_RED);
  }
}
boardType()関数
M5Unifiedのボードタイプの判別部分を切り出した関数です。戻り値はボードタイプです。
/**********
* hardware model check
**********/
char* boardType()
{
  char* name;
  switch (M5.getBoard())
  {
#if defined (CONFIG_IDF_TARGET_ESP32C3)
  case m5::board_t::board_M5StampC3:
    name = "StampC3";
    break;
  case m5::board_t::board_M5StampC3U:
    name = "StampC3U";
    break;
#else
  case m5::board_t::board_M5Stack:
    name = "Stack";
    break;
  case m5::board_t::board_M5StackCore2:
    name = "StackCore2";
    break;
  case m5::board_t::board_M5StickC:
    name = "StickC";
    break;
  case m5::board_t::board_M5StickCPlus:
    name = "StickCPlus";
    break;
  case m5::board_t::board_M5StackCoreInk:
    name = "CoreInk";
    break;
  case m5::board_t::board_M5Paper:
    name = "Paper";
    break;
  case m5::board_t::board_M5Tough:
    name = "Tough";
    break;
  case m5::board_t::board_M5Station:
    name = "Station";
    break;
  case m5::board_t::board_M5Atom:
    name = "ATOM";
    break;
  case m5::board_t::board_M5AtomPsram:
    name = "ATOM PSRAM";
    break;
  case m5::board_t::board_M5AtomU:
    name = "ATOM U";
    break;
  case m5::board_t::board_M5TimerCam:
    name = "TimerCamera";
    break;
  case m5::board_t::board_M5StampPico:
    name = "StampPico";
    break;
#endif
  default:
    name = "Who am I ?";
    break;
  }

  return name;
}
char readio()関数
短点・長点を判定する関数です。MONOISTに掲載のコードをそのまま使わせてもらっています。
char readio()
{
  if (signal_len < 200 && signal_len > 20)
  {
    return '.';                        //if button press less than 0.2sec, it is a dot
  }
  else //if (signal_len >= 300)
  {
    return '-';                        //if button press more than 0.2sec, it is a dash
  }
}
convertor()関数
モールス符号を英数字・記号に変換する関数です。MONOISTに掲載のコード(基本の英数字)をベースに英文モールス符号で規定されている記号を一通り追加しました。ただし、“ダイアクリティカルマーク”付きアルファベットは対応していません。
ここで定義されていないモールス符号が入力された場合は、ホストに改行コードを送信します。
char convertor()
{
  static String letters[] = {
    ".-",   // A (1)
    "-...", // B
    "-.-.", // C
    "-..",  // D
    ".",    // E
    "..-.", // F
    "--.",  // G
    "....", // H
    "..",   // I
    ".---", // J
    "-.-",  // K
    ".-..", // L
    "--",   // M
    "-.",   // N
    "---",  // O
    ".--.", // P
    "--.-", // Q
    ".-.",  // R
    "...",  // S
    "-",    // T
    "..-",  // U
    "...-", // V
    ".--",  // W
    "-..-", // X
    "-.--", // Y
    "--..", // Z (26)
    "-----",  // 0
    ".----",  // 1
    "..---",  // 2
    "...--",  // 3
    "....-",  // 4
    ".....",  // 5
    "-....",  // 6
    "--...",  // 7
    "---..",  // 8
    "----.",  // 9 (36)
    "E"       // end code
  };

  int i = 0;
  char c;
  if (code == ".-.-.-")
  {
    c = '.';        //period
  }
  else if (code == "--..--")
  {
    c = ',';        //comma
  }
  else if (code == "..--..")
  {
    c = '?';        //question
  }
  else if (code == ".----.")
  {
    c = 0x27;        //Apostrophe (')
  }
  else if (code == "-.-.--")
  {
    c = '!';        //Exclamation
  }
  else if (code == "-..-.")
  {
    c = '/';        //slash
  }
  else if (code == "-.--.")
  {
    c = '(';        //Open parenthesis
  }
  else if (code == "-.--.-")
  {
    c = ')';        //Close parenthesis
  }
    else if (code == ".-...")
  {
    c = '&';        //ampersand
  }
  else if (code == "---...")
  {
    c = ':';        //colon
  }
  else if (code == "-.-.-.")
  {
    c = ';';        //semicolon ';'
  }
  else if (code == "-...-")
  {
    c = '=';        //double dash
  }
  else if (code == ".-.-.")
  {
    c = '+';        //plus
  }
  else if (code == "-....-")
  {
    c = '-';        //hyphen
  }
  else if (code == "..--.-")
  {
    c = '_';        //underscore
  }
  else if (code == ".-..-.")
  {
    c = '?';        //Question
  }
  else if (code == "...-..-")
  {
    c = '$';        //Dollar
  }
  else if (code == ".--.-.")
  {
    c = '@';        //at mark
  }
  else if (code == "...-.-")
  {
    c = 0x0a;  //end of work, send "LF"
  }
  else
  {
    while (letters[i] != "E")  //loop for comparing input code with letters array
    {
      if (letters[i] == code)
      {
        if (i>25)
          c = '0'+(i-26);
        else
          c = 'A'+i;
        break;
      }
      i++;
    }
    if (letters[i] == "E")
    {
      c = 0x0a;  //if input code doesn't match any letter, send "LF"
//      Serial.println("");  //if input code doesn't match any letter, error
    }
  }
  code = "";                            //reset code to blank string
  return c;
}
参考にしたサイト
以下のサイトの情報を参考にさせていただきました。どうもありがとうございます。
M5Unified
CW Decorder
Morse Code
NimBLE Keyboard