はじめに
この記事はコンテナ勉強用として試したことまとめたものです。
今回はECSにWebアプリをデプロイしてみました。
ECSとは
- EC2 Container Serviceの略
- コンテナ管理用のマネージドサービス。
- Dockerコンテナの実行、更新、停止を管理する。
- クラスタ構成やロードバランサーと連携、コンテナの監視も行ってくれる。
- 2つの料金モデルがあるFageteとEC2起動タイプ。
- 公式ドキュメント
https://aws.amazon.com/jp/ecs/pricing/
デプロイまでの流れ
- ECRにイメージをプッシュ
- タスク定義を登録
- クラスターを作成
- タスクの実行
※サービスの登録は次回にでも...
ECSタスク定義の登録
-
以下リンクにあるjsonファイルを利用してタスク定義を登録する。コンソールから登録することも可能。
(事前にECRリポジトリにイメージを登録しておきます。)
https://github.com/aws-samples/ecs-demo-php-simple-app/blob/master/simple-app-task-def.json -
設定例
{
    "family": "console-ecs-app-test",
    "volumes": [
        {
            "name": "my-vol",
            "host": {}
        }
    ],
    "containerDefinitions": [
        {
            "environment": [],
            "name": "simple-app",
            "image": "1111111111111.dkr.ecr.ap-northeast-1.amazonaws.com/amazon-ecs-repo-test:latest",
            "cpu": 10,
            "memory": 300,
            "portMappings": [
                {
                    "containerPort": 80,
                    "hostPort": 80
                }
            ],
            "mountPoints": [
                {
                    "sourceVolume": "my-vol",
                    "containerPath": "/var/www/my-vol"
                }
            ],
            "entryPoint": [
                "/usr/sbin/apache2",
                "-D",
                "FOREGROUND"
            ],
            "essential": true
        },
        {
            "name": "busybox",
            "image": "busybox",
            "cpu": 10,
            "memory": 300,
            "volumesFrom": [
            {
              "sourceContainer": "simple-app"
            }
            ],
            "entryPoint": [
                "sh",
                "-c"
            ],
            "command": [
                "/bin/sh -c \"while true; do /bin/date > /var/www/my-vol/date; sleep 1; done\""
            ],
            "essential": false
        }
    ]
}
- タスク登録コマンドを実行する。
(今回はEC2起動タイプを使用していきます。
# aws ecs register-task-definition --cli-input-json file://simple-app-task-def.json
/usr/lib/python2.7/site-packages/urllib3/util/ssl_.py:365: SNIMissingWarning: An HTTPS request has been made, but the SNI (Server Name Indication) extension to TLS is not available on this platform. This may cause the server to present an incorrect TLS certificate, which can cause validation failures. You can upgrade to a newer version of Python to solve this. For more information, see https://urllib3.readthedocs.io/en/latest/advanced-usage.html#ssl-warnings
  SNIMissingWarning
{
    "taskDefinition": {
        "status": "ACTIVE",
        "family": "console-ecs-app-test",
        "placementConstraints": [],
        "requiresAttributes": [
            {
                "name": "com.amazonaws.ecs.capability.ecr-auth"
            }
        ],

・・・(省略)・・・

                "volumesFrom": [
                    {
                        "sourceContainer": "simple-app"
                    }
                ]
            }
        ],
        "revision": 4
    }
}
- コンソールからタスク登録されていることを確認する。

ECSクラスターを作成
- 「クラスターの作成」ボタンを押下する。

- 「EC2 Linux + ネットワーキング」を選択する。

- クラスターの設定をする。

- クラスターが起動するのを待つ。

- クラスターの起動を確認する。

タスクの実行
- 「新しいタスクの実行」ボタンを押下する。

- 起動タイプを「EC2」、タスク数を「2」設定する。
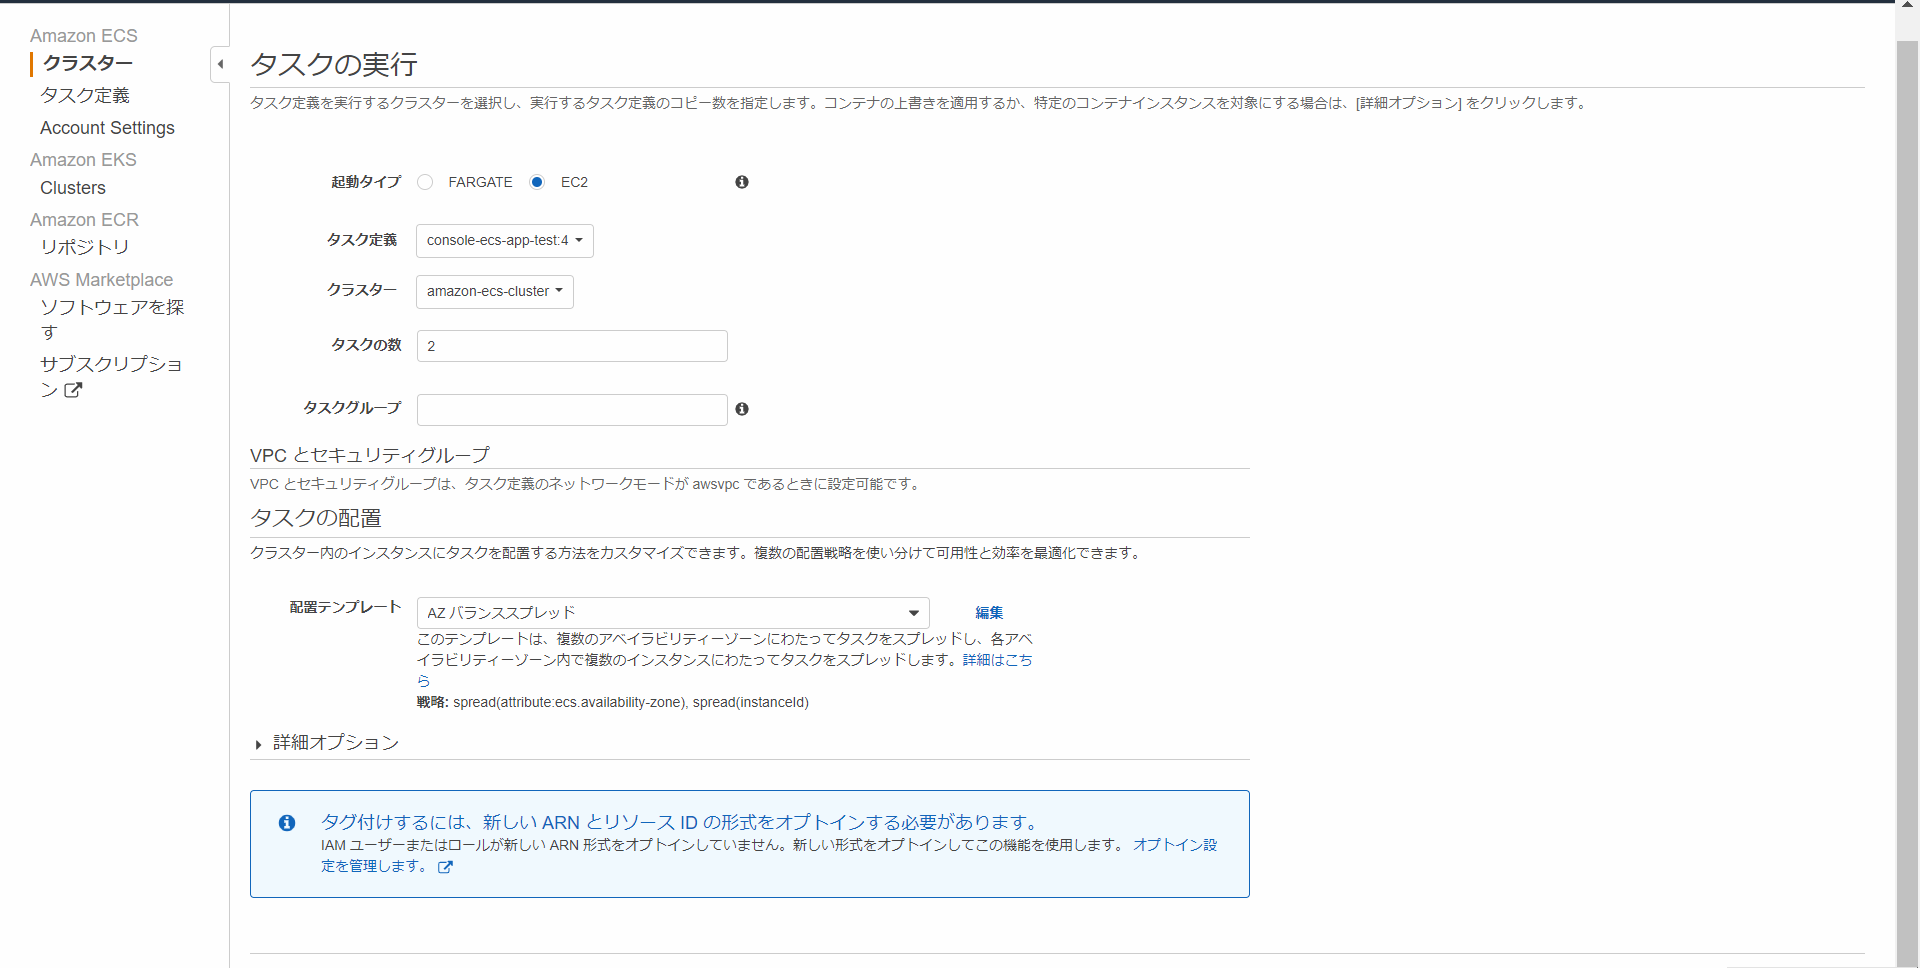
- タスク実行されたことを確認する。

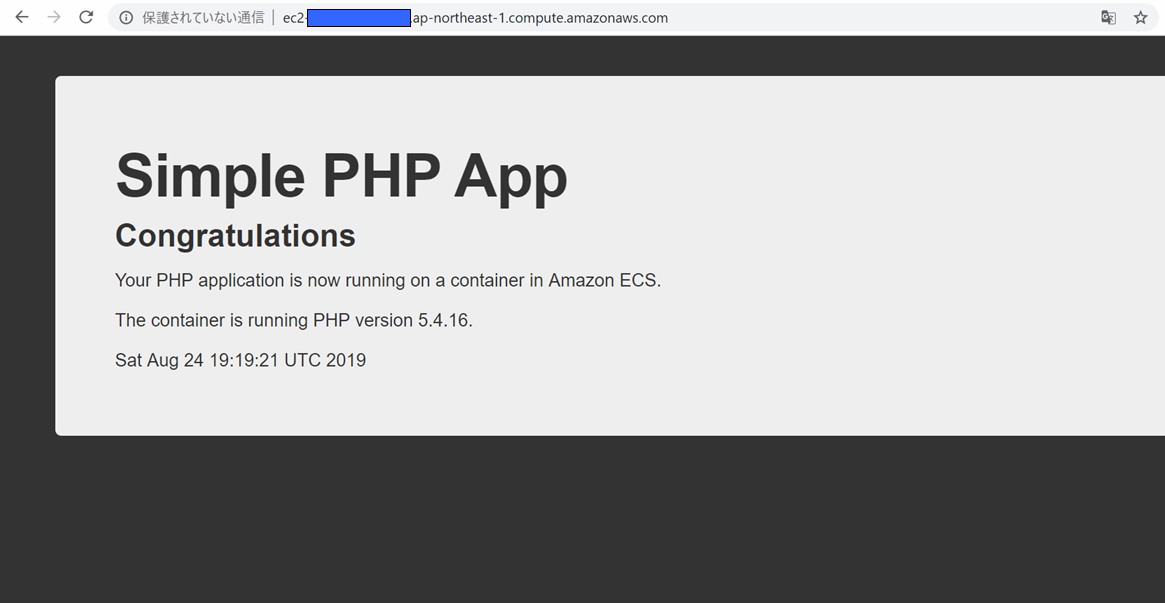
- ブラウザからアクセス確認する。
クラスターの「ECSインスタンス」タブからコンテナインスタンスを選択するとDNSやIPなど確認できる。
まとめ
- 「No Container Instances were found in your cluster.」といったエラーでタスク実行に失敗したが、
そもそもEC2インスタンスを削除してしまったものだった。クラスターを再作成することで解消。 - ECSのタスク定義項目が多いのでドキュメントで確認しながら覚えていくしかないかな。