7
8

Delete article

Deleted articles cannot be recovered.

Draft of this article would be also deleted.

Are you sure you want to delete this article?

More than 5 years have passed since last update.

NewRelicを導入してみた(CentOS・PHP編)

Posted at

##NewRelicとは
http://newrelic.com/

iOSやAndroid、サーバ、Webアプリのパフォーマンスを、サービス別、オペレーティングシステム別など、アプリのさまざまな稼働条件/環境別にリアルタイムで調べる。
デベロッパはNew Relicにログインし、アプリの対話的なアクションを調べるためのさまざまなオプションを指定する。またアプリのパフォーマンスをブラウザ上とサーバ上の両方でモニタできる機能もある。

基本機能はLiteプラン(無料)で使うことができます。

##NewRelicアカウント作成
https://newrelic.com/signup
上記URLからお願いします!

##CentOS7サーバに導入
###1.「SERVERS」のタブをクリック
アカウント作成後、画面上の「SERVERS」のタブをクリックします。
今回は、CentOS7に導入するので「Red Hat or CentOS」をクリックします。名称未設定 3.png
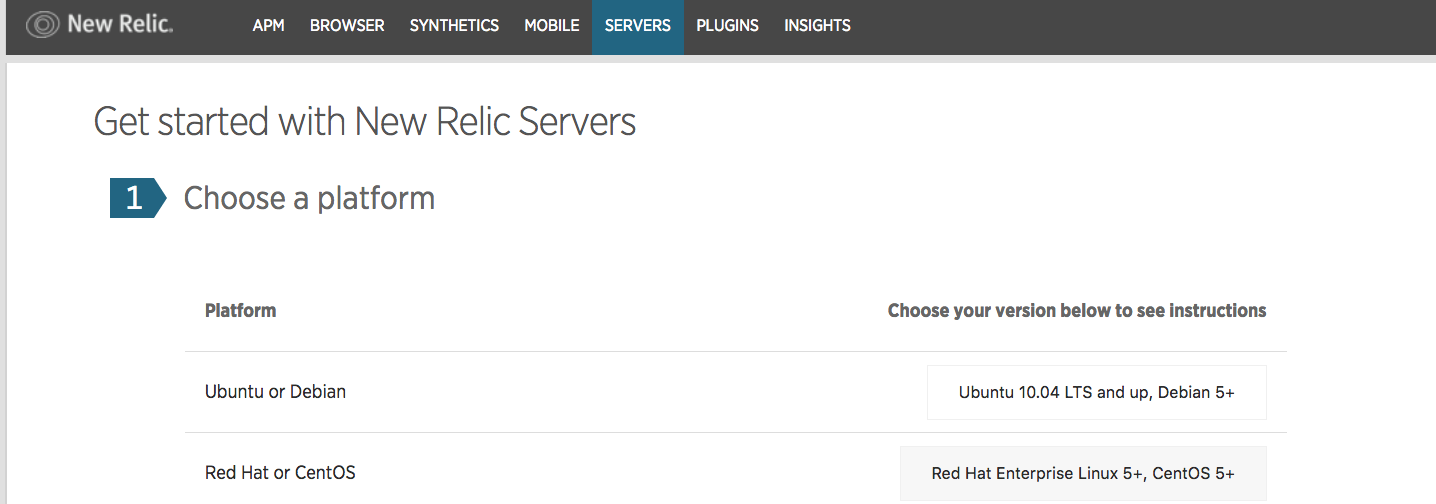
###2.NewRelicのリポジトリを入れる
スクリーンショット 2016-09-20 17.47.57.png

rpm -Uvh https://download.newrelic.com/pub/newrelic/el5/i386/newrelic-repo-5-3.noarch.rpm

###3.NewRelicのインストールスクリーンショット 2016-09-20 17.48.01.png

yum install newrelic-sysmond

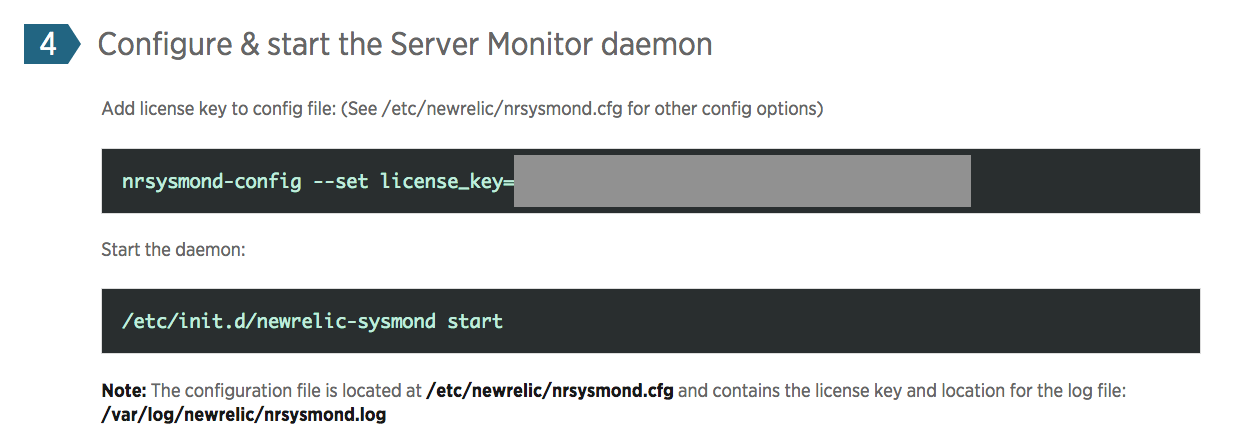
###4.ライセンスキーと自動起動設定
スクリーンショット 2016-09-20 17.48.06.png

nrsysmond-config --set license_key=xxxxxxxxxxxxxxxxxxxxx
/etc/init.d/newrelic-sysmond start

###5.動作確認
ボタンを押して、確認しましょう!
スクリーンショット 2016-09-20 17.48.19.png

##PHPアプリに導入
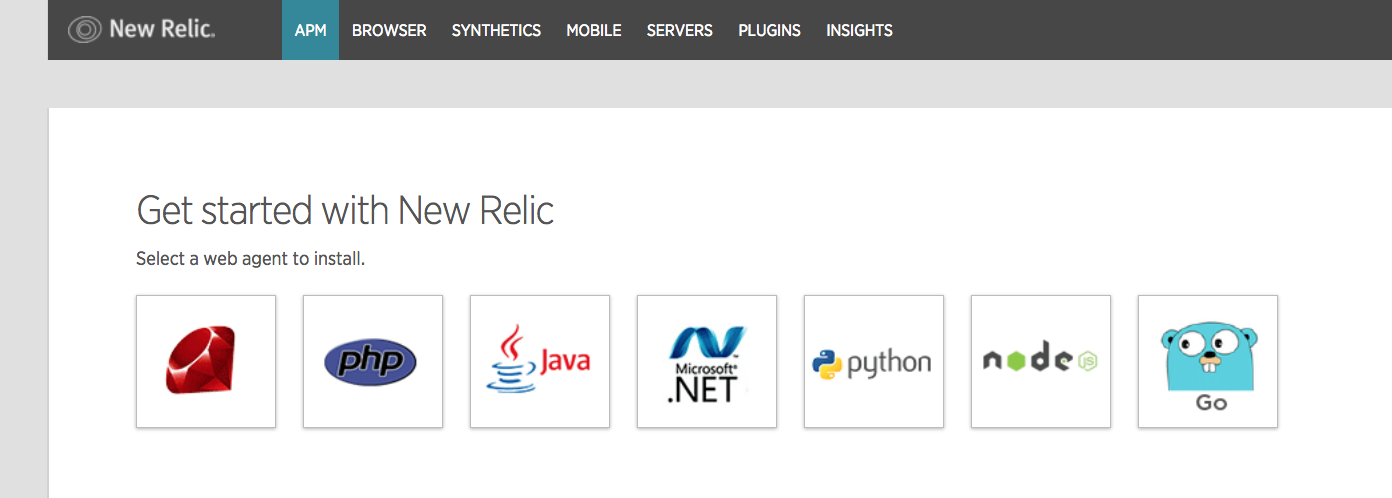
###1. PHPアプリを選択
スクリーンショット 2016-09-20 18.04.41.png
###2.RPM-Basedを選択
スクリーンショット 2016-09-20 18.05.17.png
###3.PHP用NewRelicのインストール
スクリーンショット 2016-09-20 18.05.34.png

sudo rpm -Uvh http://yum.newrelic.com/pub/newrelic/el5/x86_64/newrelic-repo-5-3.noarch.rpm
sudo yum install newrelic-php5
sudo newrelic-install install

###4.ライセンスキーの設定
php.iniにライセンスキーを追加し、アプリケーションを再起動
スクリーンショット 2016-09-20 18.05.50.png

###5. 動作確認
データが送られてきたら、OK
スクリーンショット 2016-09-28 10.27.11.png

7
8
0

Register as a new user and use Qiita more conveniently

  1. You get articles that match your needs
  2. You can efficiently read back useful information
  3. You can use dark theme
What you can do with signing up
7
8

Delete article

Deleted articles cannot be recovered.

Draft of this article would be also deleted.

Are you sure you want to delete this article?