【本文】
EtherumにはWhisperという一種のチャット機能があります。
このWhisperでのメッセージのやり取りはブロックチェーン上には記録されませんが、メッセージのやり取りをしながら、送金処理や仮想通貨の売買を実施する等、工夫次第でDAppsの機能を拡張することが可能となります。
ブロックチェーン上には記録されない為、一定時間経過後にメッセージがなくなるという時限制のあるもの(※時間設定は個人で可能。)ですが、P2Pを介した非同期通信(※相手がオフライン状態でもメッセージ送信可能。)という利点を有しています。
なお、Whisperの実装は、shhというライブラリを使用することになります。
今回は、このWhisperの実装事例を紹介します。
【今回利用した開発環境等】
(※バージョンは割愛)
- OS: Lubuntu(Ubuntuの軽量版)
- ブロックチェーン基盤: geth
- フロント画面: node.js(+ web3のライブラリ)
- shhライブラリ
【事前準備】
- gethやnode.jsはインストール済みであること。
- geth起動時に、コマンド引数として、「shh」を設定すること。
- shhライブラリをインストール済みであること。(※やり方は、web3の時の同じ。)
> geth --shh console
(※Webブラウザで使用するためには、上記引数以外にも、rpc関連の設定が必要です。)
【DApps開発】
- DApps画面アプリの本体となるモジュールを作成。
exec_test_shh.js
//box-logs
var box_logs_shh = document.querySelector("#box_logs_shh");
//topics
var btn_topics = document.querySelector("#btn_topics");
//push
var btn_push = document.querySelector("#btn_push");
let input_topics;
let input_payload;
set_topics.innerText = "[topics]: ";
//topicsを設定
btn_topics.onclick = function() {
input_topics = document.querySelector("#input_topics").value;
set_topics.innerText = "[topics]: " + input_topics;
//filter開始
exec_filter();
}
//メッセージを送信
btn_push.onclick = function() {
input_payload = document.querySelector("#input_payload").value;
//push(メッセージ送信)
var shh_post = web3.shh.post(
{topics: [input_topics],
payload: web3.fromAscii(input_payload),
ttl: web3.fromDecimal("100")});
}
/* イベント監視 */
function exec_filter() {
var shh_message;
var filter_shh = web3.shh.filter({topics: [input_topics]});
filter_shh.watch(function(error,result){
if (!error) {
var shh_topics = filter_shh.options.topics;
shh_message = web3.toAscii(result.payload);
box_logs_shh.innerHTML +=
"[timestamp]:" + new Date(result.sent * 1000) + "
"
+ "[topics]: " + web3.toAscii(parseInt(shh_topics).toString(16)) + "
"
+ "[payload]: " + web3.toAscii(result.payload) + "
";
}
});
}
- web3インスタンスの生成とセットアップファイルを作成。(本体に直接定義してもよい。)
connect_web3.js
//web3インスタンスの生成とセットアップ
var web3 = require("web3");
var web3 = new Web3();
web3.setProvider(new web3.providers.HttpProvider("http://localhost:8545"));
- DAppsアプリのフロント画面となるindex.html及びスタイルシートの作成。(スタイルシートは割愛。)
test_shhtest_shh.html
test_shh
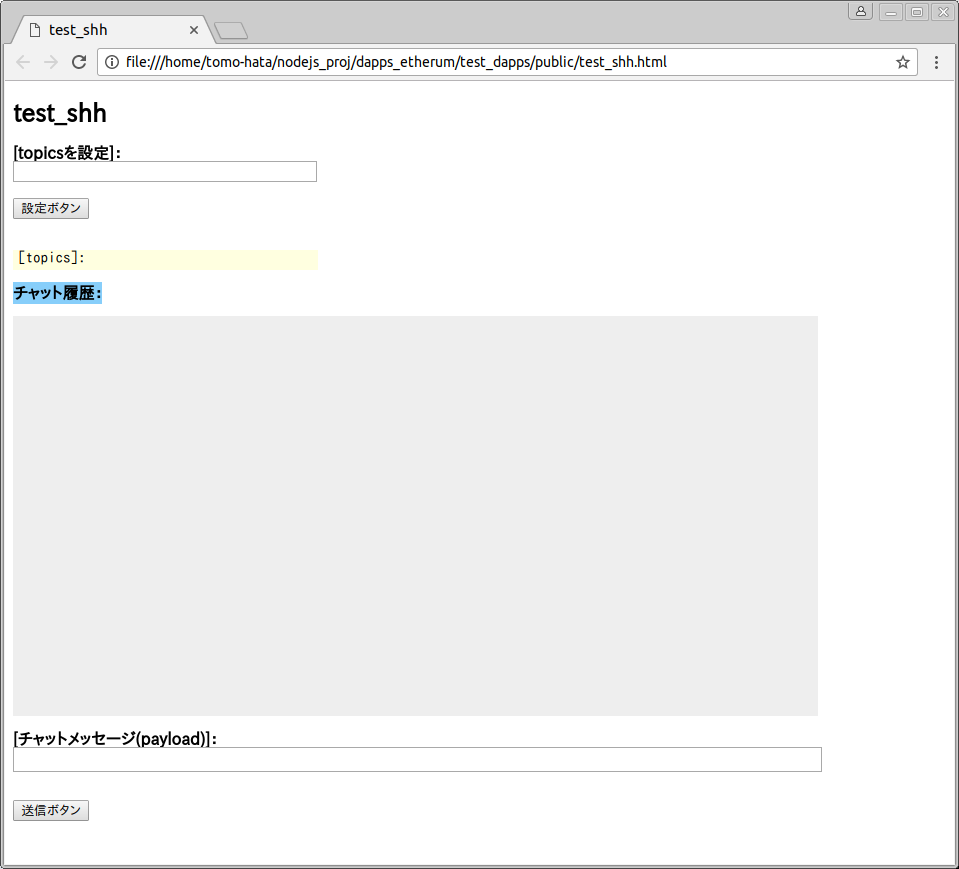
- 出来上がりは以下のような画面となる。
(図1)
【DApps画面の実行確認】
注)以下の説明について、画面上は単一ノード上ですが、実際のメッセージのやり取りはP2P上の複数ノードで実施しています。
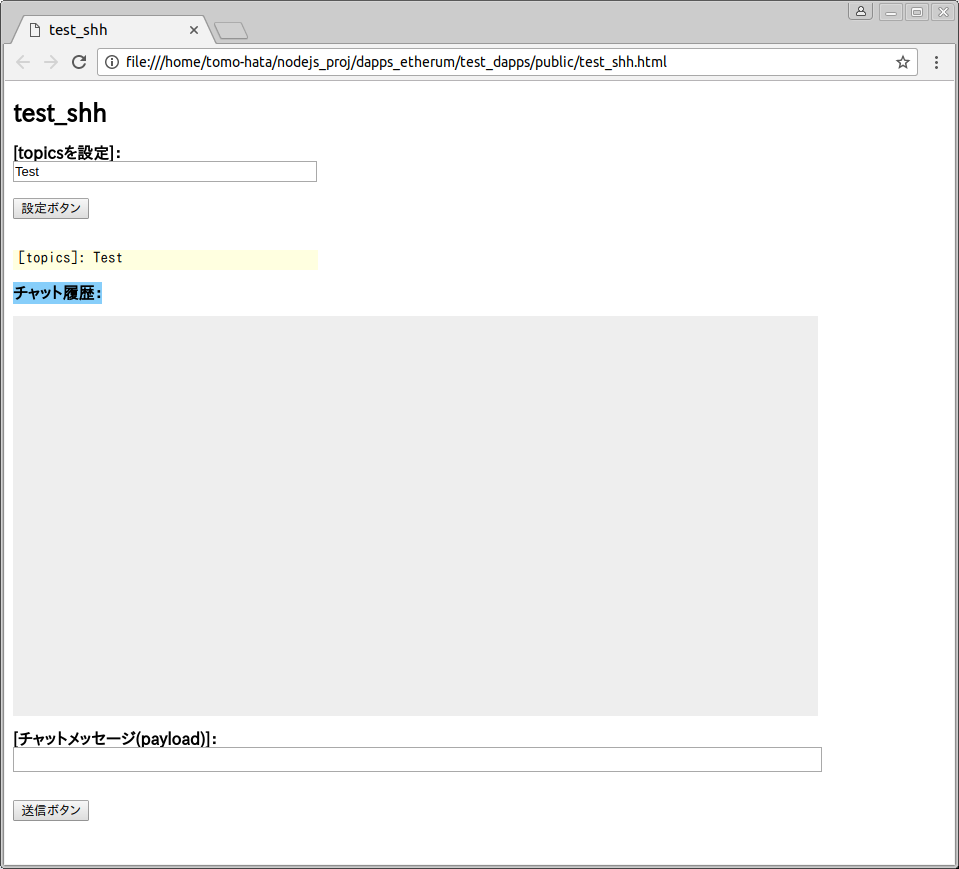
- **[topicsを設定]:欄に、任意のtopicsを入力し、「設定ボタン」**を押下する。
- **「設定ボタン」**の直下にある黄色枠内にtopicsが設定される。
(図2)
- **[チャットメッセージ(payload)]:欄に、任意の英数字を入力し、「送信ボタン」**を押下する。
- **「チャット履歴」**欄にメッセージ情報が出力される。同時に、P2Pノード上にメッセージがブロードキャストされる。(※メッセージを見れるのは、同じtopicsを設定しているノードのみ。)
(図3)
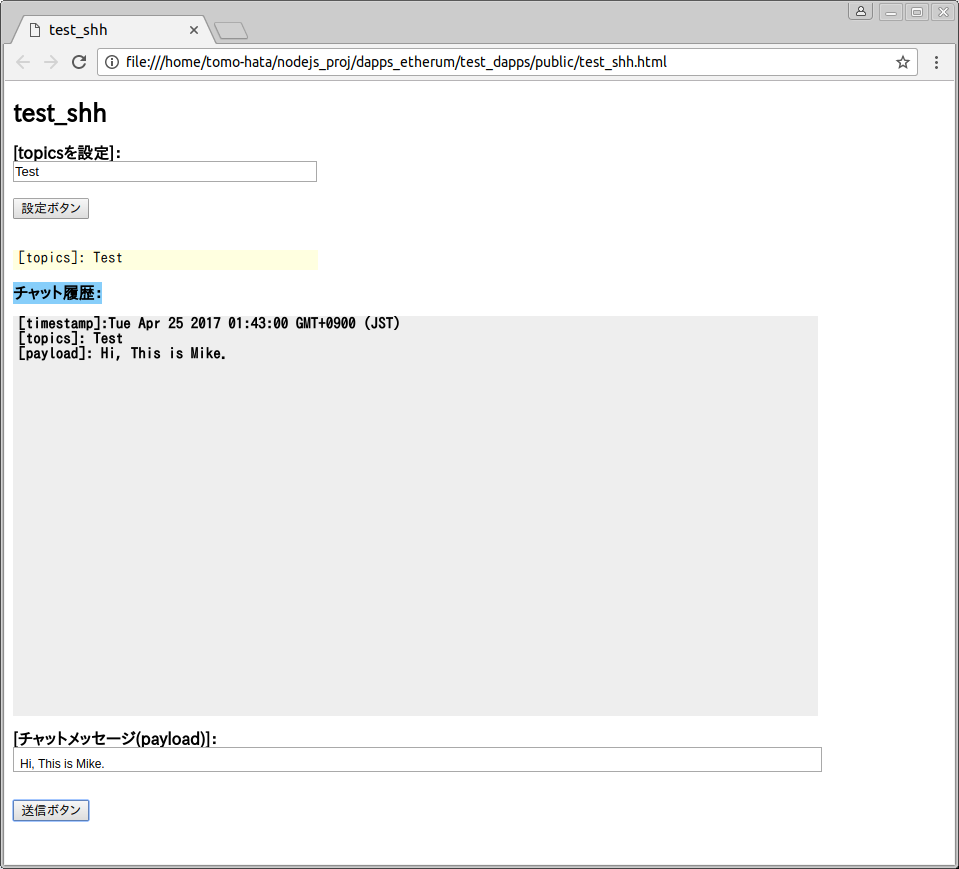
ノードAが発信したメッセージ[timestamp]:Tue Apr 25 2017 01:43:00 GMT+0900 (JST) [topics]: Test [payload]: Hi, This is Mike.
- 別のノードから発信されたメッセージ(topicsは同じ「test」を設定。)を受信する。
(図4)
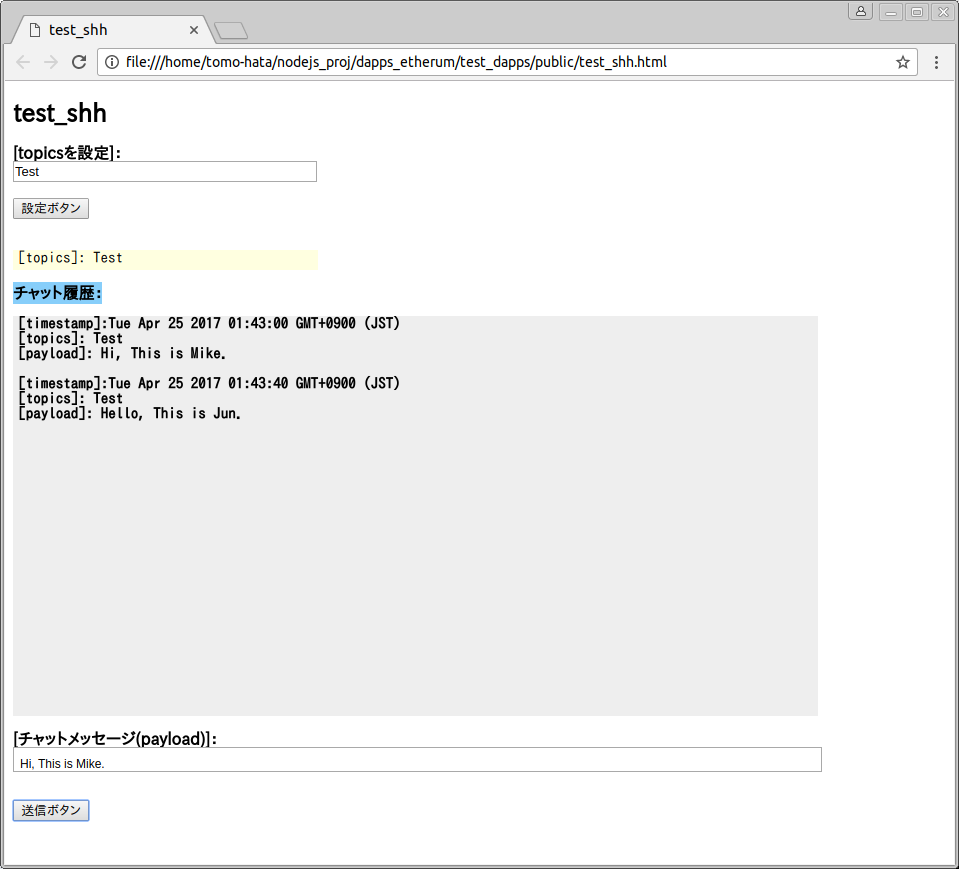
ノードBからのメッセージを受信[timestamp]:Tue Apr 25 2017 01:43:40 GMT+0900 (JST) [topics]: Test
[payload]: Hello, This is Jun.
【後記】
今回紹介したWhisperのように、Ethereumには未だ私自身も十分に把握できていない機能が色々備わっているようです。
これからも勉強していきたいと思います。