はじめに
本記事では、ローカル開発環境で作成した Azure Functions 関数を Azure Pipelines を使ってデプロイする方法を説明します。
前提
-
Visual Studio Code
ローカル開発環境は Visual Studio Code を使用します。
https://docs.microsoft.com/ja-jp/azure/azure-functions/functions-develop-vs-code?tabs=nodejs -
Azure Functions
Azure Functions を作成しておきます。
本記事では、以下の構成で Azure Portal から作成しました。
関数はこの時点では空のままで OK です。- ランタイムスタック : Node.js (14 LTS)
- オペレーティングシステム : Windows
- プラン : 消費量 (サーバーレス)
-
Azure DevOps PJ
新規に DevOps PJ も作成しておきます。
Repos や Pipelines はまだ設定されていない状態で OK です。
ローカル開発環境で関数を作成
まずはローカル開発環境で Azure Functions の関数を作成していきます。
任意のフォルダーを作成し、その場所で Visual Studio Code を開き作業開始です。
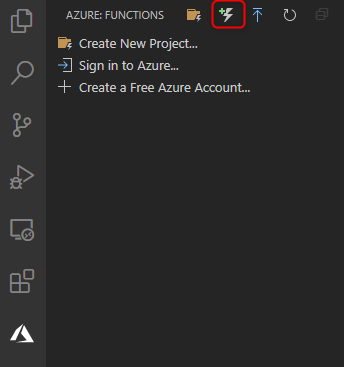
Azure Functions 拡張機能のインストール
以下のドキュメントに従って、Visual Studio Code に Azure Functions 拡張機能をインストールしましょう。
https://docs.microsoft.com/ja-jp/azure/azure-functions/functions-develop-vs-code?tabs=nodejs#install-the-azure-functions-extension
Visual Studio Code のアクティビティバーに Azure アイコンが表示されたら OK です。
関数の作成
続いて、関数を作成していきます。
アクティビティバーの Azure アイコンを選択し、create Function ボタンを押します。
The selected folder is not a function project. Create new project? と聞かれたら Yes を選択、続けて作成する関数の情報を入力していきます。
language は今回 JavaScript を選択し、template は、HTTP trigger を選択しています。
その後、任意の関数名を入力します。
承認レベルは、今回は Anonymous を選択します。
承認レベルの詳細については以下のドキュメントもご参照ください。
https://docs.microsoft.com/ja-jp/azure/azure-functions/functions-bindings-http-webhook-trigger?tabs=csharp#authorization-keys
ここまで進めると、空だったフォルダに Azure Functions Project を構成するファイル群が格納されています。
git プロジェクトになっているので、このあとの Azure DevOps Repos に push することを見越してコミットしておきましょう。
Azure DevOps Repos に push
事前に作成した Azure DevOps PJ に移動し、Repos を選択します。
まだ、Repos には何も入っていない状態なので、画面に表示されている push コマンドをコピーして先ほど作成した Azure Functions Project を push しましょう。
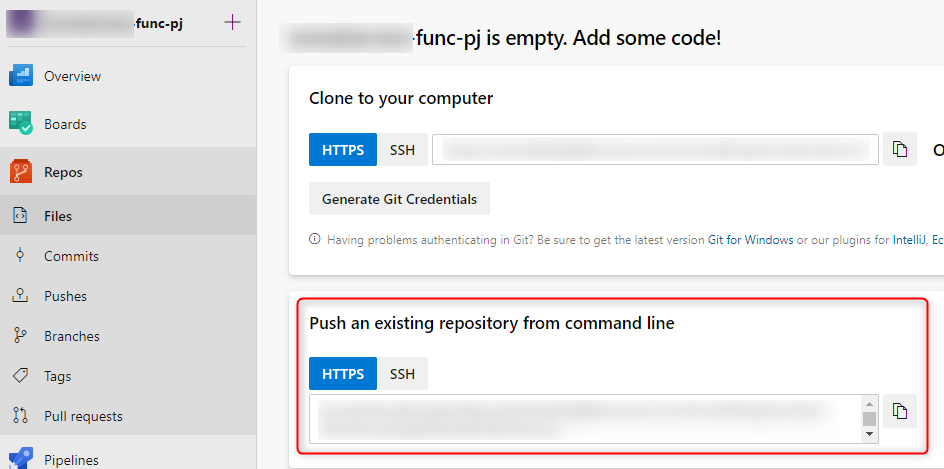
push すると、ローカル開発環境で作成した Azure Functions Project が Repos にも表示されるはずです。
Azure DevOps Pipelines の作成
それでは、ここから Azure Functions にデプロイするためのパイプラインを作成していきます。
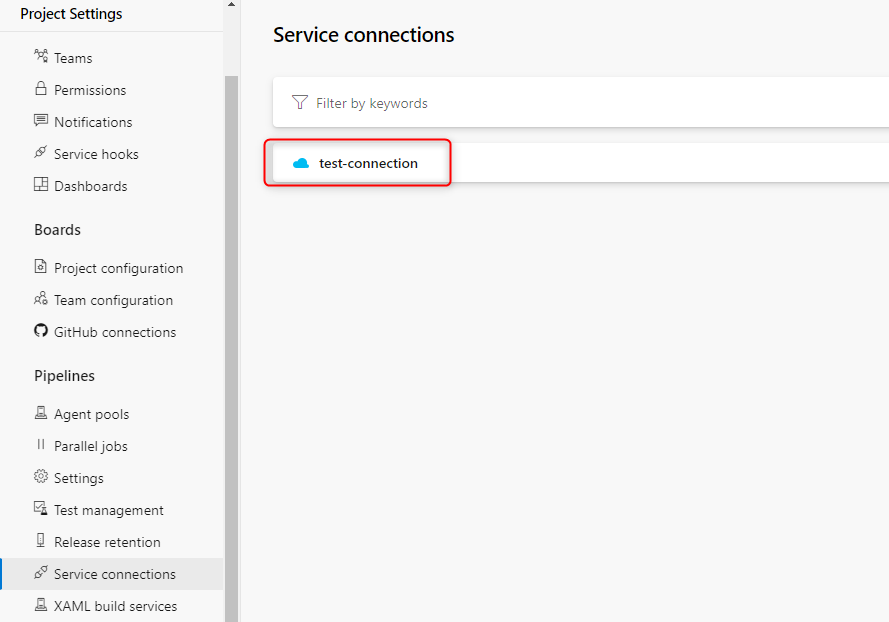
Service connections の作成
Azure Pipelines から Azure Subscription 上のリソース (Azure Functions) に接続するために必要な Service connections を作成します。
https://docs.microsoft.com/en-us/azure/devops/pipelines/library/service-endpoints?view=azure-devops&tabs=yaml
Service connections の作成は Azure DevOps の Project settings > Service connections から作成可能です。
connection type は Azure Resource Manager を選択します。
Authentication method は、今回は Service principal (automatic) にします。
その後、必要な情報を入力し Save すると、Service connections が作成されます。(Service connections の名前はパイプライン作成時に必要になります。)
Service connections の作成方法については、以下のドキュメントもご参照ください。
https://docs.microsoft.com/en-us/azure/devops/pipelines/library/service-endpoints?view=azure-devops&tabs=yaml#create-a-service-connection
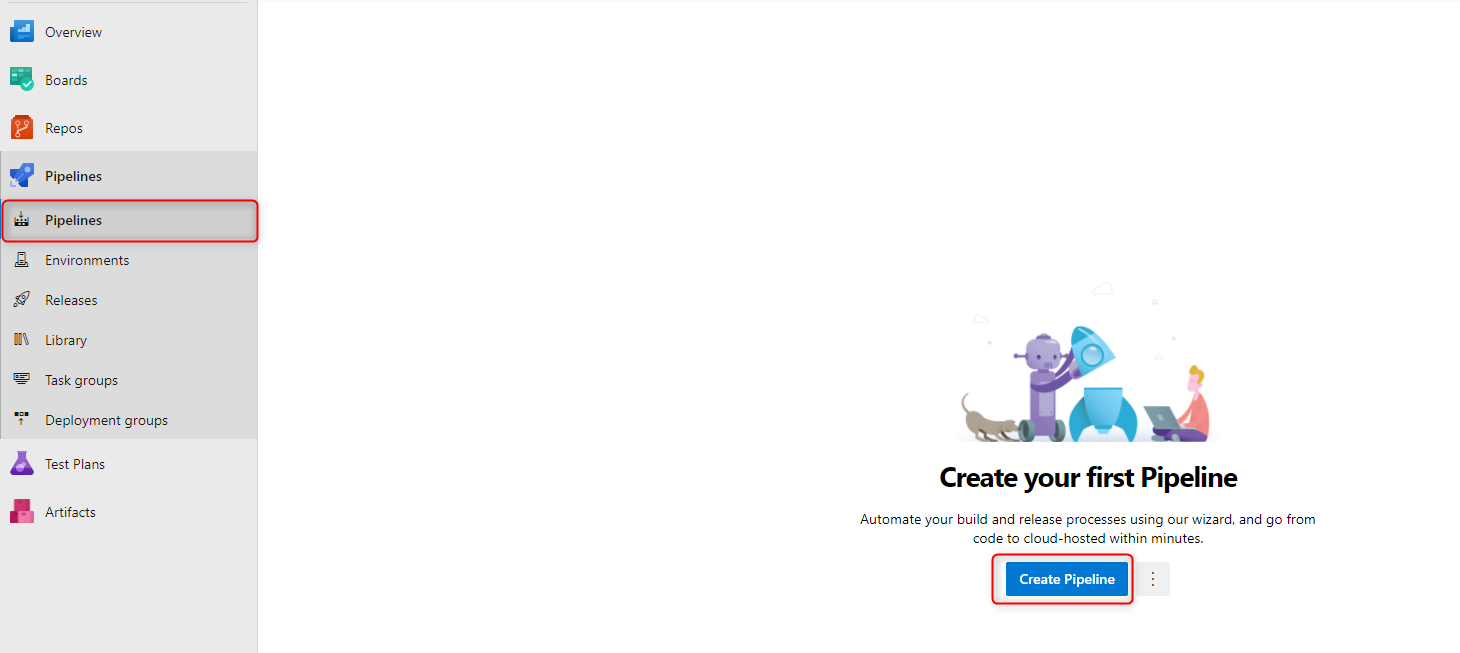
パイプラインの作成
いよいよパイプラインを作成していきます。
Pipelines を選択し、Create Pipeline を押下します。
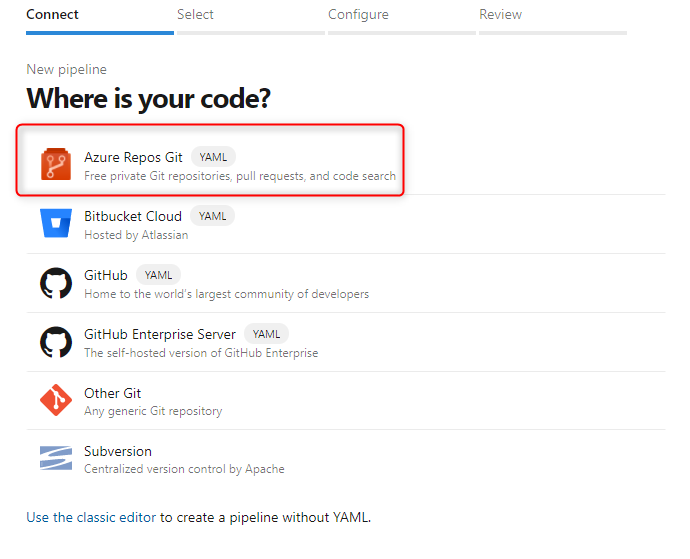
Azure Repos Git を選択します。
その後、リポジトリ選択画面で先ほど Repos に作成した Azure Functions Project リポジトリを選択します。
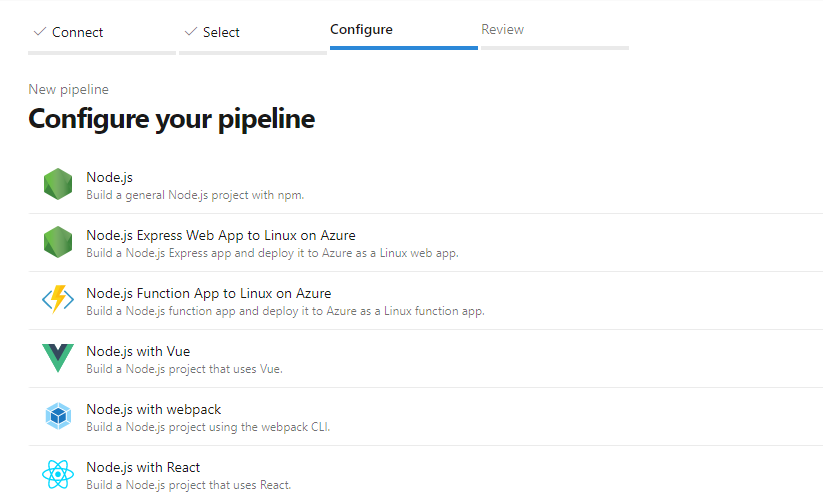
次の Configure 画面では、何かしら選択しないと次に進めません。今回は一番上の Node.js を選択しておきます。
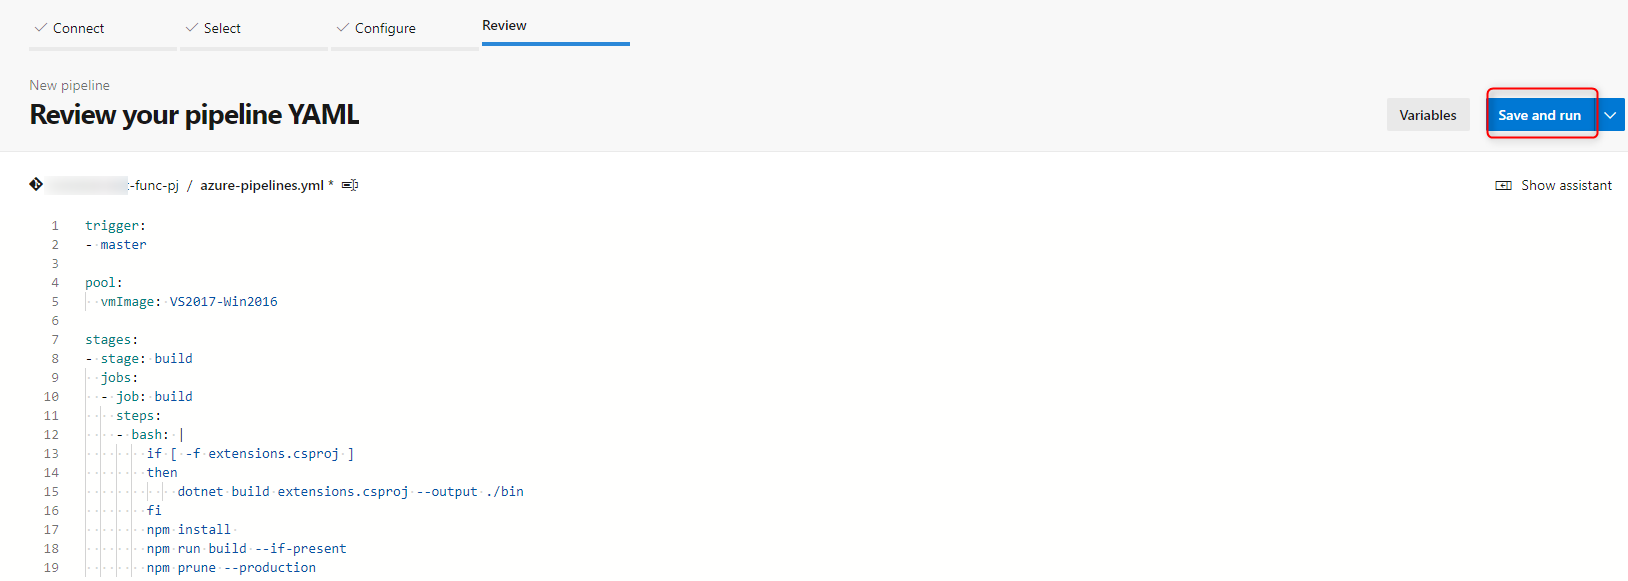
すると、YAML 編集画面が表示されると思うので、ここでパイプラインを作成していきます。
以下のドキュメントをもとに作成したパイプライン YAML コードを載せておきます。
こちらでコードを上書きします。
https://docs.microsoft.com/ja-jp/azure/azure-functions/functions-how-to-azure-devops?tabs=javascript
trigger:
- master

pool:
  vmImage: VS2017-Win2016

stages:
- stage: build
  jobs:
  - job: build
    steps:
    - bash: |
        if [ -f extensions.csproj ]
        then
            dotnet build extensions.csproj --output ./bin
        fi
        npm install
        npm run build --if-present
        npm prune --production
    - task: ArchiveFiles@2
      displayName: "Archive files"
      inputs:
        rootFolderOrFile: "$(System.DefaultWorkingDirectory)"
        includeRootFolder: false
        archiveFile: "$(System.DefaultWorkingDirectory)/build$(Build.BuildId).zip"
    - task: PublishBuildArtifacts@1
      inputs:
        PathtoPublish: '$(System.DefaultWorkingDirectory)/build$(Build.BuildId).zip'
        artifactName: 'drop'

- stage: deploy
  jobs:
  - job: deploy
    steps:
    - download: current
      artifact: drop
    - task: AzureFunctionApp@1
      inputs:
        azureSubscription: '(作成したservice connection の名前)'
        appType: functionApp
        appName: '(作成した Function App の名前)'
        package: '$(Pipeline.Workspace)/drop/*.zip'
上書きしたら、Save and run を押下します。
パイプラインが走り出し、ビルドとデプロイが実行されます。
結果確認
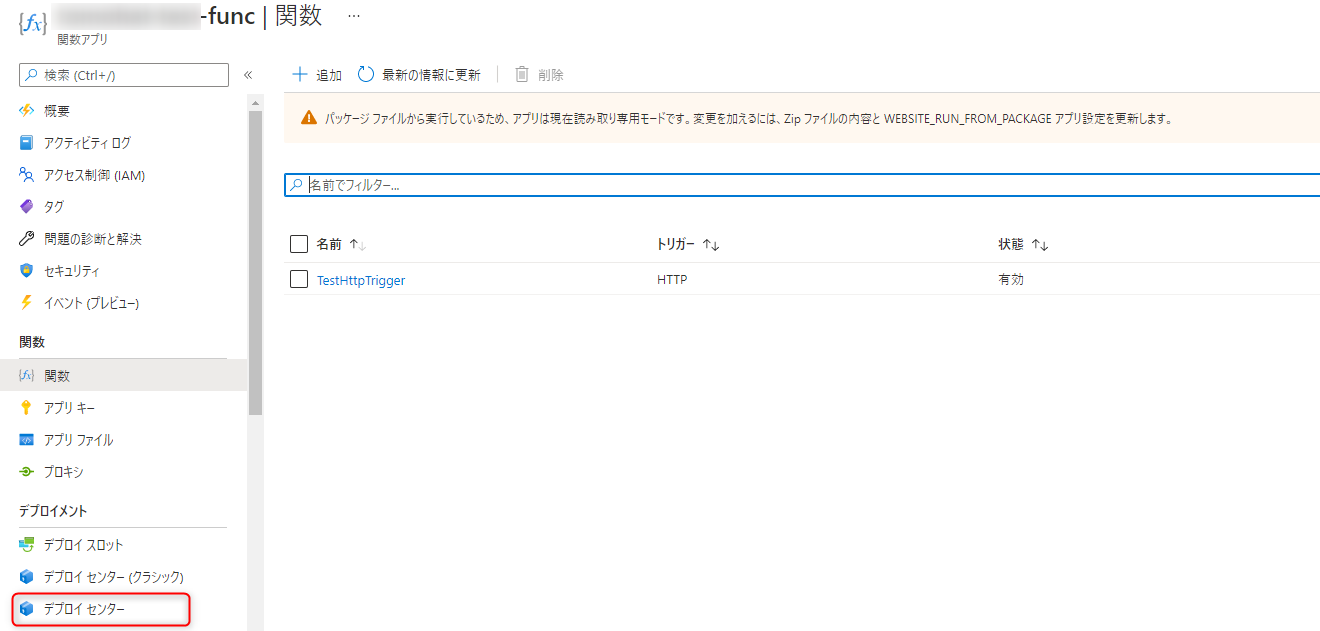
デプロイまで完了したら、事前に作成した Azure Functions を確認してみましょう。
ローカルで作成した関数がデプロイされていることが分かります。
また、画像の デプロイセンター に遷移すると Azure Pipelines からデプロイが成功したログが表示されていると思います。
以上です。
参考文献
- Visual Studio Code を使用して Azure Functions を開発する:https://docs.microsoft.com/ja-jp/azure/azure-functions/functions-develop-vs-code?tabs=nodejs
- Azure Functions の HTTP トリガー:https://docs.microsoft.com/ja-jp/azure/azure-functions/functions-bindings-http-webhook-trigger?tabs=javascript
- Azure DevOps を使用した継続的デリバリー:https://docs.microsoft.com/ja-jp/azure/azure-functions/functions-how-to-azure-devops
- Service connections:https://docs.microsoft.com/en-us/azure/devops/pipelines/library/service-endpoints?view=azure-devops&tabs=yaml