お客さんにプロジェクトのロードマップをお見せする時に、今まではPower Pointで図形を組み合わせて作成していました。
ただあまりにも面倒だったので、良い感じにロードマップが生成されるWebアプリを作成しました。
ざっくりまとめ
- タスクに開始日・終了日・バッファを入れると、タイムラインに追加される
- 作成したタスクはLocalStorageに保存する
- 作成したロードマップは画像で出力できる

技術スタック
- NextJS
- TailwindCSS
- DnD Kit
- html-to-image
工夫した箇所
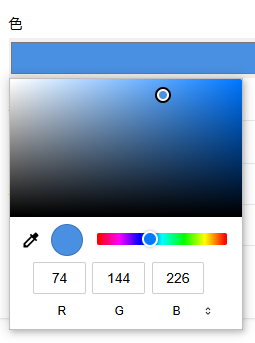
色を自由に選択できる
ビジュアル重視でいきたかったので、タスク選択時に自由に色を選択できるようにしました。
タスクの期間とバッファ期間を区別できる
ロードマップを作成する時に、きっちり開始日と終了日を定めず、バッファを前後に設けることが多かったので、バッファ期間を視覚的に分かりやすくしました。

長期のロードマップの場合は月単位・四半期単位で表示される
デフォルトは日付単位で表示されますが、プロジェクトが長くなると日付が読めなくなります。
日付の文字が小さくなりすぎる場合は、月単位や四半期単位に自動でヘッダーが切り替わるようにしました。
components/Timeline/Timeline.tsx
  const viewType = useMemo((): TimelineViewType => {
    if (scale >= 30) return "day";
    if (scale >= 10) return "month";
    return "quarter";
  }, [scale]);
utils/timelineUtils.ts
switch (viewType) {
            case 'day':
                // 毎日の線(細い線)
                gridLines.push({
                    position,
                    label: formatDayLabel(currentDate),
                    type: currentDate.getDate() === 1 ? 'major' : 'minor'
                });
                currentDate.setDate(currentDate.getDate() + 1);
                break;

            case 'month':
                // 月の始まりのみ
                if (currentDate.getDate() === 1) {
                    gridLines.push({
                        position,
                        label: formatMonthLabel(currentDate),
                        type: 'major'
                    });
                }
                currentDate.setDate(currentDate.getDate() + 1);
                break;

            case 'quarter':
                // 四半期の始まり
                if (currentDate.getDate() === 1 && [0, 3, 6, 9].includes(currentDate.getMonth())) {
                    gridLines.push({
                        position,
                        label: formatQuarterLabel(currentDate),
                        type: 'major'
                    });
                }
                currentDate.setDate(currentDate.getDate() + 1);
                break;
感想
今回はCursorを使ってベースとなるコードを書いてもらいました。
その後、エラーになった個所や細かい文言を人力で修正しました。
結果として、構想から2時間ほどでデプロイすることが出来ました。
私自身、NextJSは浅く何も分かっていないので、こういったAIを活用してコードの組み立て方を学んでいけるのはとてもありがたいなと思いました。
おまけ
四半期の表示が1月はじまりで固定なので、可変に出来ればと考えています。
また今は自動で日付・月・四半期が切り替わりますが、ドロップダウンから選択することで変えられるようにもしたいです。
今は困っていないので、困ったら機能追加しようと思います。