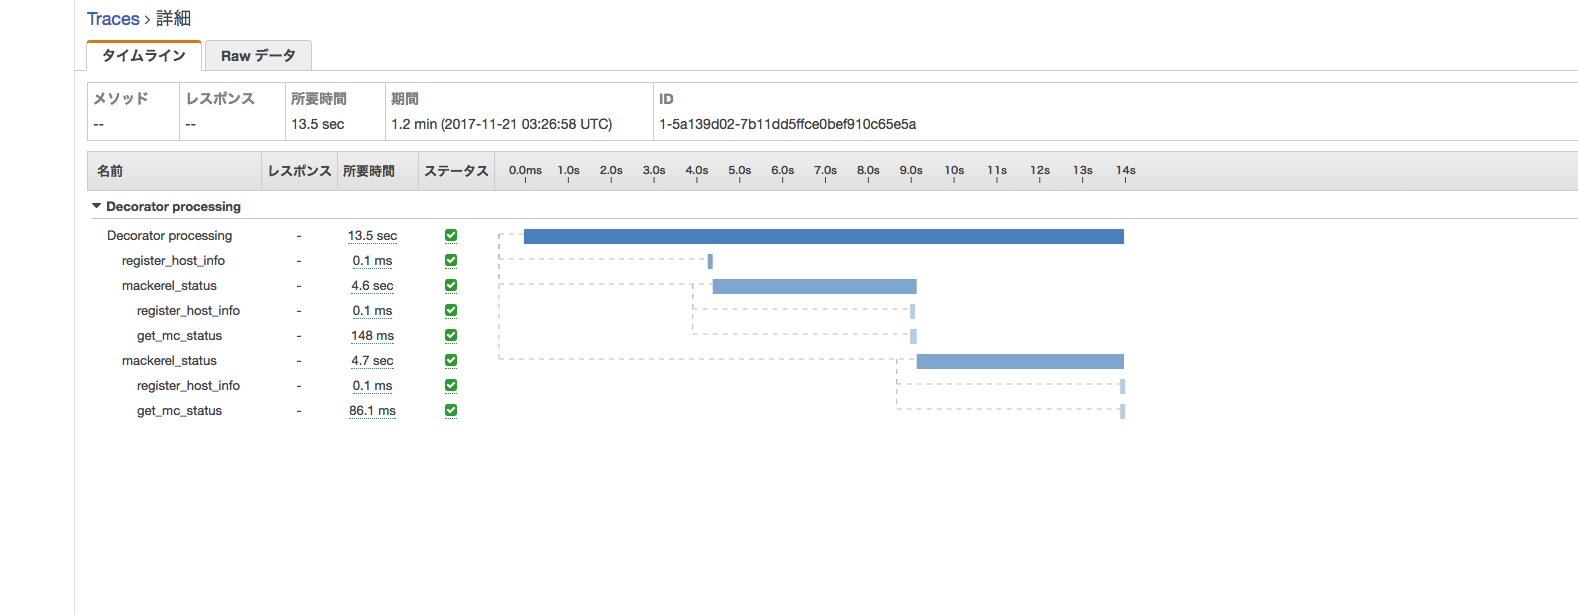
他にも色々な監視ツールでパフォーマンス計測ができるが、AWSを使用しているならこっちもいいかなと思い(pythonにも対応してるし)使ってみた。
1. 準備
環境は手元のMACで構築
OS : Mac OS Sierra 10.12.6
python : 2.7.10
AWS X-Ray daemon version: 2.0.0
事前にAWSの access key / secret key を取得して設定済みとする
動作としては直接AWSの方へプッシュするのではなく、ローカル環境で動かしているデーモンへ一端バッファリングしてから送られる。
ダウンロード
$pip install aws-xray-sdk
$curl -O https://s3.dualstack.us-east-2.amazonaws.com/aws-xray-assets.us-east-2/xray-daemon/aws-xray-daemon-macos-2.x.zipunzip aws-xray-daemon-macos-2.x.zip
$unzip aws-xray-daemon-macos-2.x.zip
$./xray_mac --version
AWS X-Ray daemon version: 2.0.0
IAMユーザ設定
IAMロール/ユーザに権限を付与
デーモンの起動
cfg.yaml(設定ファイル)
Region: "ap-northeast-1"
Endpoint: "xray.ap-northeast-1.amazonaws.com"
LogLevel: "dev"
LocalMode: True
ローカル環境で動かすのでLocalModeは"True"とする。
起動
$./xray_mac -c cfg.yaml
2017-11-21T15:38:43+09:00 [Info] Initializing AWS X-Ray daemon 2.0.0
2017-11-21T15:38:43+09:00 [Debug] Listening on UDP 127.0.0.1:2000
2017-11-21T15:38:43+09:00 [Info] Using buffer memory limit of 81 MB
2017-11-21T15:38:43+09:00 [Info] 1296 segment buffers allocated
2017-11-21T15:38:43+09:00 [Debug] Using Endpoint read from Config file: xray.ap-northeast-1.amazonaws.com
2017-11-21T15:38:43+09:00 [Debug] Fetch region ap-northeast-1 from commandline argument
2017-11-21T15:38:43+09:00 [Info] Using region: ap-northeast-1
2017-11-21T15:38:43+09:00 [Debug] ARN of the AWS resource running the daemon:
2017-11-21T15:38:43+09:00 [Debug] No Metadata set for telemetry records
2017-11-21T15:38:43+09:00 [Debug] Using Endpoint: https://xray.ap-northeast-1.amazonaws.com
2017-11-21T15:38:43+09:00 [Debug] Telemetry initiated
2. 計測するコードの用意
from aws_xray_sdk.core import xray_recorder

@xray_recorder.capture('mackerel_status')
def mackerel_status(Hostname):
    mc = MackerelApi(apikey)
    省略

def main():
    xray_recorder.begin_segment('test case start')
    print mackerel_alert()
    print mackerel_status("hogehoge001")
    print mackerel_status("hogehoge002")
    xray_recorder.end_segment()

if __name__ == '__main__':
計測したい関数に上記のようなデコレータを設定する。
3. 計測
testコードを実行し、下記のようなログが出力されればOK。
2017-11-21T15:50:44+09:00 [Debug] processor: sending partial batch
2017-11-21T15:50:44+09:00 [Debug] processor: segment batch size: 1. capacity: 50
2017-11-21T15:50:44+09:00 [Info] Successfully sent batch of 1 segments (0.011 seconds)
2017-11-21T15:50:44+09:00 [Debug] Send 1 telemetry record(s)
あとは、コンソールにloginして確認。
Service Map / Traces で内容を確認できれば問題ない。
3. 計測(HTTP クライアント 別の内部および外部 HTTP ウェブサービス呼び出しを計測)
X-Rayは、SDK の patch、patch_all によりサポートされたライブラリ利用時にトラッキングすることが可能。
AWS API リクエストのトラッキング : boto3、botocore
SQLite クエリのトラッキング : sqlite3
MySQL クエリのトラッキング : mysql-connector-python
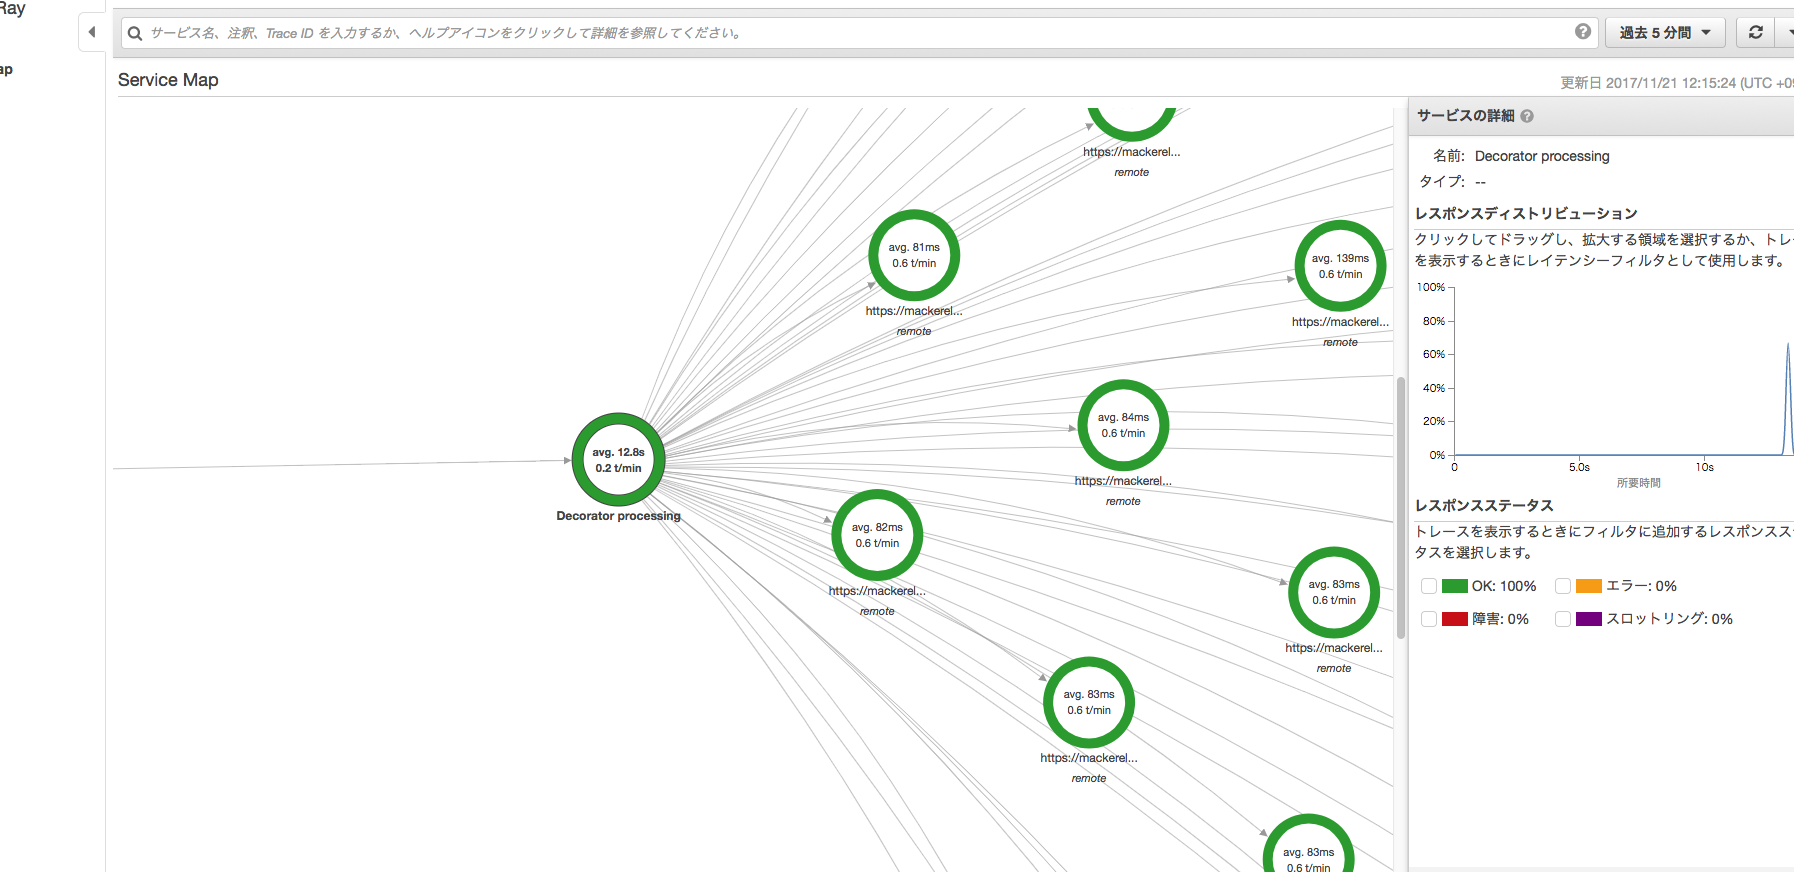
そのため、下記のようにコードに"patch_all()"を追加して計測すればコードからリクエストをしている URL 別のレスポンスタイムを確認することができる。
from aws_xray_sdk.core import xray_recorder
from aws_xray_sdk.core import patch_all

patch_all()

@xray_recorder.capture('mackerel_status')
def mackerel_status(Hostname):
コンソール画面(Service Map)
4. まとめ
かなり簡単にパフォーマンスを視覚的に確認することが可能。
cProfileと併用して、インフラサイドから開発者へのフィードバックする時に役に立ちそう。
Lambdaに対応しているのもありがたい。

