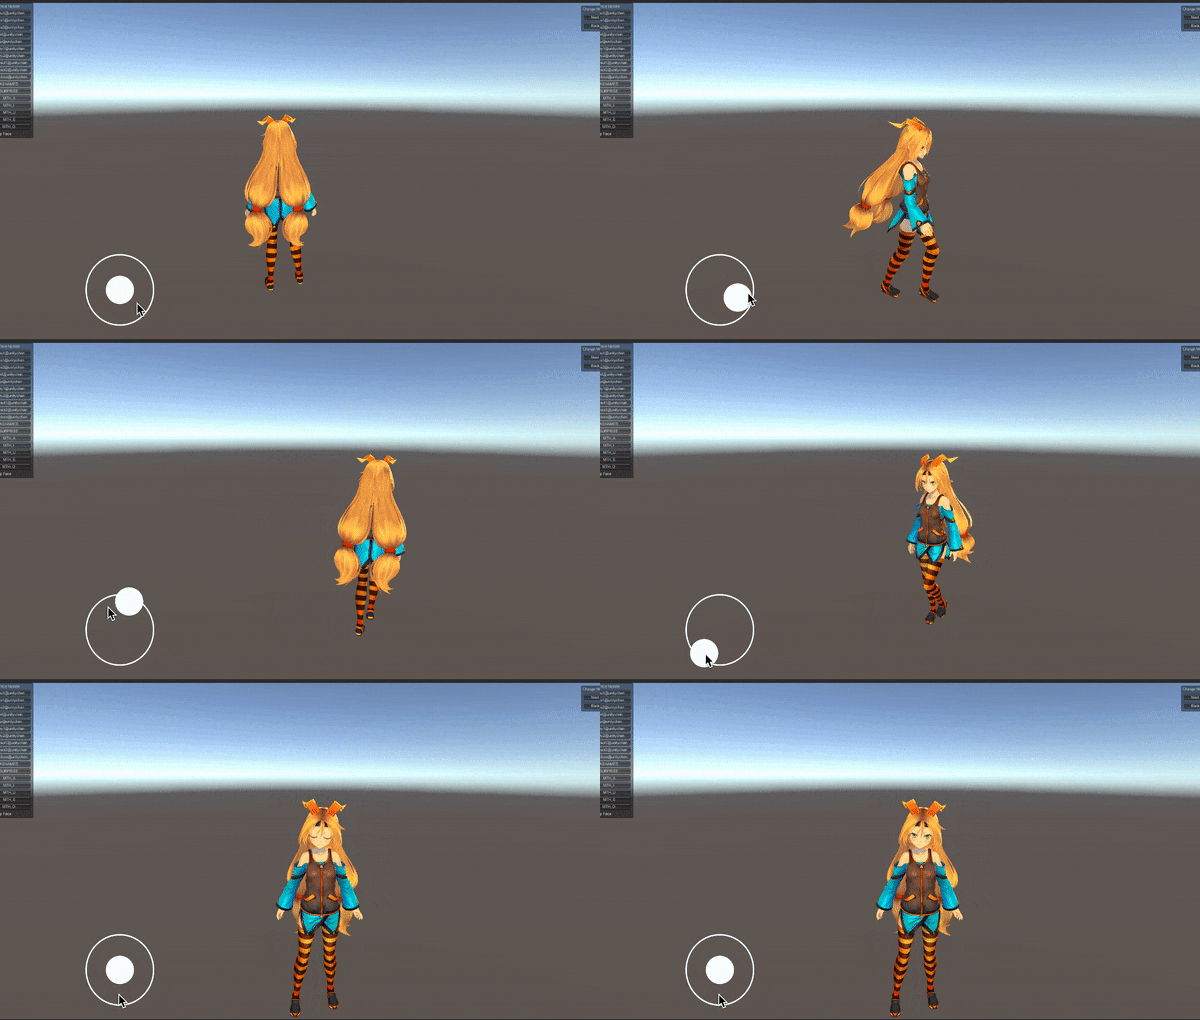
Unityちゃんをアニメーション付きでjoystickで動かしてみましょう!
RPGとか3Dステージでプレイヤーを動かしたい時に使えると思います!
初心者向けでつくっているので細かく解説しています🙌
こんなんやってみます
実装手順
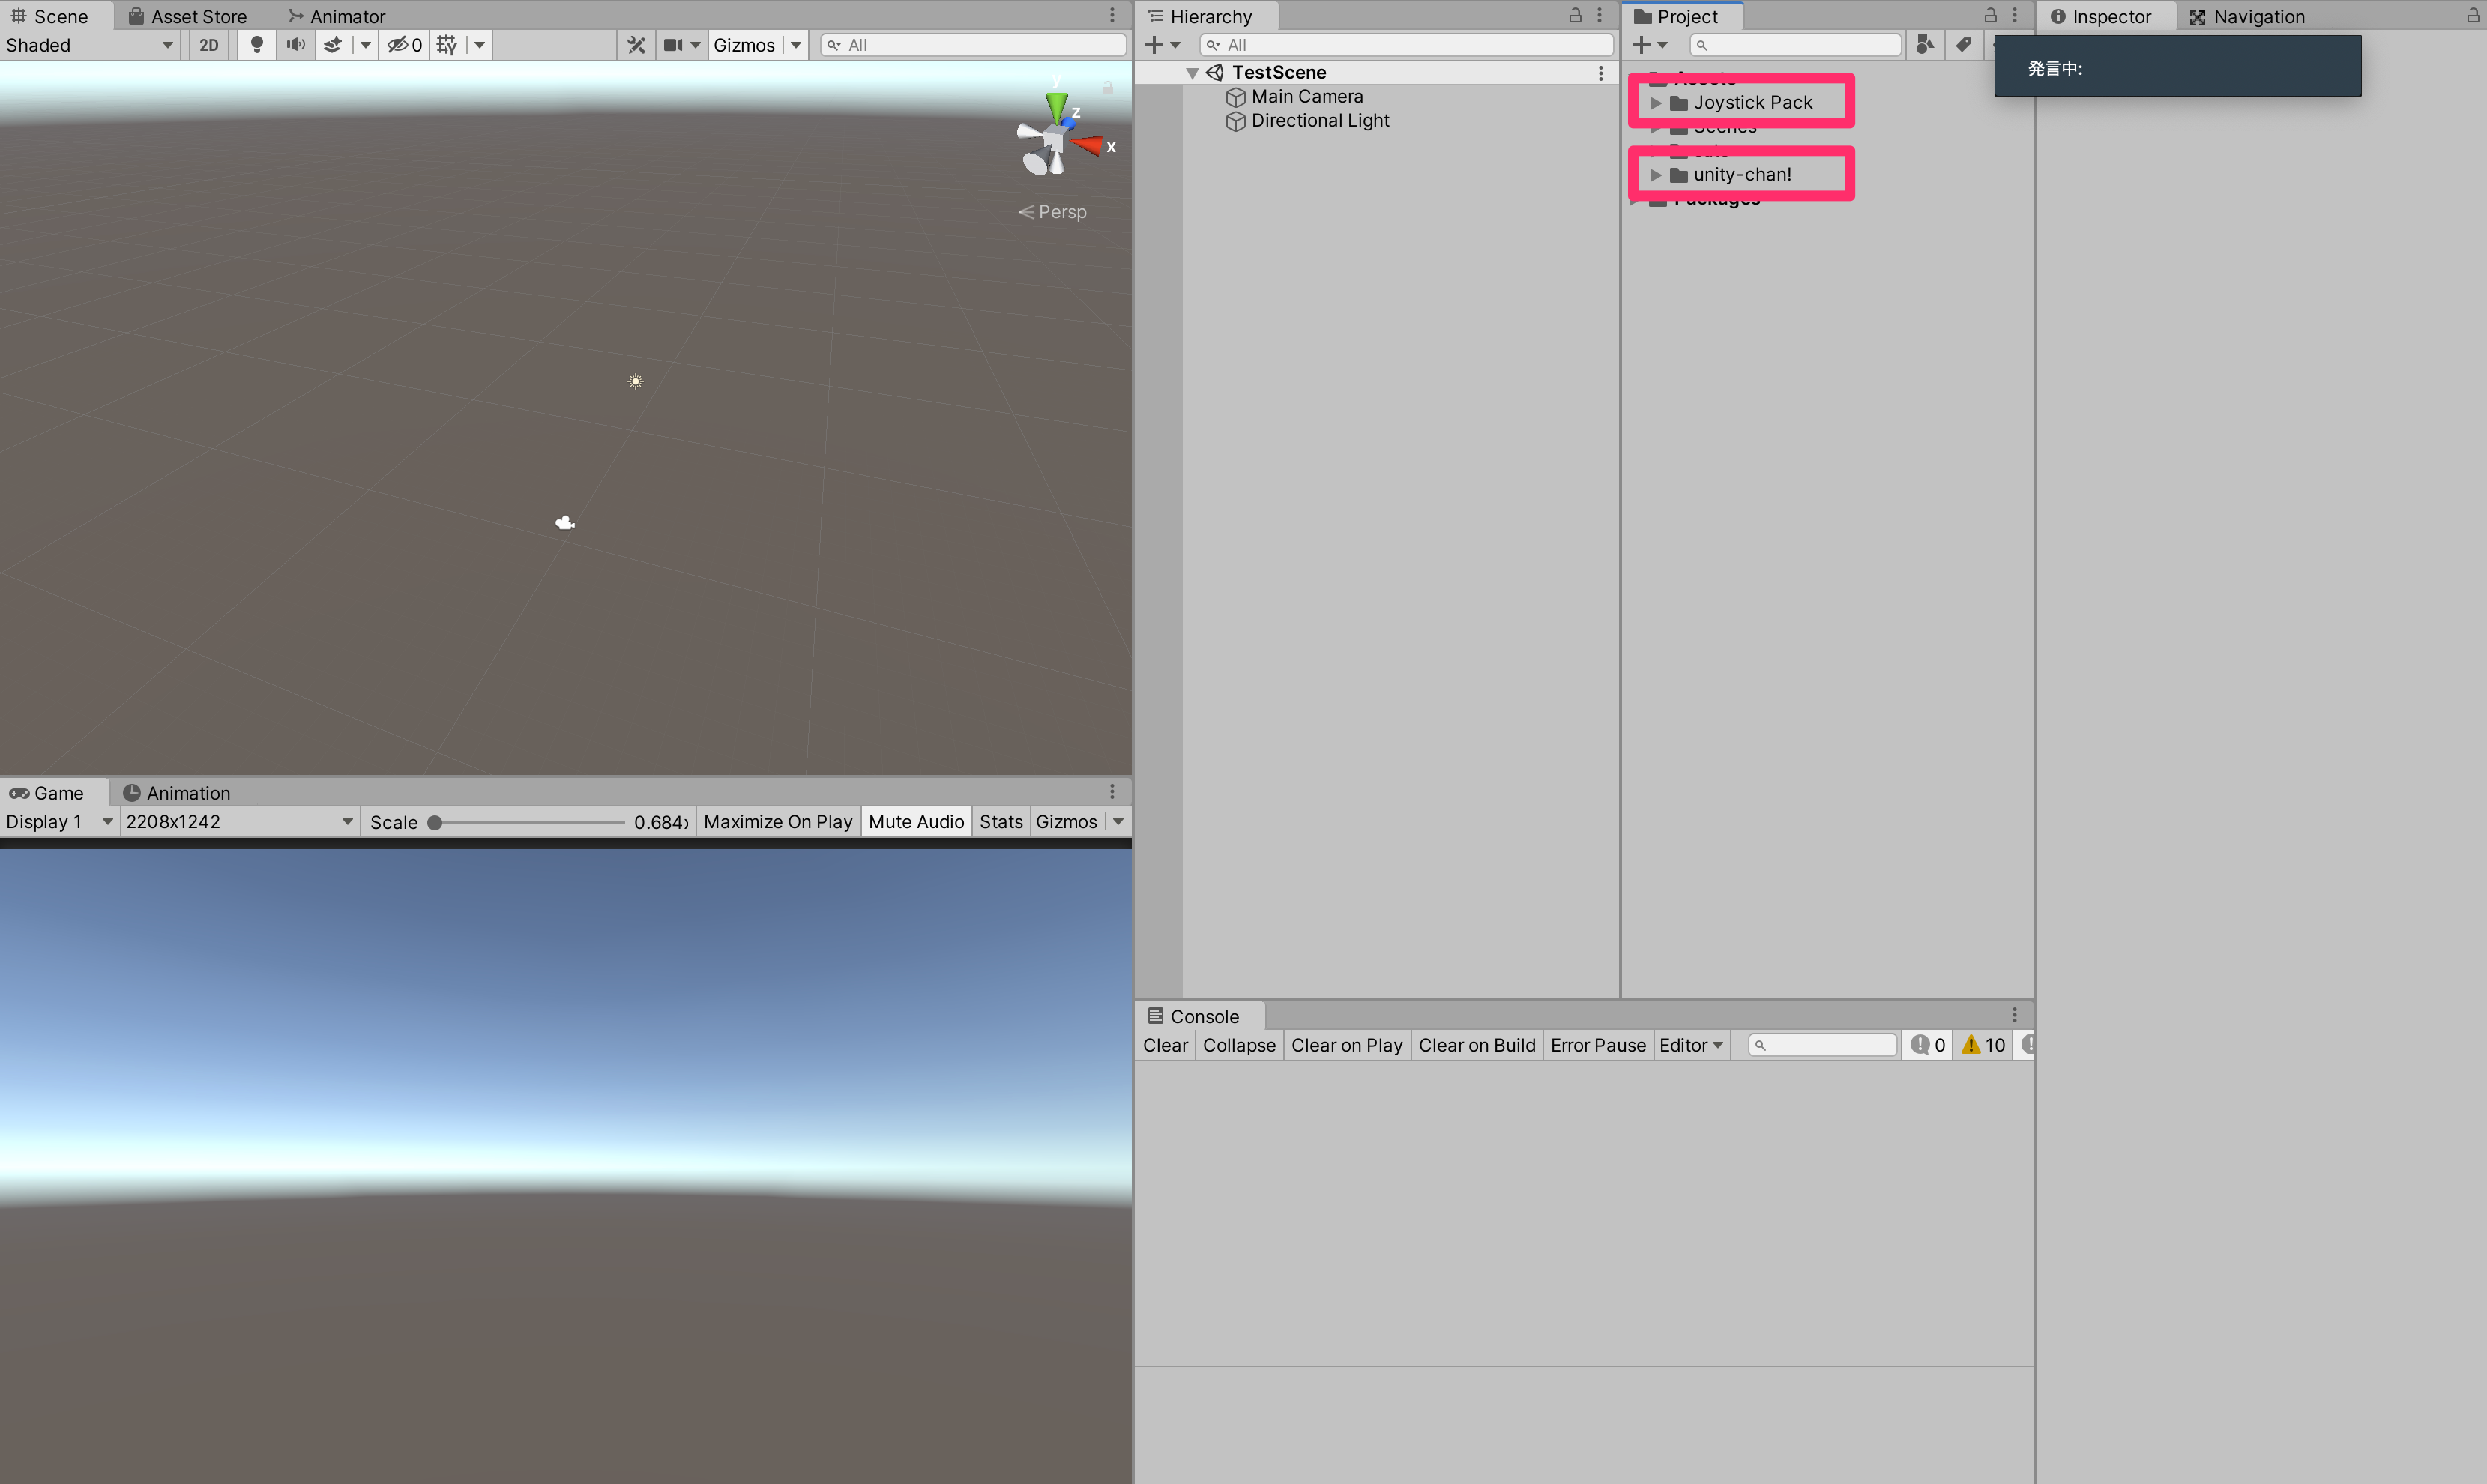
① UnityちゃんとJoyStickをアセットストアからUnityに追加
>>> アセットストアからアセットをUnityに追加する方法
この状態になっていればOKです!
② Unityちゃんの設定
まずはUnityちゃんから
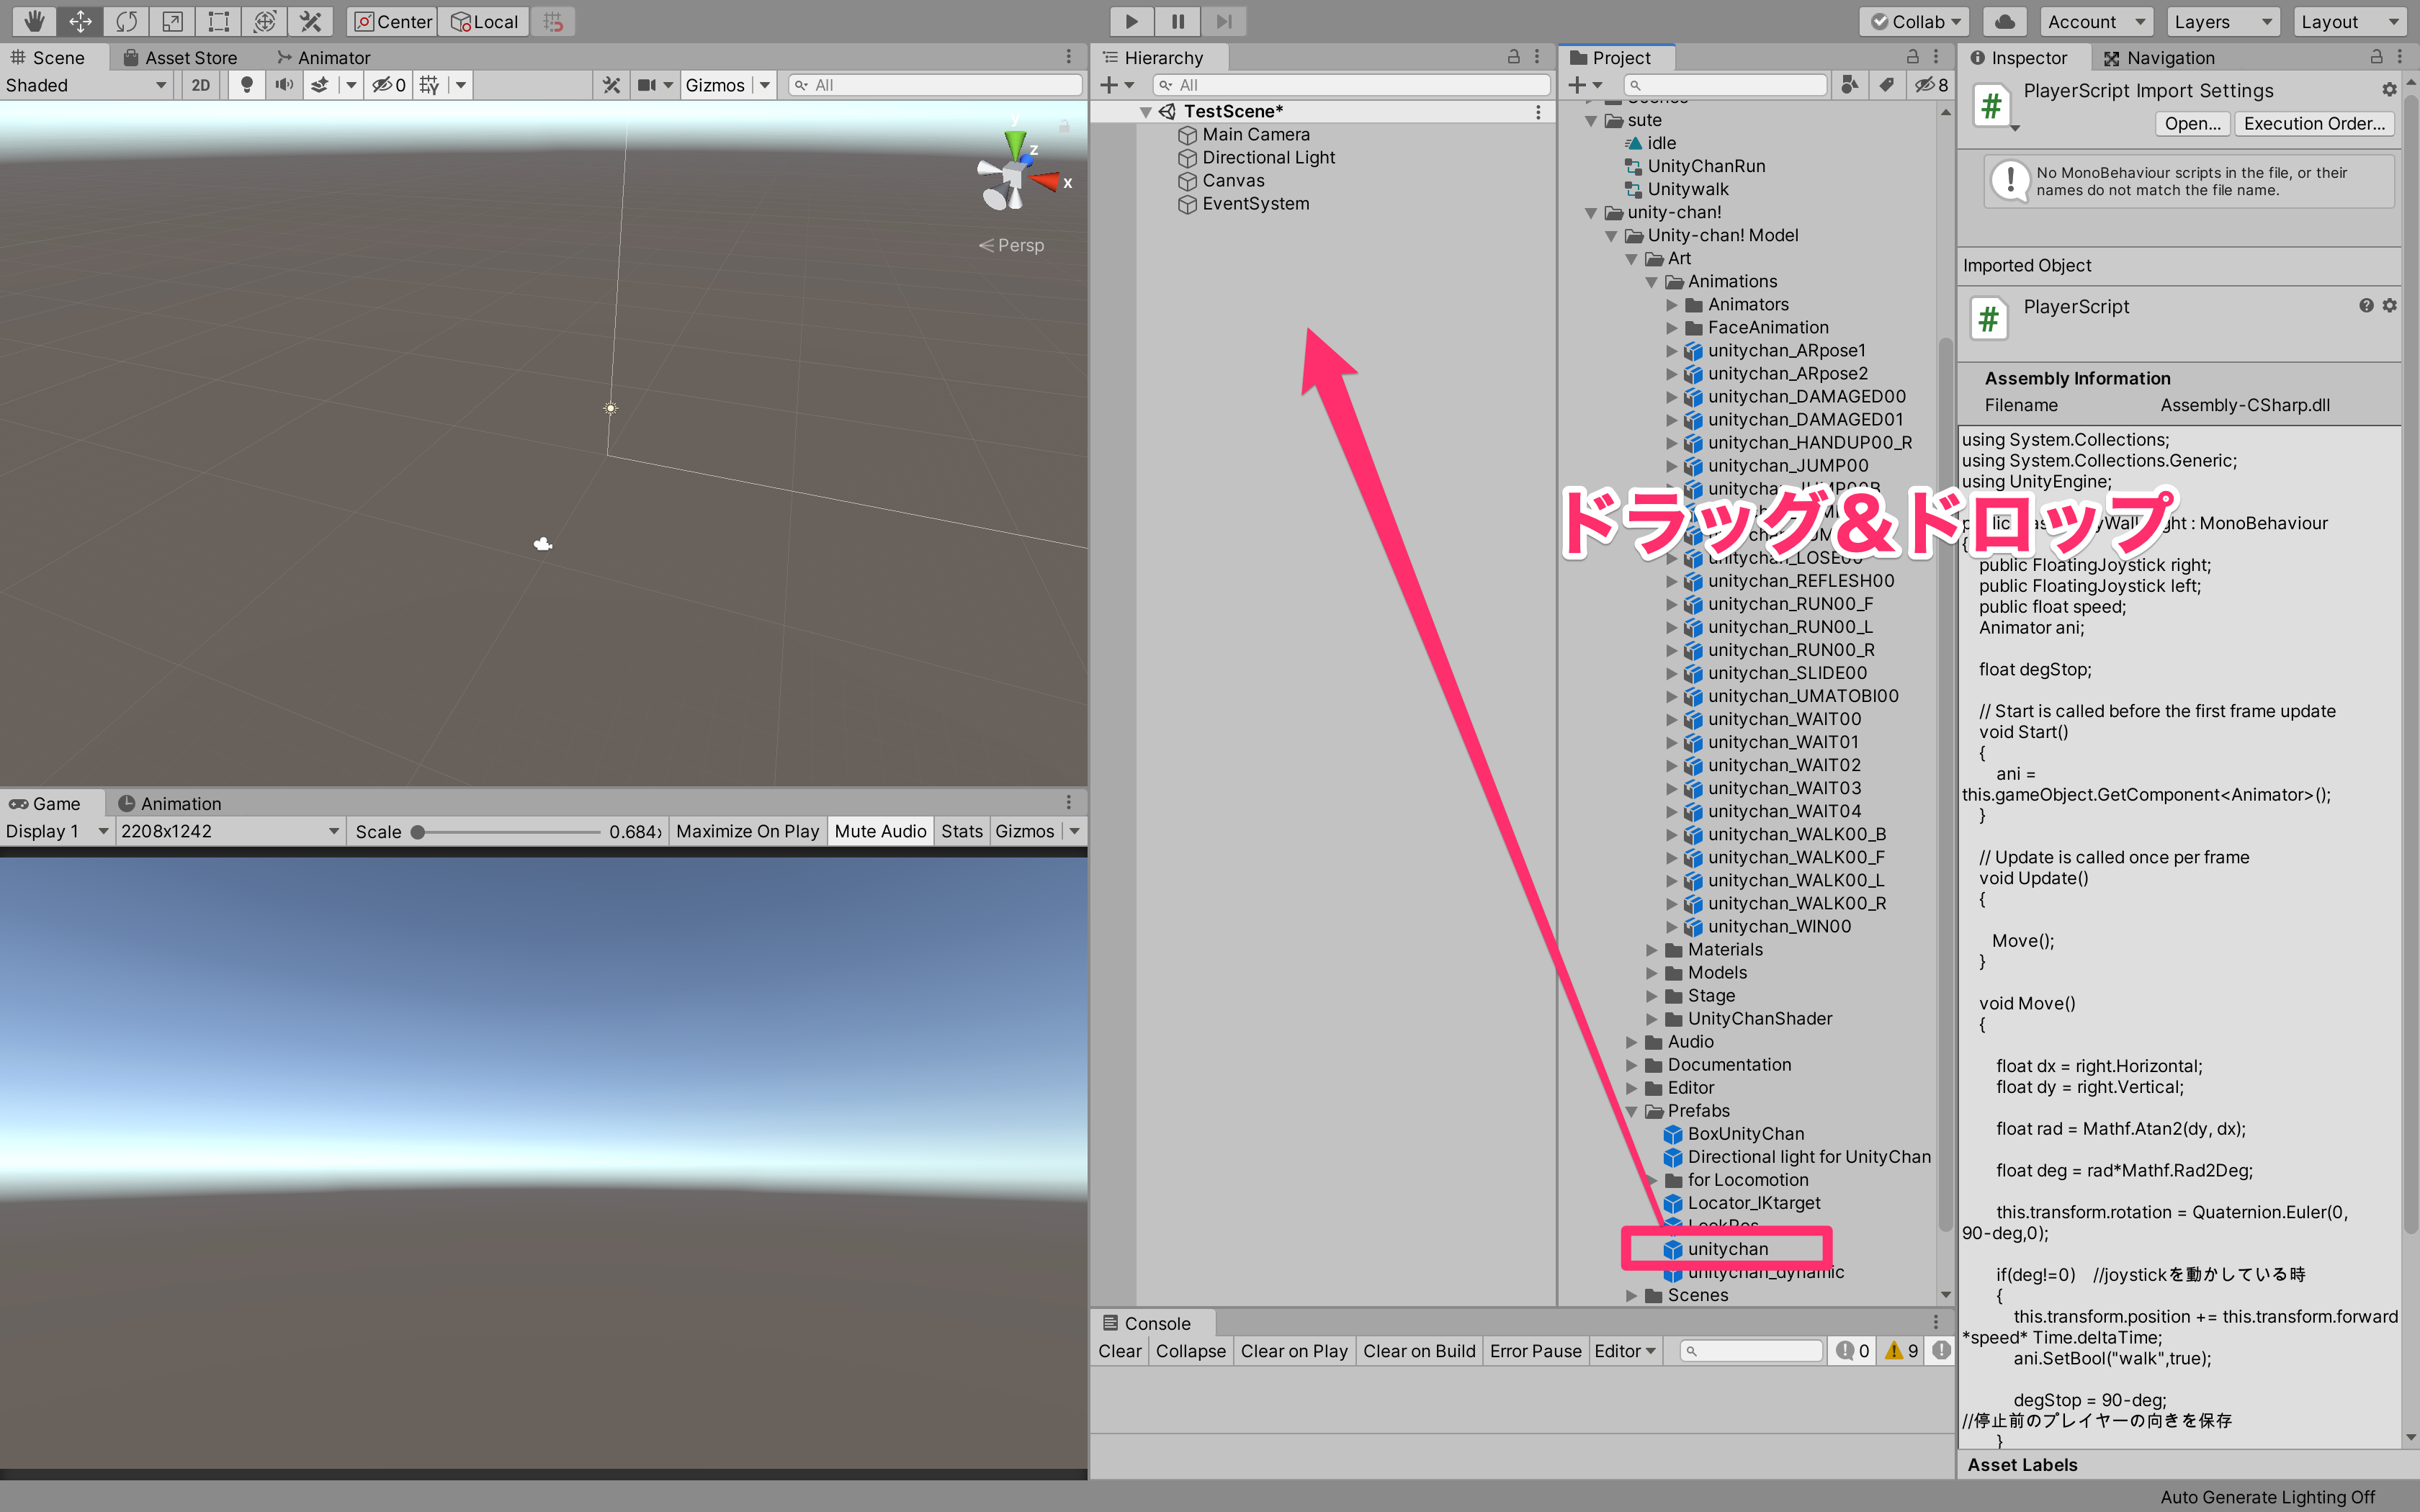
インポートしたUnityちゃんのフォルダを展開して、その中にある「UnityChan」というPrefabをHierarchyビューにドラッグ&ドロップしましょう!
Animatorを覗くといっぱいAnimationが入っているのがわかります!
このようにAssetにはすでにアニメーションがいくつも入っているんです!
今回はここに入ってるアニメーションを使って機能の実装をしてみましょう
③ Animatorの作成
新しくAnimatorを作って、自分好みのアニメーションを実装していきます。
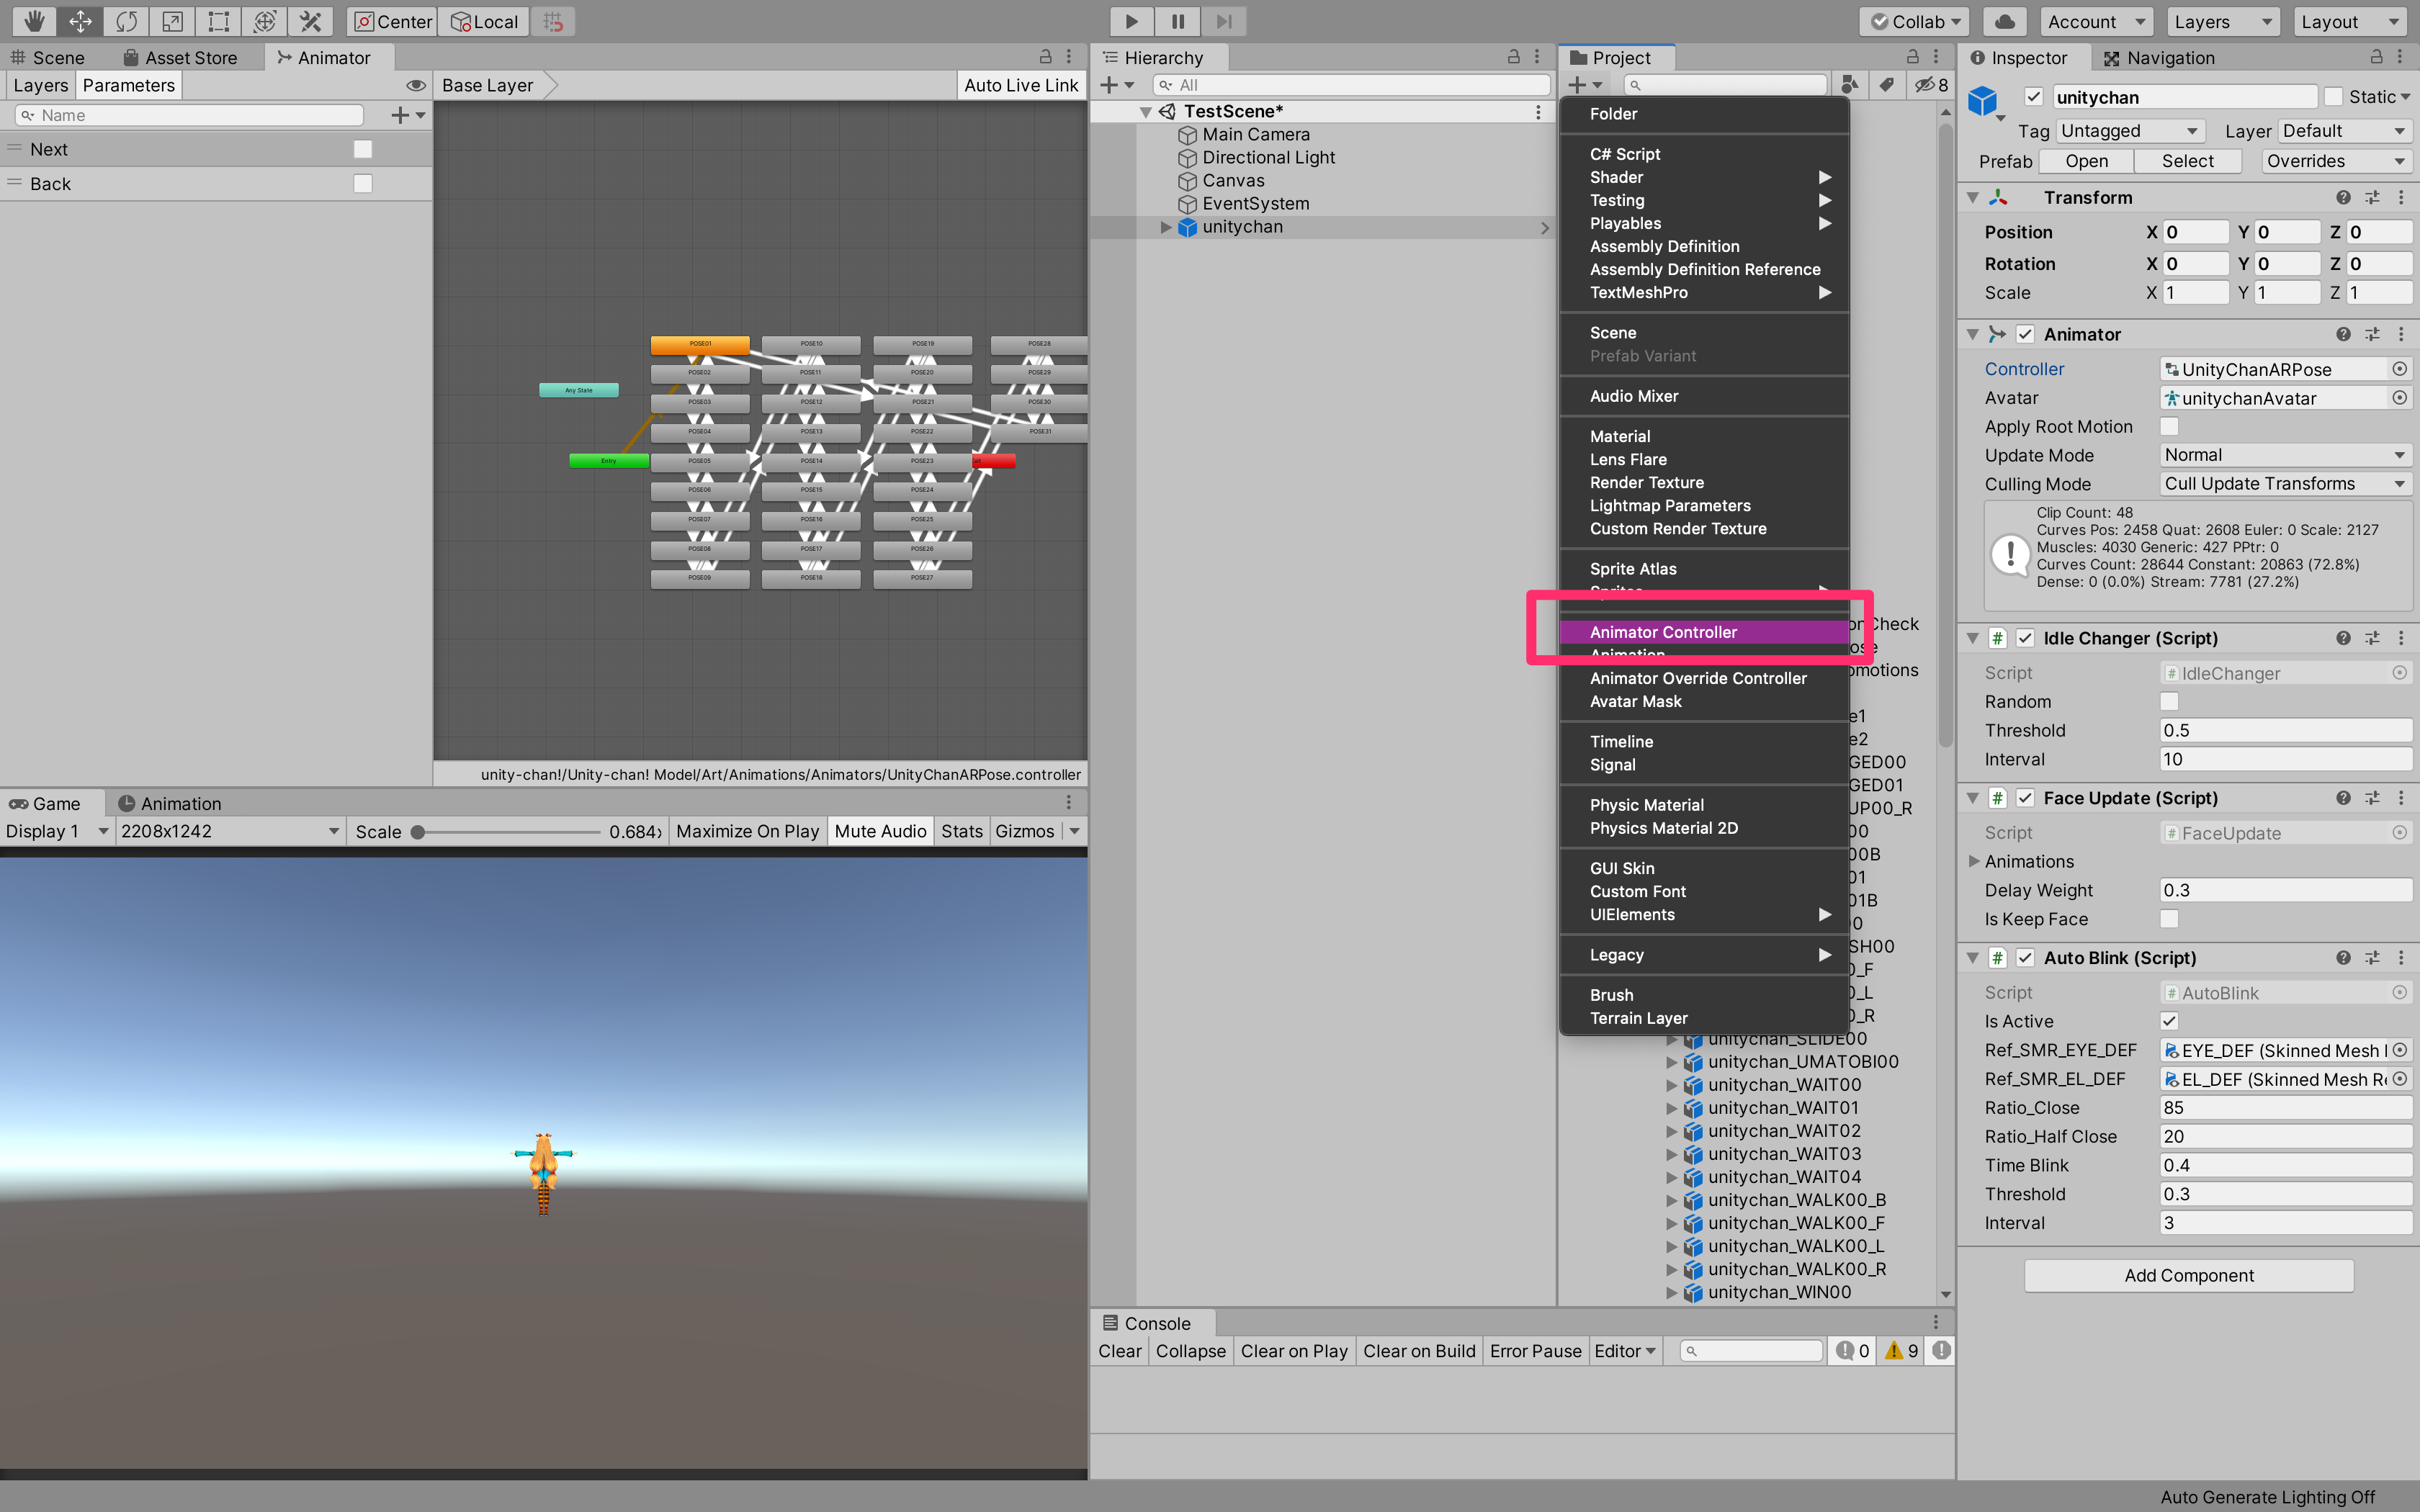
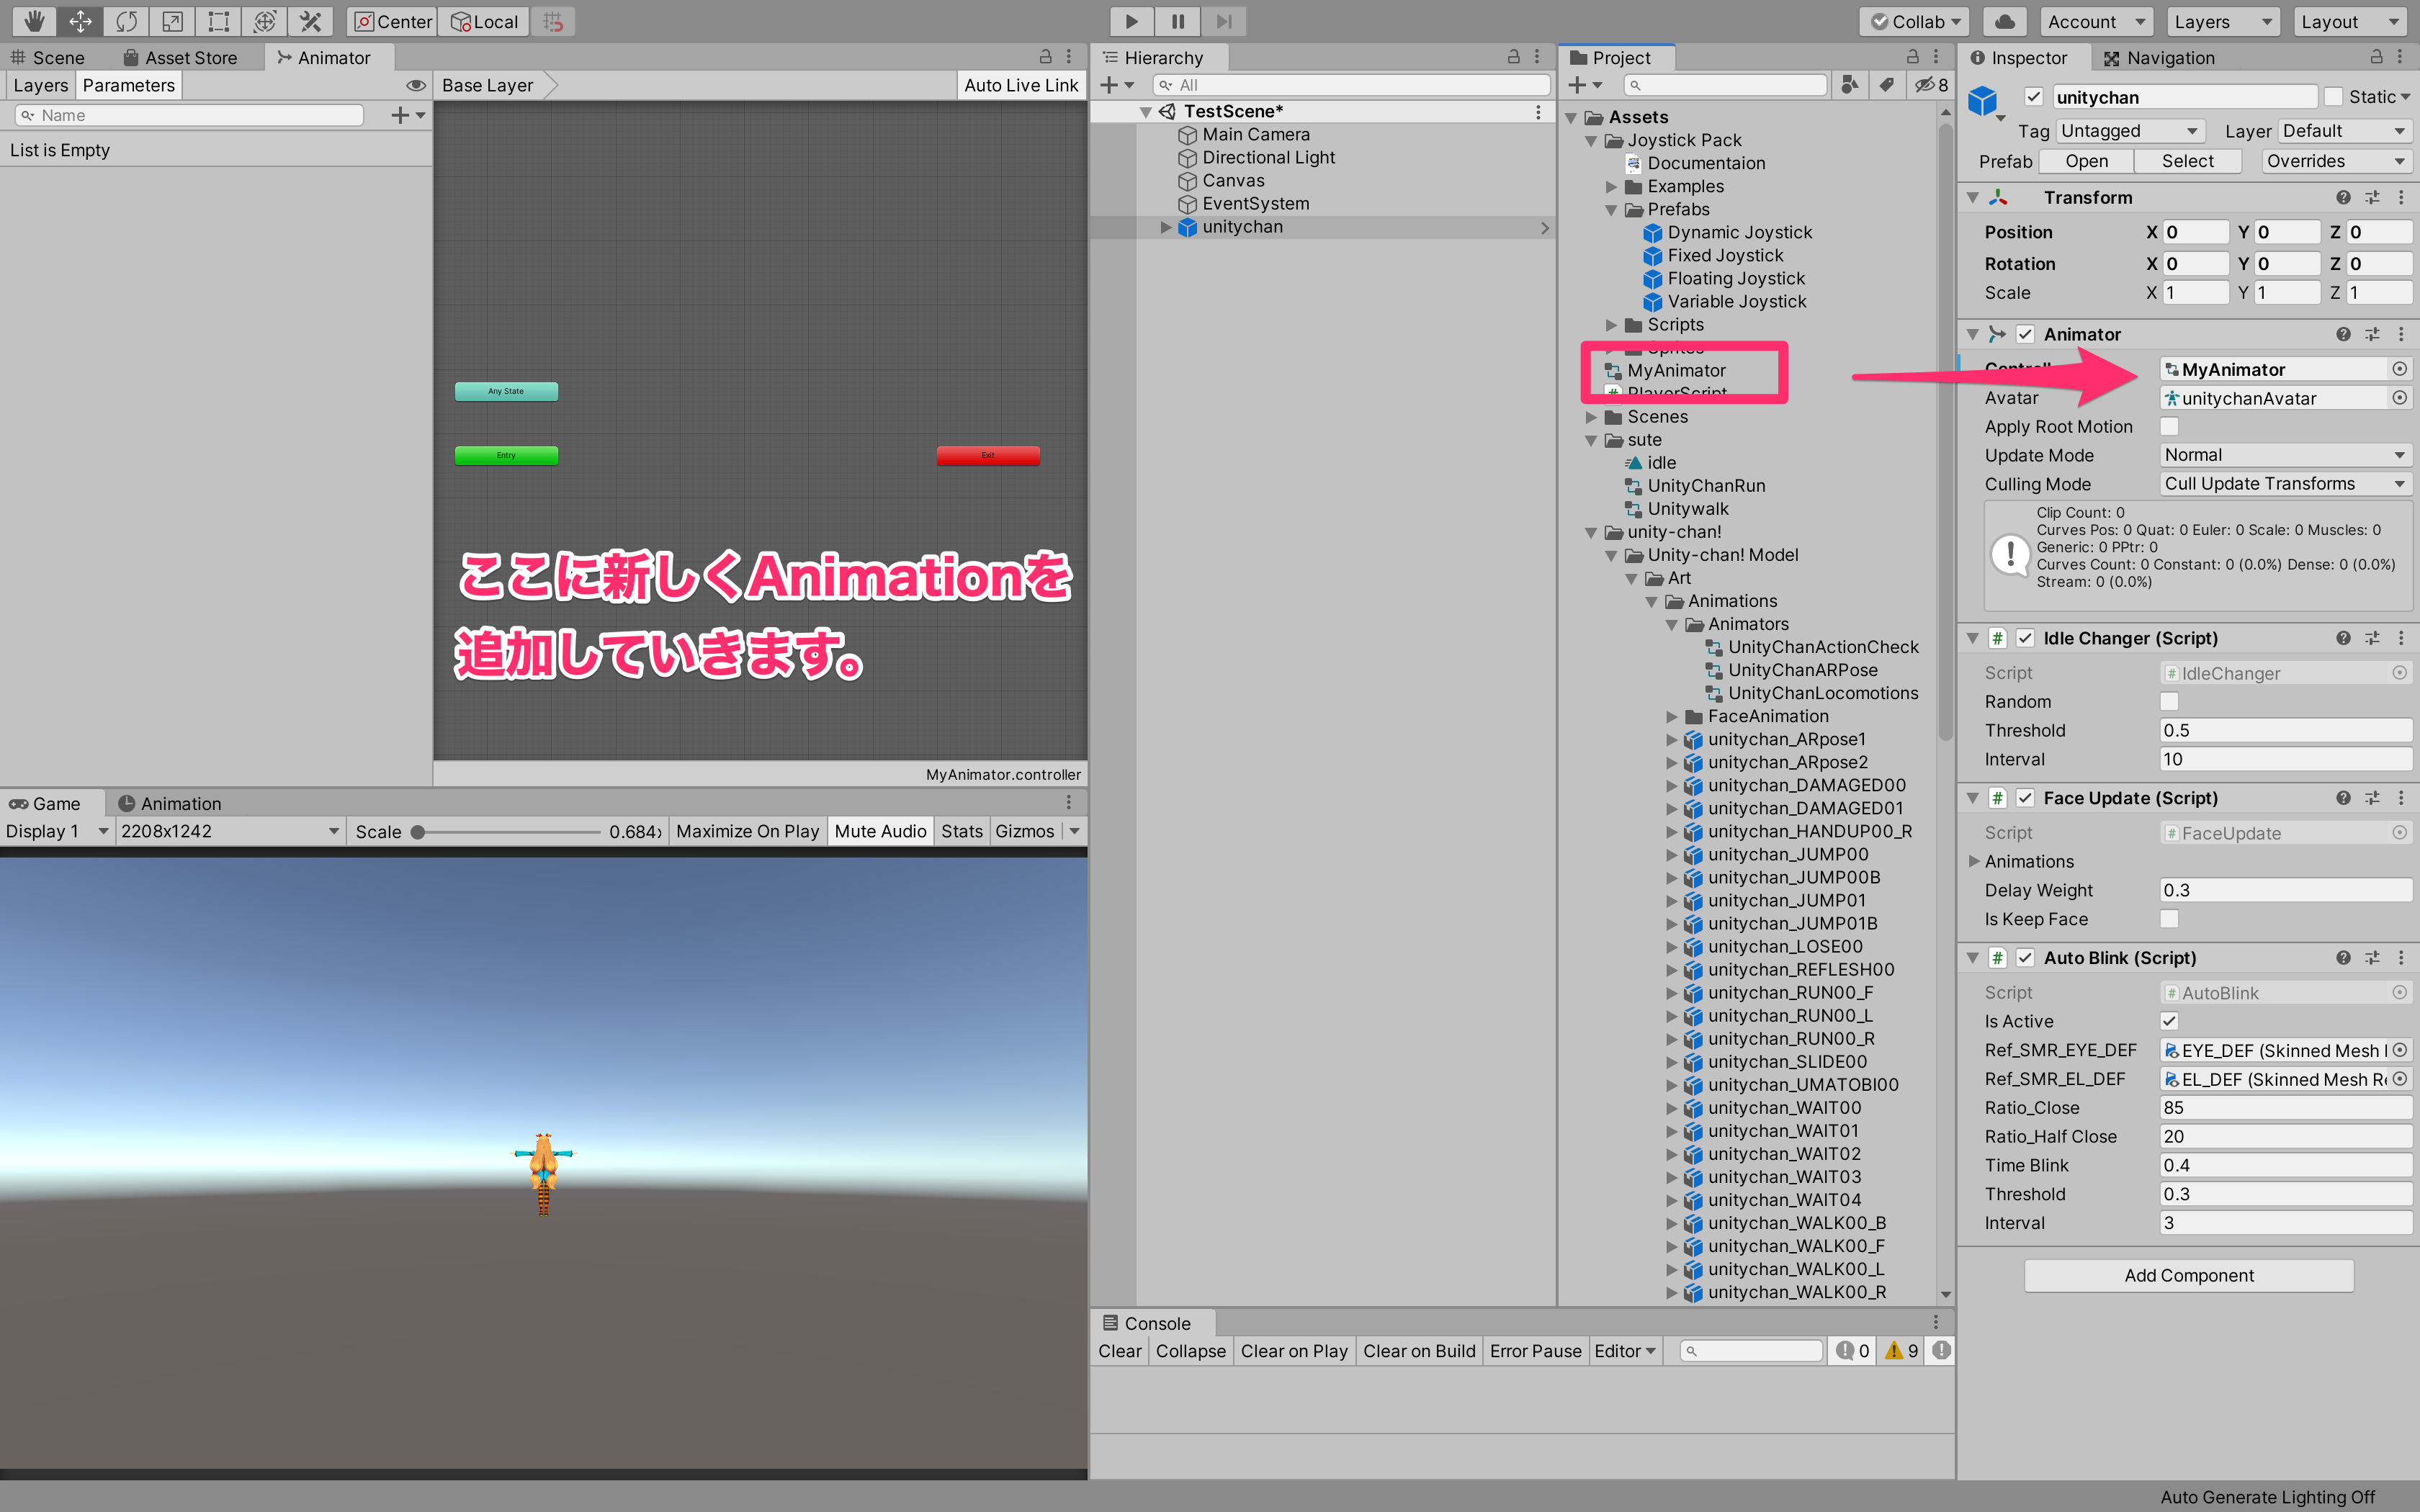
Projectから新しくAnimatorControllerを作成して、今回は名前を「MyAnimator」にしました
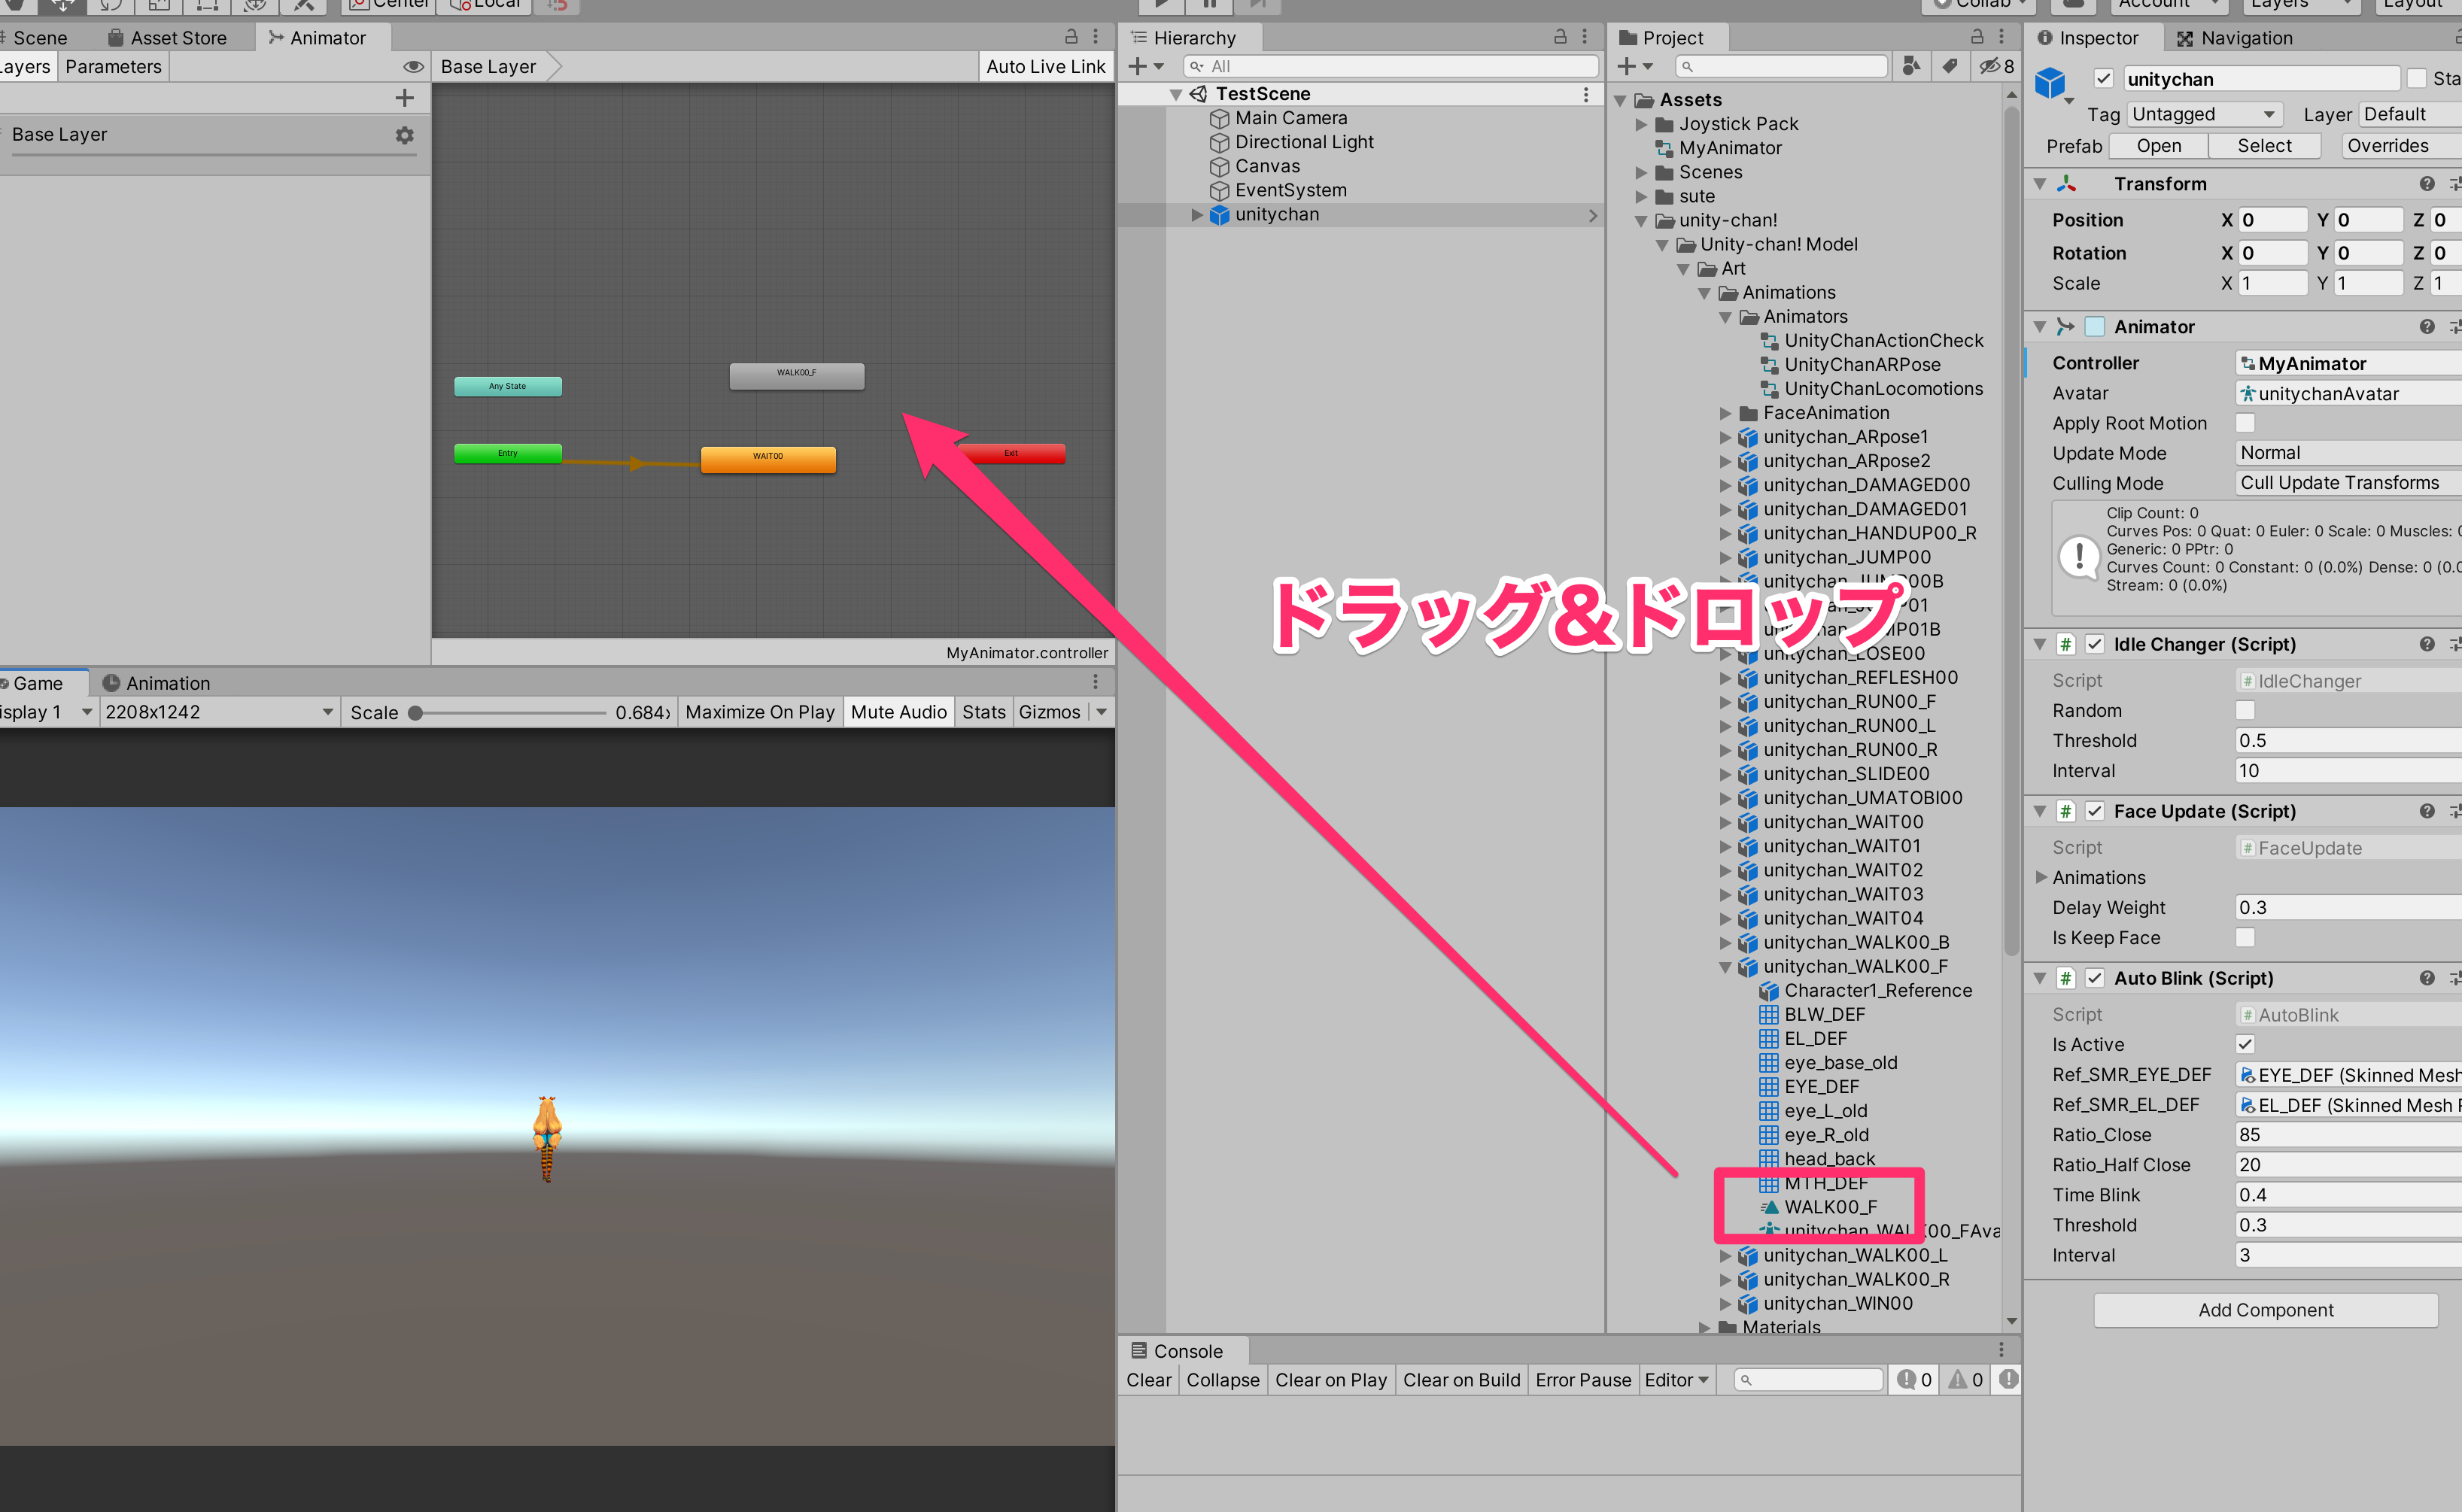
そうしたら、「MyAnimator」をUnityちゃんを選択した状態でInspectorにあるAnimatorのControllerの中にドラッグ&ドロップします。
そうすると左にAnimatorの表示がきれいになっているとおもいます。そこに新しくAnimationを組み合わせていれます!
④Animation実装
お次は、アニメーション!
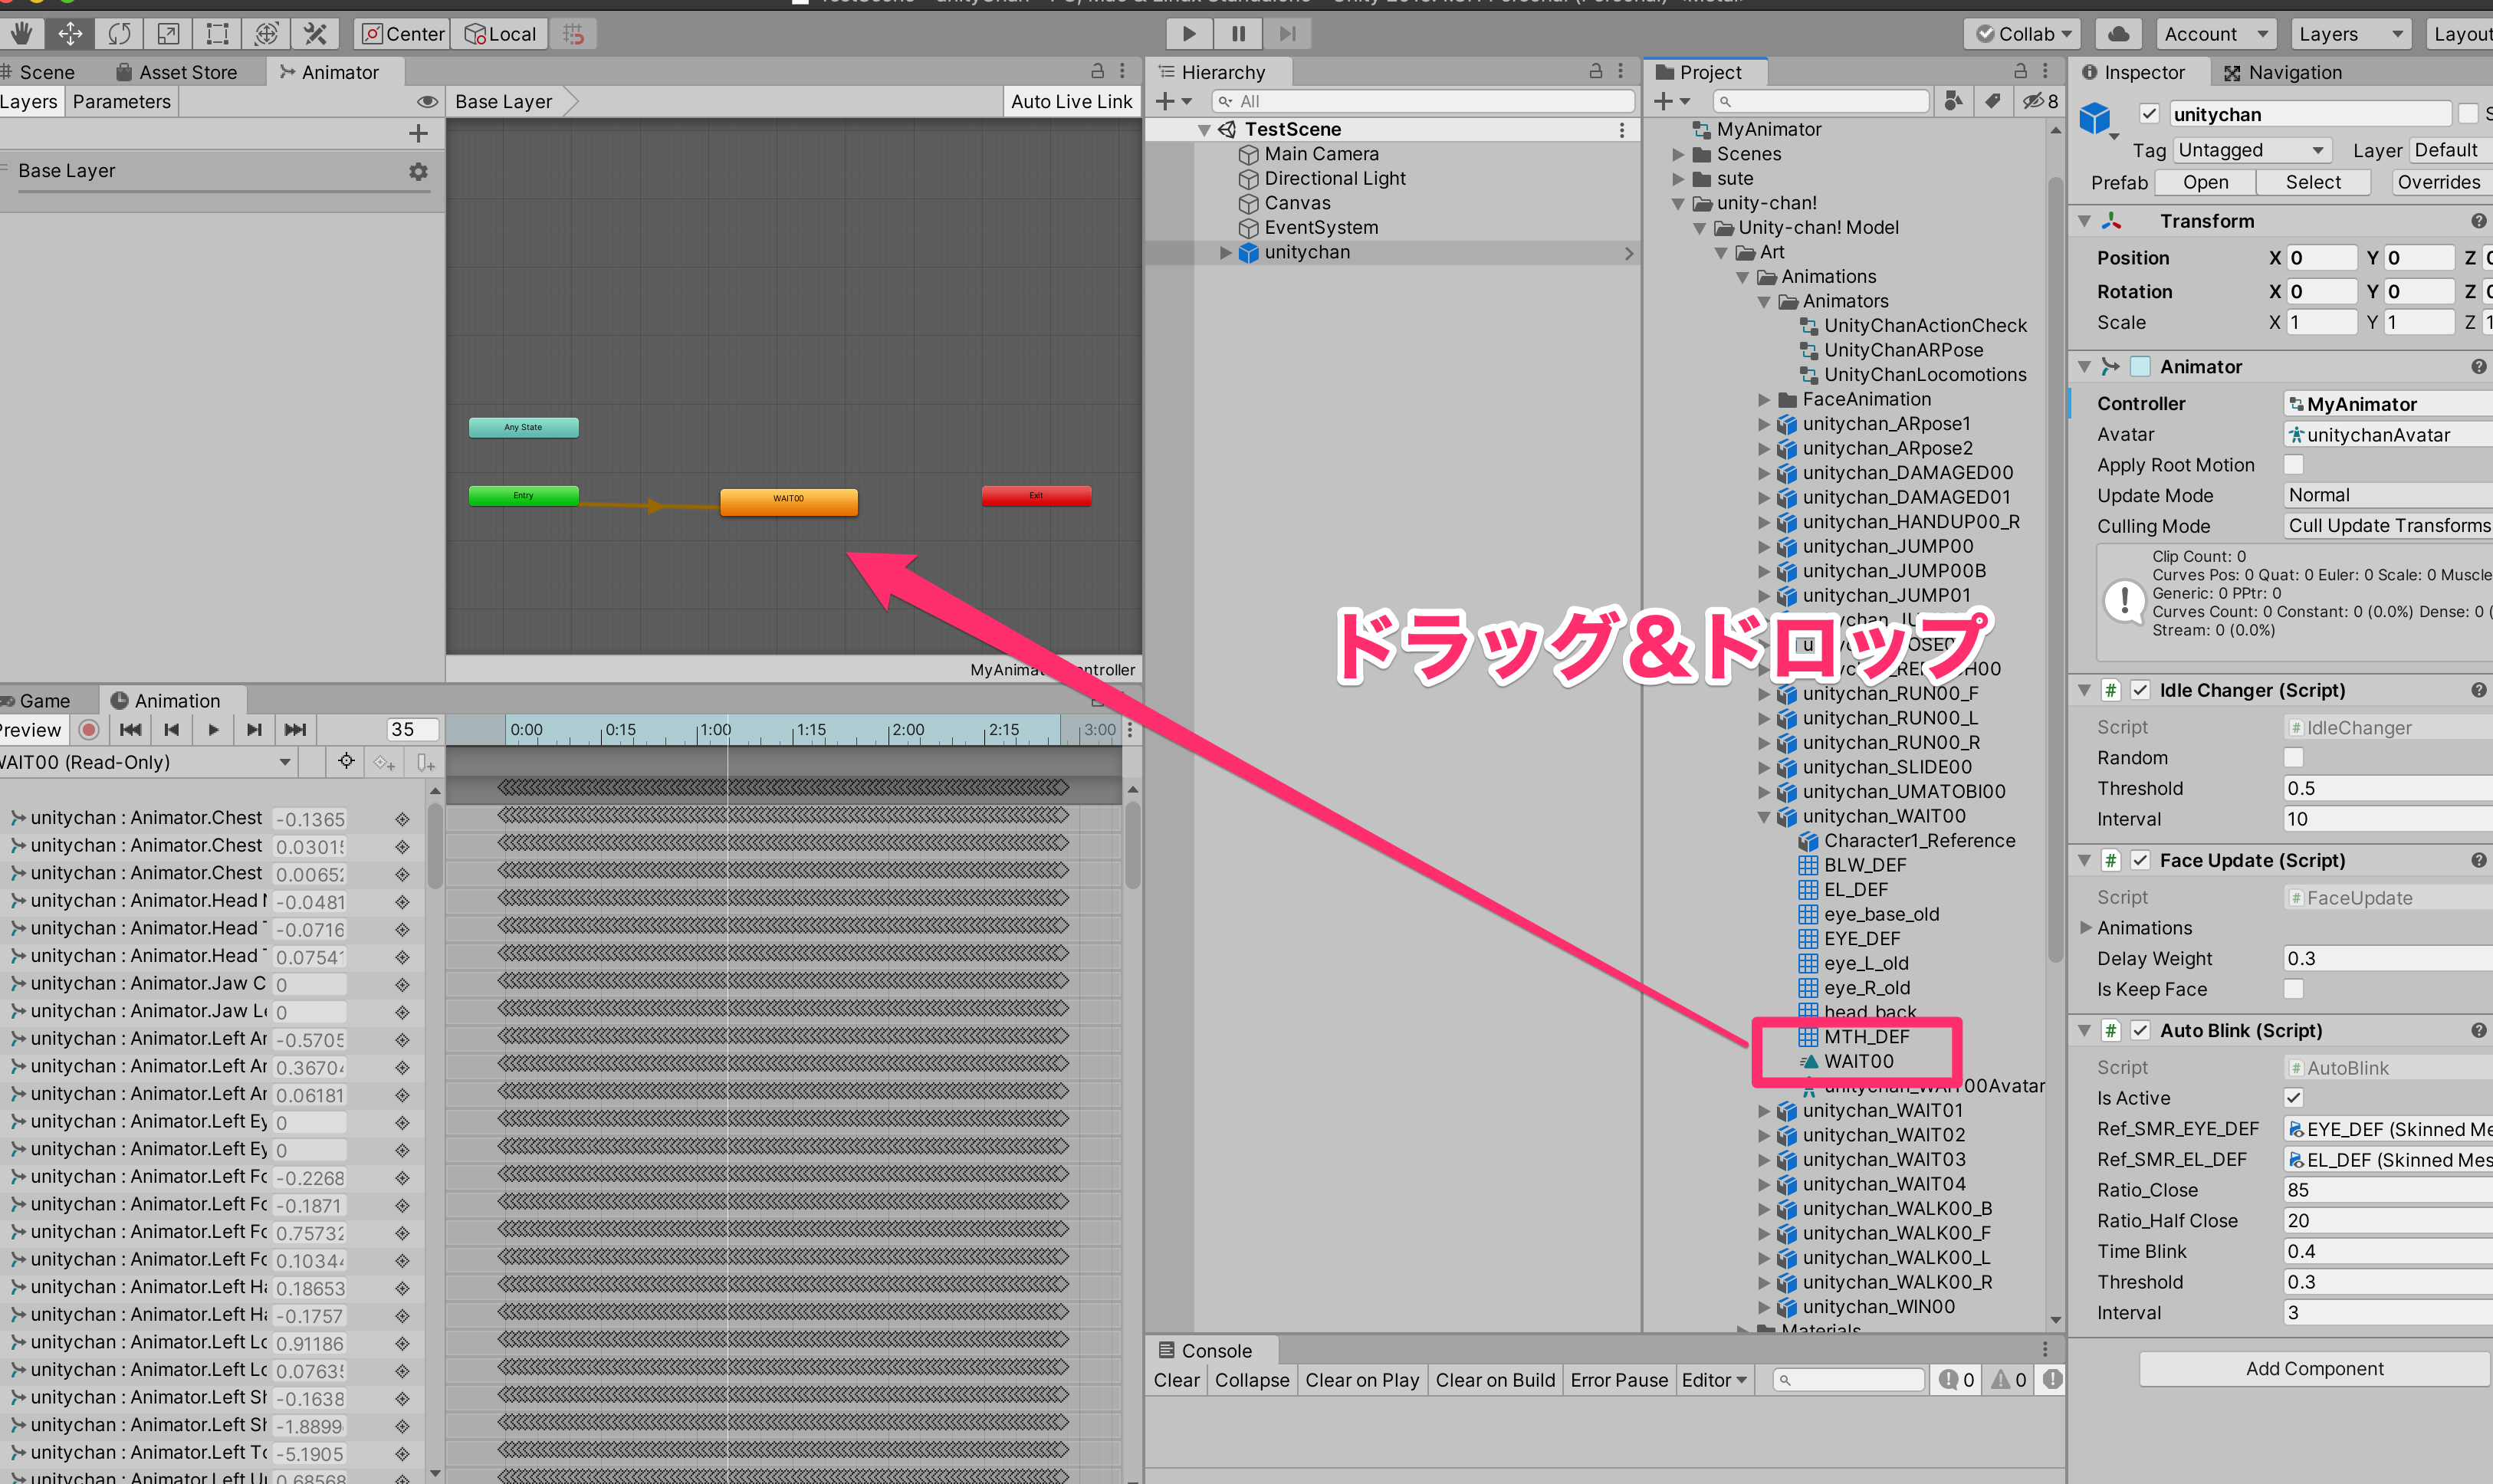
Unityちゃんは非常に便利でいっぱいアニメーションがすでに入っているのでそれを使っていきます。今回は止まった状態と歩いている状態でのアニメーションをつけていきましょう。
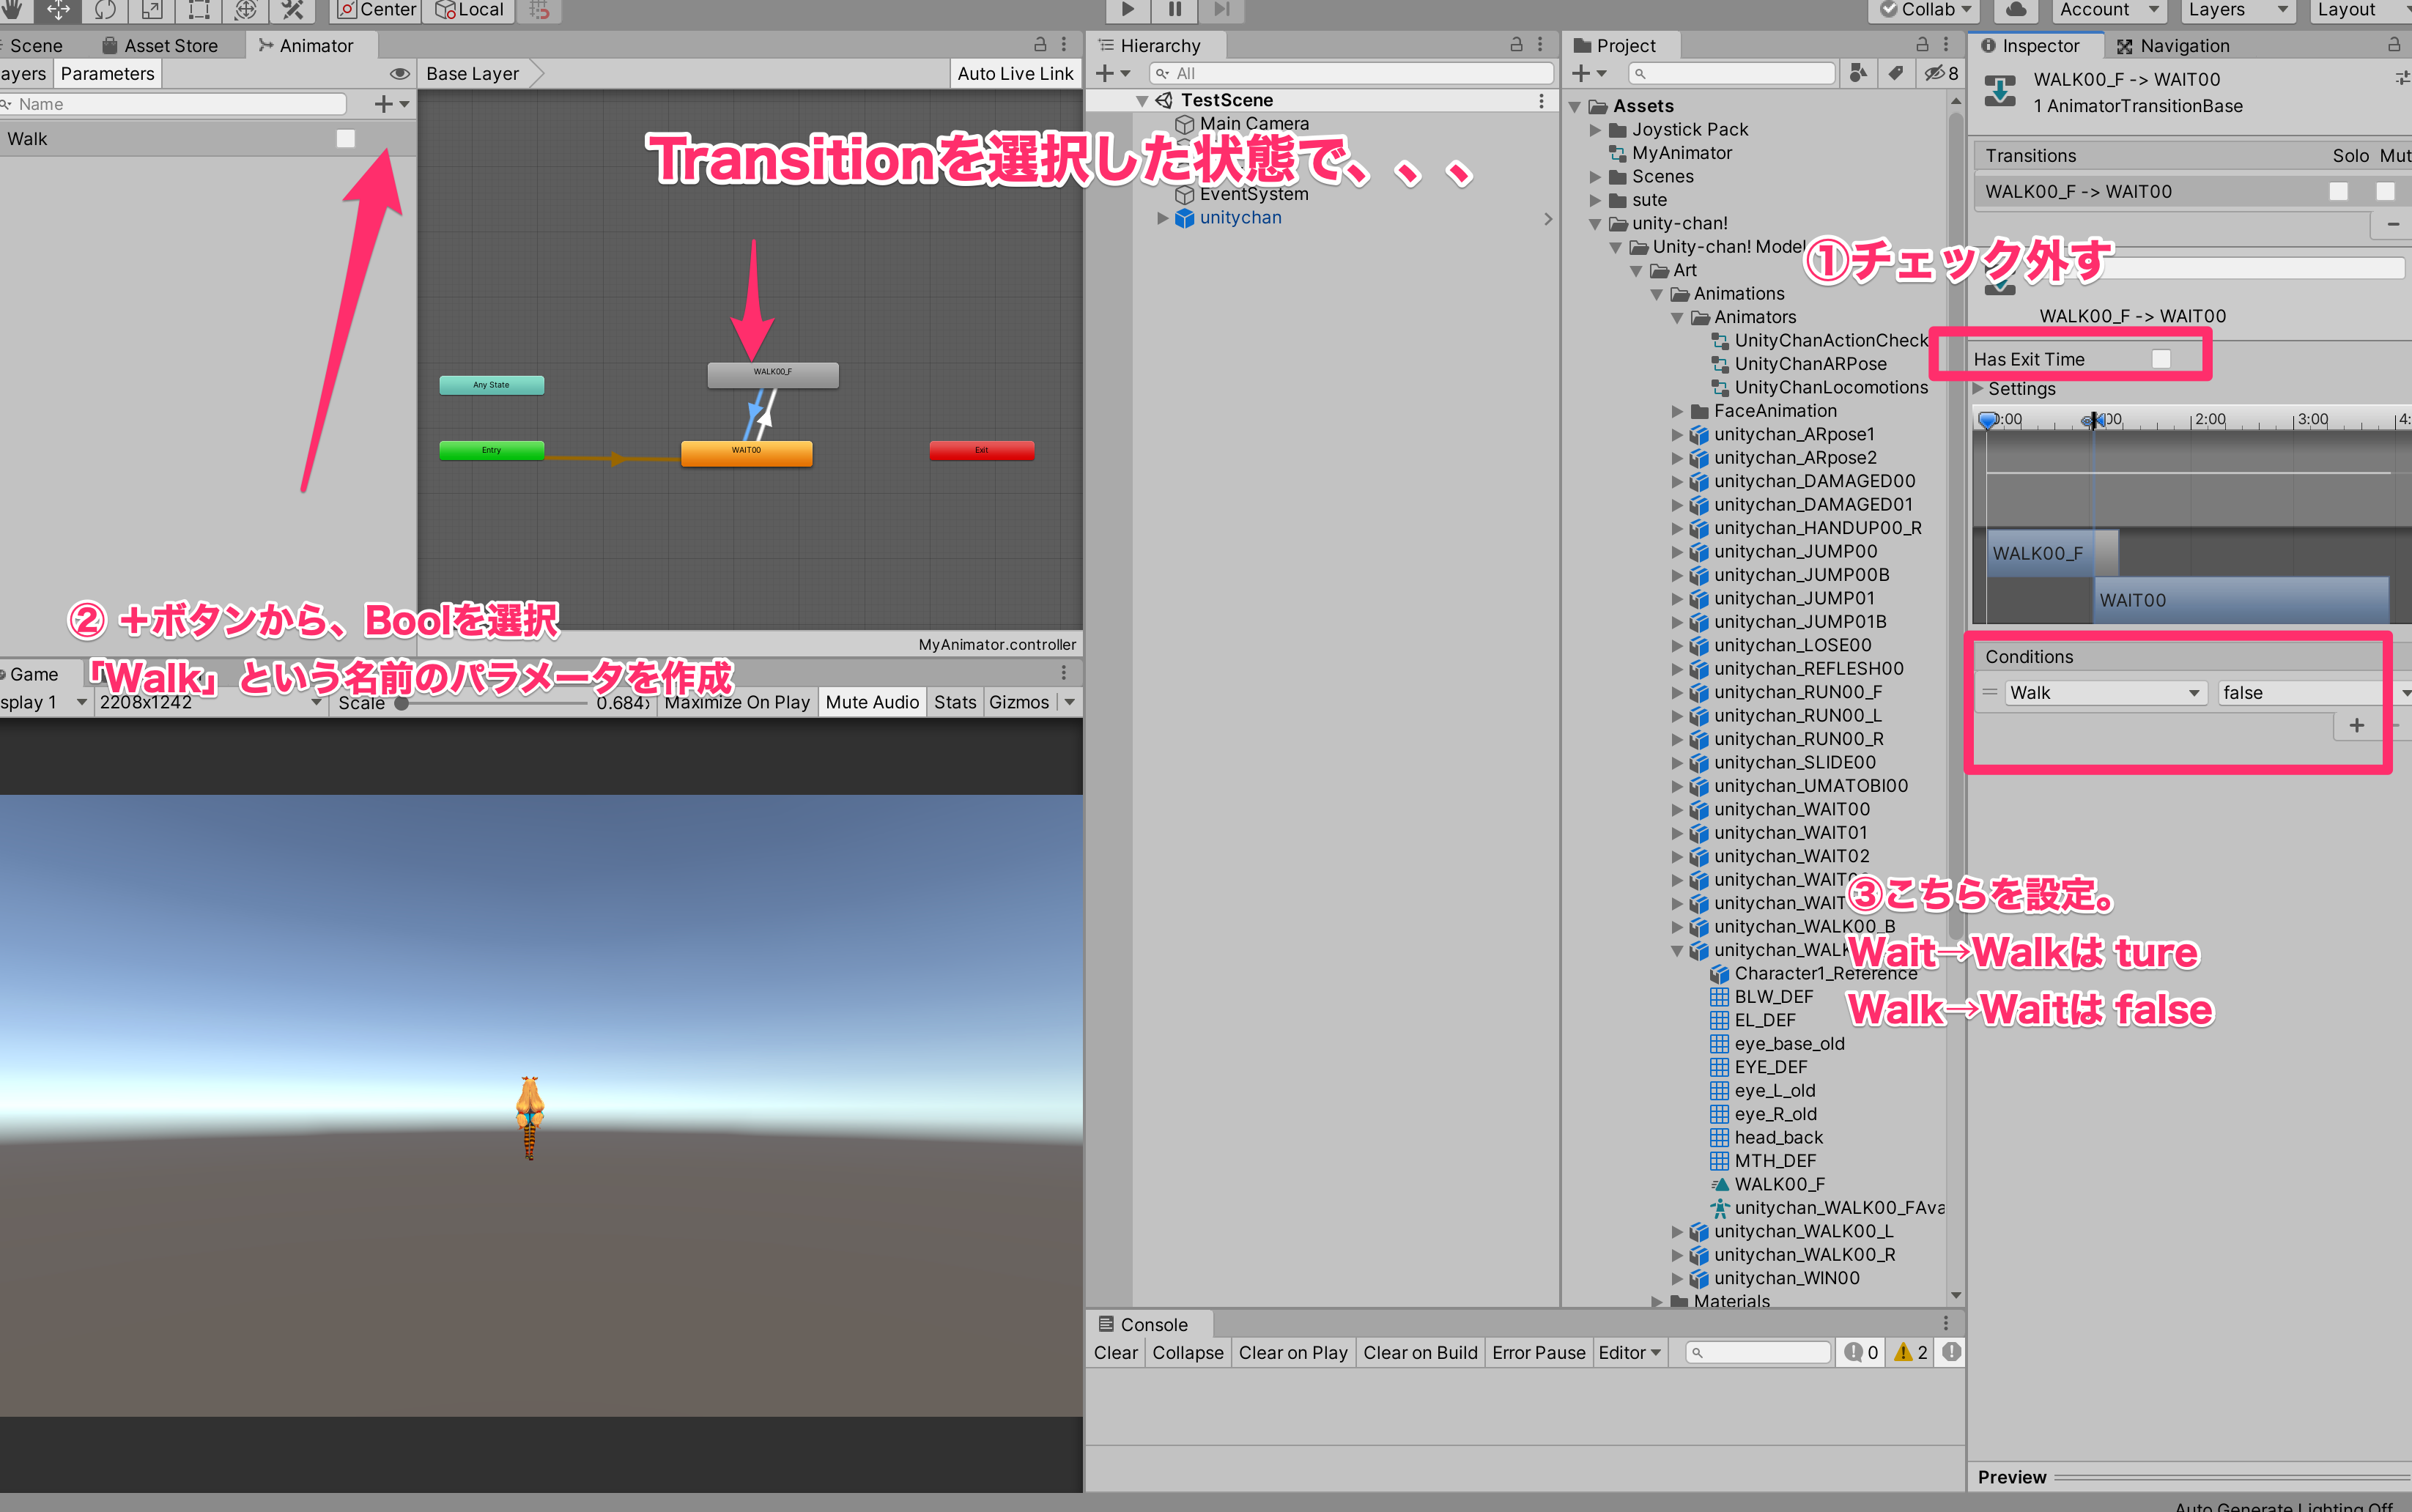
これができたらAnimatorの中にあるAnimationのところで右クリックして「MakeTransition」をしこの二つをつなげます。
その後の設定は以下の画像の通り。
これで終わり!
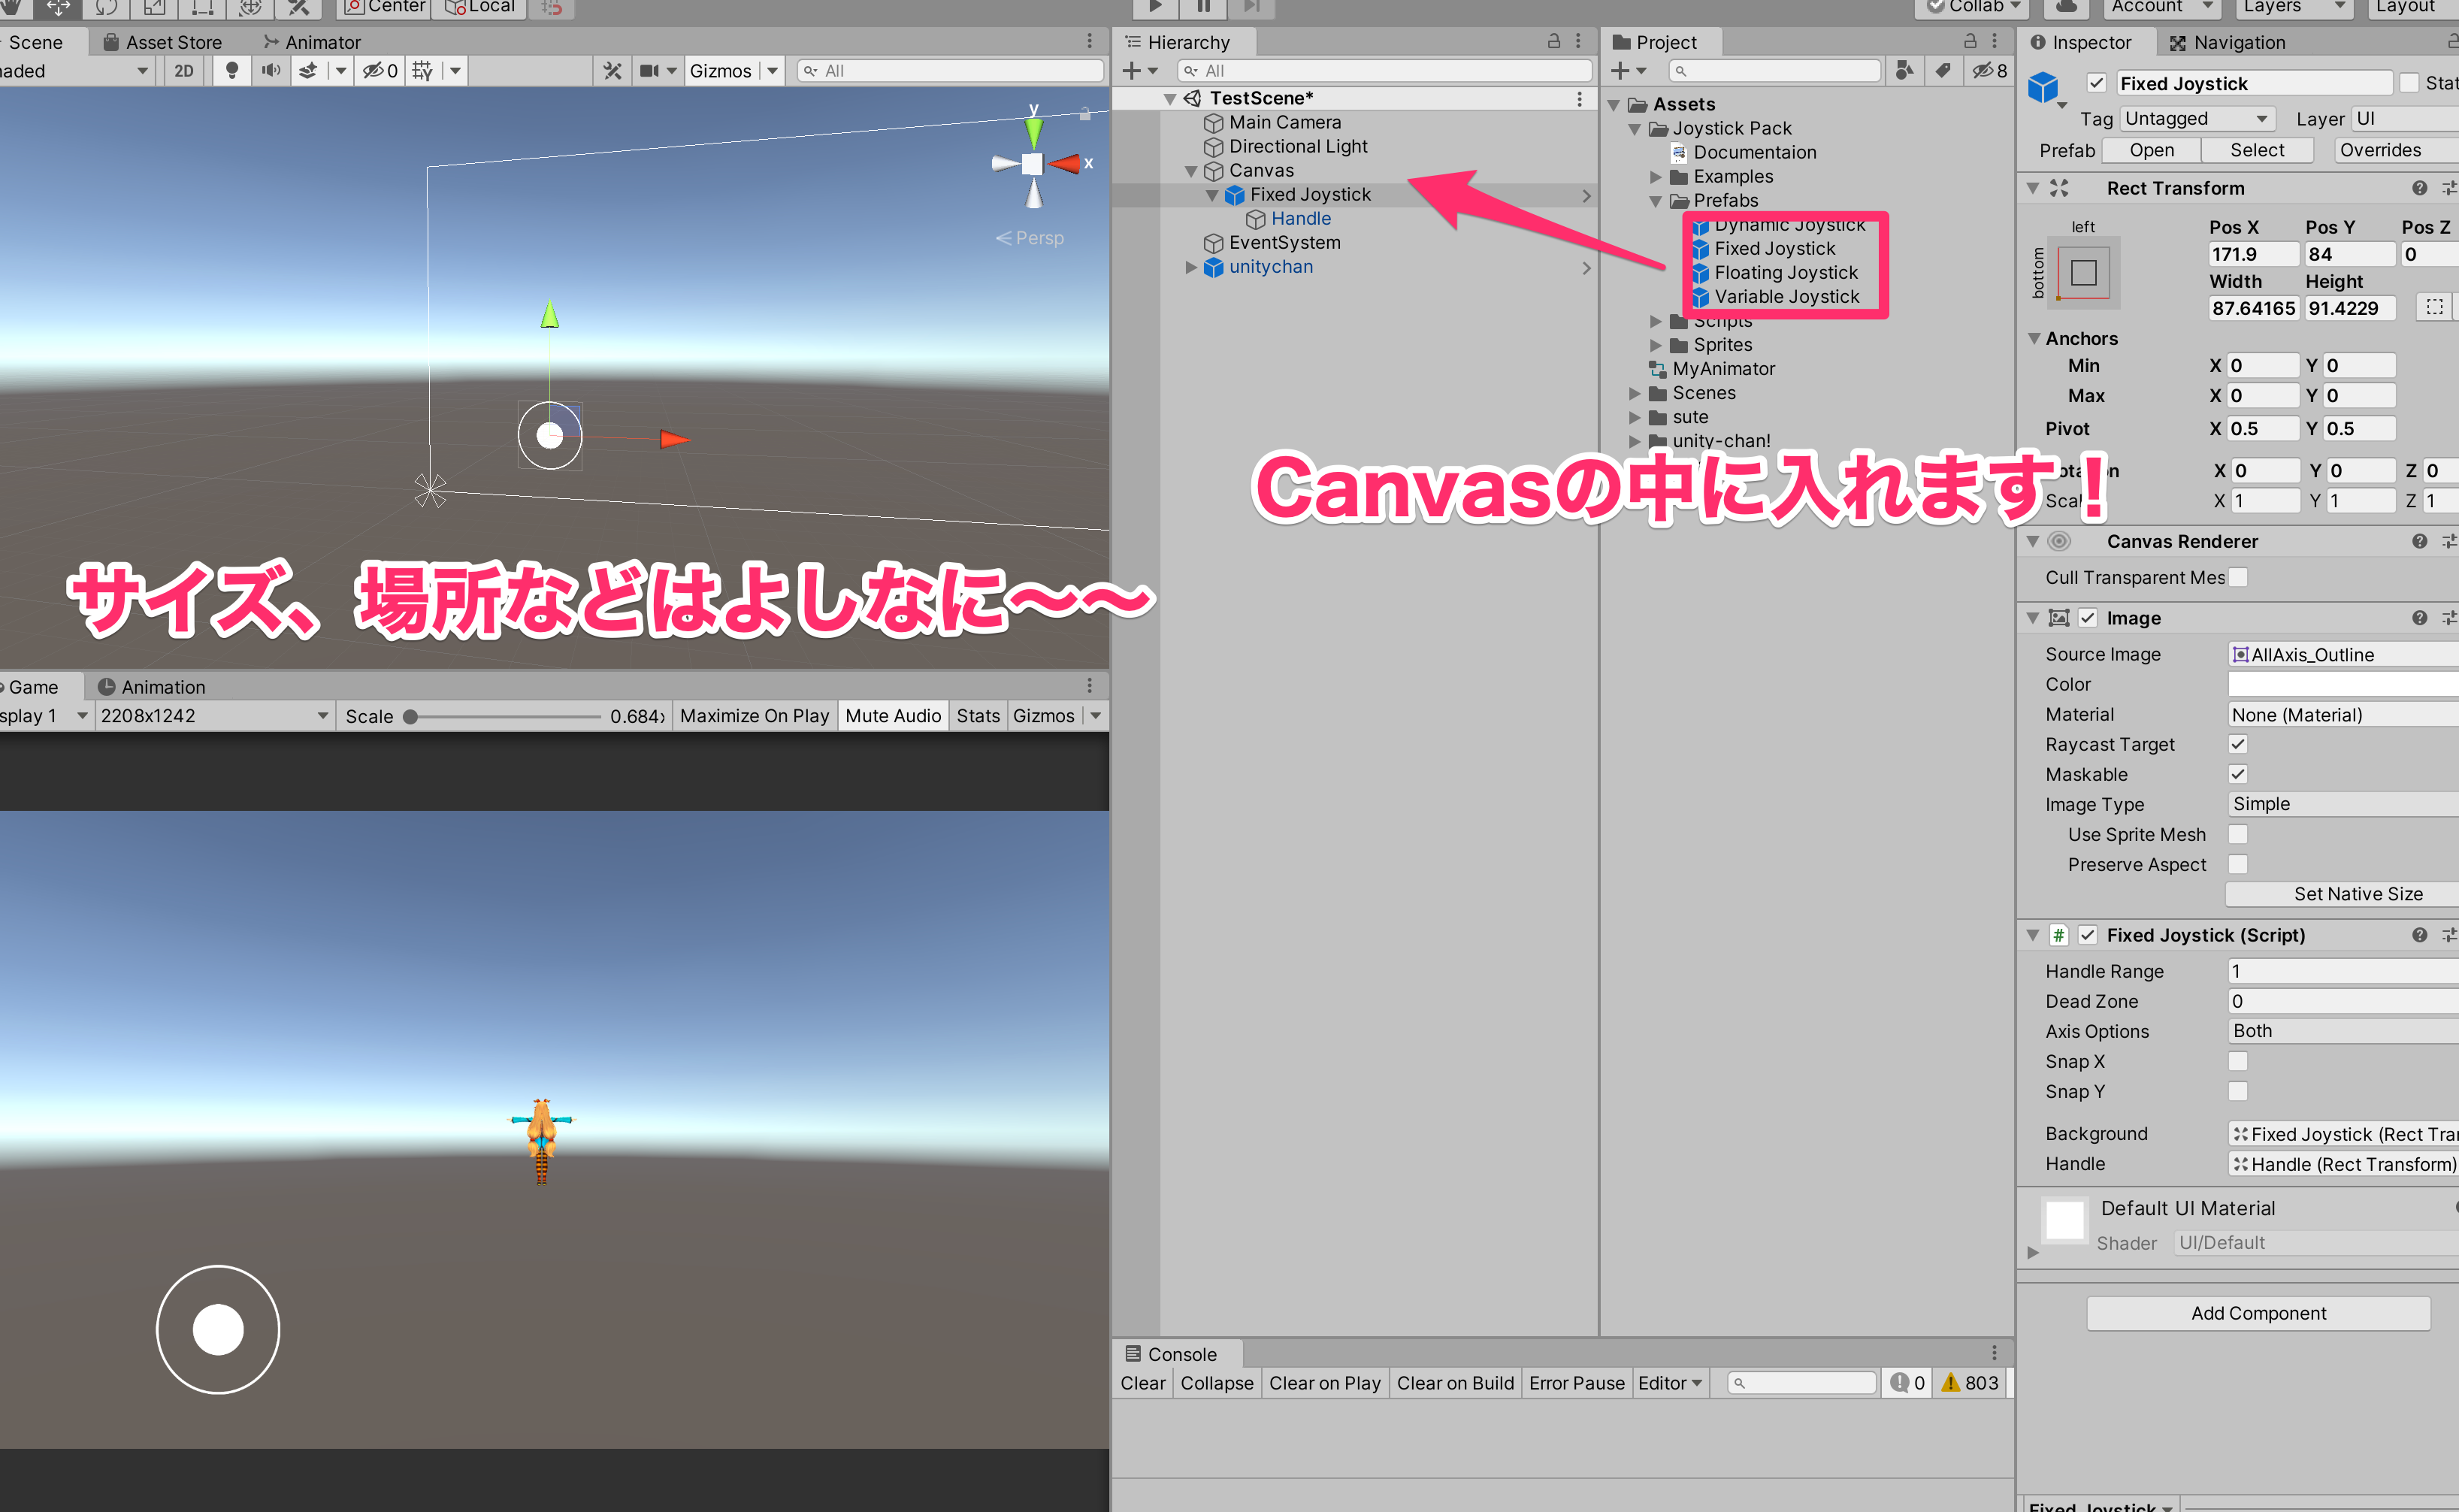
⑤JoyStickをいれます
JoyStickPackに入っているものは全部で4種類!
違いについて、詳しくはこちら
今回はFixedJoyStickをいれます(個人的な好み)
これでUnity側の準備は終わり!
⑥コードをかく
PlayerScriptとというのを使って以下のコードを書いていきます。
using System.Collections;
using System.Collections.Generic;
using UnityEngine;

public class PlayerScript : MonoBehaviour
{
    public FixedJoystick joy; // ここは入れたJoyStickの種類によって変えてください!
    public float speed; //Unity側で自由に調整して下さい
    Animator ani;

    float degStop;

    // Start is called before the first frame update
    void Start()
    {
        ani = this.gameObject.GetComponent<Animator>(); //UnityChanについているAnimatorを取得
    }

    // Update is called once per frame
    void Update()
    {

       Move();
    }

    void Move()
    {

        float dx = joy.Horizontal; //joystickの水平方向の動きの値、-1~1の値をとります
        float dy = joy.Vertical; //joystickの垂直方向の動きの値、-1~1の値をとります

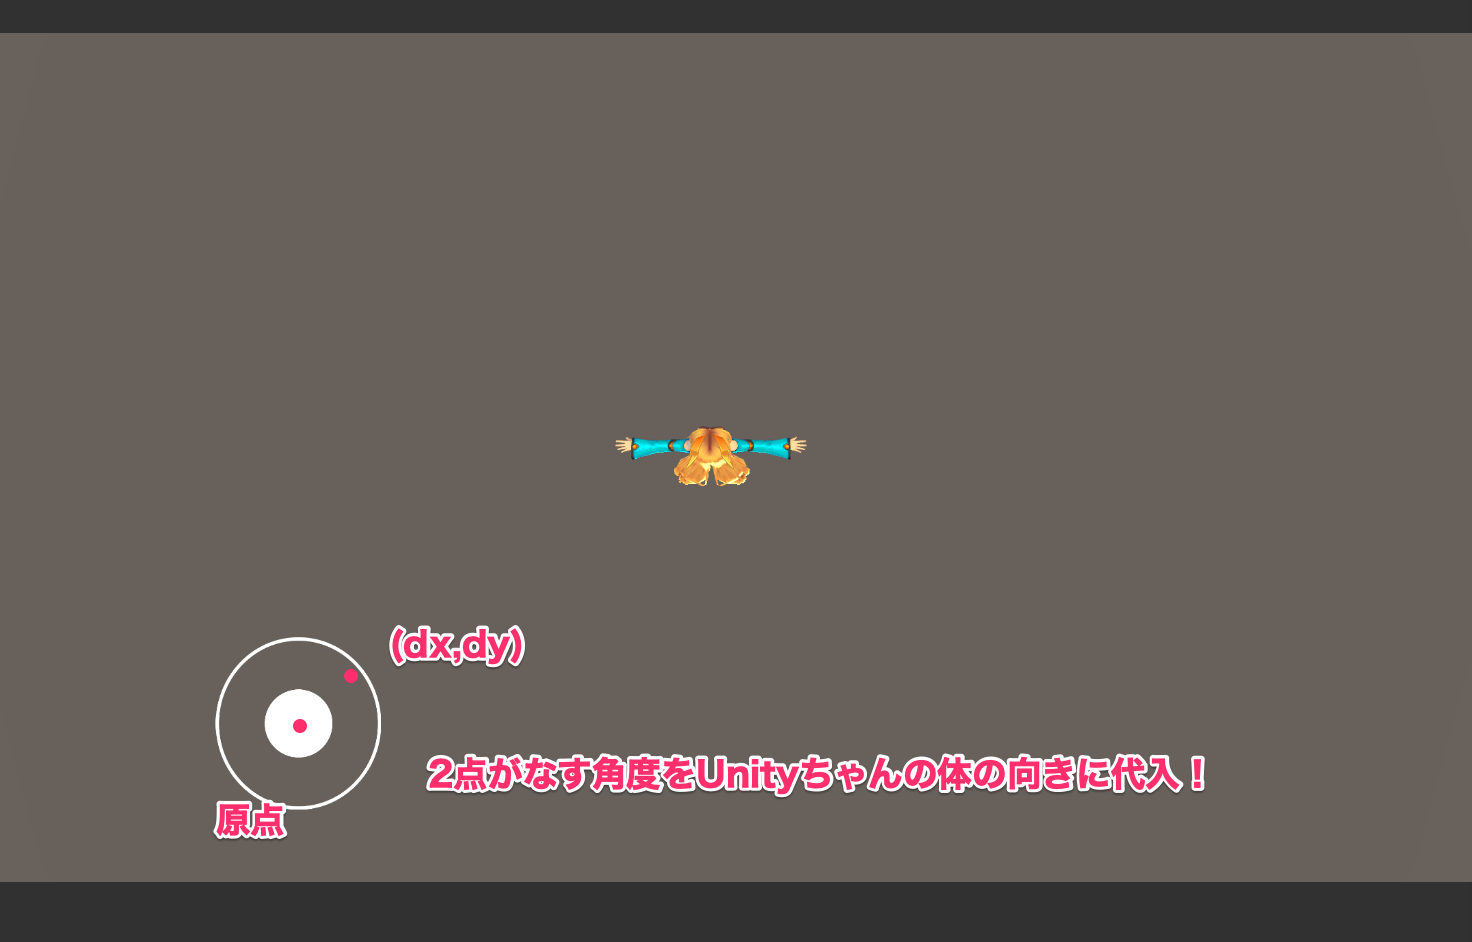
        float rad = Mathf.Atan2(dx-0, dy-0); //  原点(0,0)と点(dx,dy)の距離から角度をとってくれる便利な関数

        float deg = rad*Mathf.Rad2Deg; //radianからdegreenに変換します

        this.transform.rotation = Quaternion.Euler(0, deg,0); //Unityちゃんの向きを先ほど取得した角度に当てはめて代入します。今回はy軸方向が回転軸になります。

        if(deg!=0) //joystickの原点と(dx,dy)の2点がなす角度が0ではないとき = joystickを動かしている時
        {
            ani.SetBool("Walk",true); //wait→walkへ
            this.transform.position += this.transform.forward  *speed* Time.deltaTime; //正面方向へプレイヤーを移動させ続ける

            degStop = deg; //停止前のプレイヤーの向きを保存
        }
        else //joystickの原点と(dx,dy)の2点がなす角度が0の時 = joystickが止まっている時
        {
            ani.SetBool("Walk",false); //walk→waitへ

            this.transform.rotation = Quaternion.Euler(0,degStop,0); //停止時のプレイヤーの動きの向きを設定
        }
    }
}
詳しくはコメントアウトに書いてありますのでよんでみてください。
⑦動きの原理
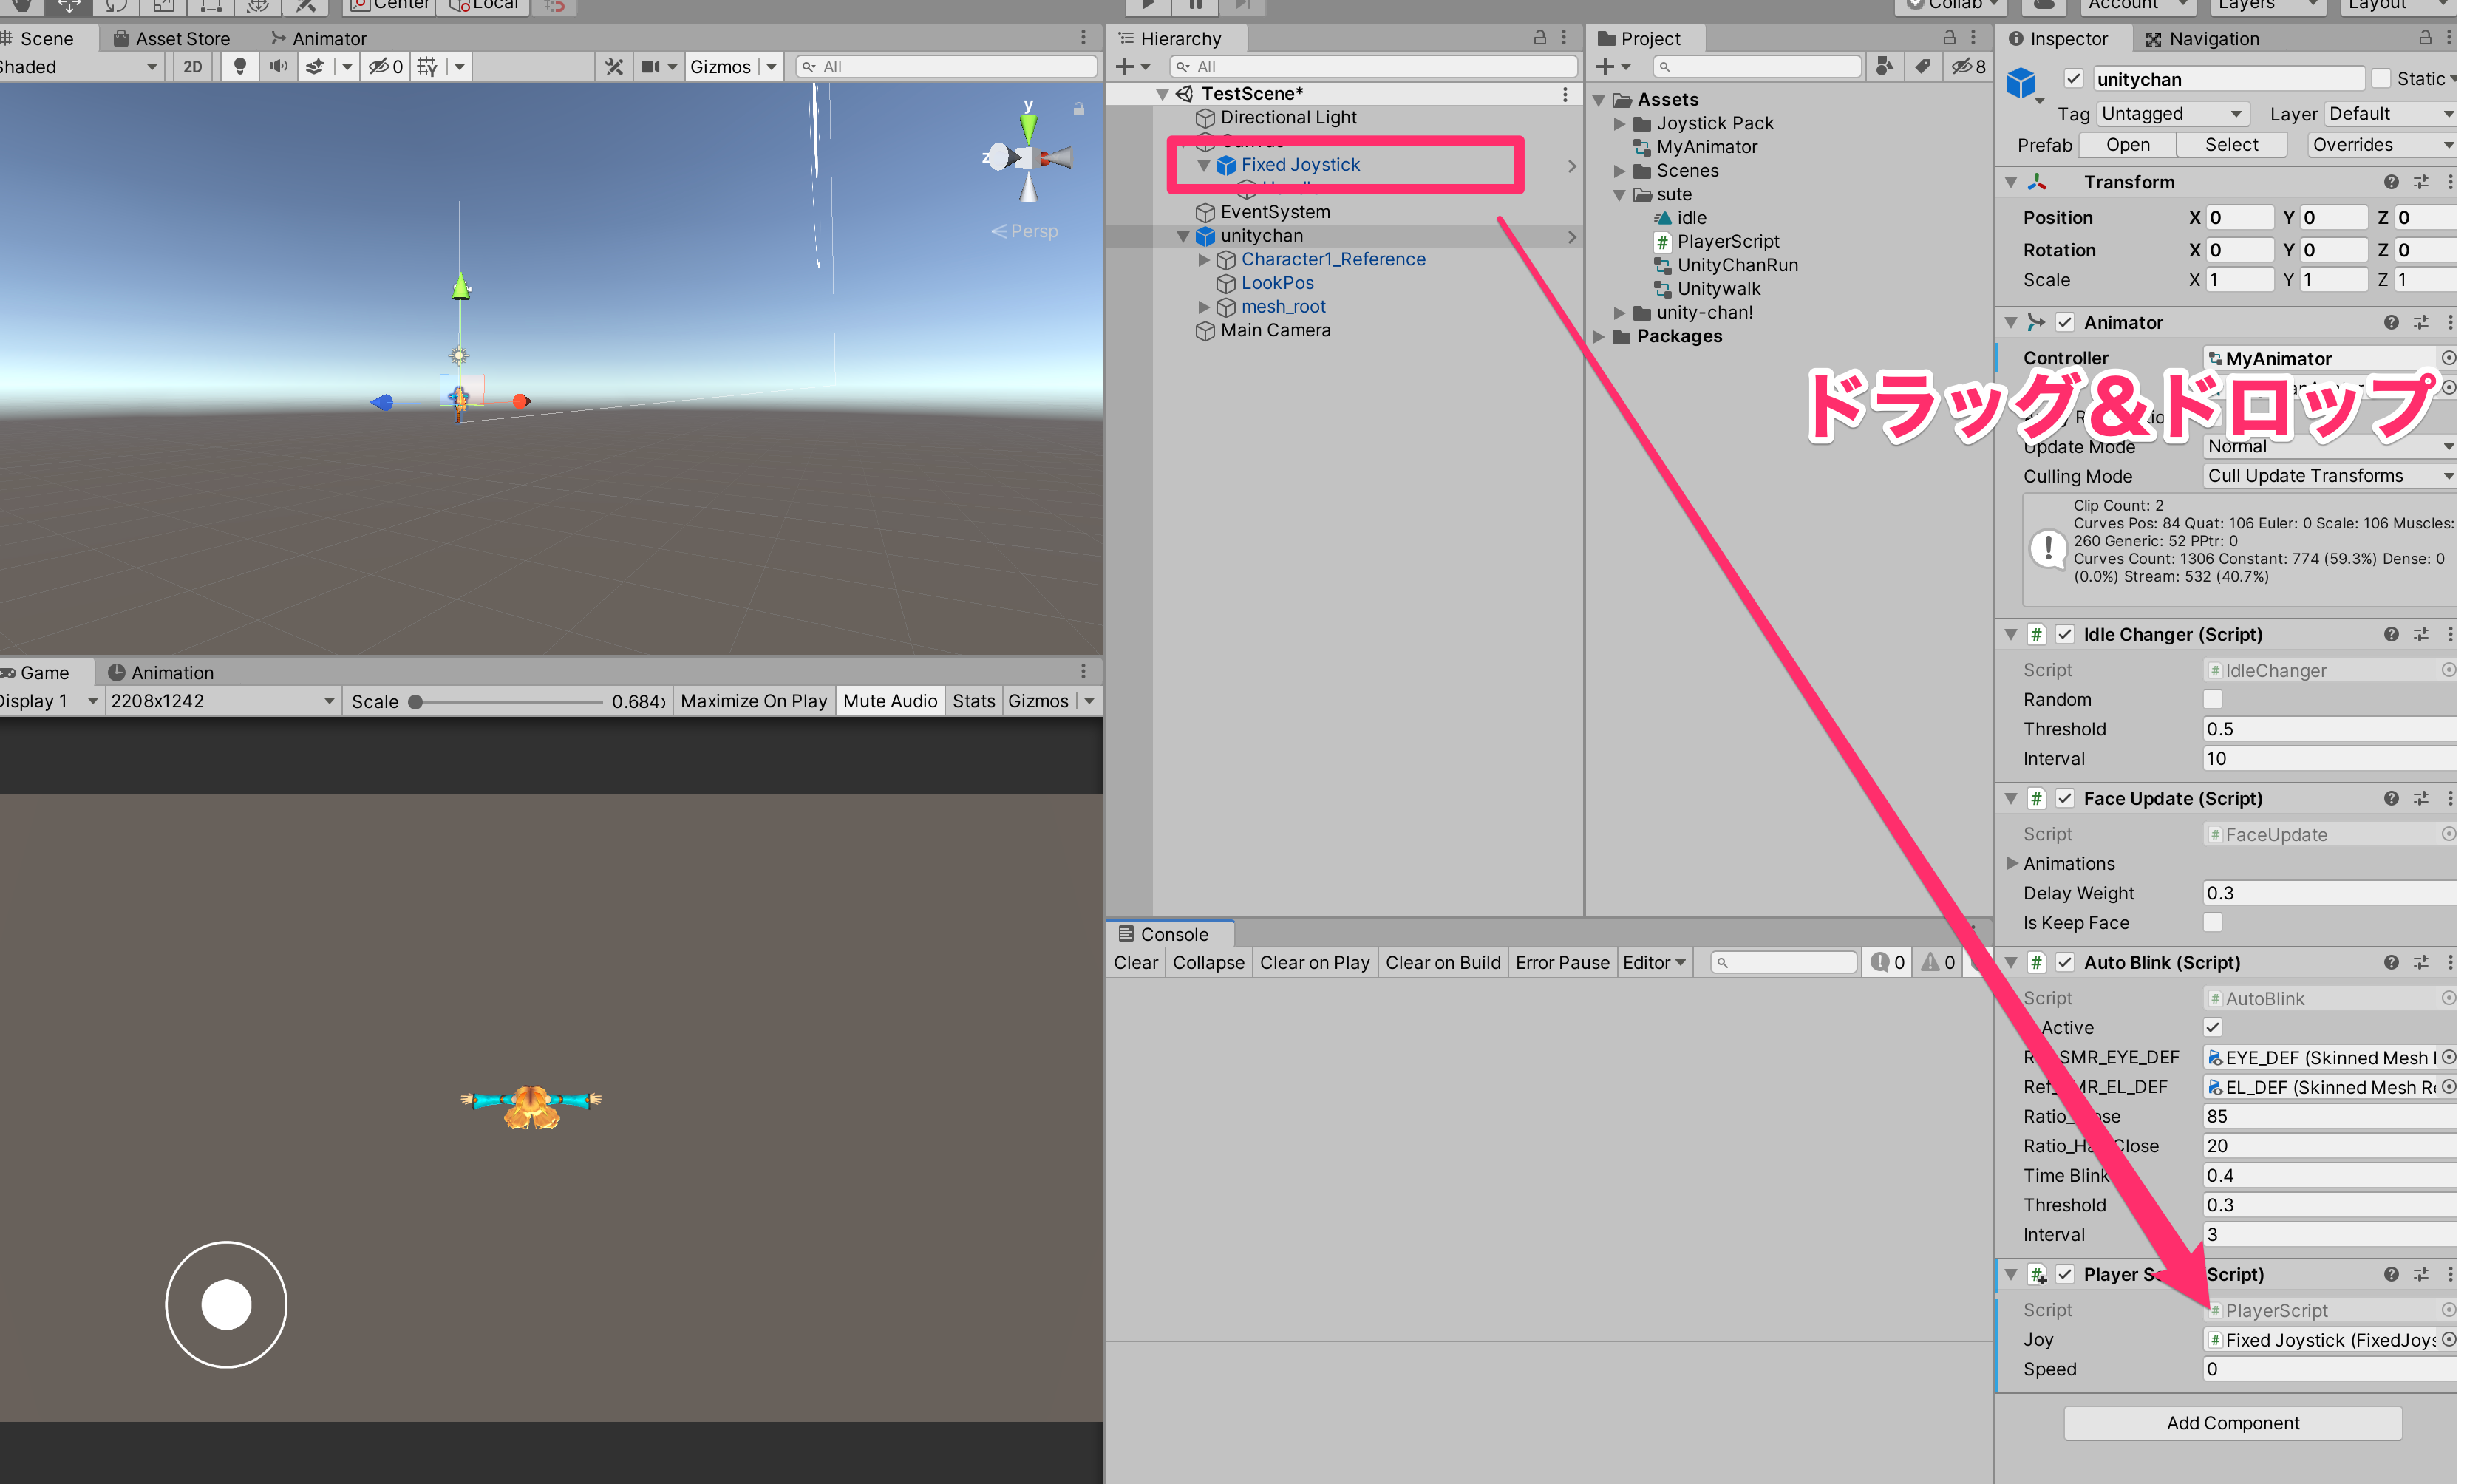
⑧Unity側でjoystickを紐付け
speedとかもいい感じに設定してみる
プレビューするといい感じに動くと思います🙌
もし歩くから走るとかのアニメーションを実装したいとかあったら、(dx,dy)の値がいくつ以上だったら走るとかにコードを書き加えていくとよりそれっぽいものが実装できます!
とりあえずここまでお疲れ様でした!
終わりに
普段はGeekSalonという大学生限定プログラミングコミュニティでメンターをしております。
Unityを使ったGameアプリ開発のコースがあるので
もし興味ありましたら下のURLからぜひ!!
👇詳細はこちらから👇
