まとめ
- Cybozu Garoon の HTMLポートレット を CLI でアップロードしたい。
- Windows環境なので powershell と selenium(WebDriver) を使用。
- type="file" 型の input 要素の隠蔽とか止めてほしい。
前置き
Cybozu Garoon は中堅・大規模組織向けのグループウェアです。
メールや掲示板、スケジュール管理など基本的なツールは一通りそろっています。それぞれのツールをjavascriptで拡張する機能もありますが、「ポートレット」呼ばれる部品をユーザーが自作し画面に追加することも可能です。
中でも HTMLポートレット という機能は Garoon のポータルに好きなように html/javascript/css をつっこめるというものです。javascript から他のサーバのAPI叩くこともできるわけで(クロスオリジンの問題とかを解決すれば)自由度は相当高い。
ただ、ポートレットを手元で作って、実際に画面確認のためにアップロードするためには管理画面で手作業で登録しなければいけない。面倒くさい。
これをコマンド一発で簡単に登録できるようにしたい。Windows環境を前提としているので登録コマンドは powershell で書きました。
Cybozuでは、パッケージ版Garoonのオンラインデモ を提供しており、今回のスクリプトはこのデモ環境でテストしました。Garoon には他にクラウド版もあります。こちらはログイン画面がパッケージ版とは異なるため、下記のスクリプトそのままでは動かないと思いますが大まかな流れは変わらないでしょう。
本文
HTMLポートレットは、html本体、複数のjavascript/css(ファイル本体または外部リンク)から構成されています。
ポートレット登録画面は二通りあり、
- 上記の要素を手作業で登録する画面。

- 上記の構成要素を1個のファイルに固めたxmlをインポートする画面。複数のポートレットを一度に登録することも可能。
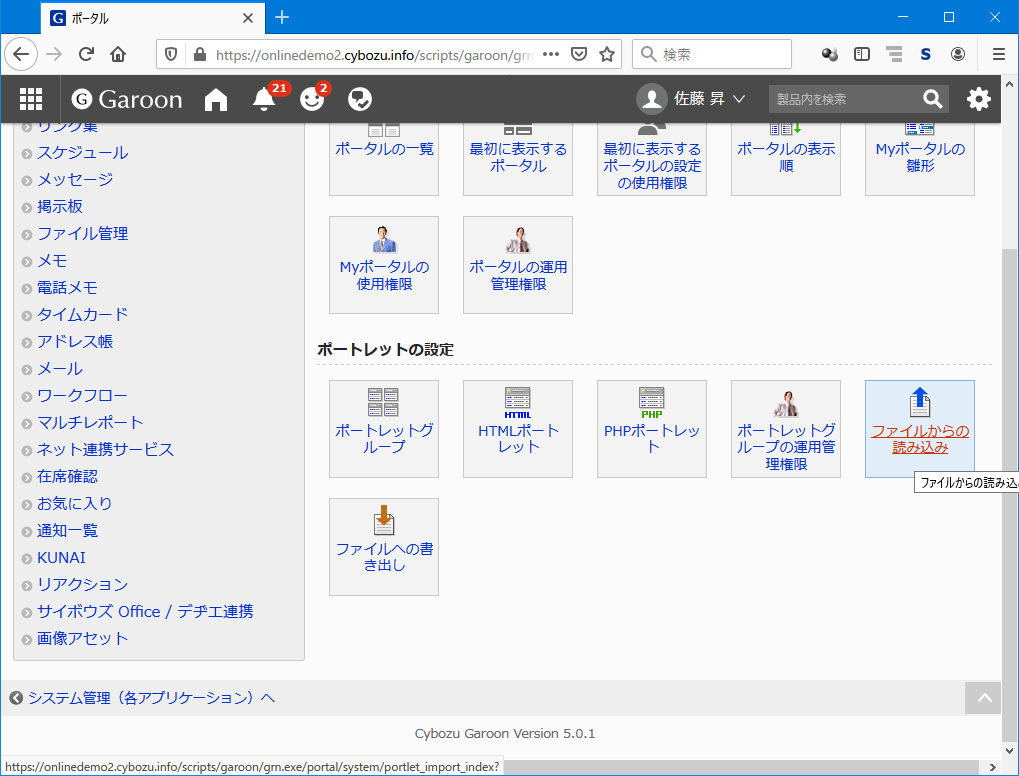
2 は登録画面というよりバックアップからのリストア想定していると思うのですが、今回はこちらを利用します。というのも1の画面では、ファイルアップロード用のinput要素が隠蔽されていてseleniumから上手く扱えないためです。こんなことして一体何の得があるんだ……。
xml の中身は
<?xml version="1.0" encoding="UTF-8" standalone="yes"?>
<html_portlets>
 <html_portlet _id="171">
  <name><![CDATA[ ... ]]></name>
  <type>grn.portal.html</type>
  <version>1</version>
  <source><![CDATA[ ... ]]></source>
  <available_myportal>1</available_myportal>
  <editor>0</editor>
  <files count="0"/>
  <customization_apply_status>1</customization_apply_status>

  <customization_resources>

   <customization_resource _id="40">
    <type>js</type>
    <file _id="19">
     <name><![CDATA[ ... ]]></name>
     <mime>application/javascript</mime>
     <size>282458</size>
     <charset></charset>
     <data>
     <![CDATA[ ... ]]>
     </data>
    </file>
   </customization_resource>

   <customization_resource _id="41">
    <type>js</type>
    <url><![CDATA[ ... ]]></url>
   </customization_resource>

   <customization_resource _id="42">
    <type>css</type>
    <file _id="20">
     <name><![CDATA[ ... ]]></name>
     <mime>text/css</mime>
     <size>61495</size>
     <charset>UTF-8</charset>
     <data><![CDATA[ ... ]]></data>
    </file>
   </customization_resource>

  </customization_resources>
 </html_portlet>
</html_portlets>
こんな感じ。CDATAセクションに html、js や css の本文またはURLが入ります。
そこで以下のような Vueのアプリをポートレットとして Garoon に登録してみます。
var vue_example = new Vue({
    el: '#vue_example',

    template: `<div>
      <p id="message">{{ message }}</p>
      <input v-model="message" />
      <button v-on:click="reverse()">Reverse</button>
      </div>`,

    data: {
      message: 'Hello Garoon!',
    },

    methods: {
      reverse: function () {
        this.message = this.message.split('').reverse().join('')
      },
    },
  })
# message {
    color: red
}
ポートレットは以下のようなスクリプトで生成してみます。xml の作り方が雑ですがとりあえずこれで問題は起きていません。
function New-Portlets {
    param($source, $target)

    if ($null -eq $source -or $null -eq $target) {
        '引数が足りません'
        exit
    }

    $json = @(Get-Content -Encoding 'utf8' $source -Raw| ConvertFrom-Json)

    $portlets = @($json | ForEach-Object { $i = 0 } {
        $resources = @($_.resources| ForEach-Object { $j = 0; $k = 0 } {
            $obj = $_
            switch ($obj.source) {
                'file' {
                    $data = Get-Content $obj.data -Raw -Encoding 'utf8'
                    $File -f $j, $k, $obj.name, $data, $data.length, $obj.type, $mime[$obj.type]
                    $k++
                    break
                }
                'link' { $Link -f $j, $obj.url, $obj.type ;break }
                default {}
            }
            $j++
        }) -join ''
        $portlet -f $i, $_.name, $_.source, $resources
        $i++
    }) -join ''

    ($xml -f $portlets) | Out-File -Encoding 'utf8' $target
}

$mime = @{
    'js' = 'application/javascript'
    'css' = 'text/css'
}

# 以下 xml のパーツのテンプレート
$xml = @'
<?xml version="1.0" encoding="UTF-8" standalone="yes"?>
<html_portlets>
{0}
</html_portlets>
'@

$portlet = @'
    <html_portlet _id="{0}">
    <name><![CDATA[{1}]]></name>
    <type>grn.portal.html</type>
    <version>1</version>
    <source><![CDATA[{2}]]></source>
    <available_myportal>1</available_myportal>
    <editor>0</editor>
    <files count="0"/>
    <customization_apply_status>1</customization_apply_status>
    <customization_resources>
    {3}
    </customization_resources>
    </html_portlet>
'@

$File = @'
<customization_resource _id="{0}">
<type>{5}</type>
<file _id="{1}">
 <name><![CDATA[{2}]]></name>
 <mime>{6}</mime>
 <size>{4}</size>
 <charset>UTF-8</charset>
 <data>
 <![CDATA[{3}]]>
 </data>
</file>
</customization_resource>
'@

$Link = @'
<customization_resource _id="{0}">
<type>{2}</type>
<url><![CDATA[{1}]]></url>
</customization_resource>
'@
ポートレットの設定自体は、json で記述します。個人的には yaml にしたかったけど、このためだけに powershell に yaml のライブラリ導入するのもどうかと思ったので。
[
  {
    "name": "サンプルポートレット1",
    "resources": [
      {
        "url": "https://js.cybozu.com/vuejs/v2.6.11/vue.min.js",
        "type": "js",
        "source": "link"
      },
      {
        "name": "sample.js",
        "type": "js",
        "source": "file",
        "data": ".\\sample.js"
      },
      {
        "name": "sample.css",
        "type": "css",
        "source": "file",
        "data": ".\\sample.css"
      }
    ],
    "source": "<div id=\"vue_example\"></div>"
  },
  {
    "name": "サンプルポートレット2",
    "resources": [
      {
        "url": "https://js.cybozu.com/vuejs/v2.6.11/vue.min.js",
        "type": "js",
        "source": "link"
      },
      {
        "name": "sample.js",
        "type": "js",
        "source": "file",
        "data": ".\\sample.js"
      },
      {
        "name": "sample.css",
        "type": "css",
        "source": "file",
        "data": ".\\sample.css"
      }
    ],
    "source": "<div id='vue_example'></div>"
  }
]
これで
. .\newPortlets.ps1
New-Portlets .\sample.json .\sample.xml
とすれば、ポートレットファイルが生成できます。
次に Garoon への登録ですが、Selenium を使用します。Selenium の使い方は、「Webアプリケーションを自動で操作してみよう」を参考にしました。
chronium Driver の入手は https://chromedriver.chromium.org/downloads から
使用している Chrome のバージョンによって Chrome Driver のバージョンも変わってくるので注意。
Selenium の入手は、https://www.selenium.dev/downloads/ から
上記記事から画面構成が変わってしまっています。リンクが多いですが、'Selenium Client & WebDriver Language Bindings' の C# の行から Download を選択します。この記事作成時点での安定版は selenium-dotnet-3.14.0.zip でした。zipファイルを解凍すると、中に
- Selenium.WebDriver.3.14.0.nupkg
- Selenium.Support.3.14.0.nupkg
- Selenium.WebDriverBackedSelenium.3.14.0.nupkg
という3つのファイルが入っています。nupkg ファイルは実は zipファイルなので(拡張子をzipに変えるなどして)さらに中身を解凍し、1 から WebDriver.dll を 2から WebDriver.Support.dll を取り出します。zipの中には、.Net Framework のバージョンごとに複数のDLLが入っています。筆者のWindows10環境では、net45のものを使用しました。
libディレクトリを作成し、取り出したDLL、解凍したChronium Driver をともに、コピーします。
アップロード用のスクリプトは以下の通り。
. '.\newPortlets.ps1'

function Publish-Portlets {
    param($source)

    if ($null -eq $source) {
        '引数が足りません'
        exit
    }
    $target = $source -replace '.json', '.xml'
    New-Portlets $source $target

    $libPath = Join-Path (Convert-Path .) 'lib'
    Add-Type -Path "${libPath}\WebDriver.dll"
    Add-Type -Path "${libPath}\WebDriver.Support.dll"

    # chromedriver.exeがあるディレクトリを指定
    $driver = New-Object OpenQA.Selenium.Chrome.ChromeDriver("${libPath}\chromedriver_win32")

    # Garoon オンラインデモの環境
    $url = 'https://onlinedemo2.cybozu.info/scripts/garoon/grn.exe/'
    $username = 'sato'
    $password = 'sato'

    # 生成されたポートレット
    $xml = Convert-Path $target

    $driver.Url = $url
    $driver.FindElement([OpenQA.Selenium.By]::Name('_account')).SendKeys($username);
    $driver.FindElement([OpenQA.Selenium.By]::Name('_password')).SendKeys($password);
    $driver.FindElement([OpenQA.Selenium.By]::Name('login-submit')).Click();
    $driver.FindElement([OpenQA.Selenium.By]::CssSelector('.cloudHeader-adminSettings-grn')).Click();
    $driver.FindElement([OpenQA.Selenium.By]::Id('com-header-system-page-link')).Click();
    $driver.FindElement([OpenQA.Selenium.By]::Id('system-application-list')).Click();
    $driver.FindElement([OpenQA.Selenium.By]::Id('portal')).Click();
    $driver.FindElement([OpenQA.Selenium.By]::Id('portal/system/portlet_import_index')).Click();
    $driver.FindElement([OpenQA.Selenium.By]::Id('portal/system/html_portlet_import')).Click();
    $driver.FindElement([OpenQA.Selenium.By]::Name('file')).SendKeys($xml);
    $driver.FindElement([OpenQA.Selenium.By]::Id('btn_file_upload')).Click();
    $driver.Quit()
    $driver.Dispose()

    Write-Host('OK')
}
これで登録まで一気に行けます。
. .\publishPortlets.ps1
Publish-Portlets .\sample.json