前回の記事
Amazon Echo で TVリモコン操作への道 (RPizero & AWSIoT & Lambda & AlexaSkill) 前編
からの続き。
- RaspberryPiでのリモコン送信機の作成
- AWS IoTとの接続
- AWS Lambdaからの操作
ここまでが完了している前提。
ここからはいよいよ本丸のAlexaSkillの作成と連携。
しかも先日ついに日本語バージョンがリリースされたので、日本語での操作を前提とします。
1 構成
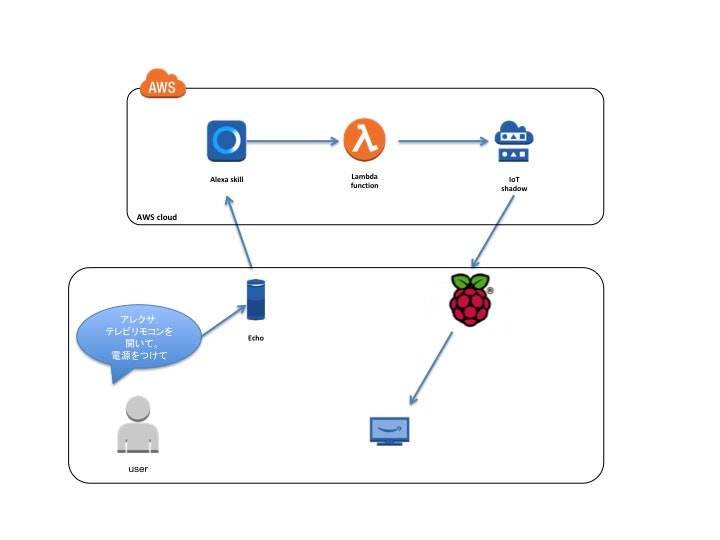
1.1 全体構成
ピタゴラスイッチ並みの連携。
Amazon Echo -> Alexa Skill への接続が目標。
AlexaSkillでテレビリモコンを実現するには、
テレビや証明などの公式の製品、デバイス向けに標準化された
- スマートホームスキル
-
カスタムスキル
での実現が可能。
今回はより柔軟で、汎用性の高い、カスタムスキルにて構築を前提とする。
実はスマートホームスキルで当初進めていたのだが、使い勝手の問題や日本語化未実装の部分があったりと、やりたいことの実現が今の自分の技術では難しそうだったので、カスタムスキルに変更した経緯もあり。。
この辺りは機会があれば後々紹介しようかと思います。
1.2 操作対象
今回実現したいアレクサ向けの命令セット
- 電源のON/OFF
- 電源をつけて/オンにして 、 電源を消して/オフにして
- 音量UP/Down
- 音量をあげて/大きくして 、 音量をさげて/小さくして
- チャンネル操作(局名)
- フジテレビにして/フジテレビに変えて 、 (日テレ/TBS/テレ朝/テレ東)
- チャンネル操作(チャンネル番号)
- 8にして/8に変えて 、 (4/6/5/7)
2 Alexa開発ツール
2.1 Amazon 開発コンソールへログイン
AlexaのSKill開発にはAmazon Developerにアカウント登録が必要。
アカウント作成は無料なのでサクッと登録。

ログイン後、Alexaのタブから「Alexa Skills Kit」を選択

2.2 新しいスキルを追加
2.3 スキル情報の入力
スキルの種類 : カスタム対話モデル
言語 : Japanese
スキル名 : myHomeTV-Ctrl (任意の名前)
呼び出し名 : テレビリモコン ※
※この呼び出し名が、AlexaへのSkill発動文言となる。

2.4 対話モデル
対話モデルに進むと、Builderを使うかどうかの選択を迫られる。
(まだBATA扱いなので選択可能だが、今後はこちらが標準となるかもしれない。)
今回はBuilderを使って作成する。

Builderを開くと、いきなりUIが変わり初めは面食らうが、、そのうち慣れるので気にしない。

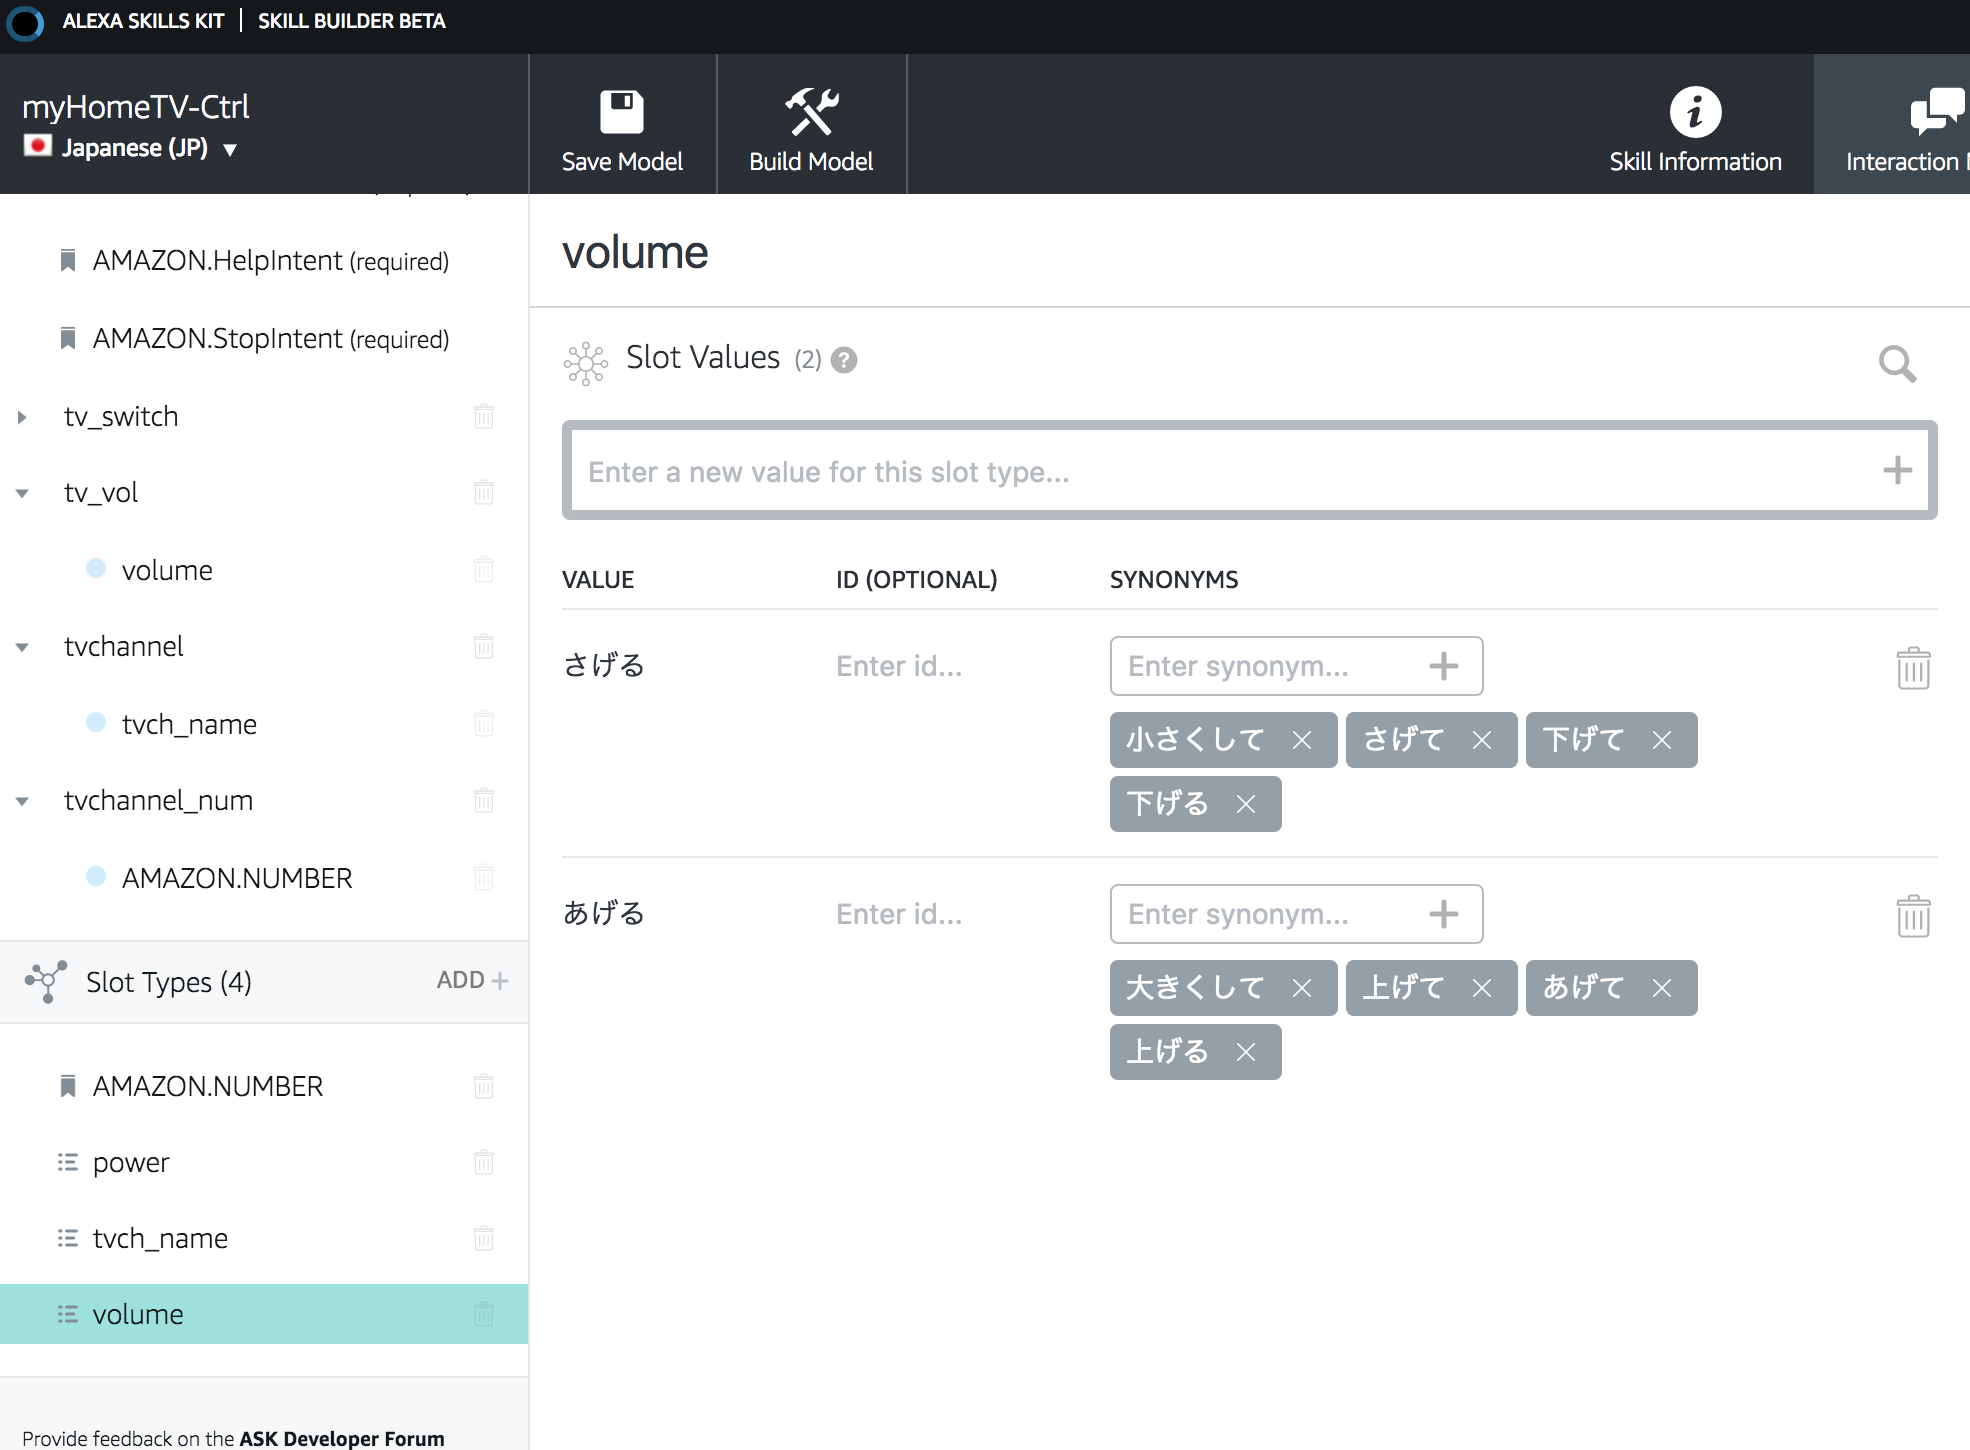
slotの追加
slotとはAlexaから、Lambda側に引き渡す際の変数定義、のようなもの。
電源のオフ、オンであれば、
電源を(オフ / オン) の ()の部分を変数として定義して、Lambda側での処理に利用する。
ここでは
slot : power
として定義。

また、power に想定されるvalue=値(この場合文言)を定義しておく。
ちなみに、SYNONYMSとは類義語?のようなもので、同じ意味合いの別単語を登録しておくと良いらしい。(、、ただ、私自身まだよくわかってない、、)

Intentsの追加
次にIntentsの追加。ドキュメントによれば
インテントとは、ユーザーの音声によるリクエストを満たすアクション
とのこと。
Alexaの入力と、LambdaへのSlot引き渡しの架け橋、のような位置付けのものと考えていいかと。
動作毎に1インテントを作成するとまとまりが良い。
電源 = tv_switch
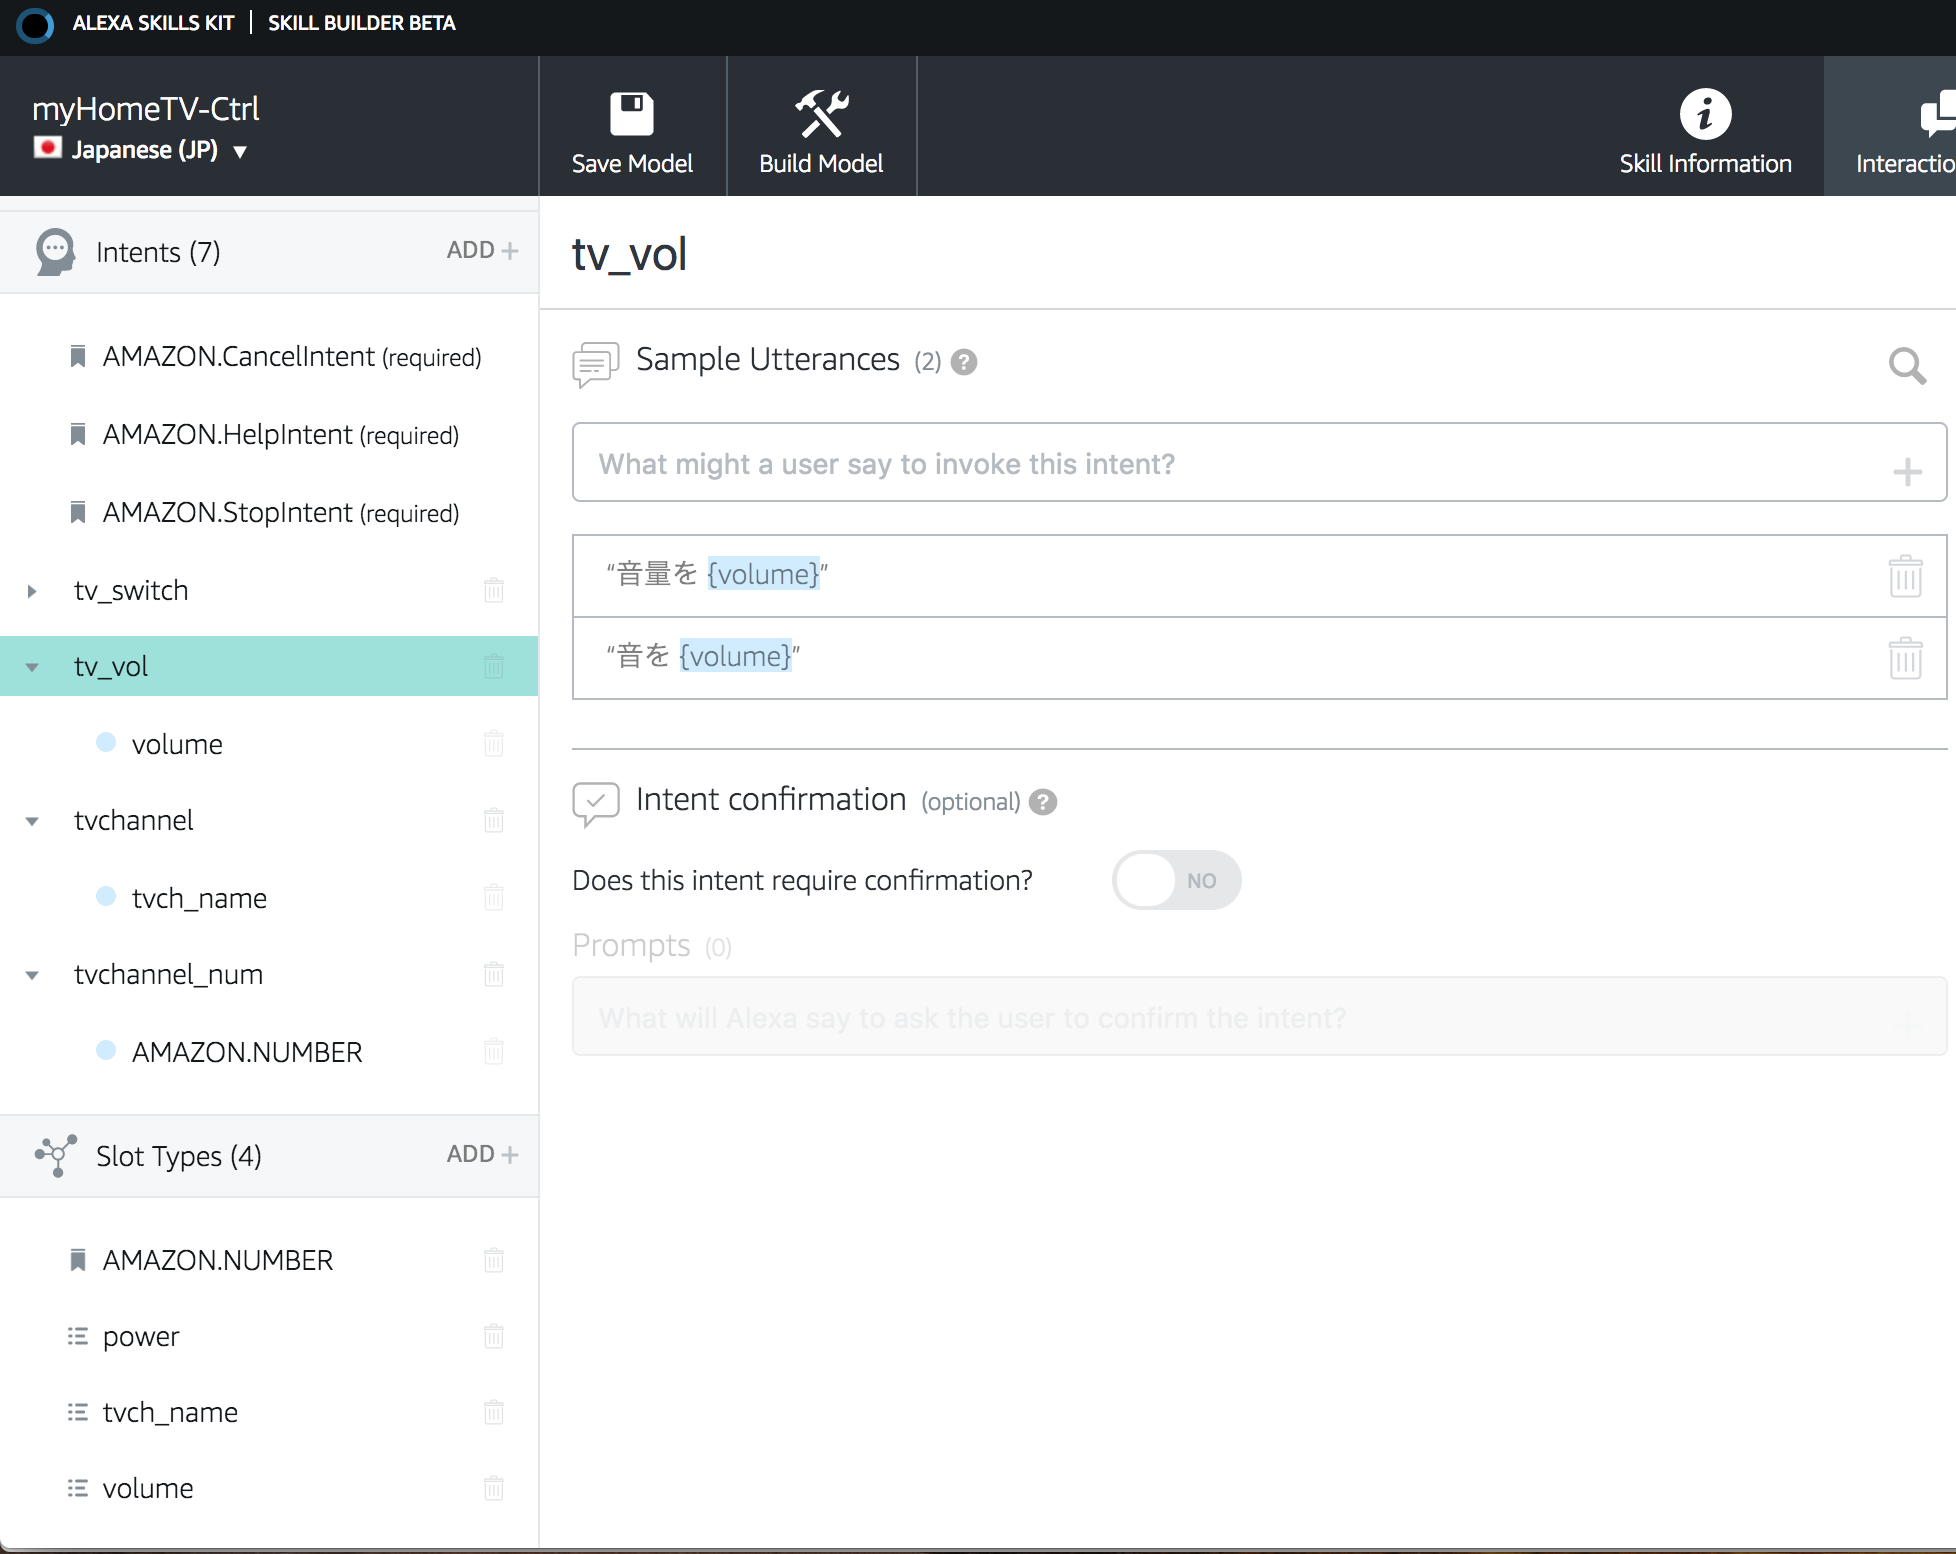
音量 = tv_vol
局名指定 = tvch_name
など。

Sample Utterances = サンプル発話集の定義。
想定される発話フレーズセットを登録する。
不特定多数の人向けのSkillなら想像つく限りのフレーズを入れるんだろうけど、今回の用途だとあくまで個人利用前提なので、自身が話しかける予定のフレーズセット登録のみとする。
電源の場合のサンプル発話は
- 電源を {power} = (つけて・オンにして)
のみ。
ちなみに、フレーズとSlotの間にスペースを入れないと、Build Modelで失敗するので、注意。
上記の場合は「電源を」 と「 {power} 」の間。
(私はこれで悩んだ。。)

作成したインテントに関連付けたSlotの「Slot Type」を、指定したものに合わせる。
ここも指定し忘れると、Save自体で失敗するので注意。

以上の要領で、同様に音量up/downの動作セットのIntentも登録。
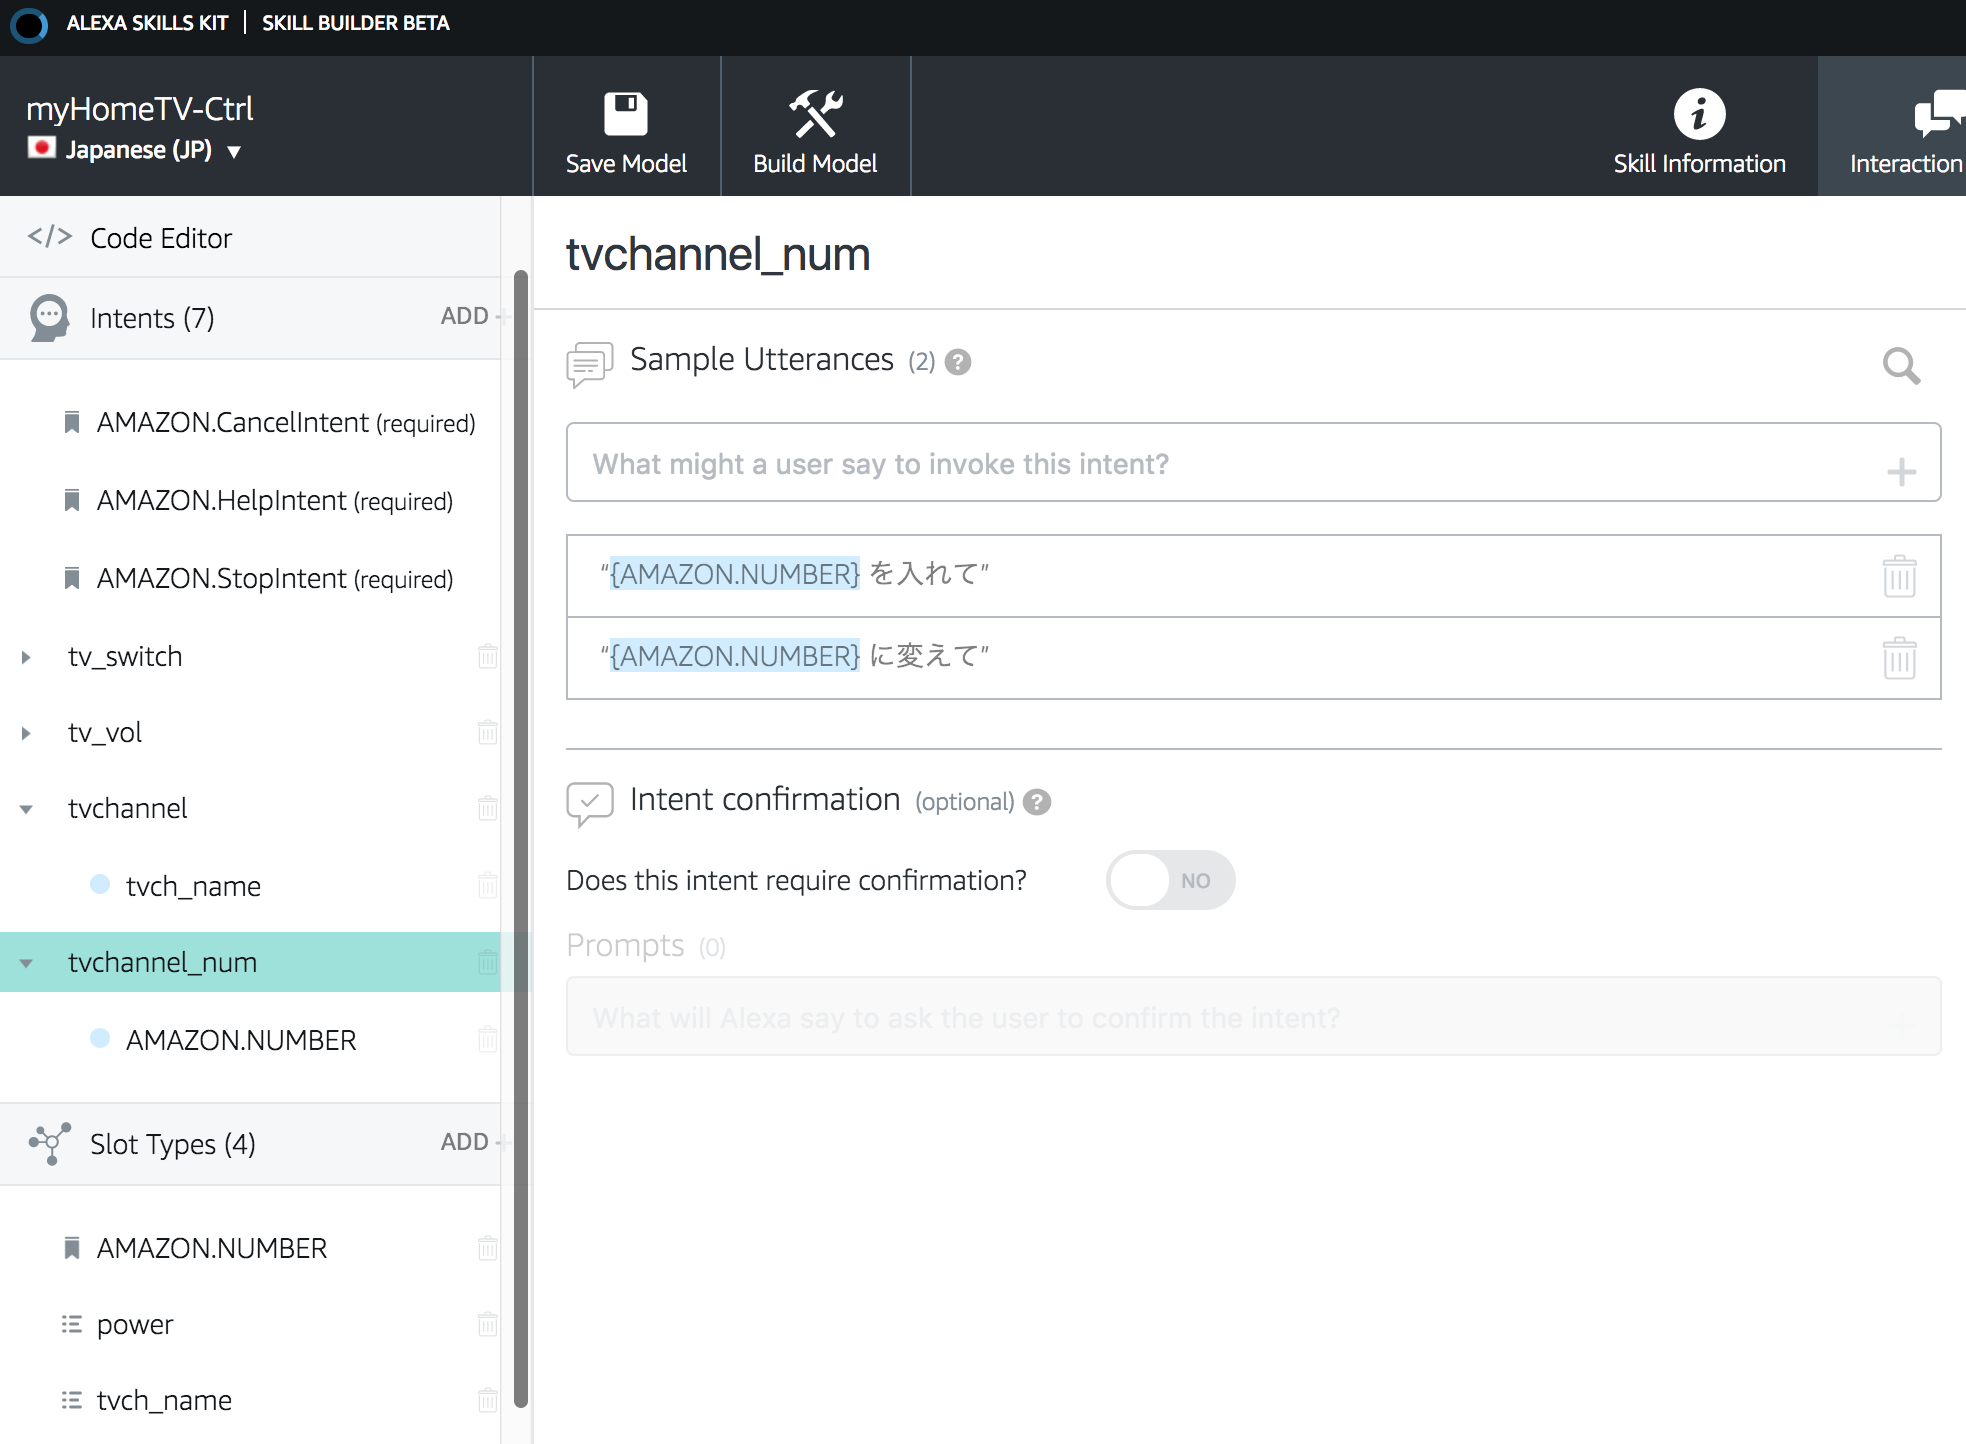
channelは、
局名(フジテレビ・日テレ・テレ朝、など)で呼ぶ場合と、チャンネル数(8,4,5,6など)で呼ぶ場合があるので、Slotをそれぞれ分ける。
スロット名では各局の呼び名を一通り入力。
ちなみに、TBS/NHKなど大文字で入れているが、Lambdaと連携される際には、英小文字になっているのでLambada側での条件分岐の際には注意。

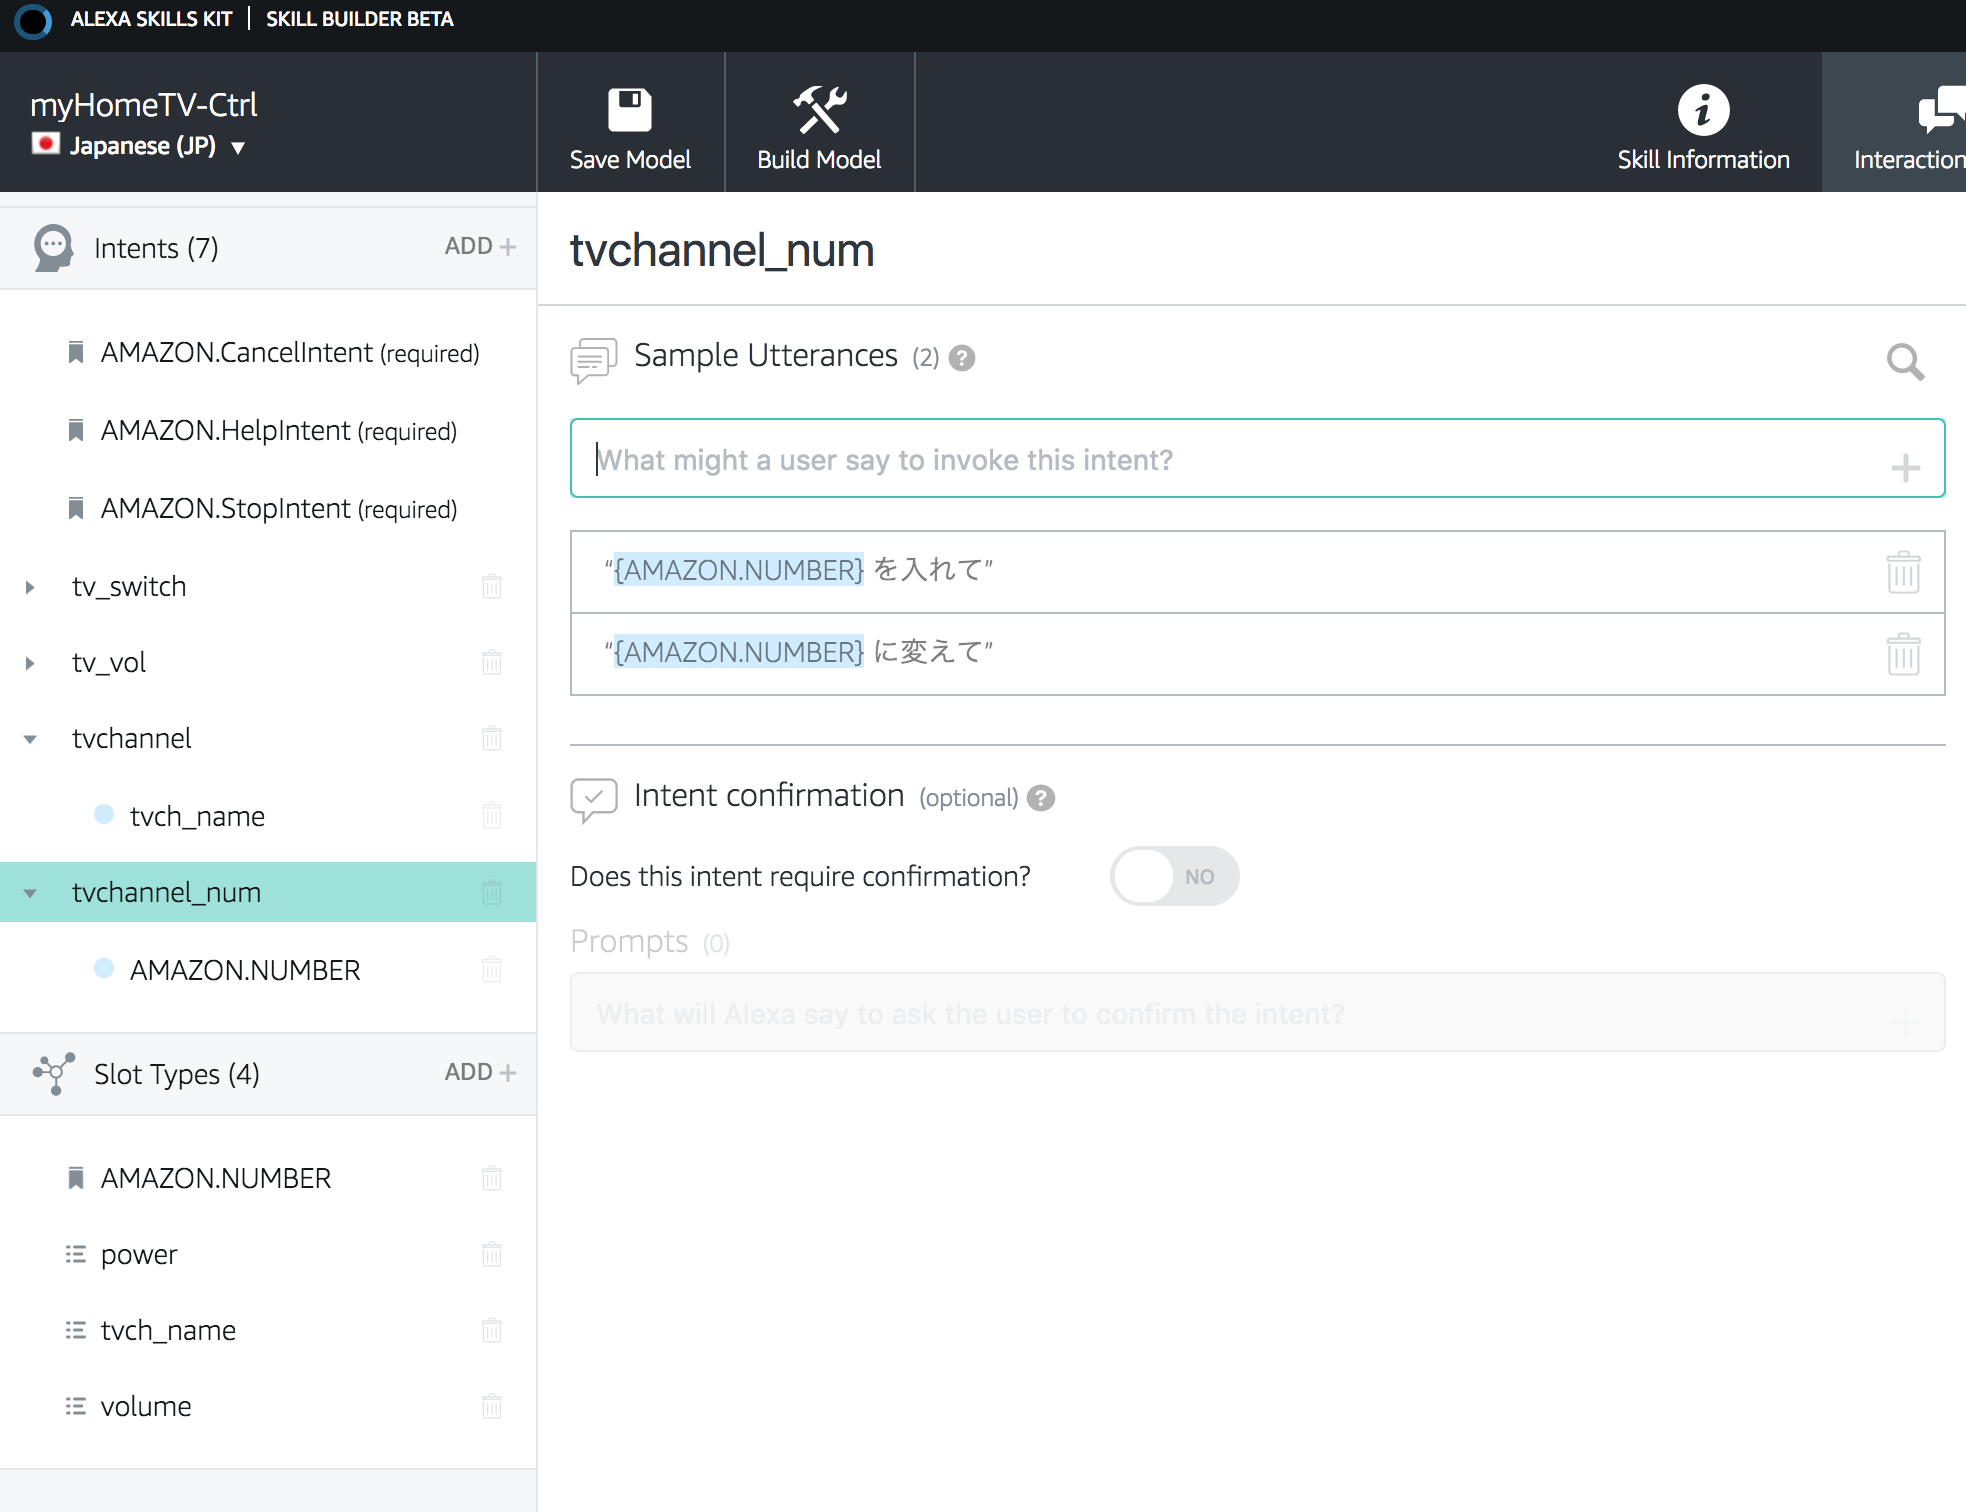
単純な数などの場合は、標準提供されているSlot集のうち、AMAZON.NUMBERを利用すると、多少楽。
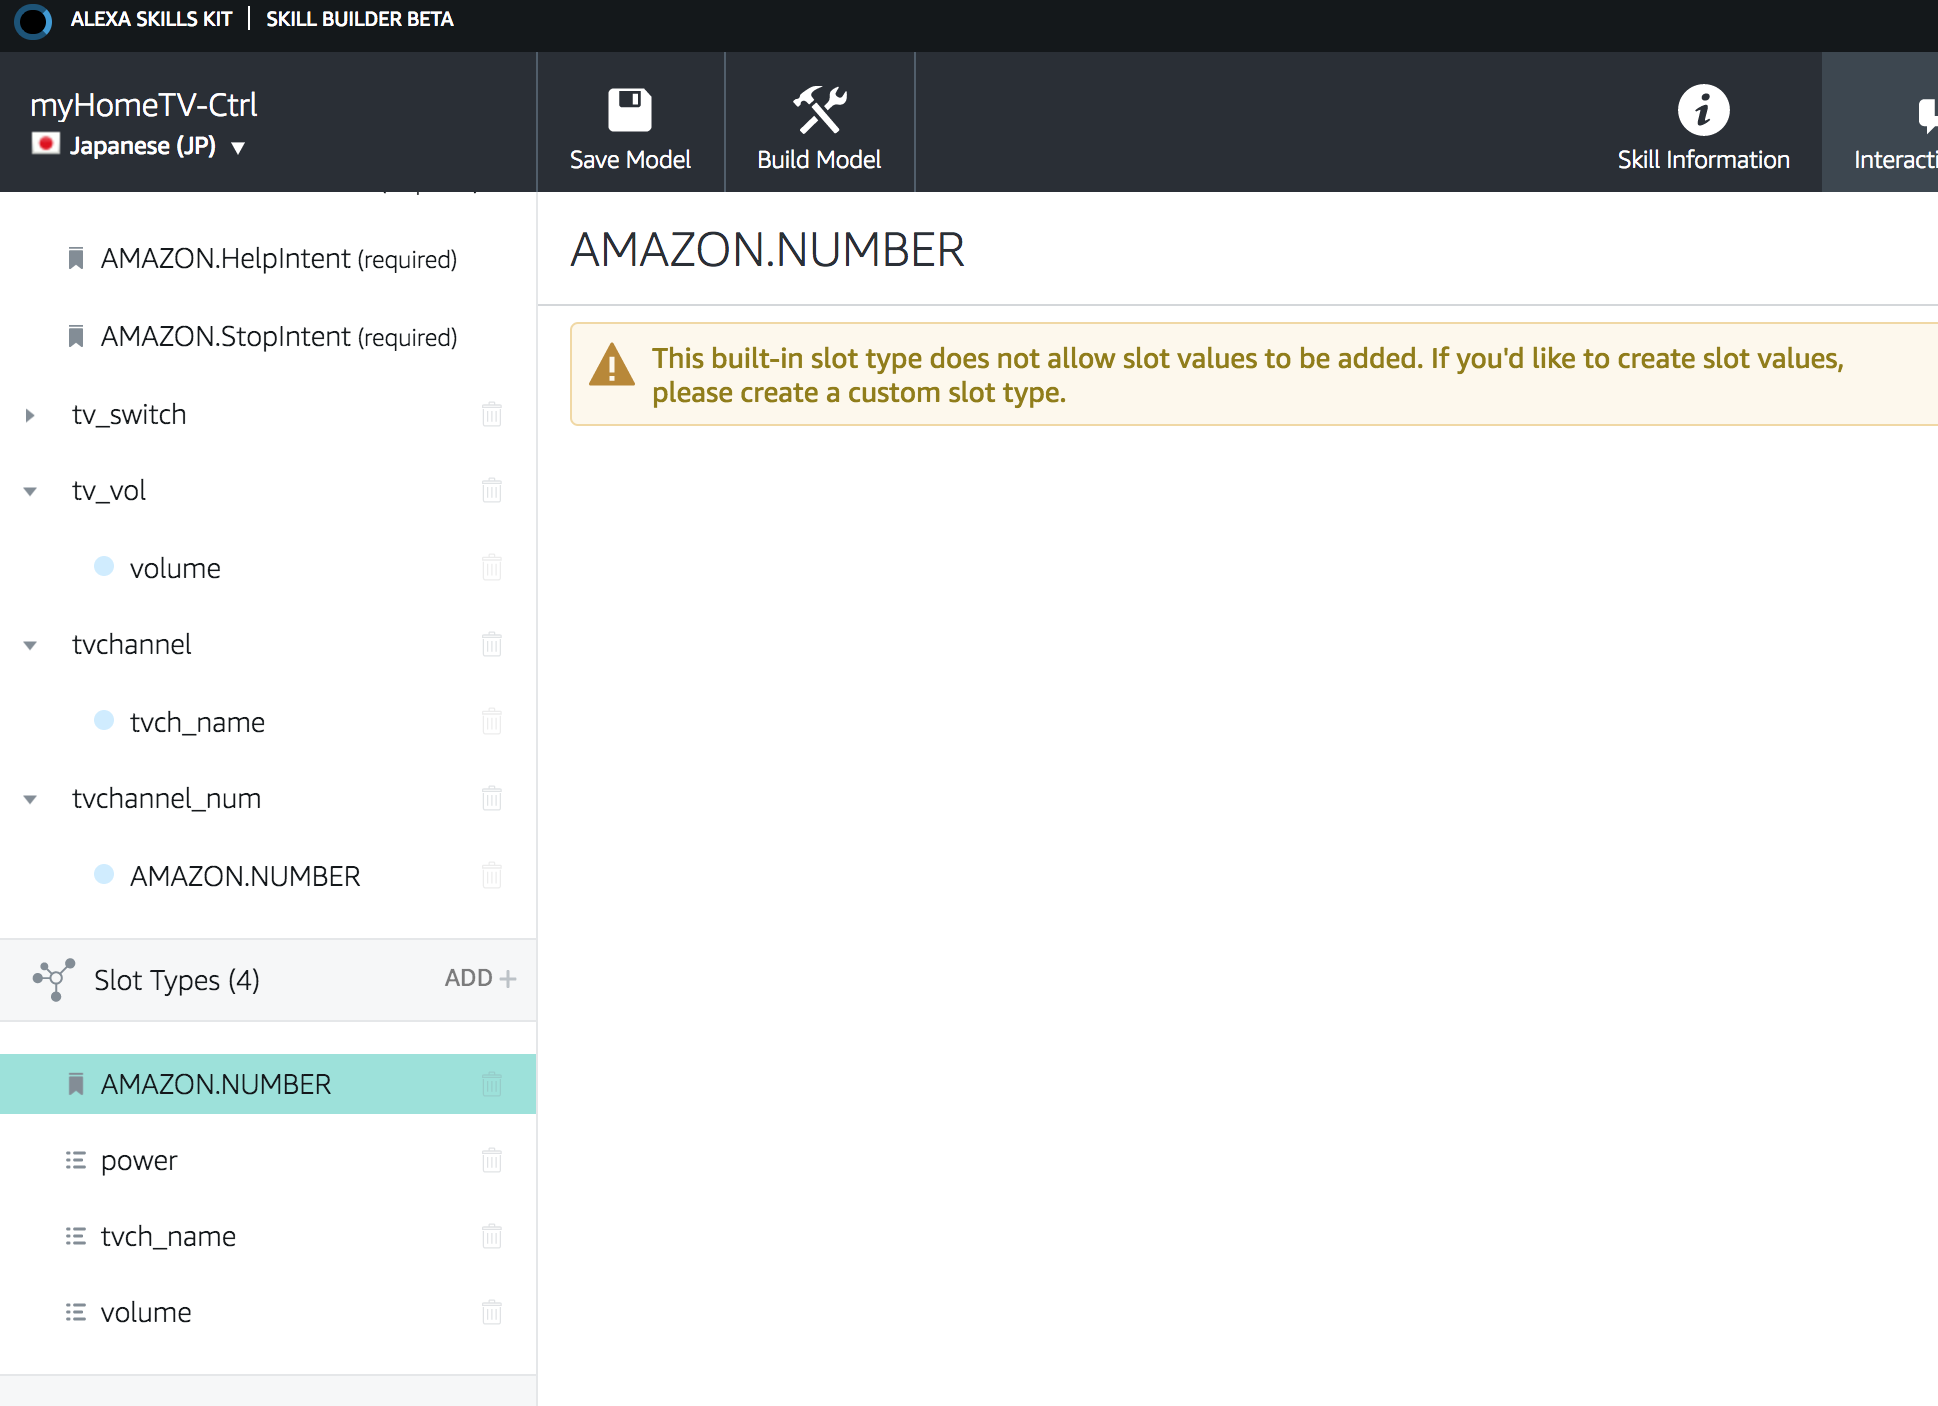
インテント・スロットの設定が一通り完了したら、「Save Model」して、問題なければ、「Build Model」を行う。
この後設定を替えるたびにSave/Buildを実施する必要がある。


これでビルダーでの作業は終了。
3 AlexaSkill用 Lambda関数の作成
3.1 Lambdaの作成
2017/11現在、日本語(Japanise)対応のLambdaを設置するリージョンとしては、**オレゴン(us-west-2)**が指定されているので、Lambdaはオレゴンにて作成する。
関数名 : myHomePi-Tv-ctrl
言語 : Python2.7
IAMPolycy : LambdaデフォルトのIAM権限+AWSIoTDataAccess
mem : 128NB
Timeout : 30s
基本的にはAWS Lambdaのブループリント(テンプレート) alexa-skills-kit-color-expert-python をベースにして作成。
ただ、今回は単純なデバイス操作のため、セッション維持は利用せず、単純に1回の応答処理のみを想定しているので、テンプレートの様なAlexaとの会話を想定している訳ではないので、比較的シンプルになっているかも。
# coding: UTF-8

from __future__ import print_function
import json
import boto3

ThingName = "myHomePi"

### Alexaへのresponse用jsonの組み立て関数
def build_speechlet_response(title, output, reprompt_text, should_end_session):
    return {
        'outputSpeech': {
            'type': 'PlainText',
            'text': output
        },
        'card': {
            'type': 'Simple',
            'title': "SessionSpeechlet - " + title,
            'content': "SessionSpeechlet - " + output
        },
        'reprompt': {
            'outputSpeech': {
                'type': 'PlainText',
                'text': reprompt_text
            }
        },
        'shouldEndSession': should_end_session
    }

### Alexaへのresponse用関数
def build_response(session_attributes, speechlet_response):
    return {
        'version': '1.0',
        'sessionAttributes': session_attributes,
        'response': speechlet_response
    }

### Alexa LaunchRequest時のレスポンス用関数
def get_welcome_response():
    """ If we wanted to initialize the session to have some attributes we could
    add those here
    """

    session_attributes = {}
    card_title = "TVリモコン"
    speech_output = "ご命令を"
    # If the user either does not reply to the welcome message or says something
    # that is not understood, they will be prompted again with this text.
    reprompt_text = "やってほしいリモコン操作を教えてください " \
                    "電源をつけて"
    should_end_session = False
    return build_response(session_attributes, build_speechlet_response(
        card_title, speech_output, reprompt_text, should_end_session))

### Alexa LaunchRequest時のレスポンス用関数
def on_launch(launch_request):
    """ Called when the user launches the skill without specifying what they
    want
    """

    print("on_launch requestId=" + launch_request['requestId'])
    # Dispatch to your skill's launch
    return get_welcome_response()


### 聞き取れなかった場合の返答用スピーチセット
def retry_voice():
    response = {
        'version': '1.0',
        'response': {
            'outputSpeech': {
                'type': 'PlainText',
                'text':  "よく分かりません、もう一回言って。",
            }
        }
    }
    return response;

### コマンド完了後の返答用スピーチセット
def return_voice(state):
    response = {
        'version': '1.0',
        'response': {
            'outputSpeech': {
                'type': 'PlainText',
                'text':  state + "にしました",
            }
        }
    }
    return response;


### AWS IoTデバイスのシャドウ変更用関数
def send_command(command):

    iot_client = boto3.client('iot-data', region_name='ap-northeast-1')

    result = iot_client.get_thing_shadow(
        thingName = ThingName
        )
    result_dict = json.loads(result['payload'].read())

    if ( result_dict["state"]["desired"][command] == 0 ):
        shadow = {
            'state': {
                'desired': {
                    command: 1
                }
            }
        }
        payload = json.dumps(shadow)
    else:
        shadow = {
            'state': {
                'desired': {
                    command: 0
                }
            }
        }
        payload = json.dumps(shadow)

    response = iot_client.update_thing_shadow(
        thingName = ThingName,
        payload = payload
    )
    return True

### TV電源操作用関数
def power_command(power):

    print(power)

    if(power == "つけて" or power =="オンにして" ):
       send_command("tv_on")
       print("TV power on!" )
       return return_voice("電源をオン")

    elif(power == "消して" or power =="オフにして" ):
       send_command("tv_off")
       print("TV power off!" )
       return return_voice("電源をオフ")

    else:
        print("Not Command")
        return retry_voice()

### TVボリューム操作用関数
def vol_command(volume):

    print(volume)

    if(volume == "大きくして" or volume =="上げて" or volume == "あげて" ):
       send_command("volup")
       print("TV volume up!" )
       return return_voice("ボリュームアップ")

    elif(volume == "小さくして" or volume =="下げて" or volume == "さげて" ):
       send_command("voldown")
       print("TV volume down!" )
       return return_voice("ボリュームダウン")

    else:
        print("Not Command")
        return retry_voice()

### TVチャンネル操作用関数
def channel_command(tvch):

    if(tvch == "フジテレビ" or tvch == "フジ" or tvch =="8"):
       send_command("ch8")
       print("change channel to " + tvch )
       return return_voice("フジテレビ")

    elif(tvch == "日テレ" or tvch =="4"):
       send_command("ch4")
       print("change channel to " + tvch )
       return return_voice("日テレ")

    elif(tvch == "tbs" or tvch == "ティービーエス" or tvch =="6"):
       send_command("ch6")
       print("change channel to " + tvch )
       return return_voice("TBS")

    elif(tvch == "テレビ朝日" or tvch == "テレ朝" or tvch =="5"):
       send_command("ch5")
       print("change channel to " + tvch )
       return return_voice("テレ朝")

    elif(tvch == "テレビ東京" or tvch == "テレ東" or tvch =="7"):
       send_command("ch5")
       print("change channel to " + tvch )
       return return_voice("テレ東")

    elif(tvch == "nhk" or tvch == "エヌエチケー" or tvch =="1"):
       send_command("ch1")
       print("change channel to " + tvch )
       return return_voice("NHK")

    else:
        print("Not Command")
        return retry_voice()

### インテント処理関数
def on_intent(intent_request):
    print(intent_request)

    intent = intent_request['intent']
    intent_name = intent_request['intent']['name']

    if intent_name == "tv_switch" :

        if  str(intent_request['intent']['slots'].get('power')) != "None" :
            print("Chanege TV power.")

            if str(intent_request['intent']['slots']['power'].get('value')) != "None":
                power = str(intent_request['intent']['slots']['power']['value'])
                response = power_command(power)
                return response
            else:
                print("Dont't Tv ctrl.")
                response = retry_voice()
                return response

    elif intent_name == "tv_vol" :

        if  str(intent_request['intent']['slots'].get('volume')) != "None" :
            print("Chanege TV volume.")

            if str(intent_request['intent']['slots']['volume'].get('value')) != "None":
                volume = str(intent_request['intent']['slots']['volume']['value'])
                response = vol_command(volume)
                return response
            else:
                print("Dont't Tv ctrl.")
                response = retry_voice()
                return response

    elif intent_name == "tvchannel" or intent_name =="tvchannel_num" :

        if  str(intent_request['intent']['slots'].get('AMAZON.NUMBER')) != "None" :
            print("Chanege TV channel.")

            if str(intent_request['intent']['slots']['AMAZON.NUMBER'].get('value')) != "None":
                tvch = str(intent_request['intent']['slots']['AMAZON.NUMBER']['value'])
                response = channel_command(tvch)
                return response
            else:
                print("Dont't Tv ctrl.")
                response = retry_voice()
                return response

        elif str(intent_request['intent']['slots'].get('tvch_name')) != "None" :
            print("Change TV channel.")

            if str(intent_request['intent']['slots']['tvch_name'].get('value')) != "None":
                tvch = str(intent_request['intent']['slots']['tvch_name']['value'])
                response = channel_command(tvch)
                return response
            else:
                print("Dont't Tv ctrl.")
                response = retry_voice()
                return response

### メイン処理
def lambda_handler(event, context):
    if event['request']['type'] == "LaunchRequest":
        return on_launch(event['request'])
    elif event['request']['type'] == "IntentRequest":
        return on_intent(event['request'])
ザックリとした処理内容
- AlexaからSkill呼び出し司令=「テレビリモコンを開いて」が発生したら、Lambdaに対して、LaunchRequestが発生。
- LambdaはlaunchRequestの場合は、セッション開始応答と、初回スピーチ内容のjsonを返答する。
- テレビリモコンのスキルが開始したら「ご命令を」と言って、待機状態になる
- ユーザからの発話の種類に応じて、Alexaスキル側でインテントを選択。
- 電源のオフオン or 音量up/down or チャンネルの変更 のインテントを判定
- Lambda側は各インテント毎に処理を分けて、それぞれで正常処理、エラーハンドリングを行い、結果セットを返す。
- 正常にIoT処理を行なった場合は、〇〇しました、というスピーチセットを返す。指示文言が不明で処理が実行できなかった場合は「もう一度最初から指示してください」というスピーチセットを返し、ユーザにやり直しさせる。
3.2 Lambda ARNを AlexaSkillに登録
登録したLambdaのARNをメモし、Alexaスキルの「設定」 - グローバルフィールドのデフォルトエンドポイントに入力する。

3.3 Alexa - Lambda間の動作テスト
「テスト」にて、実際にAlexaを経由せずに、ブラウザ上でシミュレーションをすることが可能。
以下の例は、
「電源をつけて」
と発話した場合の応答結果が、どの様にLambdaから返ってくるかを確認している例。
この際にLambda側でエラーが発生し正常処理されないと、レスポンスは返ってこない。
その場合は、通常のLambda関数開発同様にLambdaのエラーログをCloudWatchLogで適宜確認しながらデバックしていく。

ここで想定する文言を全て確認しておく。
3.4 テスト公開準備
以上で、一通りのSkill設定は完了だが、実際にAmazon EchoなどAlexa端末で利用する為には、
公開情報を入力し、「Skill Bata Testing」をアクティブにする必要がある。
まずは公開情報のフィールドに全て入力する。


画像アイコンはとりあえず、指定されたpixel数の画像を用意しておくこと。
プライバシー・コンプライアンス設定を適宜行う。

13際未満の子供を対象としている、に「はい」とすると、、テストできないので注意。。
取り急ぎ、会社ロゴ入れたけど、なんの機能だか一目じゃわからないことこの上ないので、
ちゃんとTVリモコンアイコンを入れればよかった。
4 Skillテスト公開
これで以下の通り、今までグレーアウトされていた、スキルの「ベータテスト」が選択可能になっているはず。

公開をクリック。
4.1 Skillテスト招待
動かしたいAlexaが登録されているアカウントへ招待メールを送付する。

招待メールが、
「You're invited to beta test a new Alexa skill」というサブジェクトでメールが届くので、その中のリンク、
「JP Customers: To get started.」 のリンクをクリックする。


以上で、テスト公開完了。
招待したユーザが管理しているAlexa端末から該当のSkillが使える。
ちなみにテスト中はステータスがアクティブとなる。

5 AlexaでSkill実行
これでAlexa側Skill実装も完了しているので、一通りの準備内容を確認
- RaspberryPiの赤外線送信準備が整っていること(lircdが稼働していること)
pi@raspberrypi:~ $ sudo /etc/init.d/lircd start
[ ok ] Starting lircd (via systemctl): lircd.service.
- AWSIoTにデバイス登録が完了している。
- RaspberryPiでAWSIoTとの連携プログラム(Tv.py)がバックグラウンドで稼働していること
pi@raspberrypi:~/python_aws_iot $ python Tv.py
start readConfig func
start connct shadow
shadow connect
satrt subscribe shadow
実際にAlexaから操作した際の実行例
ユーザー:アレクサ、テレビリモコンを開いて。
カスタムスキル発動
アレクサ: 「ご命令を。」
ユーザー: 電源をつけて。
TVが付く
アレクサ:「はい、電源をつけました。」
ユーザー: アレクサ、テレビリモコンを開いて。
アレクサ: 「ご命令を」
ユーザー: フジテレビに変えて。
フジテレビに変わる
アレクサ: はい。
アレクサ: 「フジテレビに変えました。」
サンプル動画置いてみました。
Qiita Alexaテレビリモコンへの道 サンプル動画https://t.co/anZofswru3
— toguma (@ogmtkc) 2017年12月3日
雑感
実際、動くとかなり感動。
結果、自分が、というか子供が大喜びで使ってる。
リモコンがすぐそこにもあるのに、わざわざAlexaに声をかける始末w
デバイスからの準備はなかなか大変だけど、やってみる価値はある。
しかもAlexa端末と、RaspberryPiさえあれば、他、部品代は数百円で、理論的には家中のリモコン操作可能な製品は、Alexa操作が可能になる。
利用方法によっては、夢の広がる技術であることがわかる。
今回はその一端が感じられることが出来たので、とても有意義だった。
今後も改善して行くので、改善ごは追記して行こうかなと。
