cypressをCircleCIで動かす際に苦戦したことを自分なりにまとめていきます。
前提
Cypressとは、Reactなどのアプリで使えるE2Eテストのためのフレームワークです。
RailsではCapybaraなどのgemを用いてSystemSpecを書いていたと思いますが、ReactアプリではCapybaraが使えないのでCypressを用いてE2Eテストを行います。
実務に入って2ヶ月目にして初めて触った技術だったので慣れないところもありましたが今は割と好きな技術です。
開発環境
以下の環境でCypressを動かします。ついでにESlintも動かします。
- React 17.0.2
- typescript 3.9.7
- cypress 7.7.0
- eslint 7.30.0
ディレクトリ構成
今回、開発にあたって以下のようなディレクトリ構成にしました。
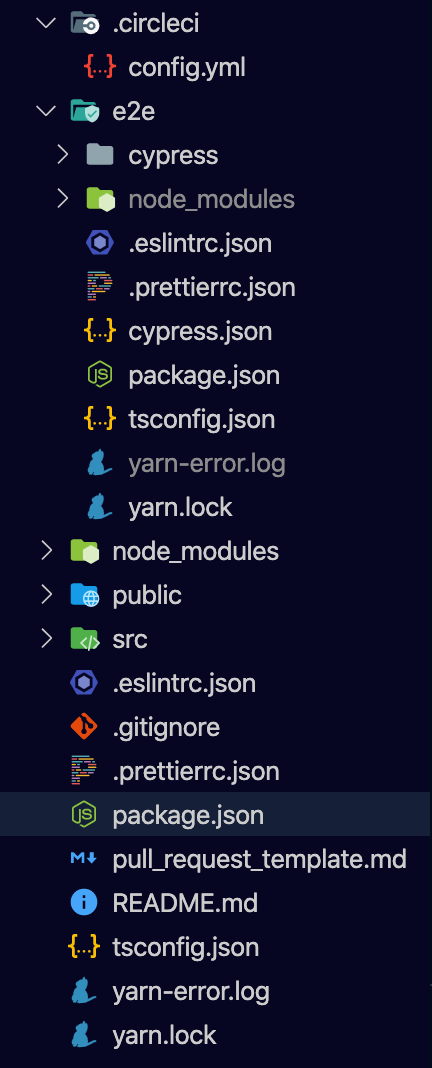
package.jsonが2つあるのがポイントです。これはdev環境でのビルド時にcypressを読み込まないようにするために
このような構成になっています。ところがこれがCIを組む上でちょっとめんどくさいことになりました。。。
結論
最初に答えから言ってしまうと、以下のようなconfig.ymlを用意しました。
version: 2.1

# CiecleCIでCypressを動かすためのorbs
orbs:
  cypress: cypress-io/cypress@1.28.0

# 実行環境の設定。実際にはjobs内で呼び出すことで利用できる
# cypressを動かすには通常とは異なるdocker imageが必要なのでexecuterも2つにした
executors:
  default:
    working_directory: ~/repo
    environment:
      ## 実行結果に色を付ける
      TERM: xterm
    docker:
      - image: circleci/node
        environment:
          TZ: Asia/Tokyo
  cypress:
    working_directory: ~/repo
    environment:
      ## 実行結果に色を付ける
      TERM: xterm
    docker:
      - image: cypress/base:14.16.0
        environment:
          TZ: Asia/Tokyo

# 各コマンドに名前をつける。&以下の部分が名前になり、「*名前」の形式で呼び出せる
references:
  cache_key: &cache_key v1-dependencies-{{ checksum "yarn.lock" }}
  save_node_modules: &save_node_modules
    save_cache:
      paths:
        - node_modules
      key: *cache_key
  restore_node_modules: &restore_node_modules
    restore_cache:
      keys:
        - *cache_key
        - v1-dependencies

# e2eとアプリケーションで別々のpackage管理を行うため、コマンドを2つ用意
  cache_key_e2e: &cache_key_e2e v1-dependencies-{{ checksum "e2e/yarn.lock" }}
  save_node_modules_e2e: &save_node_modules_e2e
    save_cache:
      paths:
        - e2e/node_modules
      key: *cache_key_e2e
  restore_node_modules_e2e: &restore_node_modules_e2e
    restore_cache:
      keys:
        - *cache_key_e2e
        - v1-dependencies

jobs:
  # 環境の設定
  setup:
    executor:
      name: default
    steps:
      - checkout
      - *restore_node_modules
      - run:
          name: Install dependencies
          command: yarn install
      - *save_node_modules
  # eslintの実行
  lint:
    executor:
      name: default
    steps:
      - checkout
      - *restore_node_modules
      # eslint→prettierの順に実行
      - run:
          name: Run lint
          command: yarn run fix

  # e2e環境のセットアップ
  setup_e2e:
    executor:
      name: cypress
    steps:
      - checkout
      - *restore_node_modules_e2e
      - run:
          name: Install dependencies
          command: yarn install --frozen-lockfile
          working_directory: e2e
      - *save_node_modules_e2e
      - *restore_node_modules
      - run:
          name: Install dependencies
          command: yarn install
      - *save_node_modules
  # e2e環境でlintを実行
  lint_e2e:
    executor:
      name: cypress
    steps:
      - checkout
      - *restore_node_modules_e2e
      - run:
          name: Run lint
          command: yarn run fix
          working_directory: e2e


workflows:
  lint:
    jobs:
      - setup
      - lint:
          requires:
            - setup
  e2e:
    jobs:
      - setup_e2e
      - lint_e2e
      # cypressのセットアップ。working_directoryでリポジトリ直下からe2eディレクトリに移動
      - cypress/install:
          requires:
            - lint_e2e
          working_directory: e2e
          yarn: true
      # cypress実行。ディレクトリを分けた関係でstartコマンドが複雑になった。
      # cd .. && yarn install && yarn startを実行してからcypressを走らせる
      - cypress/run:
          yarn: true
          requires:
            - cypress/install
          start: 'yarn run dev:start'
          record: true
          group: 'all tests' # name this group "all tests" on the dashboard
          wait-on: 'http://localhost:3000'
          working_directory: e2e
package.jsonには以下のようなカスタムコマンドを組んでます。
- プロジェクトルート
"scripts": {
  "start": "react-scripts start",
  "build": "react-scripts build",
  "test": "react-scripts test",
  "eject": "react-scripts eject",
  "eslint:fix": "eslint . --ext .js,.ts,.jsx,.tsx --fix",
  "prettier:fix": "prettier --write .",
  "fix": "yarn run eslint:fix && npm run prettier:fix"
},
- e2e
"scripts": {
  "cy:open": "cypress open",
  "cy:run:chrome": "cypress run --browser chrome",
  "dev:start": "cd .. && yarn install && yarn start",
  "eslint:fix": "eslint . --ext .spec.js,.spec.ts --fix",
  "prettier:fix": "prettier --write .",
  "fix": "yarn run eslint:fix && yarn run prettier:fix"
},
yarn run fix、でeslintとprettierを動かします。
また、e2eディレクトリでyarn run dev:startを叩くことでDevserverを起動します。
ディレクトリ分けているせいでいろいろめんどくさくなってしまってますね…
苦労したところ
やっぱりディレクトリ分けたせいでconfig.ymlは長いしpackage.jsonも2つあって管理がめんどくさいという点でした。
ディレクトリを分ける場合、微妙にconfig.ymlの記述を変える必要があります。
depeciencies系
# e2eとアプリケーションで別々のpackage管理を行うため、コマンドを2つ用意
  cache_key_e2e: &cache_key_e2e v1-dependencies-{{ checksum "e2e/yarn.lock" }}
  save_node_modules_e2e: &save_node_modules_e2e
    save_cache:
      paths:
        - e2e/node_modules
      key: *cache_key_e2e
  restore_node_modules_e2e: &restore_node_modules_e2e
    restore_cache:
      keys:
        - *cache_key_e2e
        - v1-dependencies
まず、yarn installを動かす箇所ですが、checksumのパスを指定する必要があります。
ここに書くパスは上の方に書いた
  cypress:
    working_directory: ~/repo
    environment:
      ## 実行結果に色を付ける
      TERM: xterm
    docker:
      - image: cypress/base:14.16.0
        environment:
          TZ: Asia/Tokyo
executerのworking_directoryを基準に相対パスで書きます。これ以降もパス指定の方法は同じです。
save_cacheのpathオプションも変えてあげてください。
jobsのrunコマンド
runでコマンドを指定する場合には
  # e2e環境でlintを実行
  lint_e2e:
    executor:
      name: cypress
    steps:
      - checkout
      - *restore_node_modules_e2e
      - run:
          name: Run lint
          command: yarn run fix
          working_directory: e2e # これ
のようにworking_directoryオプションをつけることで対応可能です。
cypress
cypress公式もworking_directoryオプションを提供しています。
      - cypress/install:
          requires:
            - lint_e2e
          working_directory: e2e
          yarn: true
      # cypress実行。ディレクトリを分けた関係でstartコマンドが複雑になった。
      # cd .. && yarn install && yarn startを実行してからcypressを走らせる
      - cypress/run:
          yarn: true
          requires:
            - cypress/install
          start: 'yarn run dev:start'
          record: true
          group: 'all tests' # name this group "all tests" on the dashboard
          wait-on: 'http://localhost:3000'
          working_directory: e2e
この辺がcypressのセットアップと実行ですが、working_directoryオプションを指定してます。
ここで重要なのが、cypressを動かすためにはdev serverが起動している必要があるということです。
dev serverを起動するコマンドはcypress/runのstartオプションで指定するのですが、今回ディレクトリを分けたことで
yarn startだけでは動きません。よってディレクトリ移動しつつyarn startをやる必要があります。
またCIのworkflowはどうもjobごとに環境が引き継がれないみたいなのでdev server環境のセットアップも同時にやる必要があります。
先程yarn scriptで
"scripts": {
  "dev:start": "cd .. && yarn install && yarn start",
},
こんな感じのクソ長いのが入ってたのはそのためです。もっといいやり方ねーかな…
ちなみに、wait-onオプションはつけとくほうがいいです。これがあるとlocalhost:3000が立ち上がる前に
次の処理が走ってエラーになる、といったことを防げます。
そんなこんなで無事CIが動くようになりました。めでたしめでたし
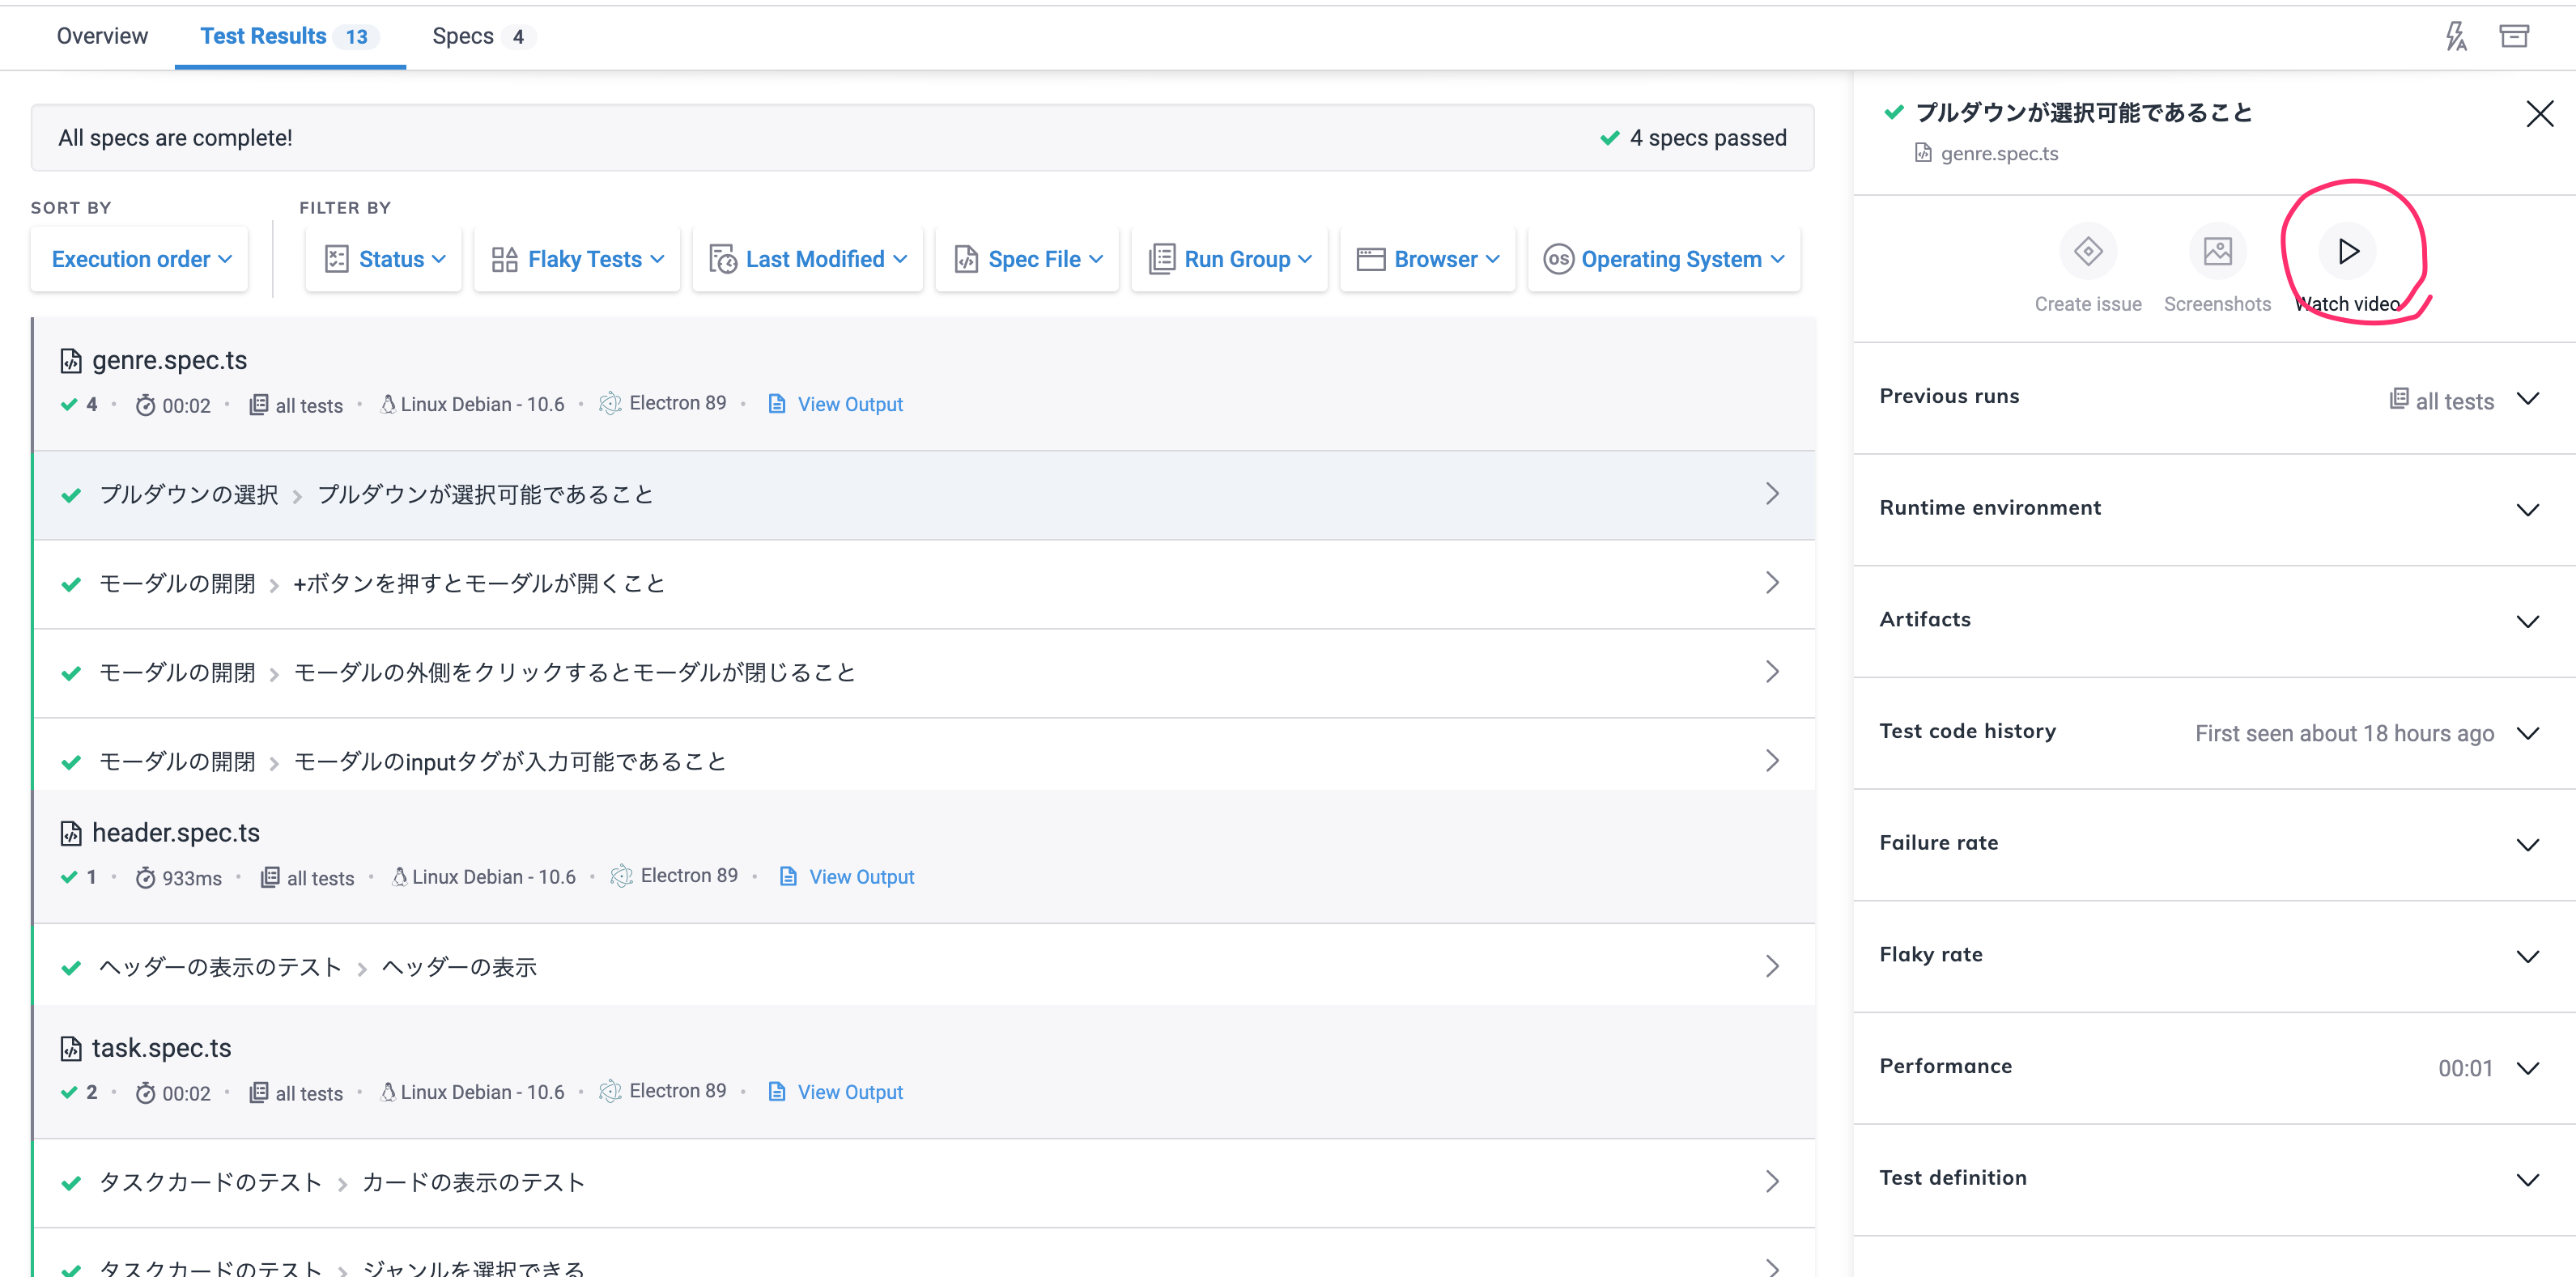
dashboardからテストの結果を見よう
Cypressは便利なもんでdashboardを使ってWEB上でテストの実行結果を見ることができます。それがこんな感じ。
詳しい紹介は省きますが、今回config.ymlでcypress/run実行時に
      # cypress実行。ディレクトリを分けた関係でstartコマンドが複雑になった。
      # cd .. && yarn install && yarn startを実行してからcypressを走らせる
      - cypress/run:
          yarn: true
          requires:
            - cypress/install
          start: 'yarn run dev:start'
          record: true
          group: 'all tests' # name this group "all tests" on the dashboard
          wait-on: 'http://localhost:3000'
          working_directory: e2e
record: trueとしているので、テストの録画も見ることができます。ファイル単位でもexample単位でも見られます。すげぇ
CIでのE2Eテストはいまいちなんでコケたのかがわからない部分があるので録画が見られるのは便利ですよね。
最初見た時感動した。
まとめ
以上でcypressをCircleCIで動かすための設定が完了です。
最初はちょっと苦戦しましたが無事動くようになってよかった。
CIのconfigファイルは一回作ってしまえば割と使いまわしが効くのでやって損はしないと思いました。
コードの改善点などありましたらコメントにてご教示いただけますと幸いです。
最後まで読んでくださった方ありがとうございました。