ある程度の規模のプロジェクトではいつか辛くなるのでjQueryやめましょう。
どう始めればいいかわかりにくいと思うので、ハンズオン用の資料を書きました。
成果物
下記にコード置いてあります。適宜参考にしてください。
https://github.com/togana/tutorial-rails-react
対象者
- Railsがチョットデキル人
- JavaScriptがチョットデキル人
- React興味あってRailsでSSRしたい人
目標
最小限の設定で、 Rails 使いでも気軽に始められる React アプリの基盤を構築できる
叶えられること
- Rails だけど SPA っぽく画面遷移
- SSR
叶えられないこと
- State 管理(厳密にはできるけど今回は対象にしない)
環境構築
brewでいれるなら下記でok。
こだわりがある方はご自由に入れてください。
普通にnodenvとかrbenvとか使ったほうがいいと思う
$ brew install node
$ brew install yarn
$ brew install ruby
$ gem install bundler
ハンズオンスタート
プロジェクト作成
$ mkdir tutorial-rails-react
$ cd tutorial-rails-react
$ bundle init
$ sed -i '' 's/# gem "rails"/gem "rails"/g' Gemfile
$ bundle install --path vendor/bundle -j4

# giboコマンド使ってrailsの良いignoreを用意
# https://www.gitignore.io/api/rails こちらで生成されたファイルを登録でも可
$ gibo rails > .gitignore

# -Bを指定しているのはbundleのディレクトリを指定したいため
# -Tを指定しているのは今回はテストしない && RSpecなどを入れやすくするため
$ bundle exec rails new . -BT
...略...
    conflict  .gitignore
Overwrite /xxx/tutorial-rails-react/.gitignore? (enter "h" for help) [Ynaqdh] n
        skip  .gitignore
    conflict  Gemfile
Overwrite /xxx/tutorial-rails-react/Gemfile? (enter "h" for help) [Ynaqdh] Y
       force  Gemfile
...略...
$ bundle install --path vendor/bundle -j4
パッケージの導入
webpackerの導入
$ echo "gem 'webpacker', '~> 3.0'" >> Gemfile
$ bundle install
$ bundle exec rails webpacker:install
Reactの導入
$ bundle exec rails webpacker:install:react
foremanの導入
$ echo "gem 'foreman'" >> Gemfile
$ bundle install
$ echo -e "rails: bundle exec rails s -p 3000\nwebpack: bin/webpack-dev-server" > Procfile
スキャフォールドで機能実装
$ bundle exec rails g scaffold board title:string message:string
マイグレーション実行
$ bundle exec rails db:migrate
動作確認
$ bundle exec foreman start
http://localhost:3000/boards にアクセスできればok
SSRするためにNodeの住人導入
hypernovaの導入(Rails側)
$ echo "gem 'hypernova'" >> Gemfile
$ bundle install
+ require 'hypernova'
+
class ApplicationController < ActionController::Base
  protect_from_forgery with: :exception
+  around_action :hypernova_render_support
end
+ require 'hypernova'
+ require 'hypernova/plugins/development_mode_plugin'
+
+ Hypernova.add_plugin!(DevelopmentModePlugin.new)
+
Rails.application.configure do
  # Settings specified here will take precedence over those in config/application.rb.
+ # Really basic configuration only consists of the host and the port
+ Hypernova.configure do |config|
+   config.host = "localhost"
+   config.port = 3001
+ end
hypernovaの導入(JavaScript側)
$ yarn add hypernova-react hypernova babel-cli
$ yarn
 {
   "presets": [
-    [
-      "env",
-      {
-        "modules": false,
-        "targets": {
-          "browsers": "> 1%",
-          "uglify": true
-        },
-        "useBuiltIns": true
+    ["env", {
+      "targets": {
+        "node": "current"
       }
-    ],
+    }],
     "react"
   ],
   "plugins": [
$ mkdir node
+ import hypernova from 'hypernova/server';
+ import * as exposed from '../app/javascript/exposeComponents';
+
+ hypernova({
+   devMode: process.env.NODE_ENV !== 'production',
+   getComponent(name) {
+     return exposed[name]
+   },
+   port: 3001
+ });
Reactコンポーネントの実装
コンポーネントの作成
+ import React, { Component } from 'react';
+
+ export default class Table extends Component {
+   render() {
+     return (
+       <div>
+         <table>
+           <thead>
+             <tr>
+               <th>Title</th>
+               <th>Message</th>
+               <th colSpan={3}></th>
+             </tr>
+           </thead>
+           <tbody>
+             {this.props.boards.map((board) => (
+               <tr key={board.id}>
+                 <td>{board.title}</td>
+                 <td>{board.message}</td>
+                 <td><a href={`/boards/${board.id}`}>Show</a></td>
+                 <td><a href={`/boards/${board.id}/edit`}>Edit</a></td>
+                 <td><a data-confirm="Are you sure?" rel="nofollow" data-method="delete" href={`/boards/${board.id}`}>Destroy</a></td>
+               </tr>
+             ))}
+           </tbody>
+         </table>
+       </div>
+     );
+   }
+ }
コンポーネントをviewから呼び出す
+ import { renderReact } from 'hypernova-react';
+ import _Table from './components/Table';
+
+ export const Table = renderReact('Table', _Table);
-/* eslint no-console:0 */
-// This file is automatically compiled by Webpack, along with any other files
-// present in this directory. You're encouraged to place your actual application logic in
-// a relevant structure within app/javascript and only use these pack files to reference
-// that code so it'll be compiled.
-//
-// To reference this file, add <%= javascript_pack_tag 'application' %> to the appropriate
-// layout file, like app/views/layouts/application.html.erb
-
-console.log('Hello World from Webpacker')
+import '../exposeComponents';
  <body>
    <%= yield %>
+     <%= javascript_pack_tag 'application', 'data-turbolinks-track': 'reload' %>
  </body>
</html>
 <h1>Boards</h1>

-<table>
-  <thead>
-    <tr>
-      <th>Title</th>
-      <th>Message</th>
-      <th colspan="3"></th>
-    </tr>
-  </thead>
-
-  <tbody>
-    <% @boards.each do |board| %>
-      <tr>
-        <td><%= board.title %></td>
-        <td><%= board.message %></td>
-        <td><%= link_to 'Show', board %></td>
-        <td><%= link_to 'Edit', edit_board_path(board) %></td>
-        <td><%= link_to 'Destroy', board, method: :delete, data: { confirm: 'Are you sure?' } %></td>
-      </tr>
-    <% end %>
-  </tbody>
-</table>
+<%= render_react_component('Table', { boards: @boards}) %>

 <br>
foremanにhypernova追加
rails: bundle exec rails s -p 3000
webpack: bin/webpack-dev-server
+ hypernova: yarn babel-node node/hypernova.js
動作確認
$ bundle exec foreman start
http://localhost:3000/boards にアクセスして下記のような画面が確認できればOK

New BoardをClickしてデータの登録ができると下記のような画面になります。
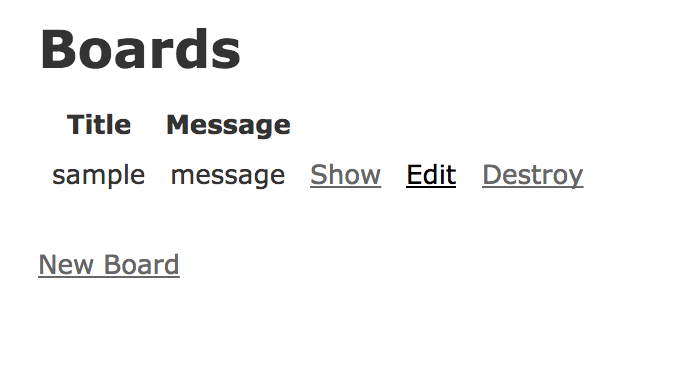
Table周りをコンポーネント化することに成功しました。
発展(状態を持たせる)
検索できるTableコンポーネントにする
import React, { Component } from 'react';

export default class Table extends Component {
+   constructor(props) {
+     super(props);
+     this.state = {
+       filterText: '',
+     };
+   }
+
+   setFilter(filterText){
+     this.setState({ filterText: filterText.target.value.replace(/[-\/\\^$*+?.()|[\]{}]/g, '\\$&') });
+   }
+
  render() {
    return (
      <div>
+         <div>
+           <lbabel>検索</lbabel>
+           <input type='text' onChange={(text) => this.setFilter(text)} />
+         </div>
        <table>
          <thead>
            <tr>
             </tr>
           </thead>
           <tbody>
-            {this.props.boards.map((board) => (
+            {this.props.boards.filter(board => board.title.match(new RegExp(this.state.filterText))).map((board) => (
               <tr key={board.id}>
                 <td>{board.title}</td>
                 <td>{board.message}</td>
bundle exec foreman start を再度実行して結果を確認しましょう。

pm2の導入
コンポーネント書き換えるたびにサーバ再起動してもらいたいので、watchできて本番でもよく使われるpm2導入しました。
$ yarn add -D pm2
+ {
+   "apps" : [{
+     "name": "hypernova",
+     "script": "./node/hypernova.js",
+     "watch": "app/javascript",
+     "interpreter": "./node_modules/.bin/babel-node"
+   }]
+ }
 rails: bundle exec rails s -p 3000
 webpack: bin/webpack-dev-server
-hypernova: yarn babel-node node/hypernova.js
+hypernova: yarn pm2 startOrRestart pm2.json -- --no-daemon
pm2のモニタリング方法
$ yarn pm2 monit
Ctrl-C で foreman を止めてもpm2は別のプロセスになるので消えません。
下記を実行する必要があります。
$ yarn pm2 delete pm2.json
まとめ
かなり少ない設定で、最低限動く Rails + React アプリの基盤になっていると思います。
(turbolinksを使うことでSPAっぽくもなってるので表示速度もそこそこ速い!)
使い方は、作成したコンポーネントを app/javascript/exposeComponents.js に追加して render側で <%= render_react_component('コンポーネント名', Props) %> 呼び出して上げるだけです。
これで dom の更新の多いところ(domが状態を持ってしまって頭がいたい)だけ React 化する運用ができると思います。
また、state 管理にReduxやMobX等を利用したほうが良いですが、詰め込みすぎると混乱すると思うので控えました。