デザインパターンCommand Pattern
今回は6章コマンドパターンをC#で勉強していきます
この章は少しボリュームが多いので中心となる部分を書きます。
レストランでは客、ホール、キッチンという関係があります。客はホールの従業員に注文を、ホールの従業員はキッチンの従業員に料理を伝えます。
サイゼリヤは注文用紙制度を取り入れているためまさにこのコマンドパターンが使えます。
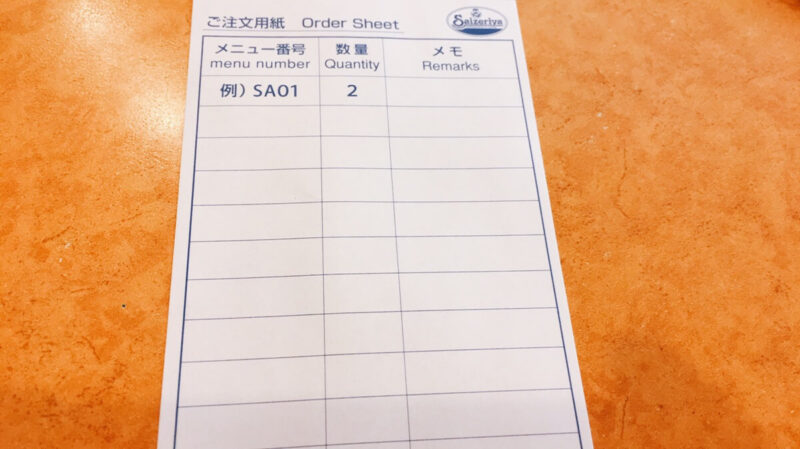
注文用紙の利点はホール従業員が注文内容を知る必要がなく、キッチン従業員が誰であるかを知る必要がなくなります。(実際のお店では注文時に確認されますが)
ホール従業員の仕事は注文用紙を受け取り、その用紙をキッチンへ届けること。
キッチン従業員は注文用紙をもとに料理を作ります。ホールの人がキッチンの特定の人に伝える必要がないので便利ですね。
実際のコード例
本のメイン部分ではリモコンを扱っています。そのリモコンに事前にコマンドを入力しておくことで自由に電化製品の電源オンオフ等扱うことができます。例えばリビングの電気、キッチンの電気を登録しておけば、そのリモコンひとつで両方の電気を管理することができるようになります。
リモコン
public class RemoteControl
    {
        Command[] onCommands;
        Command[] offCommands;

        public RemoteControl()
        {
            onCommands = new Command[7];
            offCommands = new Command[7];

            Command noCommand = new NoCommand();
            for(int i = 0; i < 7; i++)
            {
                onCommands[i] = noCommand;
                offCommands[i] = noCommand;
            }
        }

        public void setCommand(int slot,Command onCommand,Command offCommand)
        {
            onCommands[slot] = onCommand;
            offCommands[slot] = offCommand;
        }

        public void onButtonWasPushed(int slot)
        {
            onCommands[slot].execute();
        }

        public void offButtonWasPushed(int slot)
        {
            offCommands[slot].execute();
        }

        public string toString()
        {
            StringBuilder sb = new StringBuilder();
            sb.Append("\n------ Remote Control------ -\n");
            for(int i=0;i < onCommands.Length; i++)
            {
                sb.Append("[slot " + i + "] " + onCommands[i].GetType().Name + " " + offCommands[i].GetType().Name + "\n");
            }

            return sb.ToString();
        }
    }
コマンドを入れることのできるリモコンができました。スロットが7つあるのでSetCommandでそのスロットにコマンドたちを登録することができます。この場合は電源のオンオフがコマンドです。
コマンドインターフェース
public interface Command
    {
        public void execute();
        public void undo();
    }
コマンドを実装するためのインターフェイスは以下のように書くことができ、具体的なコマンドを書いていきます。
オンオフコマンド実装
public class LightOnCommand: Command
    {
        Light light;
        public LightOnCommand(Light light)
        {
            this.light = light;
        }

        public void execute()
        {
            light.on();
        }

        public void undo()
        {
            light.off();
        }
    }

    public class LightOffCommand : Command
    {
        Light light;
        public LightOffCommand(Light light)
        {
            this.light = light;
        }

        public void execute()
        {
            light.off();
        }

        public void undo()
        {
            light.on();
        }
    }
電源オンのコマンドを作り、コマンドを単に実行(Execute)する場合は電源をオンにします。Undoもできるのでその場合はオンの逆のオフです。
電源オフのコマンドはその逆を実装します。
コマンドはできましたが肝心のライトがありません。ライトができることはオンオフのみです。
ライト
public class Light
    {
        private string name;

        public Light(string name = "")
        {
            this.name = name;
        }

        public void on()
        {
            Console.WriteLine($"{name} Light is On");
        }

        public void off()
        {
            Console.WriteLine($"{name} Light is Off");
        }
    }
最後にリモコンを使ってみましょう。
実行
class Program
    {
        static void Main(string[] args)
        {
            //invoker
            RemoteControlWithUndo remote = new RemoteControlWithUndo();

            //command objects
            Light livingRoomLight = new Light("Living Room");
            Light kitchenLight = new Light("Kitchen");
            LightOnCommand livingRoomLightOn = new LightOnCommand(livingRoomLight);
            LightOffCommand livingRoomLightOff = new LightOffCommand(livingRoomLight);

            LightOnCommand kitchenLightOn = new LightOnCommand(kitchenLight);
            LightOffCommand kitchenLightOff = new LightOffCommand(kitchenLight);

            //store command objects in the invoker
            remote.setCommand(0,livingRoomLightOn,livingRoomLightOff);
            remote.setCommand(1,kitchenLightOn, kitchenLightOff);

            //execute commands
            remote.onButtonWasPushed(0);
            remote.undoButtonWasPushed();
            remote.offButtonWasPushed(0);
            remote.undoButtonWasPushed();

            Console.WriteLine(remote.toString());
            remote.onButtonWasPushed(1);
            remote.offButtonWasPushed(1);


        }
    }
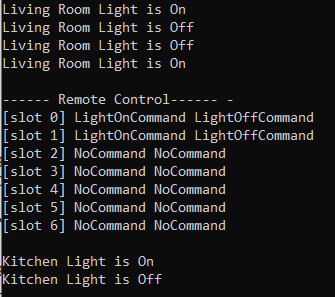
ここではまずリモコンを作りその後、キッチンライトとリビングライトを作ります。それぞれのライトに対して電源オンオフコマンドを作り、それらをリモコンに登録します。登録が終わった後は実行するだけです。
スロット0を使えばリビングライトを、スロット1を使えばキッチンライトの管理ができます。
結果
UML図
本の中では以下のようにパターンが一般化されています。

今回のライトの例であれば以下のように差し替えることができるかと思います。

今回は書きませんがライト以外にも音楽機器やテレビ、エアコン等を作りリモコンに登録することもできます。