こんにちは、Yuiです。
前回はパーティメンバーの行動の選択肢を表示しました。
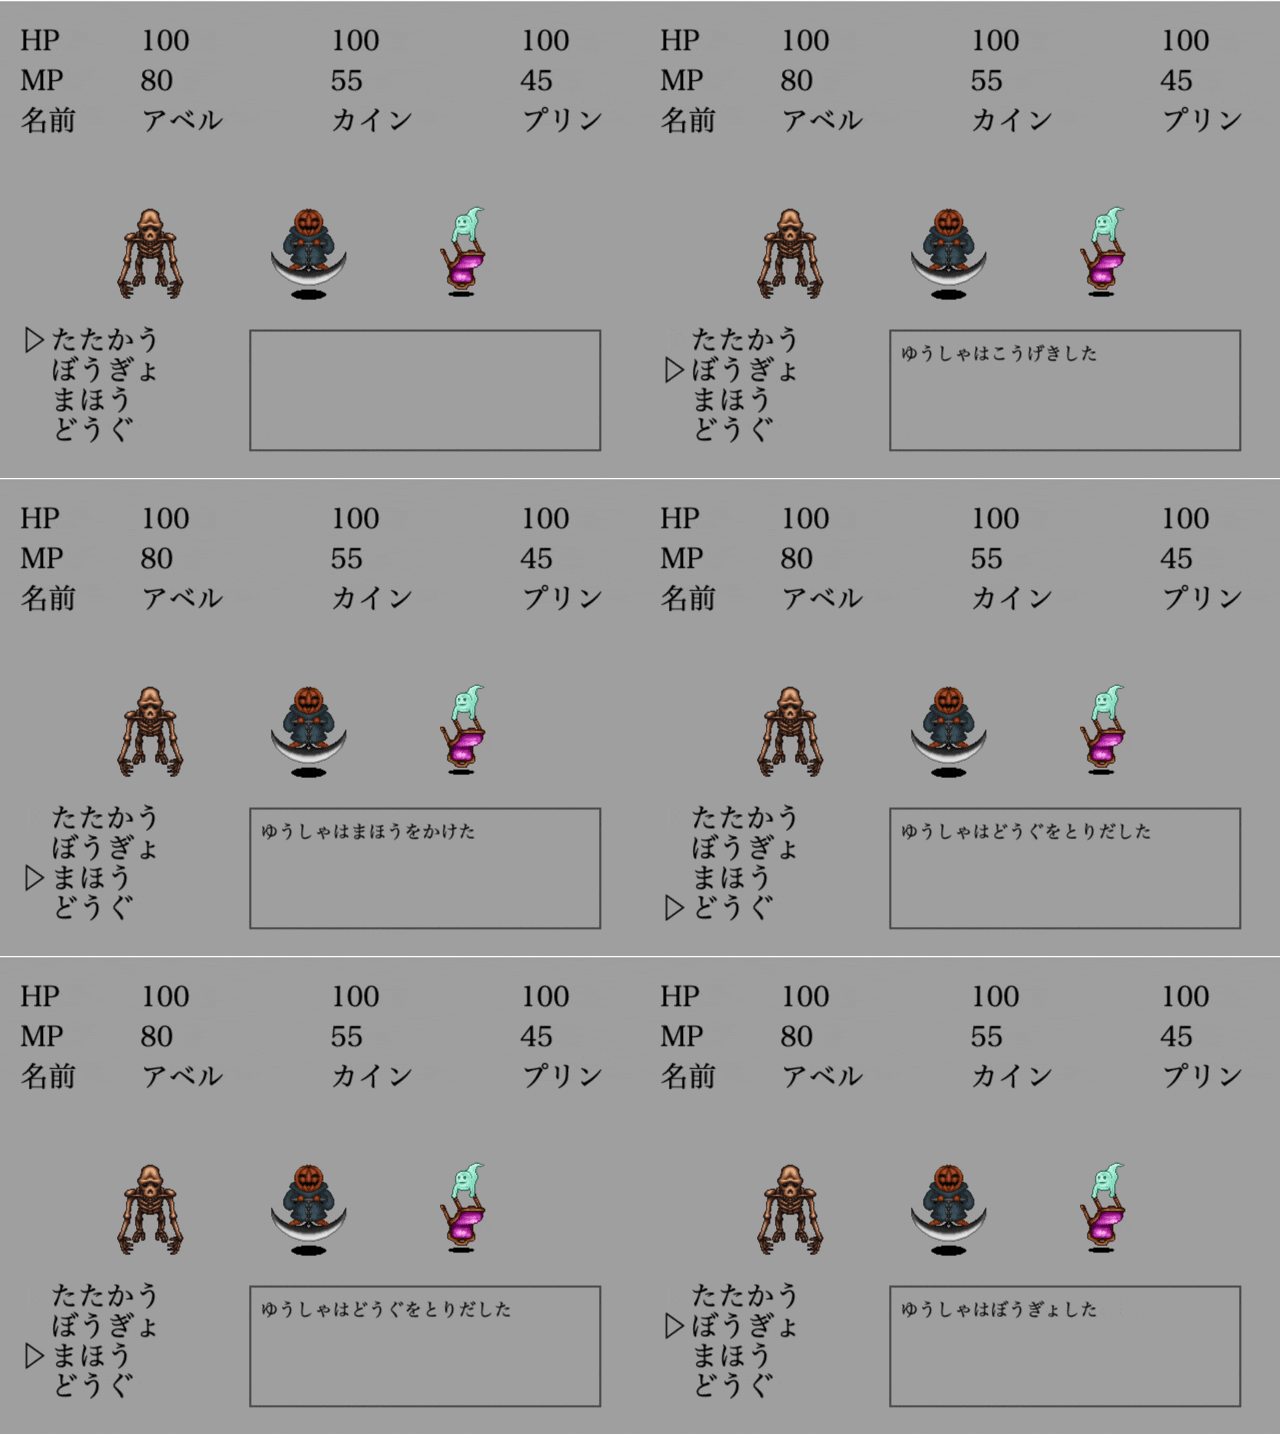
今回は選択した行動パターンに応じて、メッセージを表示したいと思います。
今回の成果物はこちらです。
クリック時の動作に応じてログを出力する
まずは、クリック時に選択した行動パターンをログとして出力するようにしましょう。
こんな感じです。
(※画面が上下で動いているのはレスポンシブにしていないからです。今回はレスポンシブに関しては扱いませんが、気になる場合はcssを調整してください。)
前回作成したchooseCommandの部分に追記します。
今回、エンターキーを押した場合は、e.keyの値がEnterになるので、それを利用します。
canvasで描画しているときはすべて座標によって判断しているため、this.setActionの値によって表示するログを変更します。
  chooseCommand(e) {
    if (e.key === "ArrowDown" && this.setAction < 440) {
      this.setAction += 30;
      this.ctx.clearRect(20,300, 25, 480)
      this.ctx.fillText("▷", 20, this.setAction)
    }
    if (e.key === "ArrowUp" && this.setAction > 350) {
      this.setAction -= 30;
      this.ctx.clearRect(20,300, 25, 480)
      this.ctx.fillText("▷", 20, this.setAction)
    }
    //以下追記
    if (e.key === "Enter") {
      if (this.setAction === 350) {
        console.log("たたかう")
      }
      if (this.setAction === 380) {
        console.log("ぼうぎょ")
      }
      if (this.setAction === 410) {
        console.log("まほう")
      }
      if (this.setAction === 440) {
        console.log("どうぐ")
      }
    }
  }
このように書くことで、選択した行動に応じて、ログが出力されたかと思います。
最初から目標物を作成しても良いのですが、このように先にログを出力することで、動作確認もできるのでなれないうちは随時ログを出力していくのがおすすめです。
ともかく、これで正しくクリック時のアクションが表示できていることがわかったので、次はこれを実際の画面で表示していきます。
メッセージを表示するエリアを描画する
まずはメッセージを表示するエリアを描画します。
とは言っても、四角の枠組みを描画するだけなので簡単ですね。
メッセージエリアを描画する部分を新しくメソッドとして追記しても良いのですが、クリック時のアクションに関してはchooseCommand部分で制御しているので、クリックを押す前にデフォルトで表示する部分は四角の枠線だけですね。
なので、showCommand部分に追加するだけにします。
  showCommand() {
    this.actions = [
      { name: "たたかう" },
      { name: "ぼうぎょ" },
      { name: "まほう" },
      { name: "どうぐ" },
    ]
    this.actions.forEach((action, index) => {
      this.ctx.fillText(action.name, 50, index * 30 + 350)
    })
    this.ctx.fillText("▷", 20, this.setAction)
   //以下追記
    this.ctx.strokeRect(250, 330, 350, 120);
  }
これで画面には四角の枠組みが現れました。
メッセージを表示する
あとはクリック時のアクションに応じてメッセージを変更します。
直接this.ctx.fillText("ゆうしゃはこうげきした", 260, 360);のように書いても良いのですが、もう少し応用のきく書き方をしたいので、this.messageという変数に表示するメッセージを格納していくようにします。
class GameManager {
  constructor() {
    const canvas = document.getElementById("canvas")
    this.ctx = canvas.getContext("2d")
    this.setAction = 350;
    this.characterList = [];
    //以下追記 初期値は何でもOKですが、とりあえずnullにしておきます。
    this.message = null;
  }
...
そしてchooseCommand部分でthis.messageを更新して描画します。
  chooseCommand(e) {
    if (e.key === "ArrowDown" && this.setAction < 440) {
      this.setAction += 30;
      this.ctx.clearRect(20,300, 25, 480)
      this.ctx.fillText("▷", 20, this.setAction)
    }
    if (e.key === "ArrowUp" && this.setAction > 350) {
      this.setAction -= 30;
      this.ctx.clearRect(20,300, 25, 480)
      this.ctx.fillText("▷", 20, this.setAction)
    }
    if (e.key === "Enter") {
      if (this.setAction === 350) {
        this.message = "ゆうしゃはこうげきした";
        this.ctx.font = `18px serif`;
        this.ctx.clearRect(255, 335, 330, 100);
        this.ctx.fillText(this.message, 260, 360);
      }
      if (this.setAction === 380) {
        this.message = "ゆうしゃはぼうぎょした";
        this.ctx.font = `18px serif`;
        this.ctx.clearRect(255, 335, 330, 100);
        this.ctx.fillText(this.message, 260, 360);
      }
      if (this.setAction === 410) {
        this.message = "ゆうしゃはまほうをかけた";
        this.ctx.font = `18px serif`;
        this.ctx.clearRect(255, 335, 330, 100);
        this.ctx.fillText(this.message, 260, 360);
      }
      if (this.setAction === 440) {
        this.message = "ゆうしゃはどうぐをとりだした";
        this.ctx.font = `18px serif`;
        this.ctx.clearRect(255, 335, 330, 100);
        this.ctx.fillText(this.message, 260, 360);
      }
    }
  }
これで、選択した行動に応じてメッセージが描画されます。
ただ、全部chooseCommandのクリック時のアクションで描画をするのは少し効率が悪く感じますね。
なので、共通している以下の部分をまとめてメソッド化してみます。
this.ctx.font = `18px serif`;
this.ctx.clearRect(255, 335, 330, 100);
this.ctx.fillText(this.message, 260, 360);
この部分をまとめて書くためにshowMessageというメソッドを作ります。
  //以下のメソッドを追加
  showMessage(message) {
    this.ctx.font = `18px serif`;
    this.ctx.clearRect(255, 335, 330, 100);
    this.ctx.fillText(message, 260, 360);
  }

//〜〜中略〜〜
  chooseCommand(e) {
    if (e.key === "ArrowDown" && this.setAction < 440) {
      this.setAction += 30;
      this.ctx.clearRect(20, 300, 25, 480)
      this.ctx.font = `28px serif`; //<= ▷の大きさも18pxで更新されてしまうため、定義し直す
      this.ctx.fillText("▷", 20, this.setAction)
    }
    if (e.key === "ArrowUp" && this.setAction > 350) {
      this.setAction -= 30;
      this.ctx.clearRect(20, 300, 25, 480)
      this.ctx.font = `28px serif`;
      this.ctx.fillText("▷", 20, this.setAction)
    }
    if (e.key === "Enter") {
      if (this.setAction === 350) {
        this.message = "ゆうしゃはこうげきした";
        this.showMessage(this.message); //<= このように一行で書ける
      }
      if (this.setAction === 380) {
        this.message = "ゆうしゃはぼうぎょした";
        this.showMessage(this.message);
      }
      if (this.setAction === 410) {
        this.message = "ゆうしゃはまほうをかけた";
        this.showMessage(this.message);
      }
      if (this.setAction === 440) {
        this.message = "ゆうしゃはどうぐをとりだした";
        this.showMessage(this.message);
      }
    }
こうすると多少は見やすくなります。
また、今回は説明のためにひとつのjsファイル(game.js)でまとめて書いているのですが、もし可能なら前回も書いた通り、分けて書いたほうが見やすいコードになるので、勉強も兼ねて分けて書くなりしてみてください。
ちなみにここまでの部分をレイアウトをきちんと整えてもっとゲームっぽくすると、以下のようになります。

※@XHACK20さん作
それでは今回はクリックに応じてメッセージを表示しました。

