Atom? Sublime? スクリプトを書くだけなら VirtualBox に Linux ぶっ込んで Vim をインストール、それでいいじゃん。
・・・と、ついさっきまで思っていたのですが、Visual Studio Code を触ってみて考えを改めたのでメモ。
まだ触り始めて1日目なので、間違いや非効率な点などが多分にあると思われます。
何かお気付きの方はご指摘をお願いします。
2017/12/04 追記:CUIでの作業が多いため結局Vim(NeoVim)に戻ってしまいました。
Bash をデバッグするための設定
rogalmic という人が作成した Bash Debug という拡張機能をインストールします。
Bash Debug: https://marketplace.visualstudio.com/items?itemName=rogalmic.bash-debug
まず Bash Debug を使うために必要なコマンドが揃っているか確認。
もし見つからなければ brew なりなんなりでインストールする。
$ which {cat,mkfifo,rm,pkill,bashdb}
-----
/bin/cat
/usr/bin/mkfifo
/bin/rm
/usr/bin/pkill
/usr/local/bin/bashdb
-----
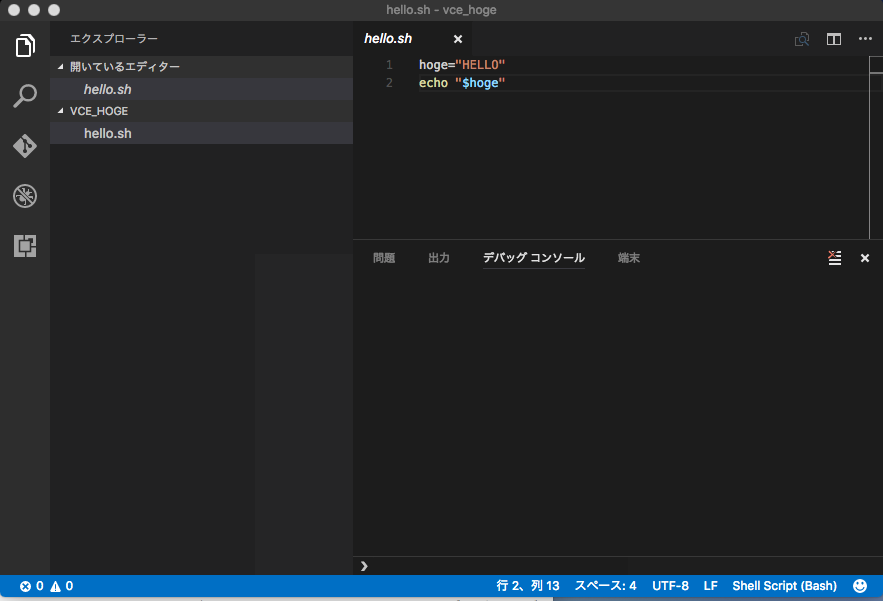
Bash Debug をインストールしたら、テキトーな Bash で動くスクリプトを一つ作り、エディタで開くと下記のようになります。
$ cat vce_hoge/hello.sh
-----
hoge="HELLO"
echo "$hoge"
-----
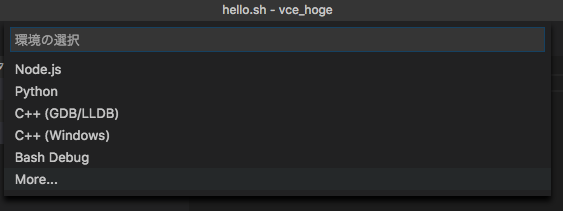
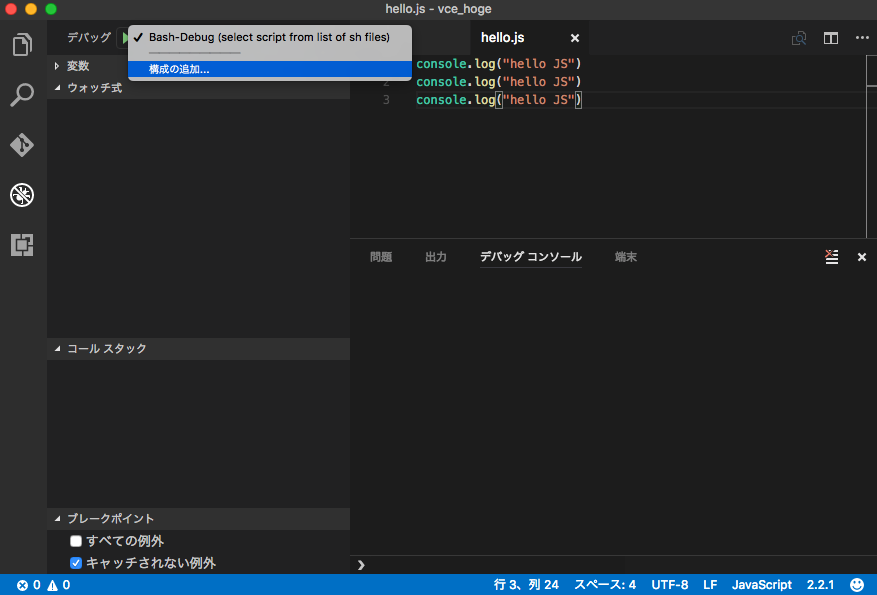
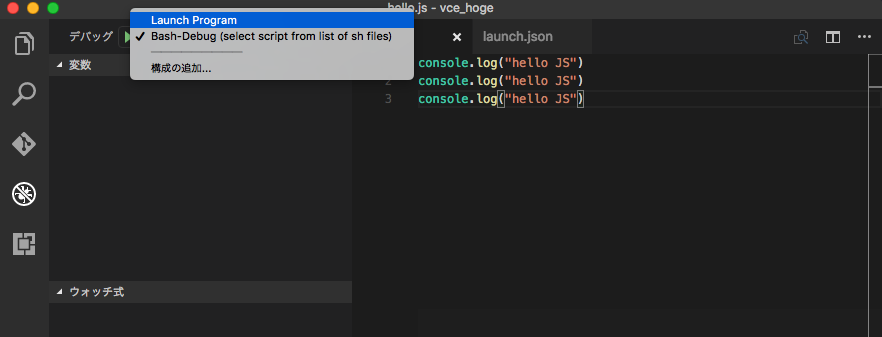
F5 を押すと下記のように何で実行するか尋ねられますので、 Bash Debug を選びましょう。
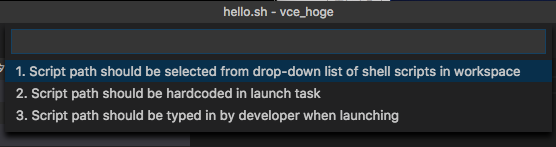
そうすると、スクリプトのパスをどのように決めるか尋ねられるのですが、具体的にどういう差があるのか調べてもいないし、何の考えもないので、 1.Script path should be selected云々を選択しました。
すると .vscode というディレクトリと launch.json という実行環境などが記載された設定ファイルが作成されます(下記の cat の結果を参照)。
$ cat vce_hoge/.vscode/launch.json
-----
{
    "version": "0.2.0",
    "configurations": [
        {
            "name": "Bash-Debug (select script from list of sh files)",
            "type": "bashdb",
            "request": "launch",
            "scriptPath": "${command.SelectScriptName}",
            "commandLineArguments": "",
            "windows": {
                "bashPath": "C:\\Windows\\sysnative\\bash.exe"
            },
            "linux": {
                "bashPath": "bash"
            },
            "osx": {
                "bashPath": "bash"
            }
        }
    ]
}
-----
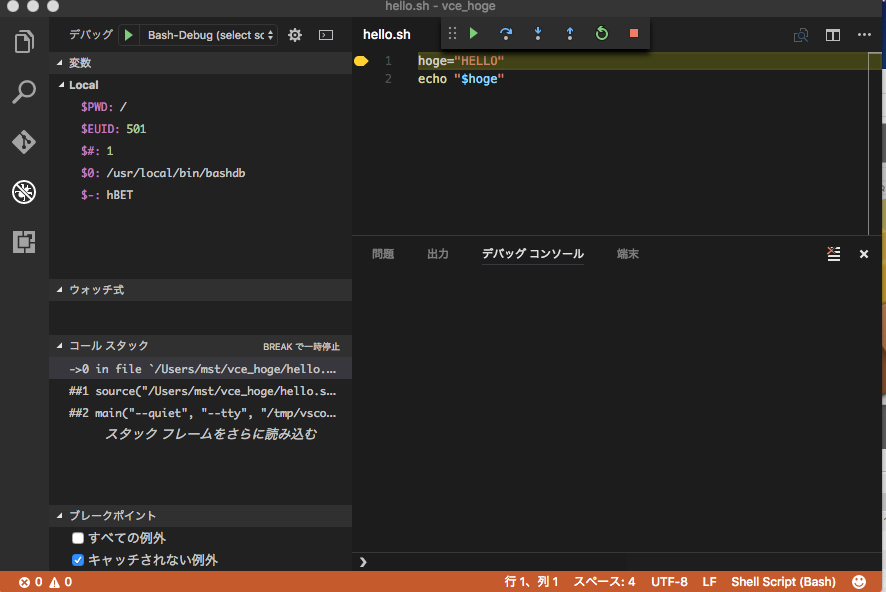
上記のファイルが作成されたのち、エディタに戻り F5 を押すとエクスプローラーのドロップダウンリストに現在のフォルダにあるスクリプトの一覧が表示されるので、実行(デバッグ)したいスクリプトを選択します。
そうすると下図のようにデバッグができます。
Javascript をデバッグするための設定
Bash の次は Javascript です。
まず Node.js がインストールされているか確認します。インストールされていなければ brew なりなんなりで(以下同上
$ which node
-----
/usr/local/bin/node
-----
VSCode には Node Debug 2 という Javascript のデバッガがビルトインで搭載されているので、拡張機能のインストールはひとまず不要かと。
もろもろ設定をする前に、まず hello.js というファイル作りました。
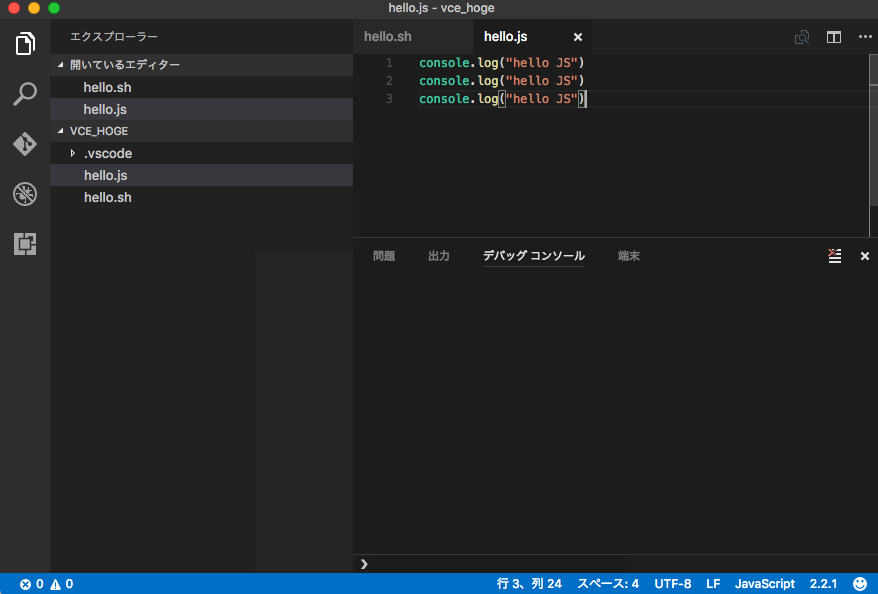
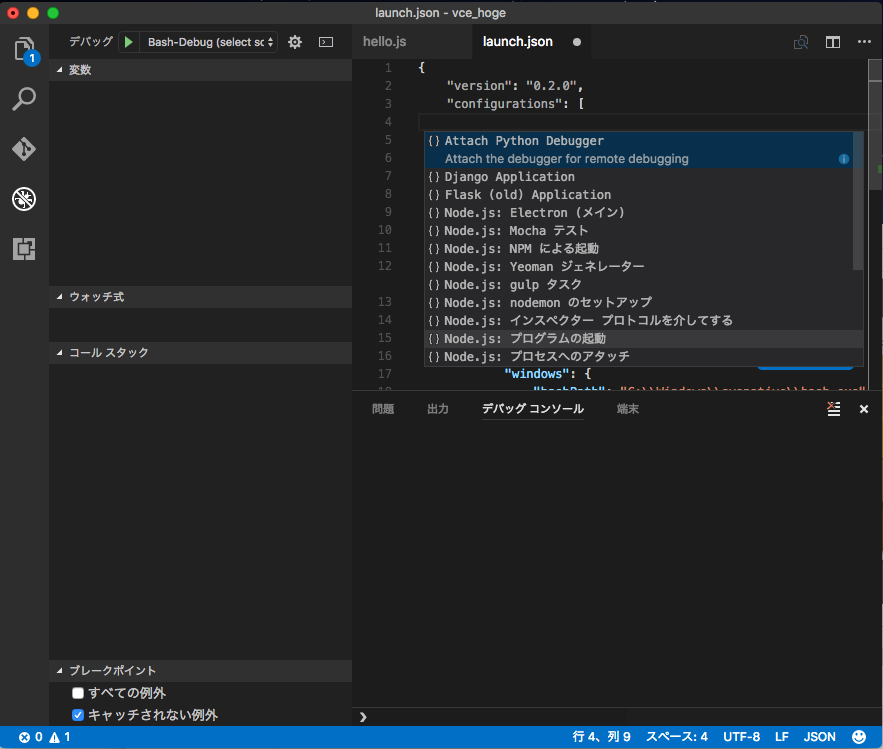
ファイルを作ったら、デバッグコンソールを開いて Javascript を実行するための構成の追加を行います。
『プログラムの起動』を選択します。
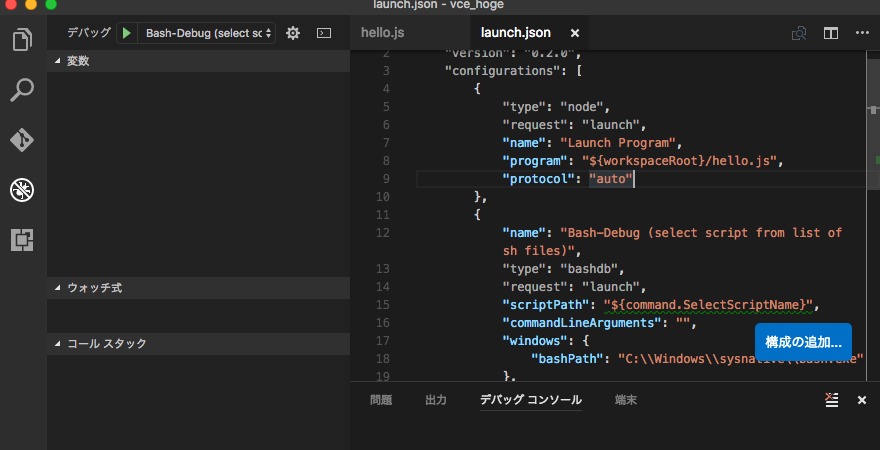
launch.json に設定が追記されるので、"program"の値を適宜修正し、"protocol"を追加してから保存します。
デバッギングプロトコルについての詳細:https://code.visualstudio.com/docs/editor/node-debugging
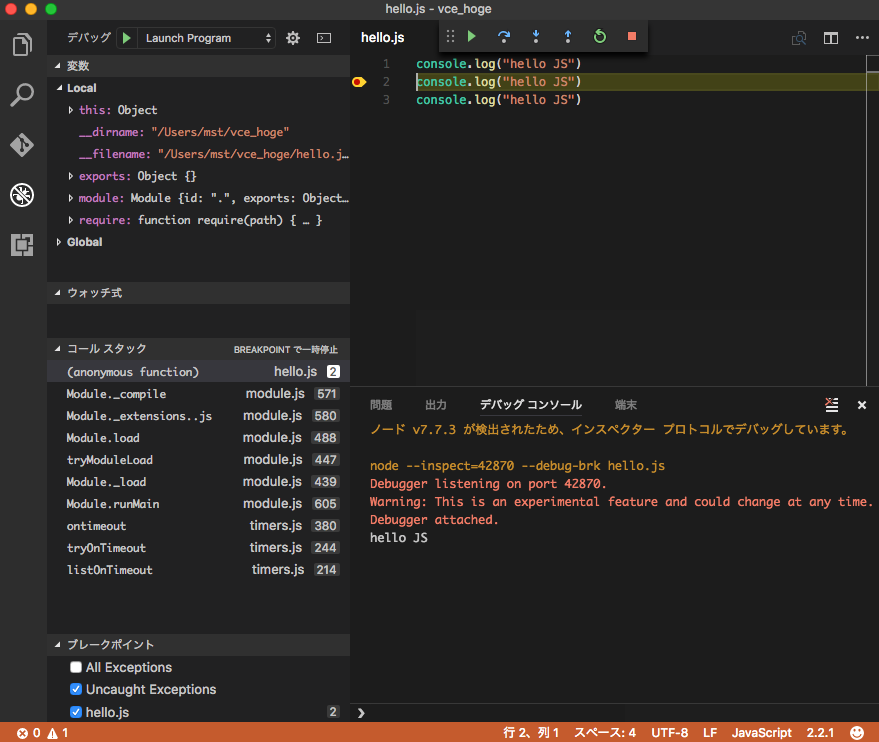
デバッグコンソールを開き、どの構成のデバッグを行うのか選択します。
構成を選択したのち、 F5 を押すと下記のようにデバッグができるようになります。
Python
Don Jayamanne という人が作成した Python という拡張機能をインストールします。
https://marketplace.visualstudio.com/items?itemName=donjayamanne.python
当然、Python の実行環境は必要なので、brewなりなん(以下同上
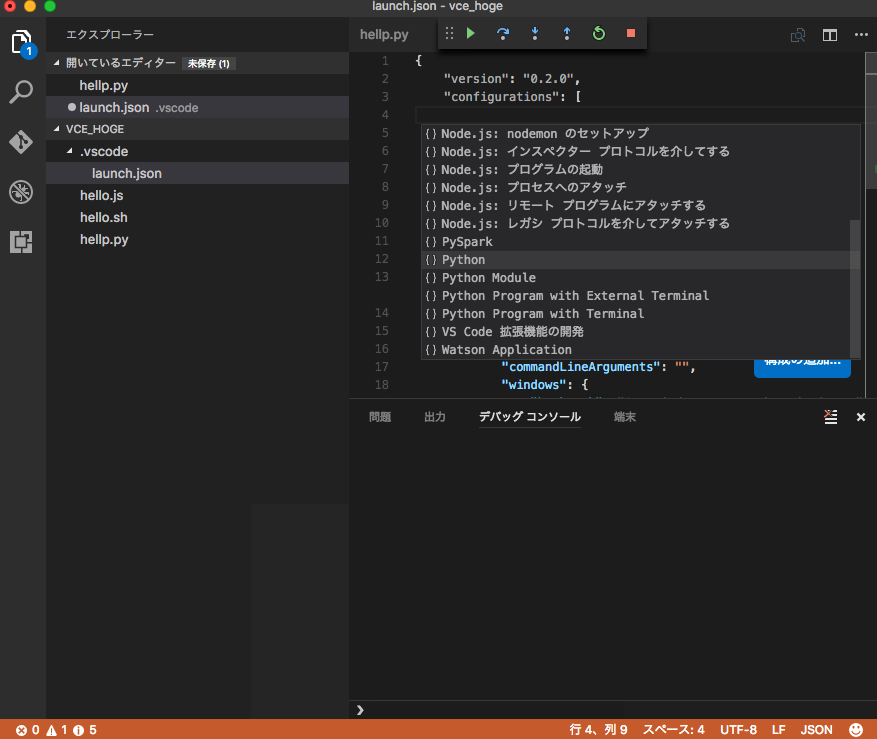
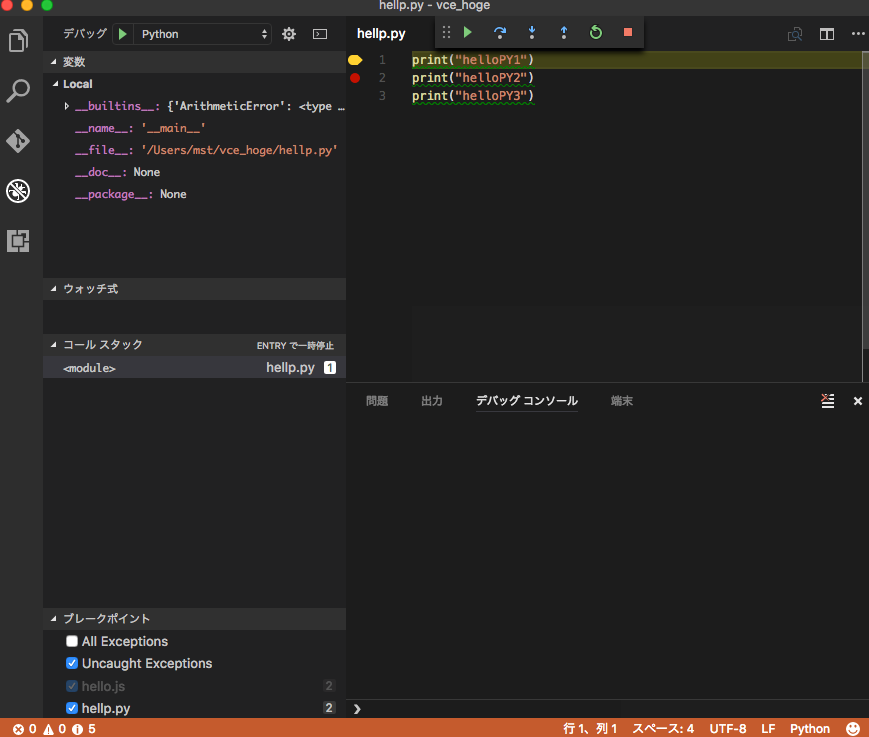
要領は Javascript と同じです。構成の追加で "Python" を選択し、launch.json を保存します。
デバッグコンソールを開いて構成から Python を選択し F5 を押せばデバッグできるようになります。
便利そうな拡張機能とか
Code Runner
これはソースコードのドラッグで選択した特定箇所のみを実行できるようにする拡張機能です。
Code Runner: https://marketplace.visualstudio.com/items?itemName=formulahendry.code-runner
※上記の gif アニメもこちらから引用しました。
code コマンドについて
VSCode のコマンドラインについてちょっとだけ書く - espresso3389の日記
code コマンドで、できることなど、概要を掴むにはこの記事がとても参考になりました。
Mac で code コマンドを使うには
Mac の場合、code コマンドの実行ファイルのパスは
/Applications/Visual\ Studio\ Code.app/Contents/Resources/app/bin/code
にあるようです(Application ディレクトリに配置した場合)。
上記のディレクトリを PATH に追加しても、素直に動いてくれないので、私は下記のような alias を .bashrc に登録しました。
alias code="/Applications/Visual\ Studio\ Code.app/Contents/Resources/app/bin/code"
$ code --help
------
Visual Studio Code 1.10.2

Usage: code [options] [paths...]

Options:
  -d, --diff                  Open a diff editor. Requires to pass two file paths as arguments.
  -g, --goto                  Open the file at path at the line and character (add :line[:character] to path).
  --locale <locale>           The locale to use (e.g. en-US or zh-TW).
  -n, --new-window            Force a new instance of Code.
  -p, --performance           Start with the 'Developer: Startup Performance' command enabled.
  -r, --reuse-window          Force opening a file or folder in the last active window.
  --user-data-dir <dir>       Specifies the directory that user data is kept in, useful when running as root.
  --verbose                   Print verbose output (implies --wait).
  -w, --wait                  Wait for the window to be closed before returning.
  --extensions-dir <dir>      Set the root path for extensions.
  --list-extensions           List the installed extensions.
  --show-versions             Show versions of installed extensions, when using --list-extension.
  --install-extension <ext>   Installs an extension.
  --uninstall-extension <ext> Uninstalls an extension.
  --disable-extensions        Disable all installed extensions.
  --disable-gpu               Disable GPU hardware acceleration.
  -v, --version               Print version.
  -h, --help                  Print usage.
-----
もちろん diff オプションも使えます。
$ cat hoge.txt
-----
hoge
-----

$ cat hoge2.txt
-----
hoge2
-----

$ code -d hoge.txt hoge2.txt
-----
下記の画像を参照してください
-----

code コマンドの中身
$ cat /Applications/Visual\ Studio\ Code.app/Contents/Resources/app/bin/code
-----
# !/usr/bin/env bash
#
# Copyright (c) Microsoft Corporation. All rights reserved.
# Licensed under the MIT License. See License.txt in the project root for license information.

function realpath() { /usr/bin/python -c "import os,sys; print os.path.realpath(sys.argv[1])" "$0"; }
CONTENTS="$(dirname "$(dirname "$(dirname "$(dirname "$(realpath "$0")")")")")"
ELECTRON="$CONTENTS/MacOS/Electron"
CLI="$CONTENTS/Resources/app/out/cli.js"
ELECTRON_RUN_AS_NODE=1 "$ELECTRON" "$CLI" "$@"
-----
なんとなく、察しが付きそうな気もするのですが、今は見なかったことに・・・。
ショートカットキー
Mac だと F11 などが OS の標準機能と競合するのでリマップした方が良いかもしれません。