はじめに
「Unityでゲームを作るならたぶん誰しもが実装したことがあるし、大したことではないから誰も記事まとめたりしない」ような内容をあえて記事にしていきます。
シリーズものになるかは未定。
今回のテーマ
「爆発を作る」
概要
アクションゲームを作っていると、モノによっては周りのオブジェクトを吹き飛ばす「爆発」を作ることになるでしょう。
今回はこれをサクッと作ってみます。
作り方
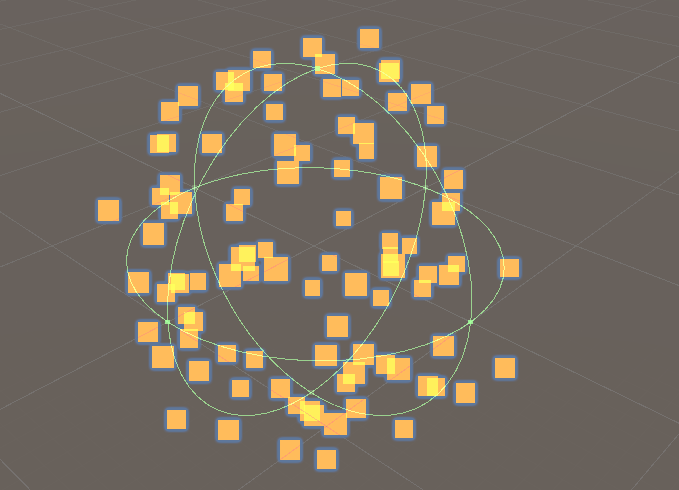
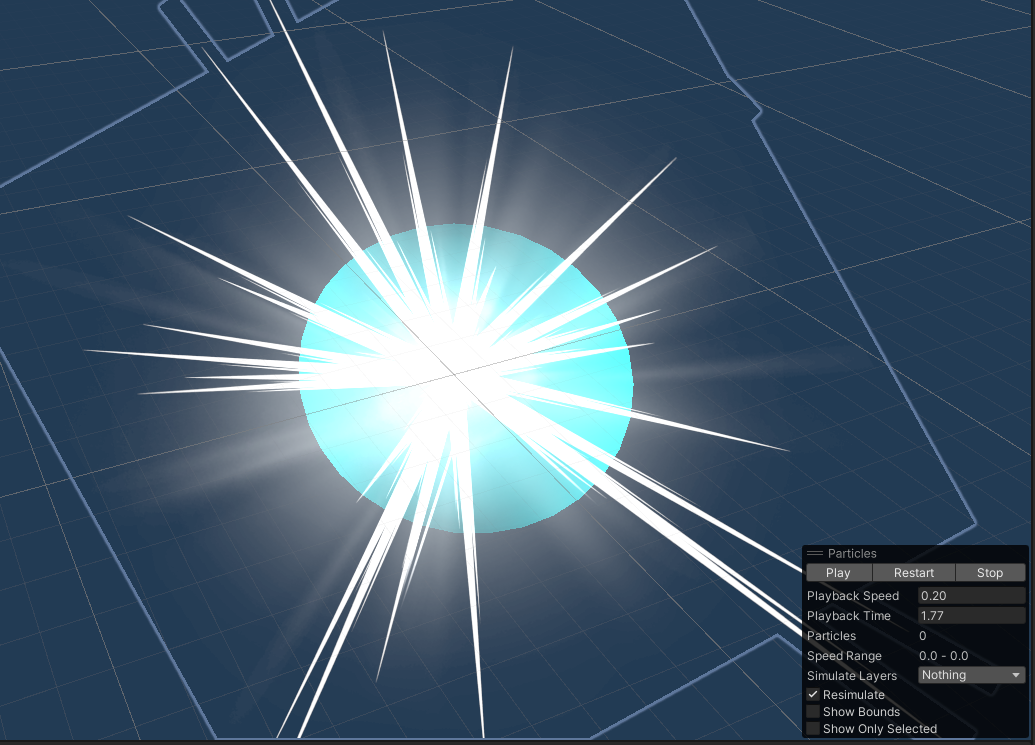
1.爆発のエフェクトを用意する
爆発のエフェクトを用意します。
ParticleSystemを使って自作してもよいし、AssetStoreから良さそうなのを拾ってくるでもOKです。
今回はParticleSystemで雑に作りました。
このエフェクトをもつGameObjectをExplosionEffectという名前にしてPrefabにしておきます。
2.「Explosion」という名のGameObjectを作り、1.のエフェクトを子にする
こういう階層でオブジェクトを置きます。
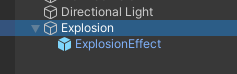
このとき、「Explosion」と「ExplosionEffect」のTransformのPositionはそれぞれ(0, 0, 0)に合わせてください。
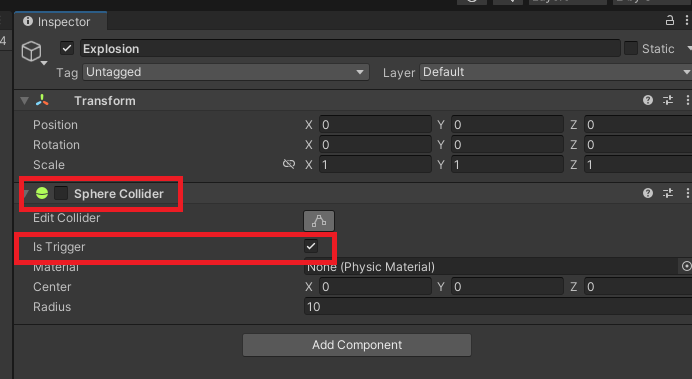
3. 「Explosion」にSphereColliderをアタッチする
このSphereColliderのサイズが爆風の影響範囲になります。
だいたいエフェクトと一致するくらいのサイズ感だとヨシ。
また、IsTriggerにチェックをして、さらにコンポーネントを非アクティブ状態にしておきます。
4. 爆発の効果音を用意して、「Explosion」にAudioSourceをアタッチする
爆発の効果音を用意します。
今回は効果音ラボ様のものを使いました。
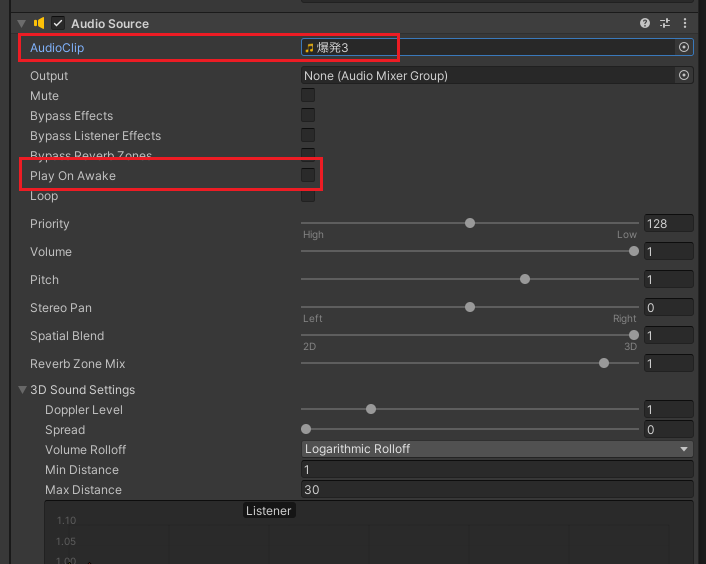
また、「Explosion」にAudioSourceをアタッチし、各種パラメータを調整してさきほどの効果音を割り当てておきます。
このとき、Play On Awakeのチェックは外しておきます。
5. C#スクリプト「Explosion.cs」を定義する
次のようなスクリプトを用意します。
using System.Collections;
using UnityEngine;

namespace ExplosionSample
{
    public class Explosion : MonoBehaviour
    {
        [Header("爆風に当たったときに吹っ飛ぶ力の強さ")] [SerializeField]
        private float _futtobiPower;

        [Header("爆風の判定が実際に発生するまでのディレイ")] [SerializeField]
        private float _startDelaySeconds = 0.1f;

        [Header("爆風の持続フレーム数")] [SerializeField] private int _durationFrameCount = 1;

        [Header("エフェクト含めすべての再生が終了するまでの時間")] [SerializeField]
        private float _stopSeconds = 2f;

        [SerializeField] private ParticleSystem _effect;

        [SerializeField] private AudioSource _sfx;

        [SerializeField] private SphereCollider _collider;

        private void Awake()
        {
            _effect.Stop();
            _sfx.Stop();
            _collider.enabled = false;
        }

        /// <summary>
        /// 爆破する
        /// </summary>
        public void Explode()
        {
            // 当たり判定管理のコルーチン
            StartCoroutine(ExplodeCoroutine());
            // 爆発エフェクト含めてもろもろを消すコルーチン
            StartCoroutine(StopCoroutine());

            // エフェクトと効果音再生
            _effect.Play();
            _sfx.Play();
        }

        private IEnumerator ExplodeCoroutine()
        {
            // 指定秒数が経過するまでFixedUpdate上で待つ
            var delayCount = Mathf.Max(0, _startDelaySeconds);
            while (delayCount > 0)
            {
                yield return new WaitForFixedUpdate();
                delayCount -= Time.fixedDeltaTime;
            }

            // 時間経過したらコライダを有効化して爆発の当たり判定が出る
            _collider.enabled = true;

            // 一定フレーム数有効化
            for (var i = 0; i < _durationFrameCount; i++)
            {
                yield return new WaitForFixedUpdate();
            }

            // 当たり判定無効化
            _collider.enabled = false;
        }

        private IEnumerator StopCoroutine()
        {
            // 時間経過後に消す
            yield return new WaitForSeconds(_stopSeconds);
            _effect.Stop();
            _sfx.Stop();
            _collider.enabled = false;

            Destroy(gameObject);
        }

        /// <summary>
        /// 爆風にヒットしたときに相手をふっとばす処理
        /// </summary>
        private void OnTriggerEnter(Collider other)
        {
            // 衝突対象がRigidbodyの配下であるかを調べる
            var rigidBody = other.GetComponentInParent<Rigidbody>();

            // Rigidbodyがついてないなら吹っ飛ばないの終わり
            if (rigidBody == null) return;

            // 爆風によって爆発中央から吹き飛ぶ方向のベクトルを作る
            var direction = (other.transform.position - transform.position).normalized;

            // 吹っ飛ばす
            // ForceModeを変えると挙動が変わる(今回は質量無視)
            rigidBody.AddForce(direction * _futtobiPower, ForceMode.VelocityChange);
        }
    }
}
6. 「Explosion.cs」をExplosionオブジェクトにアタッチして、諸々セットする
さきほどのスクリプトを「Explosion」にアタッチして、それぞれ紐付けておきます。
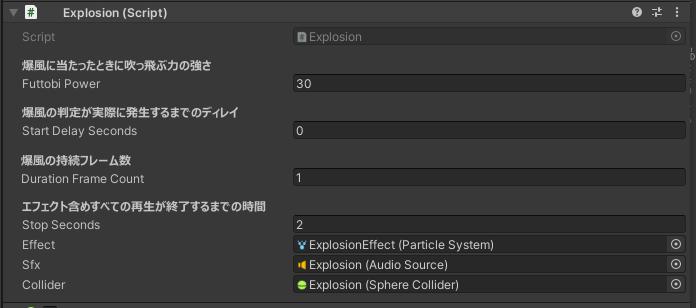
Start Delay Secondsを変更することで、爆発の影響が発生するまでの時間を操作できます。
エフェクトに”タメ”があったりする場合はここを調整します(今回はエフェクトにタメはないので、0にします)
7. ExplosionをPrefab化しておく

最終的にこうなっていればOK。
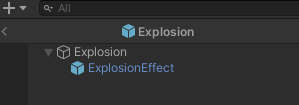
(Explosionの下にExplosionEffectがある)
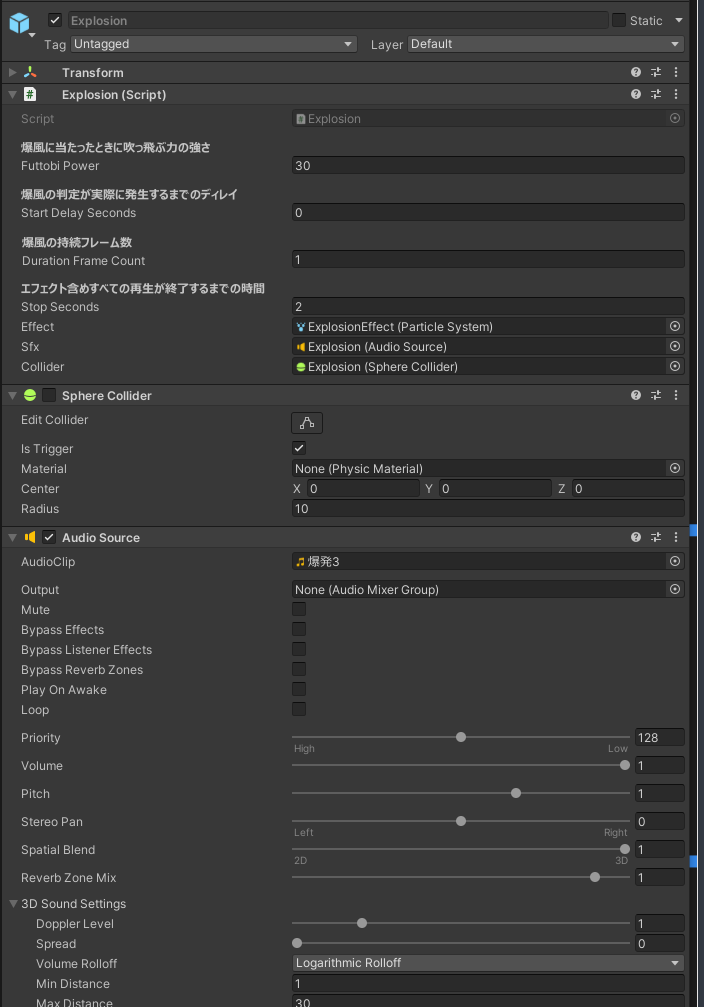
(Explosionのコンポーネント設定)
これで完成です。
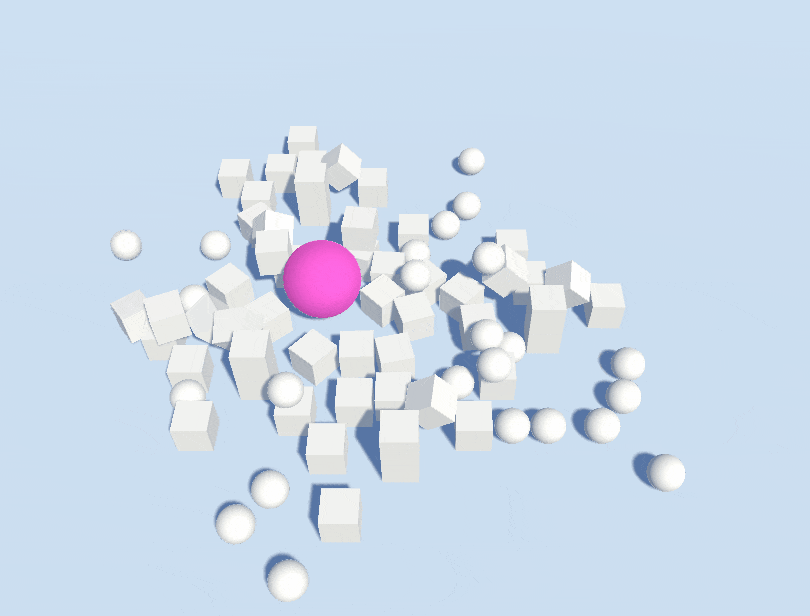
実際に動かしてみる
下準備:「Bomb」を作る
実際にこのExplosionを使うために、時限爆弾に相当する「Bomb」オブジェクトを作っておきます。
適当にSphereを用意してそこにRigidbodyをアタッチして、次のスクリプトも貼り付けておきます。
using UnityEngine;

namespace ExplosionSample
{
    public class Bomb : MonoBehaviour
    {
        [Header("爆発までの時間[s]")] [SerializeField]
        private float _time = 3.0f;

        [Header("爆風のPrefab")] [SerializeField] private Explosion _explosionPrefab;

        private void Start()
        {
            // 一定時間経過後に発火
            Invoke(nameof(Explode), _time);
        }

        private void Explode()
        {
            // 爆発を生成
            var explosion = Instantiate(_explosionPrefab, transform.position, Quaternion.identity);
            explosion.Explode();

            // 自身は消える
            Destroy(gameObject);
        }
    }
}
実演

(ピンクのSphereがさっき作った「Bomb」)
完成しました。
補足
実装のキモは何なのか
SphereColliderを一瞬だけenableにしていることろです。Colliderがdisableからenableに切り替わったときでも、そのコライダーの範囲内に入っているオブジェクトをOnTriggerEnterで検知することができます。
この性質を利用しています。
エフェクトに合わせて挙動を変える
たとえば、こういう「タメ」があるエフェクトに合わせたい場合。
 (Epic Toon FXより)
これに合わせてExplosionスクリプトのパラメータを調整してみます。
だいたい、エフェクトの「爆発」がエフェクト再生開始から1.77秒後なので、それも踏まえてExplosionのパラメータをそれに合わせて調整します。
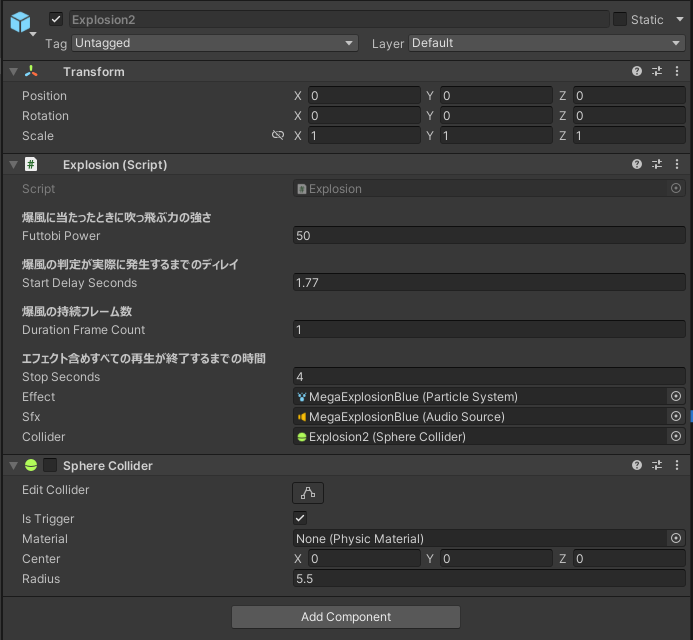
そうするとこうなりました。

パラメータ調整でいろんなエフェクトに対応ができる、使い回しが効く「爆発」のギミックになってますね。
コルーチンを使いたくない
UniTaskで書くならこう。正直、コルーチンで書くのとあまり差はないです。
(UniTask.DelayをFixedUpdate上で待てればよいのだが、そんな機能はない)
using System;
using System.Threading;
using Cysharp.Threading.Tasks;
using UnityEngine;

namespace ExplosionSample
{
    public class ExplosionUniTask : MonoBehaviour
    {
        [Header("爆風に当たったときに吹っ飛ぶ力の強さ")] [SerializeField]
        private float _futtobiPower;

        [Header("爆風の判定が実際に発生するまでのディレイ")] [SerializeField]
        private float _startDelaySeconds = 0.1f;

        [Header("爆風の持続フレーム数")] [SerializeField]
        private int _durationFrameCount = 1;

        [Header("エフェクト含めすべての再生が終了するまでの時間")] [SerializeField]
        private float _stopSeconds = 2f;

        [SerializeField] private ParticleSystem _effect;

        [SerializeField] private AudioSource _sfx;

        [SerializeField] private SphereCollider _collider;

        private void Awake()
        {
            _effect.Stop();
            _sfx.Stop();
            _collider.enabled = false;
        }

        /// <summary>
        /// 爆破する
        /// </summary>
        public void Explode()
        {
            var ct = this.GetCancellationTokenOnDestroy();
            ExplodeAsync(ct).Forget();
            StopAsync(ct).Forget();

            // エフェクトと効果音再生
            _effect.Play();
            _sfx.Play();
        }

        private async UniTaskVoid ExplodeAsync(CancellationToken ct)
        {
            // 指定秒数が経過するまでFixedUpdate上で待つ
            var delayCount = Mathf.Max(0, _startDelaySeconds);
            while (delayCount > 0)
            {
                await UniTask.Yield(PlayerLoopTiming.FixedUpdate, ct);
                delayCount -= Time.fixedDeltaTime;
            }

            // 時間経過したらコライダを有効化して爆発の当たり判定が出る
            _collider.enabled = true;

            // 一定フレーム数有効化
            await UniTask.DelayFrame(_durationFrameCount, PlayerLoopTiming.FixedUpdate, ct);

            // 当たり判定無効化
            _collider.enabled = false;
        }

        private async UniTaskVoid StopAsync(CancellationToken ct)
        {
            // 時間経過後に消す
            await UniTask.Delay(TimeSpan.FromSeconds(_stopSeconds), cancellationToken: ct);
            _effect.Stop();
            _sfx.Stop();
            _collider.enabled = false;

            Destroy(gameObject);
        }

        /// <summary>
        /// 爆風にヒットしたときに相手をふっとばす処理
        /// </summary>
        private void OnTriggerEnter(Collider other)
        {
            // 衝突対象がRigidbodyの配下であるかを調べる
            var rigidBody = other.GetComponentInParent<Rigidbody>();

            // Rigidbodyがついてないなら吹っ飛ばないの終わり
            if (rigidBody == null) return;

            // 爆風によって爆発中央から吹き飛ぶ方向のベクトルを作る
            var direction = (other.transform.position - transform.position).normalized;

            // 吹っ飛ばす
            // ForceModeを変えると挙動が変わる(今回は質量無視)
            rigidBody.AddForce(direction * _futtobiPower, ForceMode.VelocityChange);
        }
    }
}
爆風の威力を中心からの距離によって変えたい
やり方は2つあります。
AddExplosionForceを使う
AddExplosionForceという、「爆風から受ける力」を計算してくれるまさにまんまなメソッドがあります。
これを用いることで「中心からの距離に応じた威力減衰」が簡単に実現できます。
/// <summary>
/// 爆風にヒットしたときに相手をふっとばす処理
/// </summary>
private void OnTriggerEnter(Collider other)
{
    // 衝突対象がRigidbodyの配下であるかを調べる
    var rigidBody = other.GetComponentInParent<Rigidbody>();

    // Rigidbodyがついてないなら吹っ飛ばないの終わり
    if (rigidBody == null) return;

    // AddExplosionForceで吹っ飛ばす
    rigidBody.AddExplosionForce(
        explosionForce: _futtobiPower,
        explosionPosition: transform.position,
        explosionRadius: _collider.radius,
        upwardsModifier: 0,
        mode: ForceMode.VelocityChange);
}
 (
(AddExplosionForceによるふっとばし。中心から離れるほど威力が弱くなっている)
シンプルで簡単な反面、距離による威力減衰の具合を細かく調整することはできません。
自分で調整した場合は次の方法を使います。
自分で計算する
OnTriggerEnterでの計算を工夫してください。
たとえばシンプルに「中心からの距離に応じて線形(一次関数)で威力が減衰する」の場合はこう。
/// <summary>
/// 爆風にヒットしたときに相手をふっとばす処理
/// </summary>
private void OnTriggerEnter(Collider other)
{
    // 衝突対象がRigidbodyの配下であるかを調べる
    var rigidBody = other.GetComponentInParent<Rigidbody>();

    // Rigidbodyがついてないなら吹っ飛ばないの終わり
    if (rigidBody == null) return;

    // 差分ベクトル
    var delta = (other.transform.position - transform.position);
    var length = delta.magnitude;

    // 線形で威力が落ちる
    var power = Mathf.Lerp(_futtobiPower, 0, length / _collider.radius);

    // 吹っ飛ばす
    // ForceModeを変えると挙動が変わる(今回は質量無視)
    rigidBody.AddForce(delta.normalized * power, ForceMode.VelocityChange);
}
 (線形で威力を減衰させた場合)
線形で威力が下がるの嫌な場合は、イージング関数あたりからそれっぽいのを使ったり、AnimationCurveを使ったりしてもよさそう。
爆風の影響範囲を時間変化させたい
最初の爆破範囲は狭く、時間とともに巨大化するみたいなやつ。
AnimationCurveを使ってグラフを作ったあと、その数値を↓のあたりで SphereCollider.radiusに適用してあげればたぶんできます。
private IEnumerator ExplodeCoroutine()
{
    var delayCount = Mathf.Max(0, _startDelaySeconds);
    while (delayCount > 0)
    {
        yield return new WaitForFixedUpdate();
        delayCount -= Time.fixedDeltaTime;
    }

    _collider.enabled = true;

    for (var i = 0; i < _durationFrameCount; i++)
    {
        /*
        * このへんでradiusを操作する
        */

        yield return new WaitForFixedUpdate();
    }

    _collider.enabled = false;
}
(かなりめんどくさいので実装例は紹介しません)
オブジェクトプールに対応させたい
StopAsync()でDestroy()している部分を、プールへの返却命令に変更すればOKです。
private async UniTaskVoid StopAsync(CancellationToken ct)
{
    // 時間経過後に消す
    await UniTask.Delay(TimeSpan.FromSeconds(_stopSeconds), cancellationToken: ct);
    _effect.Stop();
    _sfx.Stop();
    _collider.enabled = false;

    // このタイミングでプールに戻す、的な
    ReturnToPool();
}
まとめ
アクションゲームを作る上で「爆発」は欠かせません(要出典)
もし爆発を作るとなったときに、この記事が参考になれば嬉しいです。
今後、シリーズ化するかはわかりません。ネタがあれば書きます。