はじめに

この本の第7章、React Nativeの状態管理のなかでデータの永続性(保存)
に触れられた部分で、エラーが出てしまい、先に進めなくなってしまった。
そこで、これの解決策を示すことで、後からこの学習に取り組む若者たちの手助けとなるような記事を書いていきたい
作りたいアプリ
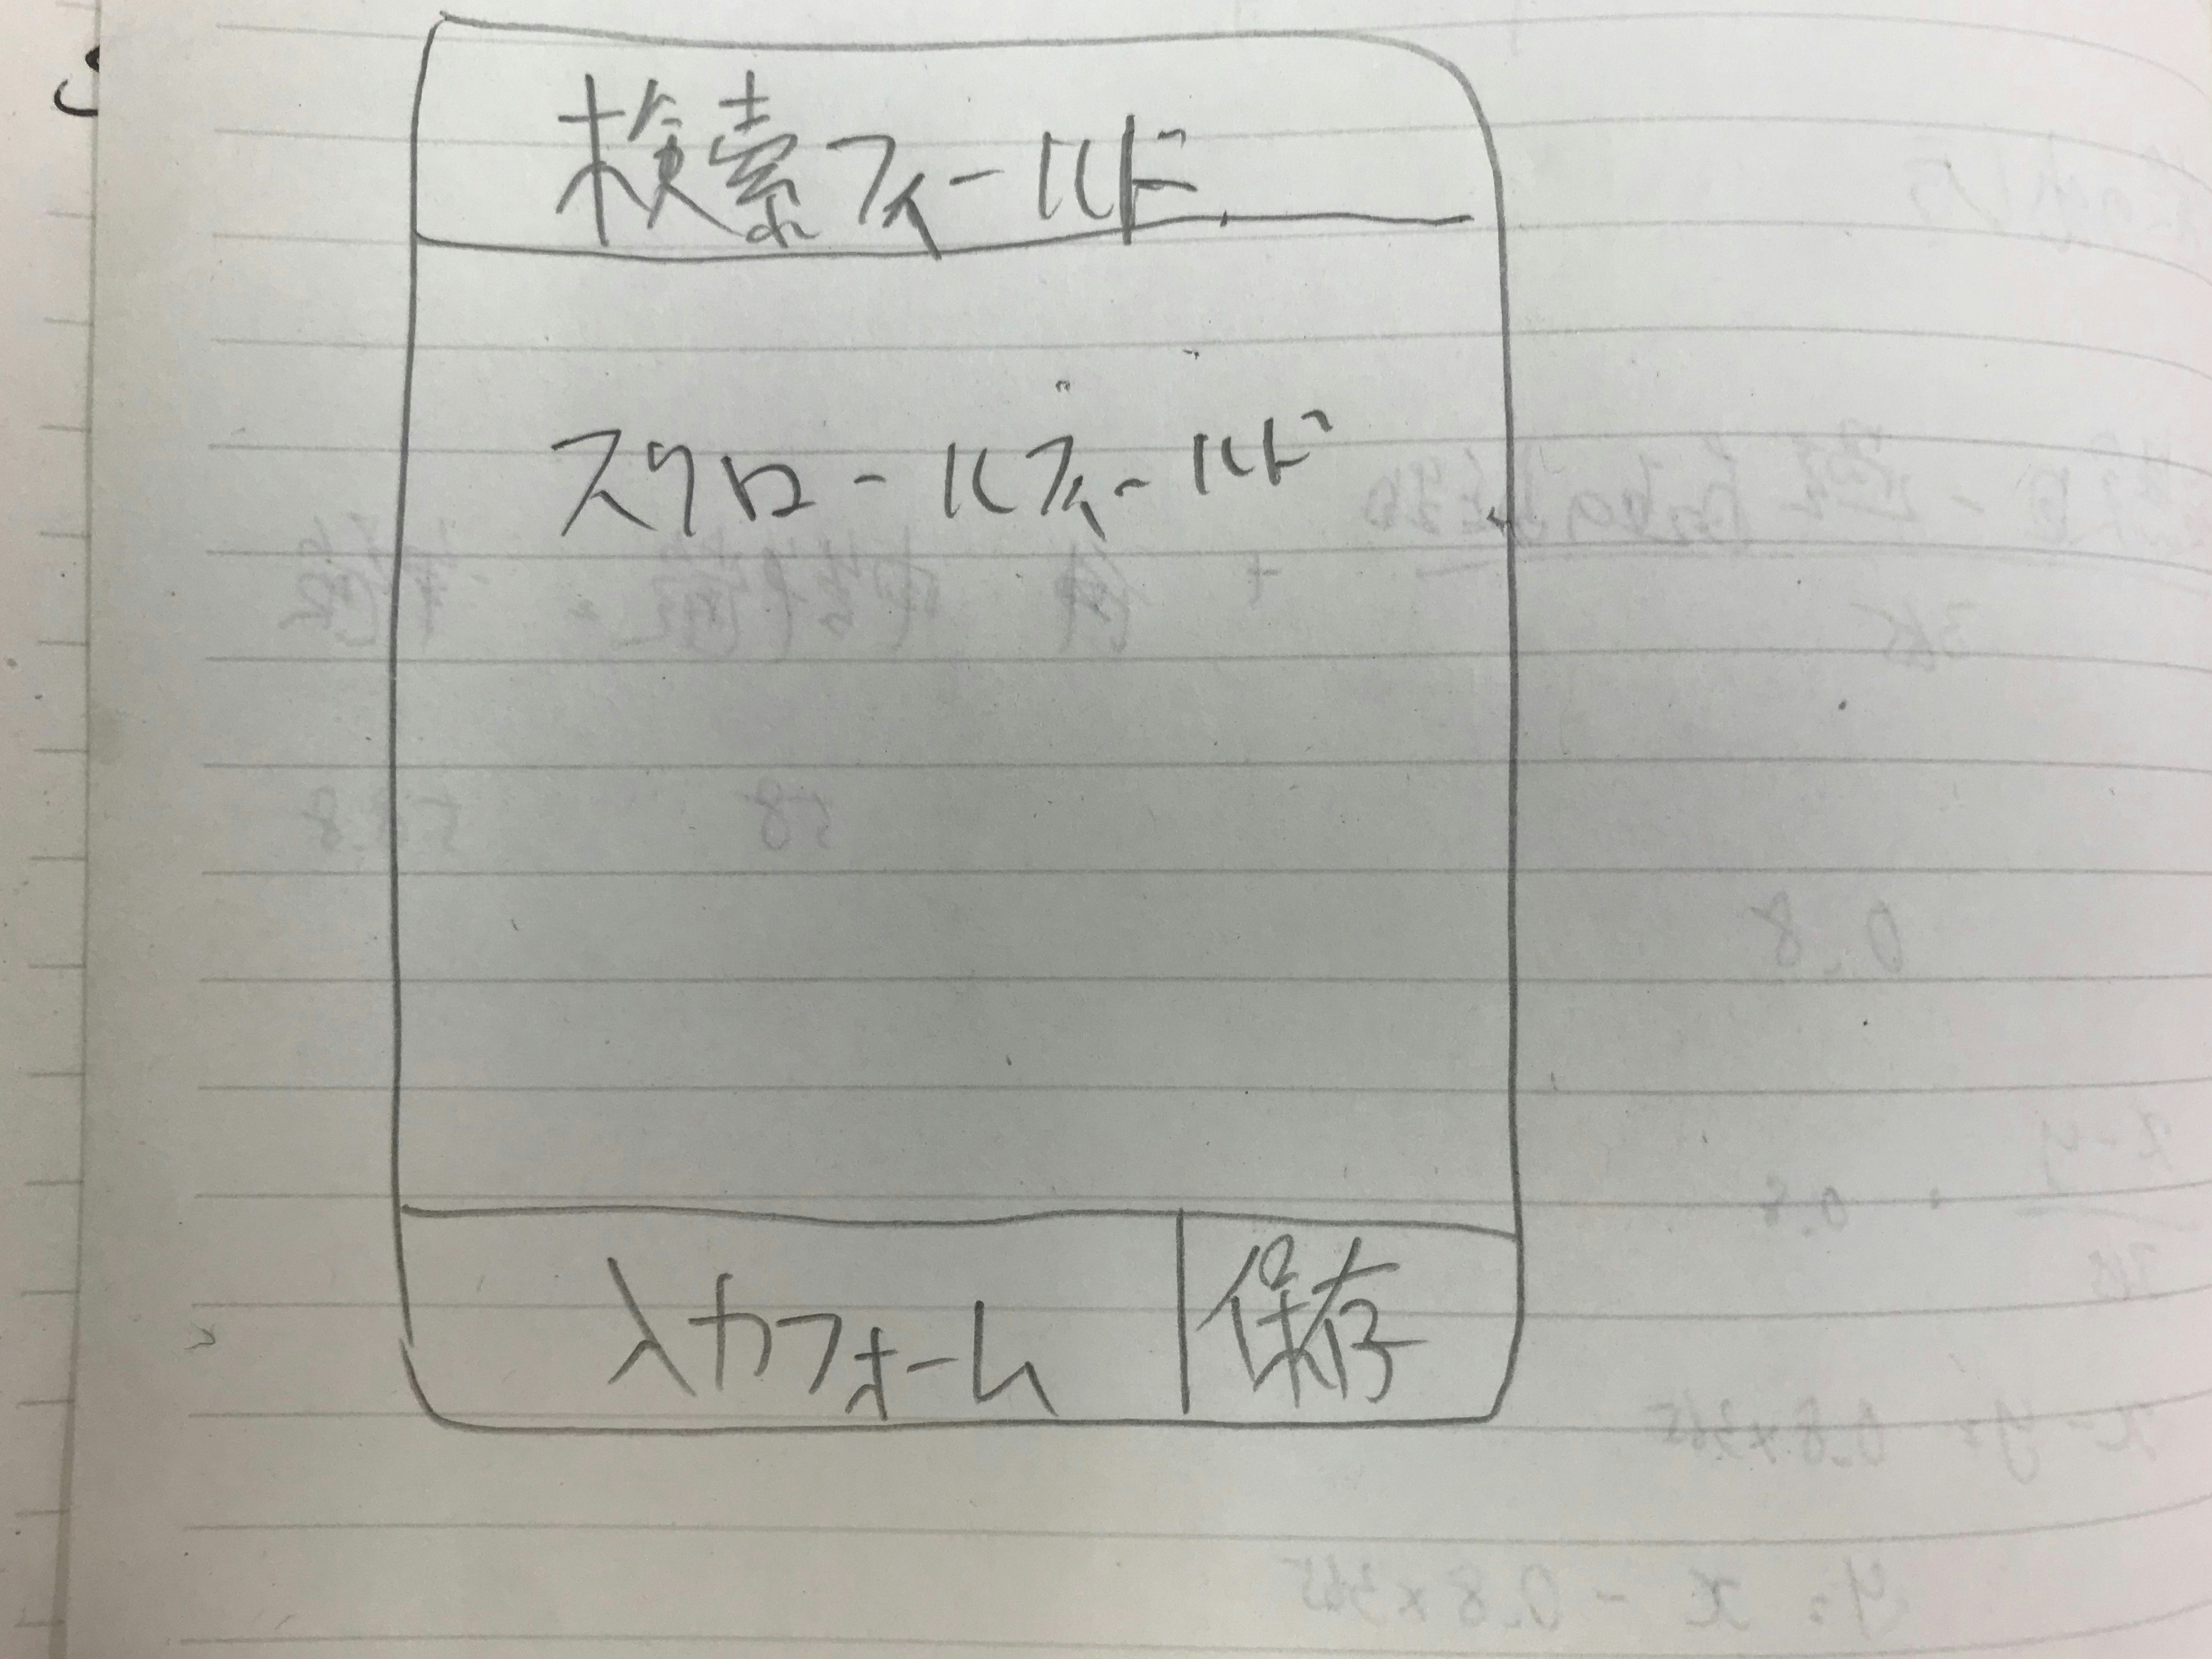
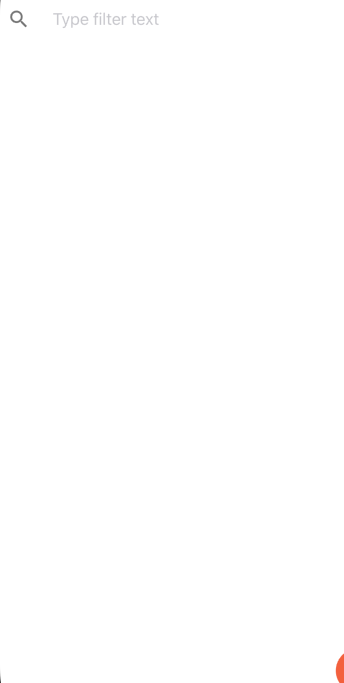
単純なTodoアプリで
検索フィールド、スクロールフィールド、入力フォームがあるアプリ、図にするとこんな感じ↓
コード
App.js
import {createStore} from 'redux'
import {persistReducer,persistStore} from 'redux-persist'
import storage from 'redux-persist/lib/storage'
import rootReducer from './rootReducer'


const persistConfig ={
    key: 'TODO',
    storage,
    whitelist:['todos'.currentIndex]
}
const persistedReducer = persistReducer(persistConfig,rootReducer)
const store = createStore(persistedReducer)


export const persistor = persistStore(store)
export default store
src/actionCreator.js
import {TODO} from './actions'
export const addTodo = (text) =>{
    return {
        type:TODO.ADD,
        text,
    }
}
export const toggleTodo = (todo) => {
    return {
        type:TODO.TOGGLE,
        todo
    }
}
src/action.js
export const TODO ={
    Add:'TODO_APP',
    TOGGLE:'TODO_TOGGLE',
}
src/rootReducer.js
import { combineReducers} from 'redux'
import todoReducer from './todoReducer'

export default combineReducers({
    todos:todoReducer
})
src/store.js
import {createStore} from 'redux'
import {persistReducer,persistStore} from 'redux-persist'
import storage from 'redux-persist/lib/storage'
import rootReducer from './rootReducer'


const persistConfig ={
    key: 'TODO',
    storage,
    whitelist:['todos'.currentIndex]
}
const persistedReducer = persistReducer(persistConfig,rootReducer)
const store = createStore(persistedReducer)


export const persistor = persistStore(store)
export default store
src/todoReducer.js
import {TODO} from './actions'

const initialState = {
  todos:[],
  currentIndex:0,
  }

  const todos = (state = initialState,action) =>{
    switch(action.type){
      case TODO.ADD:
        const newTodo = {title:action.text,index:state.currentIndex,done:false}
        return {
          ...state,
          todos:[...state.todos,newTodo],
          currentIndex:state.currentIndex + 1
        }
        case TODO.TOGGLE:
          const todoItem = action.todo
          const todos = Object.assign([],state.todos)
          const index = todos.indexOf(todoItem)
          todoItem.done = !todoItem.done
          todos[index] = todoItem
          return {
            ...state,
            todos:todos
          }
        default:
          return state
    }
  }
  export default todos
src/TodoScreen.js
import React from 'react';
import {
StyleSheet,
Text,
View,
StatusBar,
Platform,
ScrollView,
FlatList,
KeyboardAvoidingView,
AsyncStrage,
TouchableOpacity,
} from 'react-native';
import {
SearchBar,
Input,
Button,
ListItem,
} from 'react-native-elements';
import Icon from 'react-native-vector-icons/Feather';
import Icon2 from 'react-native-vector-icons/MaterialIcons';
import {ifIphoneX,getStatisBarHeight, getStatusBarHeight} from 'react-native-iphone-x-helper';
import {connect} from 'react-redux'
import {addTodo,ToggleTodo, toggleTodo} from './actionCreators'
const TODO = "@todoapp.todo"
// iPhoneX対応
const STATUSBAR_HEIGHT = getStatusBarHeight()
const TodoItem =(props) =>{
// let textStyle = styles.todoItem
// if(props.done === true){
// textStyle = styles.todoItemDone
// }
let icon = null
if ( props.done == true){
icon = <Icon2 name="done" />
}
return (
<TouchableOpacity onPress={props.onTapTodoItem}>
{/* <Text style={textStyle}>{props.title}</Text> */}
<ListItem
title={props.title}
rightIcon={icon}
bottomDivider
/>
</TouchableOpacity>
)
}
class TodoScreen extends React.Component {
constructor(props){
super(props);
this.state = {
inputText:"",
filterText:"",
}
}
onAddItem = () => {
const title = this.state.inputText
if(title == "" ){
return
}
this.props.addTodo(title)
this.setState({
inputTexxt:""
})
}
onTapTodoItem= (todoItem)=>{
this.props.ToggleTodo(todoItem)
}
render() {
const filterText = this.state.filterText
let todo = this.props.todo
if(filterText !== ""){
todo = todo.filter(t=>t.title.includes(filterText))
}
const platform = Platform.os == 'ios' ? 'ios' : 'android'
return (
<KeyboardAvoidingView style={styles.container} behavior="padding">
<SearchBar
platform={platform}
cancelButtontTitle='Cancel'
onChangeText = {(text) => this.setState({filterText: text})}
onClear={()=>this.setState({filterText:''})}
value={this.state.filterText}
placeholder='Type filter text'
/>
<ScrollView style={styles.todolist}>
<FlatList data={todo}
extraData={this.state}
renderItem={({item}) =>
<TodoItem
title={item.title}
done={item.done}
onTapTodoItem={()=>this.onTapTodoItem(item)}
/>
}
keyExtractor={(item, index) => "todo_" + item.index}
/>
</ScrollView>
<View style={styles.input}>
<Input
onChangeText={(text) => this.setState({inputText:text})}
value={this.state.inputText}
style={styles.inputText}
/>
<Button
icon={
<Icon
name='plus'
size={30}
color="white"
/>
}
onPress={this.onAddItem}
title=""
buttonStyle={styles.inputButton}
/>
</View>
</KeyboardAvoidingView>
);
}
}
const mapStateToProps = state =>{
return {
todo:state.todos.todos,
}
}
const mapDispatchToProps = dispatch =>{
return {
addTodo(text){
dispatch(addTodo(text))
},
ToggleTodo(todo){
dispatch(toggleTodo(todo))
}
}
}
export default connect(mapStateToProps,mapDispatchToProps)(TodoScreen)
const styles = StyleSheet.create({
input:{
...ifIphoneX({
paddingBottom:30,
height:80
},{
height:50,
}),
height:70,
flexDirection:'row',
paddingRight:10,
},
inputText:{
paddingLeft:10,
paddingRight:10,
flex:1,
},
inputButton:{
width:48,
height:48,
borderWidth:0,
borderColor:'transparent',
borderRadius:48,
backgroundColor:'#ff6347',
},
container:{
flex:1,
backgroundColor:'#fff',
paddingTop:STATUSBAR_HEIGHT ,
},
// 追加したUIのスタイル
filter:{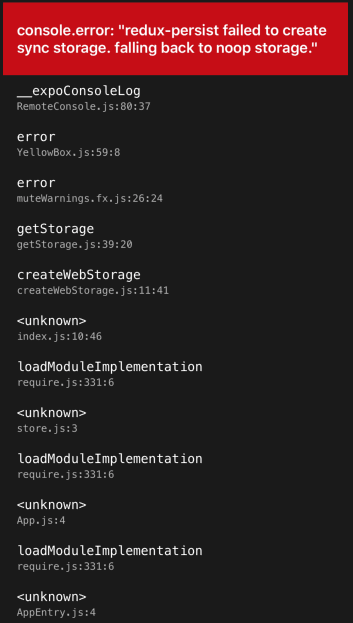
height:30,
},
inputText:{
flex:1,
},
todoItem:{
fontSize:20,
backgroundColor:"white"
},
todoItemDone:{
fontSize:20,
backgroundColor:"tomato"
},
});
出てきたエラー

よく見てみると
App.js:4
store.js:3とある。
それぞれ該当箇所を抜き出してみると
App.js
{/*4行目*/}
import store,{persistor} from "./src/store"
store.js
{/*3行目*/}
import storage from 'redux-persist/lib/storage'
どうやら、redux-persistを使うところでエラーが出ている模様。
なので。
redux-persistを追加する
npm install redux-persist --save
した後、プロジェクトを立ち上げ、エミュレータを起動してみると
結果かわらず😞
いろいろ調べてみると、どうもコマンドが悪かったようで、
https://github.com/irisAsh/learnreactlibrary/wiki/redux_persist
を参考に
yarn add redux-persist
でやってみると
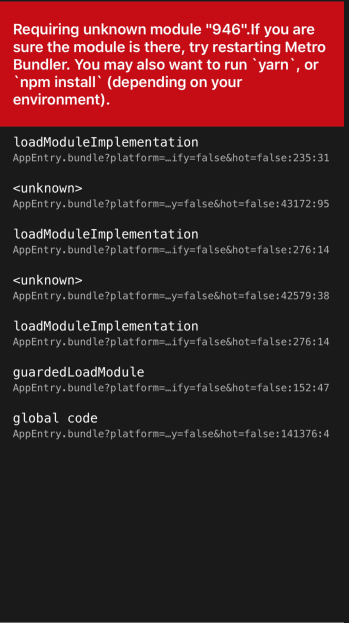
エラーが変わった☺️
もう一回
yarn add redux-persist
をやってみると、アプリが表示できた。
ただ、下の入力フィールドにテキスト入力後、保存ボタン(右のオレンジ)を押すと
またしてもエラーが
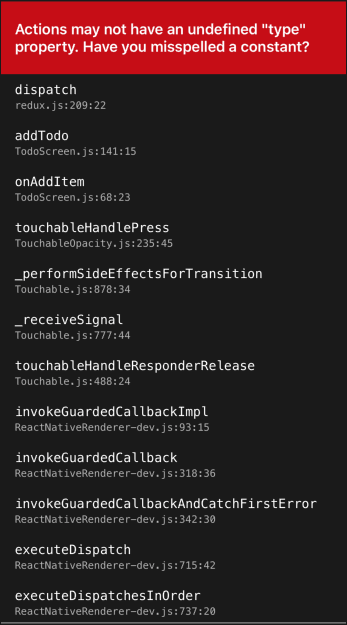
ここで、全てのコードを見直してみたところ、以下の間違いに気づいた
src/TodoScreen.js
inputTexxt → inputText
ToggleTodo →  toggleTodo
props.todo → props.todos
src/store.js
.currentIndex → ,'currentIndex'
src/action.js
Add → ADD
これを直してプロジェクトを再度立ち上げてみると、エラーが出なくなった。
最初の

は出るが、これはDismissで抜けられることが判明したので、解決ということにしておく