はじめに
先日、AWS IAM Roles Anywhereなるサービスが発表されました。
下記、公式blog記事に丁寧に書いてあるので詳細は割愛しますが、X.509証明書を用いてAWS Temporary Security Credentials (i.e. AccessKeyId/SecretAccessKey/SessionTokenの組み合わせ)を取得し、これを用いてAWS S3/DynamoDB等のAWSサービスを利用できる仕組みとなります。
Extend AWS IAM roles to workloads outside of AWS with IAM Roles Anywhere | AWS Security Blog
https://aws.amazon.com/jp/blogs/security/extend-aws-iam-roles-to-workloads-outside-of-aws-with-iam-roles-anywhere/
本稿の動機
公式blog記事は丁寧に書いてあり、記載に従えば一通りの挙動は検証できるようになっていますが、プライベートCA局としてAWS Certificate Manager Private CAを利用している点がネックになります。
下記の通り、当該サービスは30日の無料試用期間はあるものの、基本的には$400/月の料金がかかるため、個人で試すには些かハードルが高いものと思います。
料金 - AWS Certificate Manager | AWS
https://aws.amazon.com/jp/certificate-manager/pricing/
そこで、AWS Certificate Manager Private CAの代わりに、自前の自己署名のルートCA局を作って代替とする手順を整理しました。
ちょっとIAM Roles Anywhereを試したい、といった方の参考になれば幸いです。
検証内容
OpenSSLを用いて、自前のプライベートCA局を構築します。
IAM Roles AnywhereのTrust anchorにプライベートCA局の証明書を登録し、信頼関係を構築します。
その後、自前のプライベートCA局にて、オンプレミスサーバでの利用を想定したX.509証明書およびこれに紐づく秘密鍵を作成します。
当該の証明書と秘密鍵を用いて、AWS Temporary Security Credentialsを取得し、S3 Bucketにアクセスできることを確認します。
用語の定義
IAM Roles AnywhereはX.509証明書を利用します。
オンプレミスサーバ等向けのX.509証明書をあらかじめ発行しておくことが必要になりますが、この目的の証明書を限定的に呼称するため、本稿では「サーバEntity用の証明書」と呼ぶことにします。(良い名称が思いつかない…)
その他、文言がぶれやすいものを以下に定義しておきます。
- 自前プライベートCA局: 今回自前で作るCA局。
- プライベートCA局ルート証明書: 自前プライベートCA局の証明書。自己署名の証明書となる。
- サーバEntity用の証明書: 自前プライベートCA局にて署名する証明書。オンプレミスサーバ等での利用を想定したもの。
- AWS Temporary Security Credentials: AssumeRoleを行った場合など、AWS STSにて一時的に発行されるクレデンシャル情報。AccessKeyId/SecretAccessKey/SessionTokenの組み合わせ。
環境
AWS IAM自体はグローバルサービスとなりますが、IAM Roles Anywhereはリージョナルなサービスとなります。本稿ではus-west-2リージョンを利用しました。
自前プライベートCA局の構築、証明書の発行にはOpenSSLを用いました。opensslコマンドを実行できる環境が必要です。
- AWS
- AWSアカウントID: 998877665544
- Region: Oregon(us-west-2)
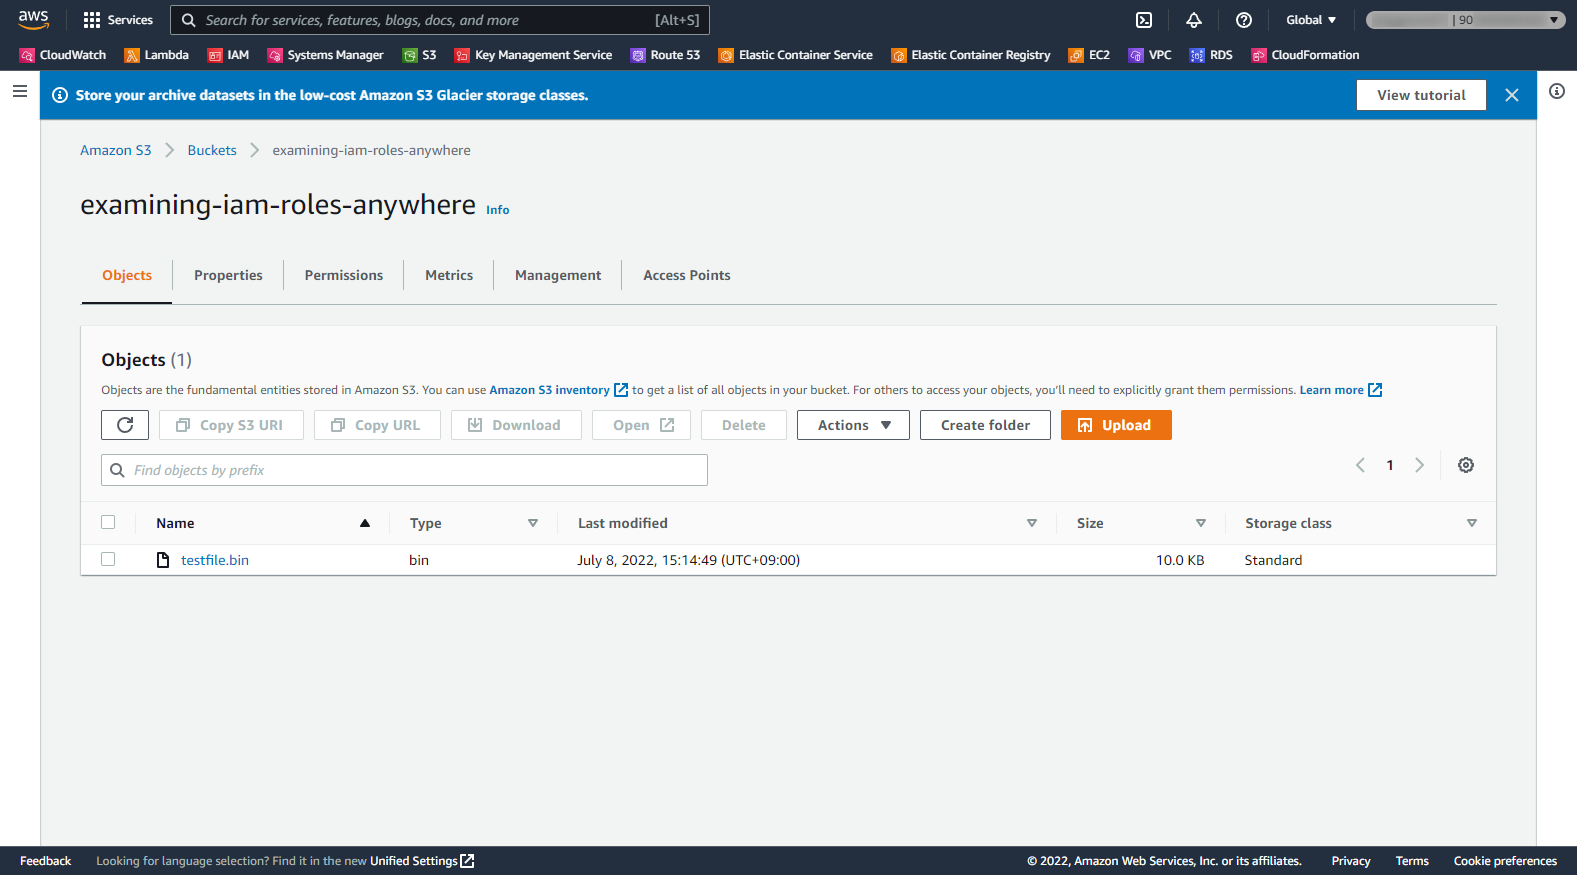
- 動作確認用S3 Bucket:
- S3 Bucket名: examining-iam-roles-anywhere
- 確認用ファイル: s3://examining-iam-roles-anywhere/testfile.bin
- IAM Role: ExaminingIAMRolesAnywhereExampleRole
- IAM Roles Anywhere
- Trust anchor name: Examining IAM Roles Anywhere Root CA
- Prorile name: example server entities
- OpenSSL実行環境
- OS: Amazon Linux 2
- OpenSSLバージョン(@amzn-coreリポジトリ上のバージョン): 1:1.0.2k-24.amzn2.0.3
- 自前プライベートCA局/X.509証明書関連
- 自前のCA局の名称(Issuer/SubjectのCN): Examining IAM Roles Anywhere Root CA
- サーバEntity用の証明書の名称(SubjectのCN): example server entity 1
作業ステップ(概要)
大きく以下のステップになります。
IAM Roles Anywhereを利用して、あるX.509証明書を用いてAWS Temporary Security Credentialsを取得し、これを以てS3 Bucket上のファイルを参照・取得できることを確認します。
大項番2および4はOpenSSLコマンドによる作業となります。
- アクセス確認用のS3 Bucketを作成し適当なファイルを格納する
- 自前プライベートCA局を作る
2-1. 自前プライベートCA局の秘密鍵を作る
2-2. 自前プライベートCA局の証明書を発行する
2-3. 自前プライベートCA局の証明書の内容を確認する - IAM Roles Anywhereを設定する
3-1. IAM Roleを作る
3-2. IAM Roles Anywhere Trust anchorを作る
3-3. IAM Roles Anywhere Profileを作る - サーバEntity用証明書を作る
4-1. サーバEntity用の秘密鍵を作る
4-2. サーバEntity用の証明書を発行する
4-3. サーバEntity用の証明書の内容を確認する - サーバEntity用証明書を用いて、アクセス確認用のS3 Bucketを参照する
5-1. IAM Roles Anywhere用のcredential helper toolをインストールする
5-2. サーバEntity用の証明書・秘密鍵を用いて、AWS Temporary Security Credentialsを取得する
5-3. 取得したAWS Temporary Security Credentialsの権限を確認する
5-4. アクセス確認用のS3 Bucketからファイルを取得する
作業ステップ(詳細)
1. アクセス確認用のS3 Bucketを作成し適当なファイルを格納する
まず、動作確認のためのS3 Bucketを作成し、適当なファイルを格納します。
以下のS3 Bucketを作成し、確認用ファイルを格納しました。
2. 自前プライベートCA局を作る
自前プライベートCA局の構築は、全てopensslコマンドを利用したものとなります。
opensslを利用できる環境をあらかじめ用意しておく必要があります。
なお、この作業では幾つかのファイルを作成します。各ファイルの用途とファイル名をここにまとめておきます。
| No. | ファイル名 | 説明 |
|---|---|---|
| 1 | my_private_root_ca.priv.key | 自前プライベートCA局の秘密鍵。自分自身の証明書やサーバEntity用の証明書の署名に用いる。 |
| 2 | my_private_root_ca.req.csr | 自前プライベートCA局の証明書を発行する際に用いるCSR。当該証明書発行後、不要となる。 |
| 3 | my_private_root_ca.cert_v3ext.txt | X.509 V3拡張の項目を定義するためのファイル。当該証明書発行後、不要となる。 |
| 4 | my_private_root_ca.cert_v3.crt | 自前プライベートCA局の証明書。IAM Roles Anywhere Trust anchor作成時に必要となる。 |
2-1. 自前プライベートCA局の秘密鍵を作る
まずは自前プライベートCA局の秘密鍵を作成します。実行するコマンドは下記だけです。
$ openssl genrsa -out my_private_root_ca.priv.key 4096
Generating RSA private key, 4096 bit long modulus
.++
..............................................++
2-2. 自前プライベートCA局の証明書を発行する
CSR、およびV3拡張項目定義用のファイルを作成した後、これを用いて証明書を発行します。
まずはCSR作成します。
今回はCommon Name(CN)として、 「Examining IAM Roles Anywhere Root CA」 という文字列を設定します。
Country Name、State or Province Name、Locality Name等は任意で好きなものを設定してください。
$ openssl req -new -key my_private_root_ca.priv.key -out my_private_root_ca.req.csr
You are about to be asked to enter information that will be incorporated
into your certificate request.
What you are about to enter is what is called a Distinguished Name or a DN.
There are quite a few fields but you can leave some blank
For some fields there will be a default value,
If you enter '.', the field will be left blank.
-----
Country Name (2 letter code) [XX]:JP
State or Province Name (full name) []:Tokyo
Locality Name (eg, city) [Default City]:
Organization Name (eg, company) [Default Company Ltd]:Examining IAM Roles Anywhere company
Organizational Unit Name (eg, section) []:Examining IAM Roles Anywhere section
Common Name (eg, your name or your server's hostname) []:Examining IAM Roles Anywhere Root CA
Email Address []:

Please enter the following 'extra' attributes
to be sent with your certificate request
A challenge password []:
An optional company name []:
次に、V3拡張項目定義用のファイルを作成します。これは単純なテキストファイルです。
下記ドキュメント記載の通り、IAM Roles Anywhereで用いる証明書は、X.509 V3拡張項目のうち特定のものが含まれている必要があります。
Trust model in AWS Identity and Access Management Roles Anywhere
各項目の説明は下記を参照ください。
/docs/manmaster/man5/x509v3_config.html
ほか、ラムダノート社から出ている「プロフェッショナルSSL/TLS」にも、X.509 V3拡張項目の説明があります。
プロフェッショナルSSL/TLS
$ vi my_private_root_ca.cert_v3ext.txt
# 以下の内容を記載
basicConstraints = critical, CA:TRUE
subjectKeyIdentifier = hash
keyUsage = digitalSignature, keyCertSign, cRLSign
最後に、自前プライベートCA局の証明書を発行します。「-out」オプションで出力先ファイル名として「my_private_root_ca.cert_v3.crt」を指定していますが、これが自前プライベートCA局の証明書となります。
$ openssl x509 -req -days 7300 \
  -in my_private_root_ca.req.csr \
  -extfile my_private_root_ca.cert_v3ext.txt \
  -signkey my_private_root_ca.priv.key \
  -out my_private_root_ca.cert_v3.crt
Signature ok
subject=/C=JP/ST=Tokyo/L=Default City/O=Examining IAM Roles Anywhere company/OU=Examining IAM Roles Anywhere section/CN=Examining IAM Roles Anywhere Root CA
Getting Private key
2-3. 自前プライベートCA局の証明書の内容を確認する
発行した自前プライベートCA局の証明書の内容を確認します。
SubjectのCNが、CSR作成時に指定した 「Examining IAM Roles Anywhere Root CA」 と同一であることを確認します。
なお、自己署名証明書なのでIssuerとSubjectが同一になります。
$ openssl x509 -in my_private_root_ca.cert_v3.crt -text -noout
Certificate:
    Data:
        Version: 3 (0x2)
        Serial Number:
            e1:95:48:a3:bc:f6:2b:c1
    Signature Algorithm: sha256WithRSAEncryption
        Issuer: C=JP, ST=Tokyo, L=Default City, O=Examining IAM Roles Anywhere company, OU=Examining IAM Roles Anywhere section, CN=Examining IAM Roles Anywhere Root CA
        Validity
            Not Before: Jul  8 01:52:26 2022 GMT
            Not After : Jul  3 01:52:26 2042 GMT
        Subject: C=JP, ST=Tokyo, L=Default City, O=Examining IAM Roles Anywhere company, OU=Examining IAM Roles Anywhere section, CN=Examining IAM Roles Anywhere Root CA
        Subject Public Key Info:
            Public Key Algorithm: rsaEncryption
                Public-Key: (4096 bit)
                Modulus:
                    00:c5:87:b5:c8:fd:5b:c1:8a:28:11:df:13:3d:89:
                    # ※省略
                Exponent: 65537 (0x10001)
        X509v3 extensions:
            X509v3 Basic Constraints: critical
                CA:TRUE
            X509v3 Subject Key Identifier:
                24:31:11:76:45:31:AE:73:AC:D2:86:B8:D8:78:CC:BD:9D:EF:75:20
            X509v3 Key Usage:
                Digital Signature, Certificate Sign, CRL Sign
    Signature Algorithm: sha256WithRSAEncryption
         58:f8:2d:e4:78:09:a4:b9:64:b4:70:89:cf:b1:36:cf:c4:21:
         # ※省略
以上で、自前プライベートCA局の構築作業は完了です。
3. IAM Roles Anywhereを設定する
以下の作業はAWS Management Consoleから実施します。もちろんAWS CLIで同等のことを実施できますが、本稿では割愛します。
3-1. IAM Roleを作る
まずはIAM Roleを作成します。
Trust relationshipsに指定するTrust policyが、IAM Roles Anywhere用の指定であるほかは、通常のIAM Roleと同じです。
以下の内容で作成します。
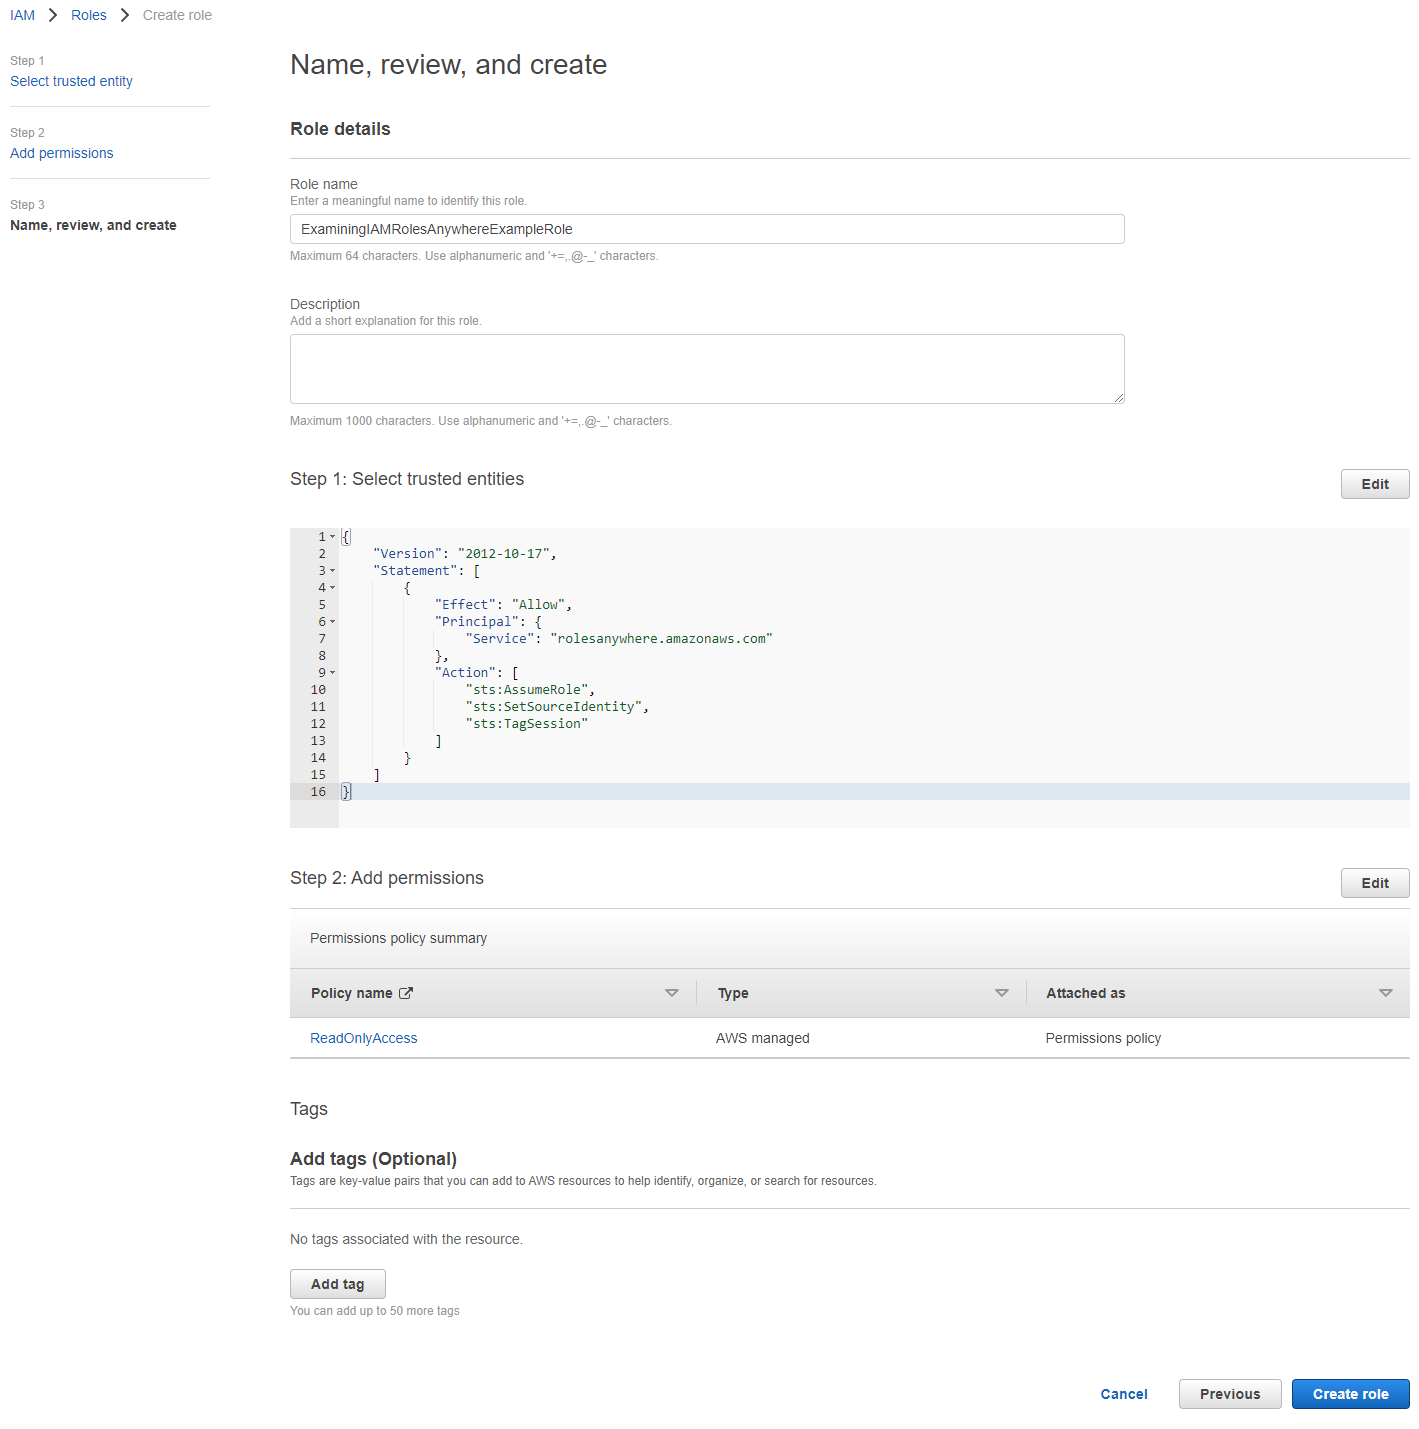
- Role name: ExaminingIAMRolesAnywhereExampleRole
- Custom trust policy: ※後述
- Permissions: ReadOnlyAccess(※AWS Managed Policyを付与)
{
    "Version": "2012-10-17",
    "Statement": [
        {
            "Effect": "Allow",
            "Principal": {
                "Service": "rolesanywhere.amazonaws.com"
            },
            "Action": [
                "sts:AssumeRole",
                "sts:SetSourceIdentity",
                "sts:TagSession"
            ]
        }
    ]
}
AWS Management Console上での操作の場合、最後のReview画面は以下のようになるでしょう。
3-2. IAM Roles Anywhere Trust anchorを作る
まず、以下のURLからIAM Roles Anywhereの管理画面を開きます。デフォルトがN.Virginiaリージョンになっているかもしれませんが、適切なリージョンを選択します。
https://console.aws.amazon.com/rolesanywhere/home/
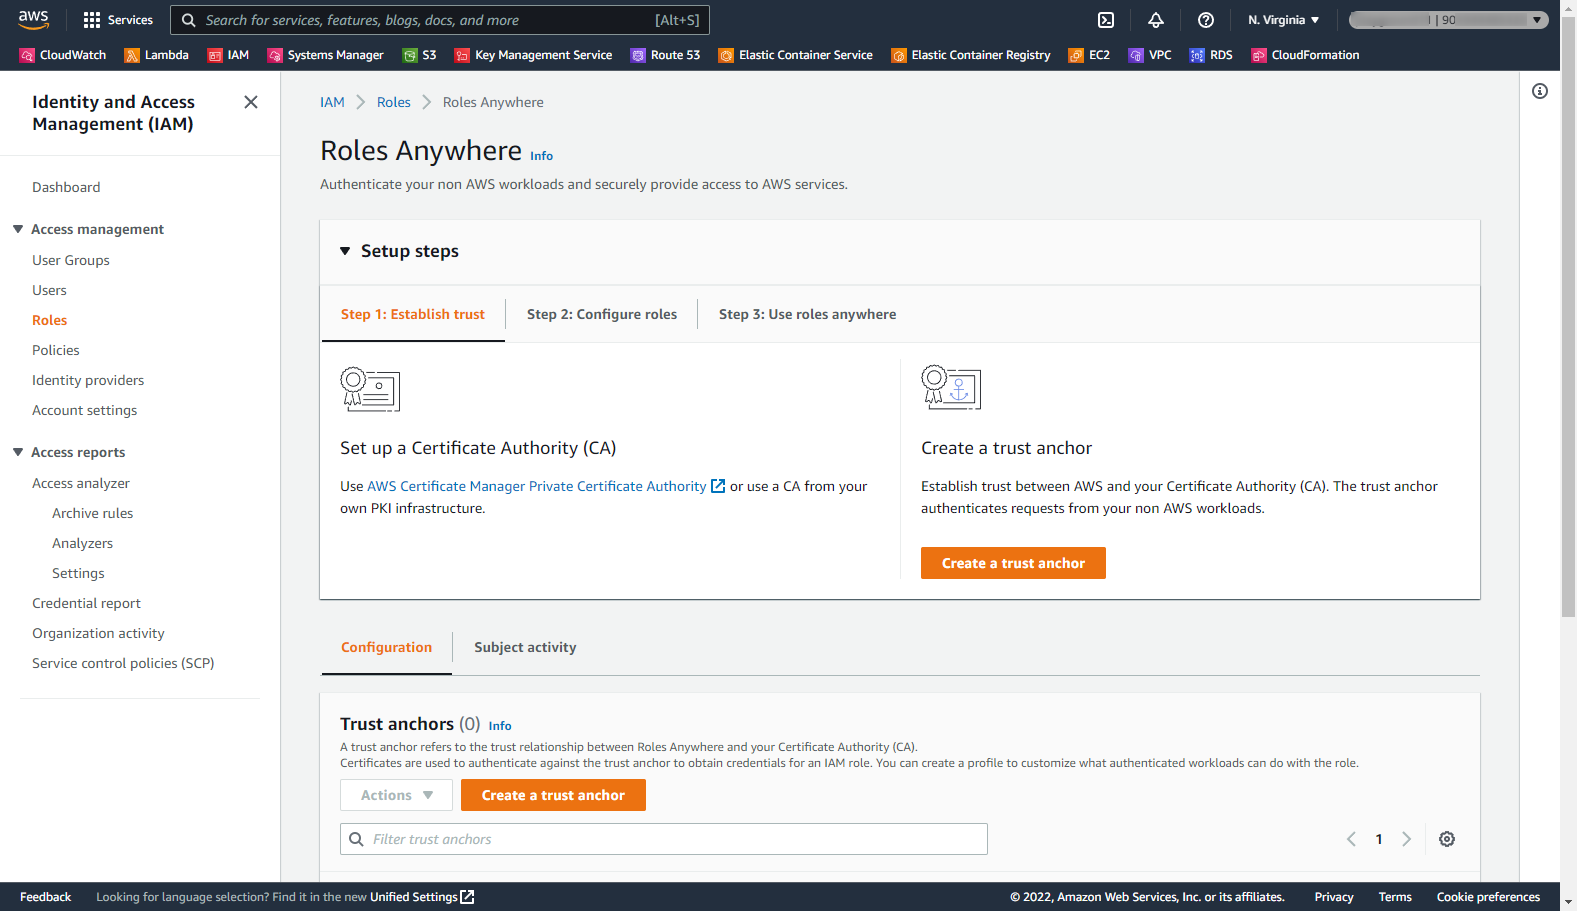
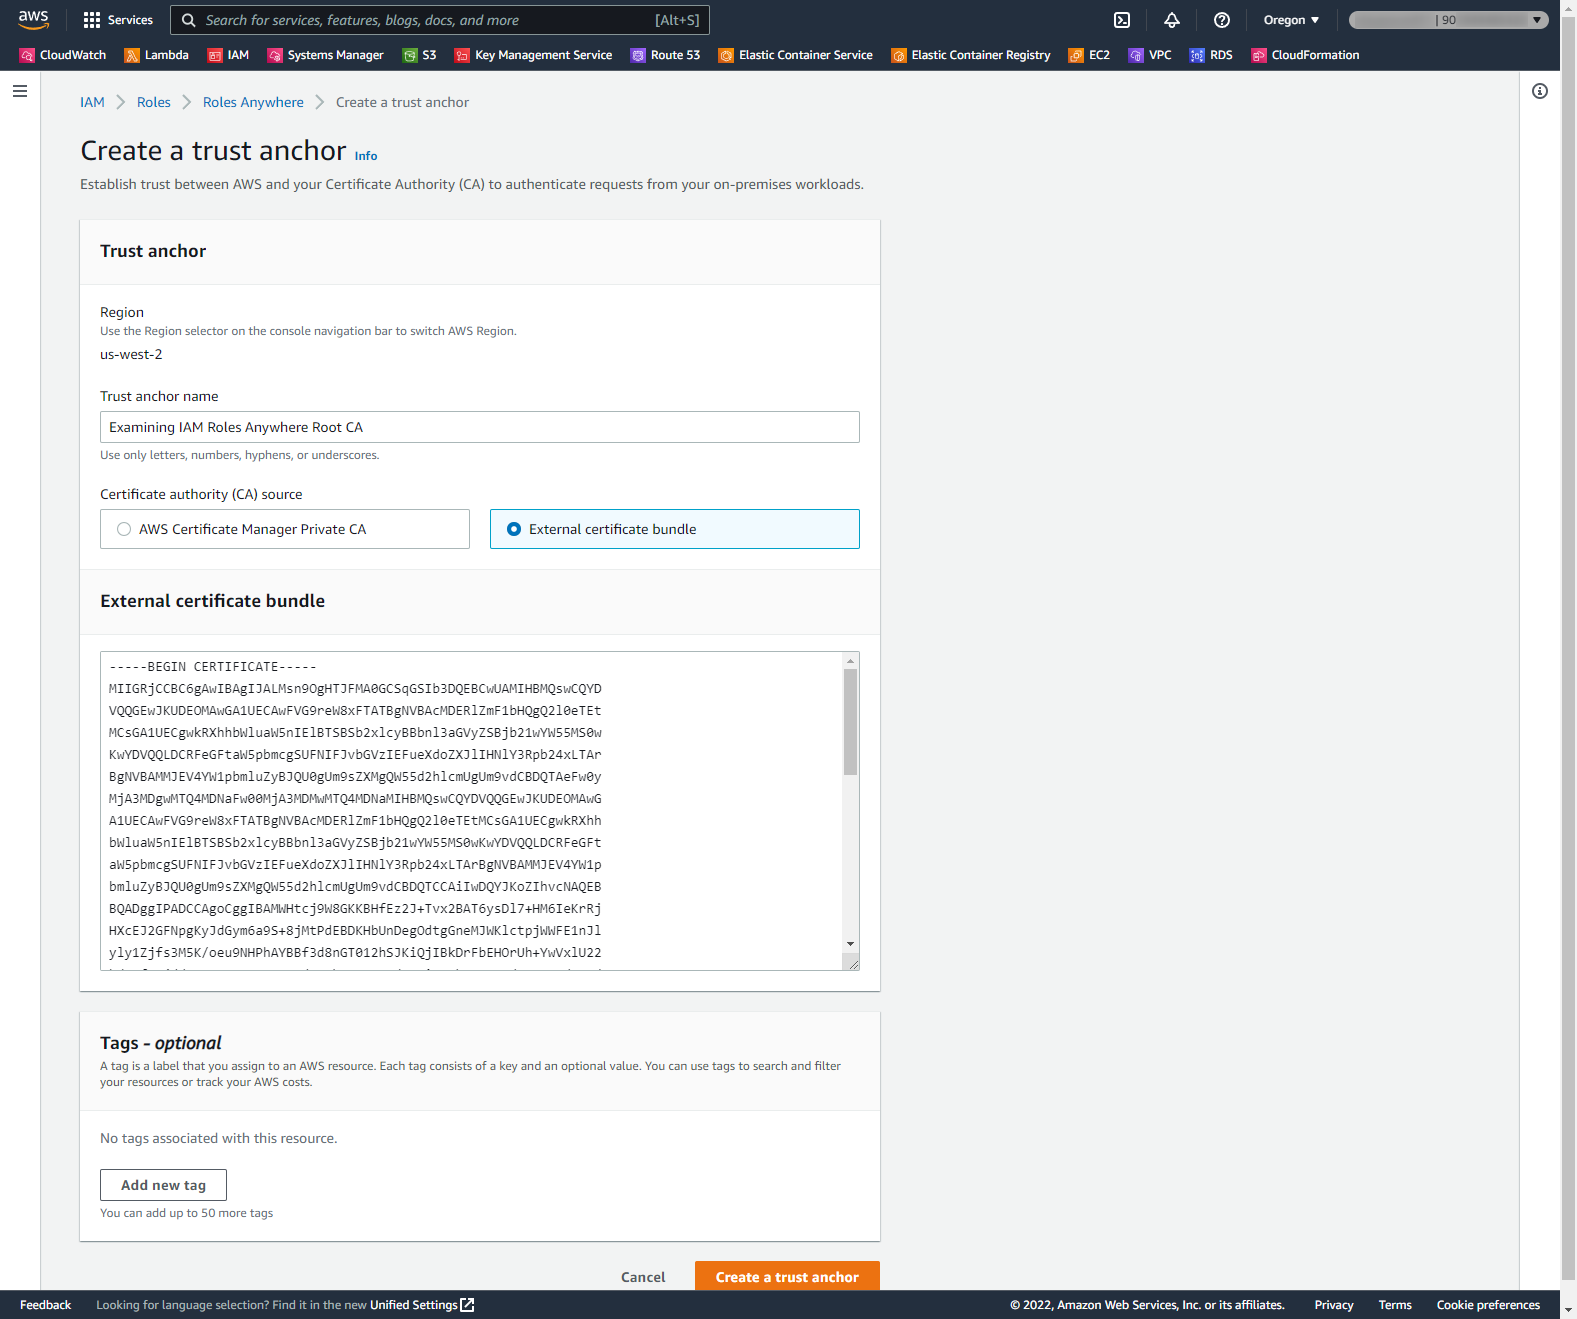
「Create a trust anchor」 画面にて、以下の内容を指定し、 「Create a trust anchor」 ボタンを押します。
Trust anchor nameの名称は何でもよいのですが、自前プライベートCA局のSubject CNと同じものにします。
- Trust anchor name: Examining IAM Roles Anywhere Root CA
- Certificate authority (CA) source: External certificate bundle
- External certificate bundle: ※項番2で発行した、自前プライベートCA局の証明書の内容をそのまま貼り付けます。
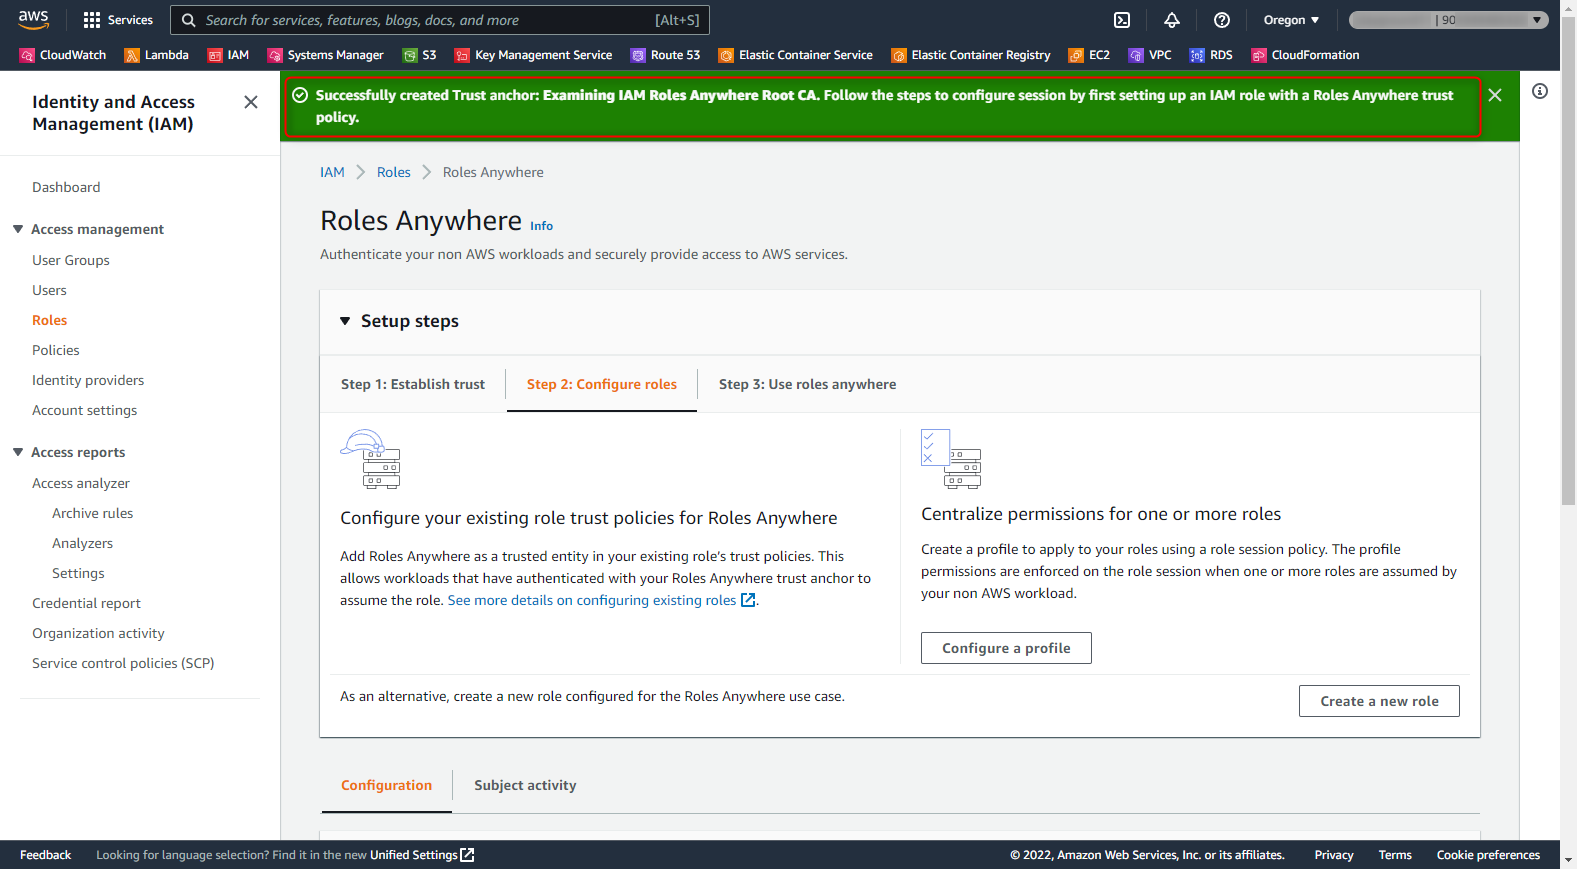
画面右上の緑色のバーに、「Successfully created Trust anchor: ~~」といったメッセージが表示されたら成功です。
3-3. IAM Roles Anywhere Profileを作る
次に、IAM Roles AnywhereのProfileを作ります。
これは、付与するIAM Roleの権限をさらに狭めるために用いるもののようです。
権限のAuthorizationについては本稿では割愛するため、ここでは具体的な制約は設定しません。
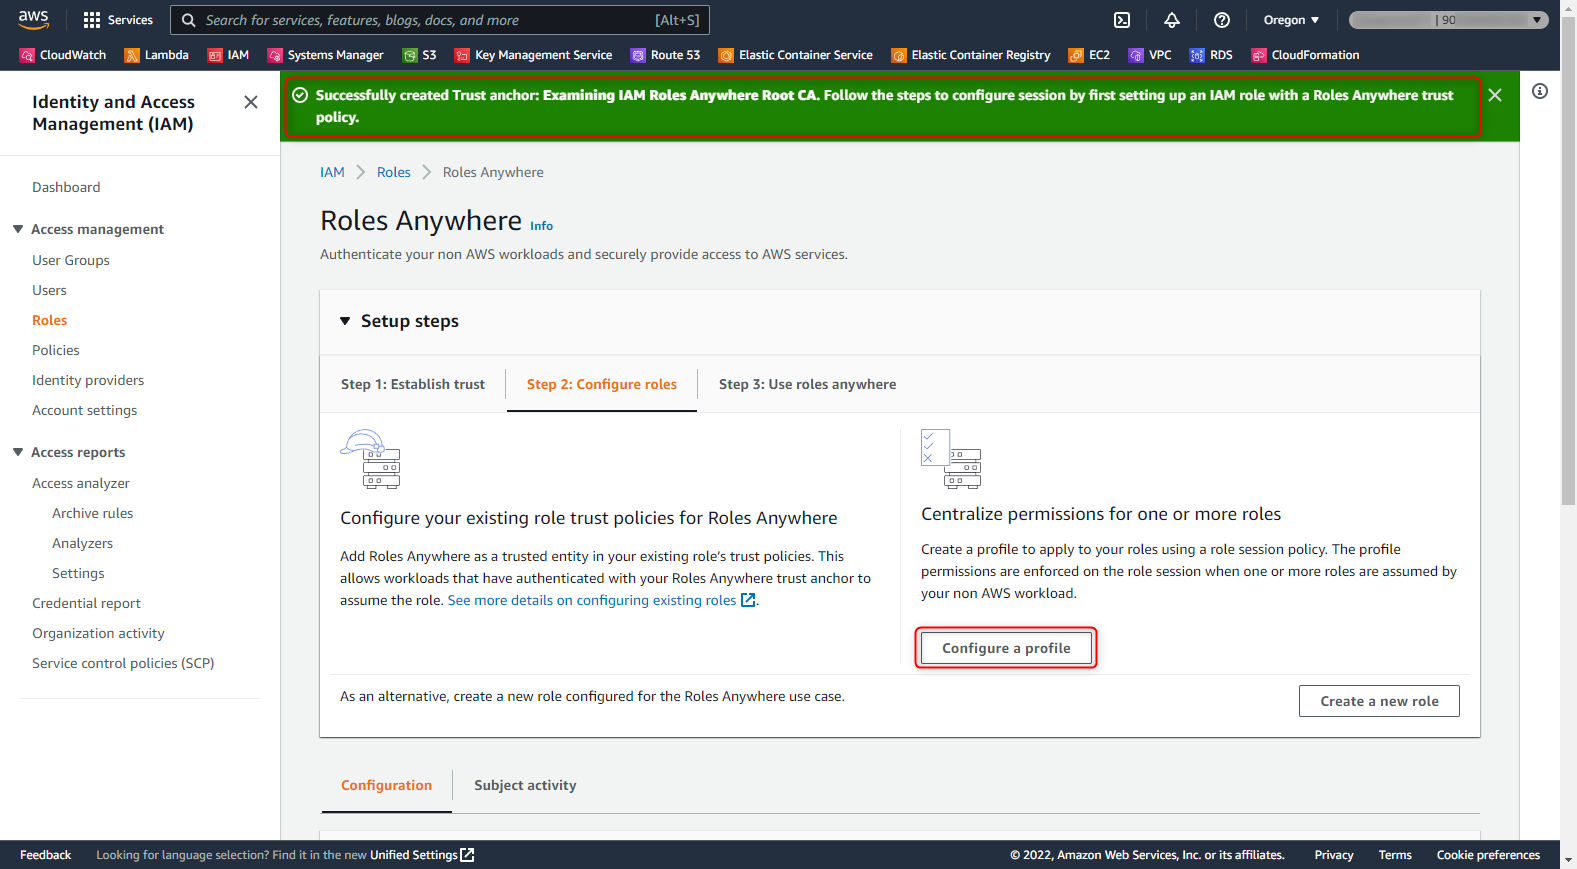
先のIAM Roles Anywhereの管理画面から、「Configure a profile」 ボタンを押します。
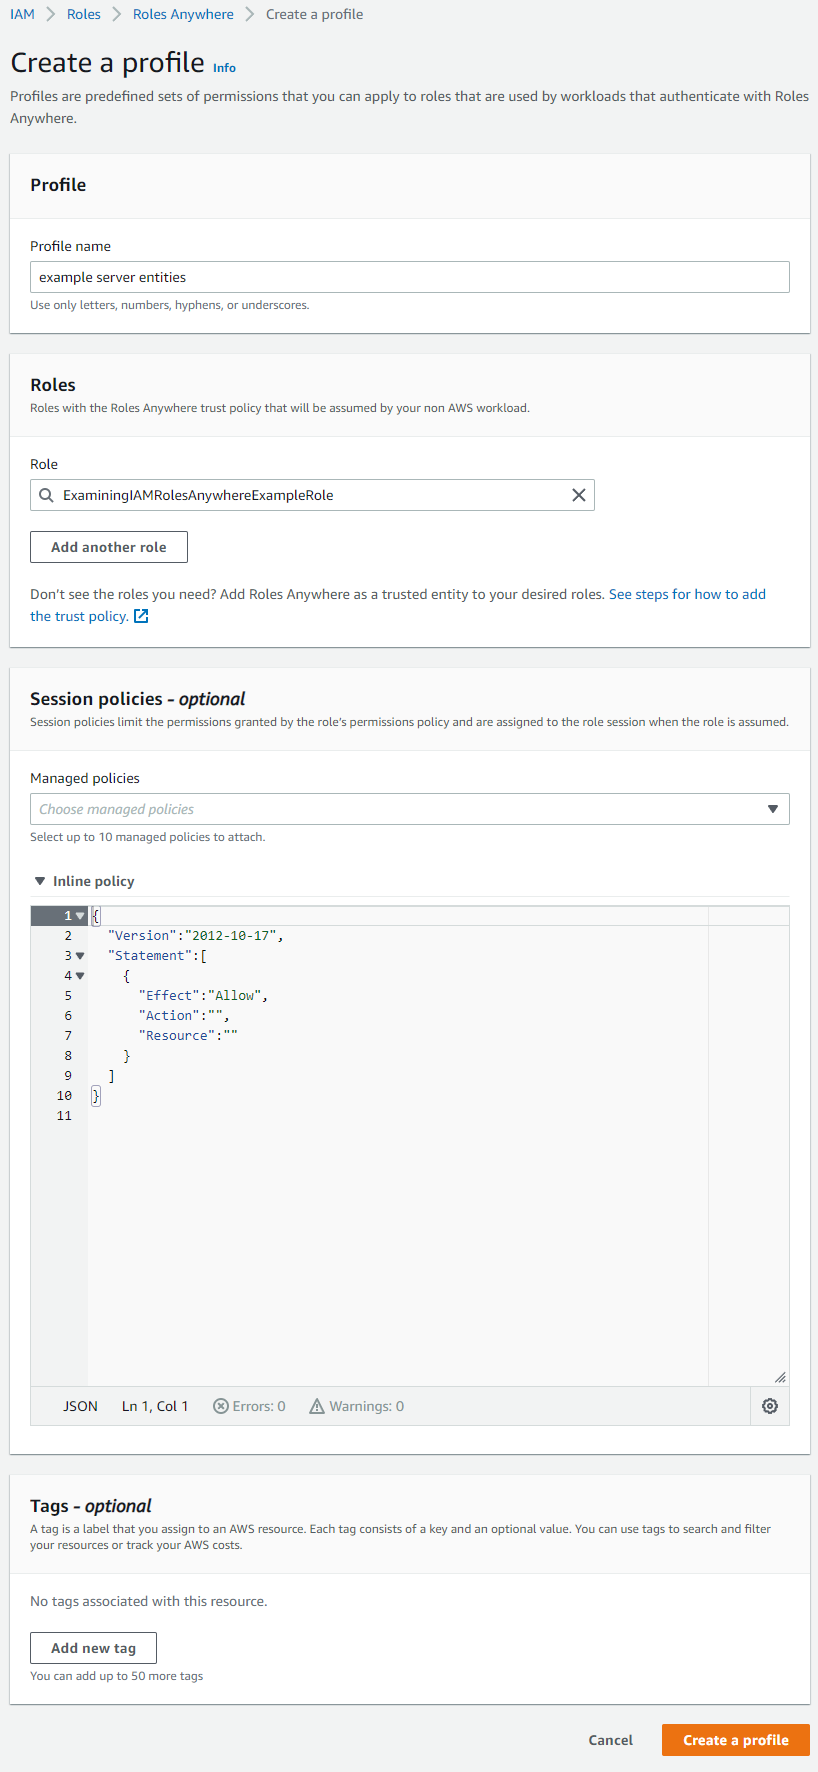
遷移後の 「Create a profile」 画面にて以下の内容を指定し、「Create a profile」 ボタンを押します。
- Profile:
- Profile name: example server entities
- Roles:
- Role: ExaminingIAMRolesAnywhereExampleRole
- Session policies
- ※デフォルトのまま変更せず
画面右上の緑色のバーに、「Successfully created Profile: ~~」といったメッセージが表示されたら成功です。
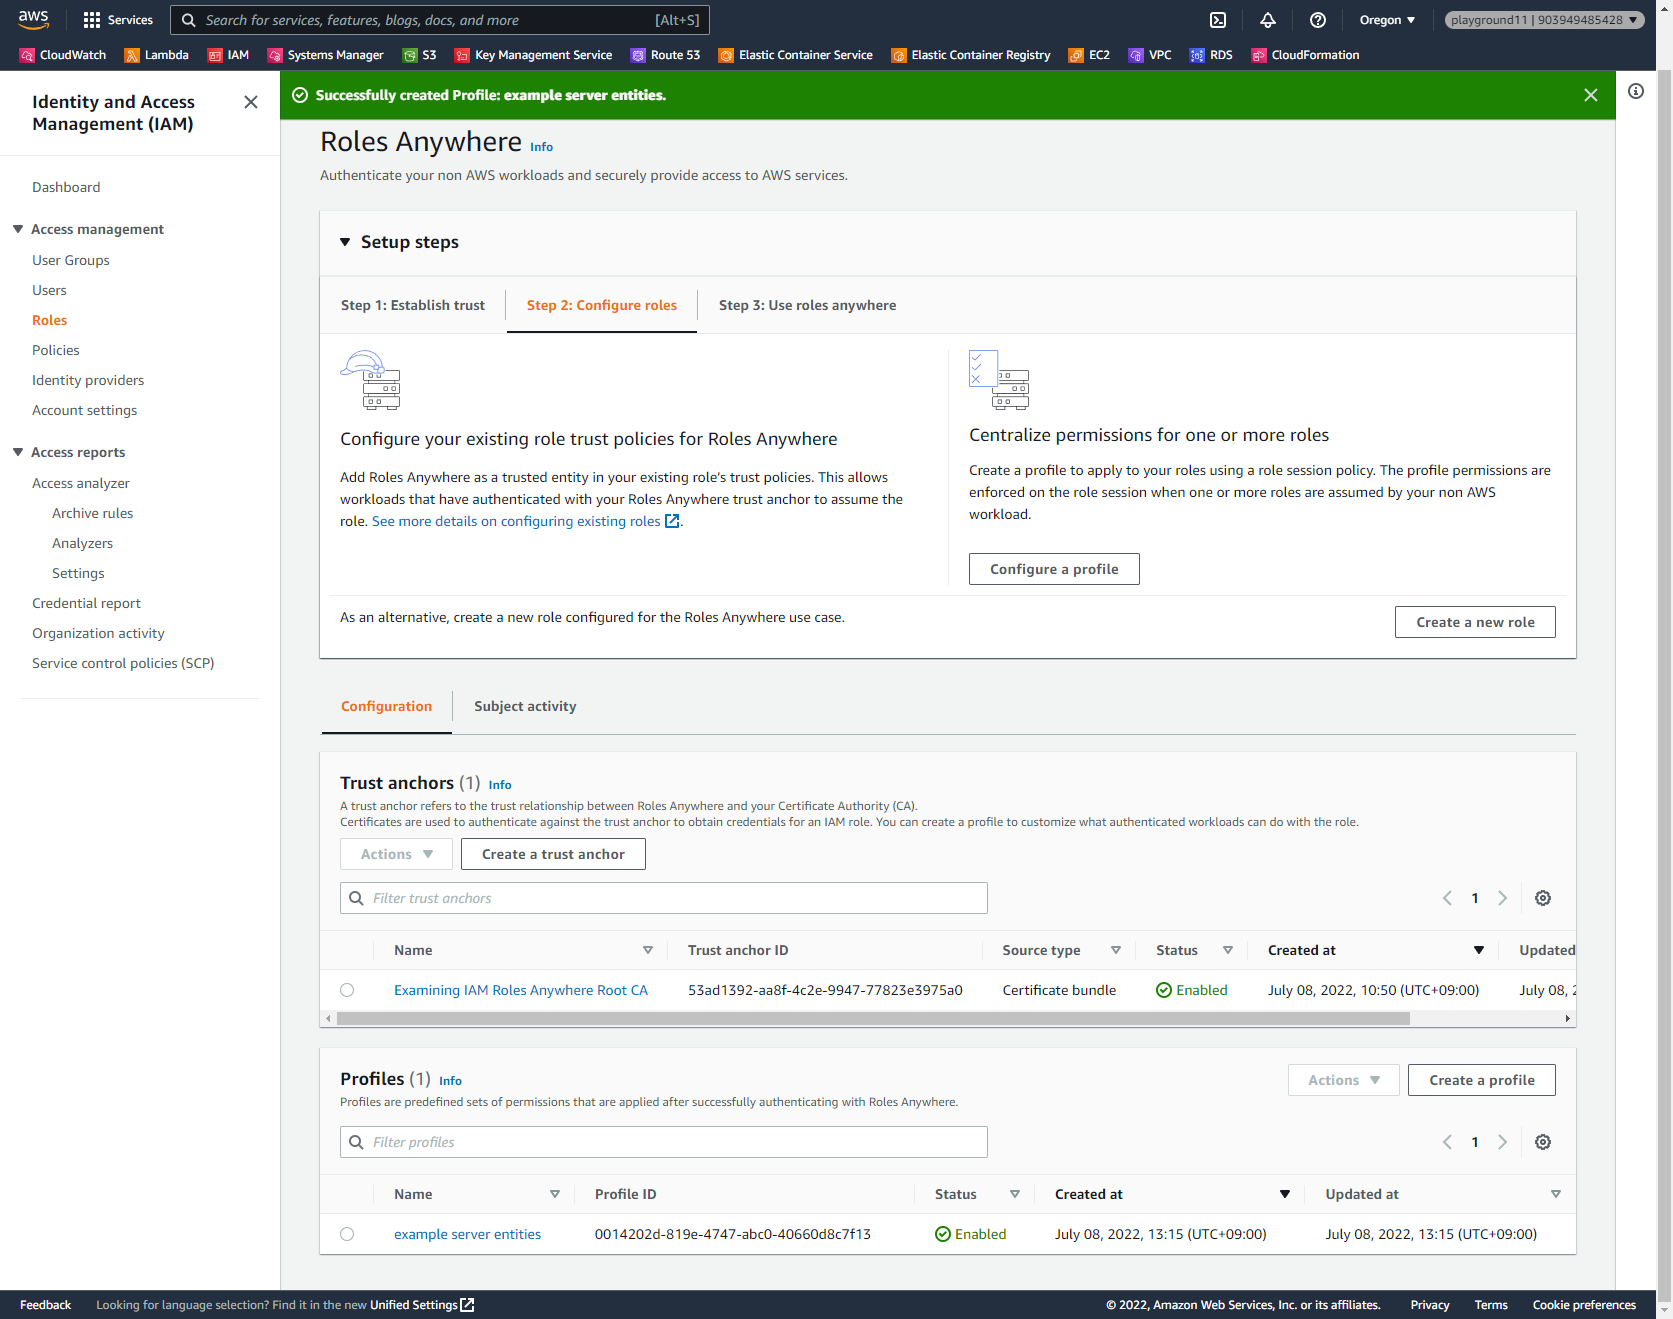
以上で、IAM Roles Anywhere側の設定は完了です。
4. サーバEntity用証明書を作る
サーバEntity用証明書の発行も、全てopensslコマンドを利用したものとなります。
なお、この作業では幾つかのファイルを作成します。各ファイルの用途とファイル名をここにまとめておきます。
| No. | ファイル名 | 説明 |
|---|---|---|
| 1 | example_entity_1.priv.key | サーバEntity用の秘密鍵。AWS Temporary Security Credentialsを得るのに必要となる。 |
| 2 | example_entity_1.req.csr | サーバEntity用証明書のCSR。当該証明書発行後、不要となる。 |
| 3 | example_entity_1.cert_v3ext.txt | X.509 V3拡張の項目を定義するためのファイル。当該証明書発行後、不要となる。 |
| 4 | example_entity_1.cert_v3.crt | サーバEntity用の証明書。AWS Temporary Security Credentialsを得るのに必要となる。 |
4-1. サーバEntity用の秘密鍵を作る
サーバEntity用の秘密鍵を作成します。実行するコマンドは下記だけです。
$ openssl genrsa -out example_entity_1.priv.key 4096
Generating RSA private key, 4096 bit long modulus
.......................................................................................++
..............................................................................++
4-2. サーバEntity用の証明書を発行する
CSR、およびV3拡張項目定義用のファイルを作成した後、これを用いて証明書を発行します。
まずはCSR作成します。
今回はCommon Name(CN)として、 「example server entity 1」 という文字列を設定します。
Country Name、State or Province Name、Locality Name等は任意で好きなものを設定してください。
次に、V3拡張項目定義用のファイルを作成します。これは単純なテキストファイルです。
下記ドキュメント記載の通り、IAM Roles Anywhereで用いる証明書は、X.509 V3拡張項目のうち特定のものが含まれている必要があります。
Trust model in AWS Identity and Access Management Roles Anywhere
各項目の説明は下記を参照ください。
/docs/manmaster/man5/x509v3_config.html
ほか、ラムダノート社から出ている「プロフェッショナルSSL/TLS」にも、X.509 V3拡張項目の説明があります。
プロフェッショナルSSL/TLS
$ vi my_private_root_ca.cert_v3ext.txt
# 以下の内容を記載
basicConstraints = CA:FALSE
authorityKeyIdentifier = keyid
subjectKeyIdentifier = hash
keyUsage = digitalSignature, keyEncipherment
extendedKeyUsage = serverAuth, clientAuth
最後に、サーバEntity用の証明書を発行します。「-out」オプションで出力先ファイル名として「example_entity_1.cert_v3.crt」を指定していますが、これがサーバEntity用の証明書となります。
$ openssl x509 -req \
  -CAkey my_private_root_ca.priv.key \
  -CA my_private_root_ca.cert_v3.crt \
  -CAcreateserial \
  -in example_entity_1.req.csr \
  -extfile example_entity_1.cert_v3ext.txt \
  -out example_entity_1.cert_v3.crt
Signature ok
subject=/C=JP/ST=Tokyo/L=Default City/O=Examining IAM Roles Anywhere company/OU=Examining IAM Roles Anywhere section/CN=example server entity 1
Getting CA Private Key
4-3. サーバEntity用の証明書の内容を確認する
発行したサーバEntity用の証明書の内容を確認します。
以下の2点を確認します。
- SubjectのCNが、CSR作成時に指定した 「example server entity 1」 と同一であること
- Issuerが、自前プライベートCA局のSubjectと同一であること(特に、CNが 「Examining IAM Roles Anywhere Root CA」 であること)を確認します。
$ openssl x509 -in example_entity_1.cert_v3.crt -text -noout
Certificate:
  Data:
      Version: 3 (0x2)
      Serial Number:
          bd:4b:dc:12:bb:c9:05:68
  Signature Algorithm: sha256WithRSAEncryption
      Issuer: C=JP, ST=Tokyo, L=Default City, O=Examining IAM Roles Anywhere company, OU=Examining IAM Roles Anywhere section, CN=Examining IAM Roles Anywhere Root CA
      Validity
          Not Before: Jul  8 06:08:14 2022 GMT
          Not After : Aug  7 06:08:14 2022 GMT
      Subject: C=JP, ST=Tokyo, L=Default City, O=Examining IAM Roles Anywhere company, OU=Examining IAM Roles Anywhere section, CN=example server entity 1
      Subject Public Key Info:
          Public Key Algorithm: rsaEncryption
              Public-Key: (4096 bit)
              Modulus:
                  00:ca:22:b0:21:14:a7:73:29:5d:e9:cc:fa:64:52:
                  # ※省略
              Exponent: 65537 (0x10001)
      X509v3 extensions:
          X509v3 Basic Constraints:
              CA:FALSE
          X509v3 Authority Key Identifier:
              keyid:24:31:11:76:45:31:AE:73:AC:D2:86:B8:D8:78:CC:BD:9D:EF:75:20

          X509v3 Subject Key Identifier:
              FA:72:69:92:FE:0A:68:B2:9B:09:14:AC:17:32:48:EA:E8:78:14:23
          X509v3 Key Usage:
              Digital Signature, Key Encipherment
          X509v3 Extended Key Usage:
              TLS Web Server Authentication, TLS Web Client Authentication
  Signature Algorithm: sha256WithRSAEncryption
       2a:b7:5e:0a:2c:55:f8:a5:35:87:e3:51:a4:bc:24:dd:ed:09:
       # ※省略
以上で、サーバEntity用証明書の発行作業は完了です。
5. サーバEntity用証明書を用いて、アクセス確認用のS3 Bucketを参照する
以下作業は、AWS CLIおよびaws_signing_helperというツールが必要となります。
インストール・実行できる環境をあらかじめ用意しておく必要があります。
5-1. IAM Roles Anywhere用のcredential helper toolをインストールする
IAM Roles Anywhere用のcredential helper toolは、以下からダウンロードできます。
本稿ではAmazon Linux 2を用いていますが、環境にあわせてダウンロード、インストールしておいてください。
credential helper toolをダウンロードし、実行権限を付与します。当該ツールは 「aws_signing_helper」 というファイル名となります。
$ wget https://s3.amazonaws.com/roles-anywhere-credential-helper/CredentialHelper/latest/linux_amd64/aws_signing_helper

$ chmod +x ./aws_signing_helper
5-2. サーバEntity用の証明書・秘密鍵を用いて、AWS Temporary Security Credentialsを取得する
上記でダウンロードした 「aws_signing_helper」 を用いて、AWS Temporary Security Credentialsを取得します。
実行には、当然ですが、サーバEntity用の秘密鍵および証明書が必要になります。
また、以下の3つのARNが必要になります。今回はそれぞれ以下の値となります。
- IAM Roles Anywhere Trust AnchorのARN:
- IAM Roles Anywhere ProfileのARN:
- AssumeRole対象のIAM RoleのARN:
以下のようにコマンドを実行します。成功すると結果がJSONで出力されるので、実行時にjqにリダイレクトしておきます。
$ ./aws_signing_helper credential-process \
 --certificate ./example_entity_1.cert_v3.crt \
 --private-key ./example_entity_1.priv.key \
 --trust-anchor-arn arn:aws:rolesanywhere:us-west-2:998877665544:trust-anchor/599473a2-aa8f-823-d139-77e4c2e3975a0 \
 --profile-arn arn:aws:rolesanywhere:us-west-2:998877665544:profile/00474714-9e81-202d-abc0-640f1603d8c7 \
 --role-arn arn:aws:iam::998877665544:role/ExaminingIAMRolesAnywhereExampleRole \
| jq .
#
# 成功すると、以下のようなJSONが出力される
#
{
"Version": 1,
"AccessKeyId": "ASIA********",
"SecretAccessKey": "7lbp****************",
"SessionToken": "IQo****************WQ==",
"Expiration": "2022-07-08T07:10:36Z"
}
上記で取得したAWS Temporary Security Credentialsを利用するため、以下のように環境変数をセットします。
$ export AWS_ACCESS_KEY_ID="ASIA********"
$ export AWS_SECRET_ACCESS_KEY="7lbp****************"
$ export AWS_DEFAULT_REGION=us-west-2
$ export AWS_SESSION_TOKEN="IQo****************WQ=="
5-3. 取得したAWS Temporary Security Credentialsの権限を確認する
上記で取得・セットしたAWS Temporary Security Credentialsに付与されている権限を確認します。
下記のように、項番3-1で作成したIAM RoleをAssumeRoleしたものが出力されれば成功です。
$ aws sts get-caller-identity
{
 "UserId": "AROA************************",
 "Account": "998877665544",
 "Arn": "arn:aws:sts::998877665544:assumed-role/ExaminingIAMRolesAnywhereExampleRole/94b00bcdc1682b0bd5"
}
5-4. アクセス確認用のS3 Bucketからファイルを取得する
最後に、上記のAWS Temporary Security Credentialsを用いて、動作確認用S3 Bucket上のファイルを参照・取得できることを確認します。
# S3 Bucket上のファイル一覧を取得
$ aws s3 ls s3://examining-iam-roles-anywhere
2022-07-08 06:14:49      10240 testfile.bin

# S3 Bucket上のファイルをダウンロード
$ aws s3 cp s3://examining-iam-roles-anywhere/testfile.bin ./
download: s3://examining-iam-roles-anywhere/testfile.bin to ./testfile.bin

# ダウンロードしたファイルを確認
$ ls -l ./testfile.bin
-rw-rw-r-- 1 vagrant vagrant 10240 Jul  8 06:14 ./testfile.bin

# Congratulations!!!
おわりに
とりあえず、AWS IAM Roles Anywhereがどんなものかを試すための手順は出来たと思います。
実際にIAM Roles Anywhereを運用していくには、サーバEntity用の秘密鍵・証明書の管理(発行/インストール/Revoke)、付与するIAM Roleの権限管理・制御などの課題が多数ありますが、そちらはまた別の機会にまとめたいと思います。
