はじめに
Elastic Workplace Search(https://www.elastic.co/jp/workplace-search) は、GmailやSalesforce、Sharepointなどの様々なプラットフォームの情報を一元化し、一括で検索できる画面を用意しています。
また、Elastic社が提供するElastic Enterprise Search(https://www.elastic.co/jp/enterprise-search) の機能の一つとして提供されており、Elastic Cloud上だけでなくオンプレでも利用することができます。
今回は、オンプレでElastic Workplace Searchを以下の環境に構築し、Windows端末からGoogle Chromeでアクセスして検索までを実行します。
・CentOS Linux 7.8
・OpenJDK 11
Elastic Workplace Searchの構築
1. 媒体をダウンロード
今回は、Version 7.10.0 をダウンロードします。
・Elasticsearch
https://www.elastic.co/jp/downloads/elasticsearch
・Elastic Enterprise Search
https://www.elastic.co/jp/downloads/enterprise-search
2. 事前にjavaをインストールしておく
今回の環境はOpenJDK11を利用
[root@nvm005567 ~]# java -version
openjdk version "11.0.9" 2020-10-20 LTS
OpenJDK Runtime Environment 18.9 (build 11.0.9+11-LTS)
OpenJDK 64-Bit Server VM 18.9 (build 11.0.9+11-LTS, mixed mode, sharing)
3. 媒体をインストールします。
rpm -ivh elasticsearch-7.10.0-x86_64.rpm
rpm -ivh enterprise-search-7.10.0.rpm
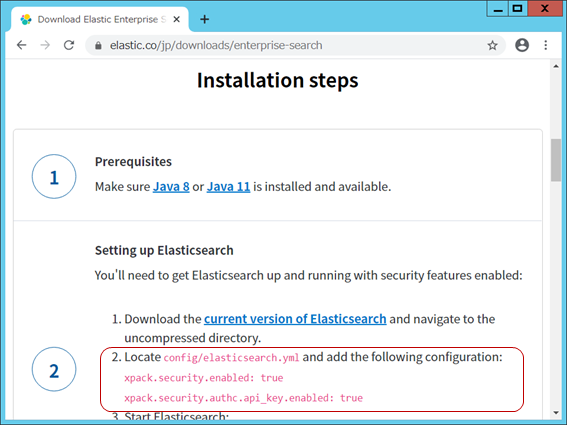
4. セキュリティ設定(SSL)
Elastic Enterprise Searchのダウンロードページの②の2にElasticsearchの設定方法が記載されていますが、Basicライセンスの場合は、追加でCA(認証局)やkeyの設定が必要となります。
セキュリティの設定についての詳細は、Elastic社のブログ(https://www.elastic.co/jp/blog/configuring-ssl-tls-and-https-to-secure-elasticsearch-kibana-beats-and-logstash) などを参考にしてください。
おおよそ以下の対応が必要となります。
・ドメイン名を定義(/etc/hostsに追記)
・CAの生成
・サーバー証明書の生成
・CAおよびサーバー証明書の設定
5. ドメイン名を定義(/etc/hostsに追記)
今回は、ホスト名「nvm005567」を利用します。
[root@nvm005567 ~]# cat /etc/hosts | grep 10.197.193.6
10.197.193.6    nvm005567.localdomain nvm005567
6. CAの生成
elasticsearchのコマンドで生成します。
-- pass ・・・パスワードを設定。今回は空で設定。
/usr/share/elasticsearch/bin/elasticsearch-certutil ca --pem --pass "" --out elastic-stack-ca.zip
zipを解凍するとファイルの中身は以下になります。
Archive:  /usr/share/elasticsearch/elastic-stack-ca.zip
   creating: /usr/share/elasticsearch/ca/
  inflating: /usr/share/elasticsearch/ca/ca.crt
  inflating: /usr/share/elasticsearch/ca/ca.key
7. サーバー証明書の生成
elasticsearchのコマンドで生成します。
--ca-cert ・・・ CAの生成で作成したcrtを指定。/usr/share/elasticsearch/からの相対パス。
--ca-key ・・・ CAの生成で作成したkeyを指定。/usr/share/elasticsearch/からの相対パス。
--ca-pass ・・・CAの生成で設定したパスワードを設定
-- name ・・・ /etc/hostsに記載した名称を記載
/usr/share/elasticsearch/bin/elasticsearch-certutil cert --ca-cert ca/ca.crt --ca-key ca/ca.key --ca-pass "" --pem --name nvm005567 --out certificate-bundle.zip
zipを解凍するとファイルの中身は以下になります。
Archive:  /usr/share/elasticsearch/certificate-bundle.zip
   creating: /usr/share/elasticsearch/nvm005567/
  inflating: /usr/share/elasticsearch/nvm005567/nvm005567.crt
  inflating: /usr/share/elasticsearch/nvm005567/nvm005567.key
8. CAおよびサーバー証明書の配置
以下のように配置します。
※/etc/elasticsearch 配下以外に格納した場合は、elasticsearchの起動時に読み込めないことがあります。
[root@nvm005567 ~]# ll /etc/elasticsearch/certs/
合計 12
-rw-r--r-- 1 root elasticsearch 1200 11月 20 16:22 ca.crt
-rw-r--r-- 1 root elasticsearch 1147 11月 20 16:23 nvm005567.crt
-rw-r--r-- 1 root elasticsearch 1675 11月 20 16:23 nvm005567.key
9. CAおよびサーバー証明書の設定
以下のように/etc/elasticsearch/からの相対パスか絶対パスで記載します。
[root@nvm005567 ~]# cat /etc/elasticsearch/elasticsearch.yml | grep -v ^#
path.data: /var/lib/elasticsearch
path.logs: /var/log/elasticsearch
network.host: 0.0.0.0
discovery.seed_hosts: ["nvm005567"]
cluster.initial_master_nodes: ["nvm005567"]
xpack.security.enabled: true
xpack.security.authc.api_key.enabled: true
xpack.security.transport.ssl.enabled: true
xpack.security.http.ssl.enabled: true
xpack.security.http.ssl.key: certs/nvm005567.key
xpack.security.http.ssl.certificate: certs/nvm005567.crt
xpack.security.http.ssl.certificate_authorities: certs/ca.crt
10. Elasticsearchの起動
systemctl start elasticsearch
11. 初期パスワードの設定
セキュリティ設定(SSL)を有効にしたため、-uオプションを追加して、以下のどちらかで初期パスワードを設定します。今回は、自動設定を実行します。
・手動設定
/usr/share/elasticsearch/bin/elasticsearch-setup-passwords interactive -v -u "https://nvm005567:9200"
・自動設定(ランダムなパスワードが設定され、実行結果にパスワードが表示されます)
/usr/share/elasticsearch/bin/elasticsearch-setup-passwords auto -u "https://nvm005567:9200"
・自動設定で実行した場合の実行結果抜粋(elasticのパスワードを使用します)
16:14:46.372 [main] DEPRECATION org.elasticsearch.deprecation.xpack.core.ssl.SSLService - invalid SSL configuration for xpack.security.transport.ssl - server ssl configuration requires a key and certificate, but these have not been configured; you must set either [xpack.security.transport.ssl.keystore.path], or both [xpack.security.transport.ssl.key] and [xpack.security.transport.ssl.certificate]
Changed password for user elastic
PASSWORD elastic = Ic2ThE21Hr7tcZzZQ9aK
12. 疎通確認
curlコマンドを実行し、応答が返ってくることを確認します。
curl https://nvm005567:9200 --cacert /etc/elasticsearch/certs/ca.crt -u elastic:Ic2ThE21Hr7tcZzZQ9aK
コマンドの実行例
[root@nvm005567 ~]# curl https://nvm005567:9200 --cacert /etc/elasticsearch/certs/ca.crt -u elastic:Ic2ThE21Hr7tcZzZQ9aK
{
  "name" : "nvm005567",
  "cluster_name" : "elasticsearch",
  "cluster_uuid" : "uCH7PdMeQ3aqwedCrHYEDQ",
  "version" : {
    "number" : "7.10.0",
    "build_flavor" : "default",
    "build_type" : "rpm",
    "build_hash" : "51e9d6f22758d0374a0f3f5c6e8f3a7997850f96",
    "build_date" : "2020-11-09T21:30:33.964949Z",
    "build_snapshot" : false,
    "lucene_version" : "8.7.0",
    "minimum_wire_compatibility_version" : "6.8.0",
    "minimum_index_compatibility_version" : "6.0.0-beta1"
  },
  "tagline" : "You Know, for Search"
}
[root@nvm005567 ~]#
13. 暗号化キーの作成
Elastic Enterprise Searchの設定で必要となる暗号化キーを作成します。
今回はopensslのコマンドを使って作成します。実行した結果を保存しておく。
※256-bitが推奨(https://www.elastic.co/guide/en/workplace-search/current/encryption-keys.html) されているため、今回は32バイトを引数で指定します。
[root@nvm005567 ~]# openssl rand -hex 32
e36bb0afb2796c4b693f59524b6a2cb68c4ff2aaf314ae41d2ac89e3f36fb1fe
14. CAおよびサーバー証明書の格納
/etc/elasticsearch/certsのファイルをコピーして、/usr/share/enterprise-search/config/certsの配下に格納します。
[root@nvm005567 ~]# ll /usr/share/enterprise-search/config/certs/
合計 12
-rw-r--r-- 1 enterprise-search enterprise-search 1200 11月 25 16:46 ca.crt
-rw-r--r-- 1 enterprise-search enterprise-search 1147 11月 25 16:46 nvm005567.crt
-rw-r--r-- 1 enterprise-search enterprise-search 1675 11月 25 16:46 nvm005567.key
15. Elastic Enterprise Searchの設定
以下のように設定します。
secret_management.encryption_keys ・・・ 保存しておいた暗号化キーを記載します。
elasticsearch.password ・・・ elasticユーザーのパスワードを記載します。
ent_search.external_url ・・・ 公開用のURLを設定します。設定してない場合は、「http://10.197.193.6:3002 」にアクセスすると、「http://localhost:3002 」のアドレスがリダイレクトされました。
[root@nvm005567 ~]# cat /usr/share/enterprise-search/config/enterprise-search.yml | grep -v ^#
log_directory: /var/log/enterprise-search
filebeat_log_directory: /var/log/enterprise-search
secret_management.encryption_keys: [e36bb0afb2796c4b693f59524b6a2cb68c4ff2aaf314ae41d2ac89e3f36fb1fe]
allow_es_settings_modification: true
elasticsearch.host: https://nvm005567:9200
elasticsearch.username: elastic
elasticsearch.password: Ic2ThE21Hr7tcZzZQ9aK
elasticsearch.ssl.enabled: true
elasticsearch.ssl.certificate_authority: /usr/share/enterprise-search/config/certs/ca.crt
elasticsearch.ssl.certificate: /usr/share/enterprise-search/config/certs/nvm005567.crt
elasticsearch.ssl.key: /usr/share/enterprise-search/config/certs/nvm005567.key
ent_search.auth.nvm005567.source: elasticsearch-native
ent_search.listen_host: 0.0.0.0
ent_search.external_url: http://10.197.193.6:3002
[root@nvm005567 ~]#
16. Elastic Enterprise Searchの起動
systemctl start enterprise-search
Elastic Workplace Searchのデータ投入から検索
1. Elastic Enterprise Searchへの接続
Elastic Enterprise Searchへの接続は、「ent_search.external_url」に設定したアドレスにアクセスします。
http://10.197.193.6:3002
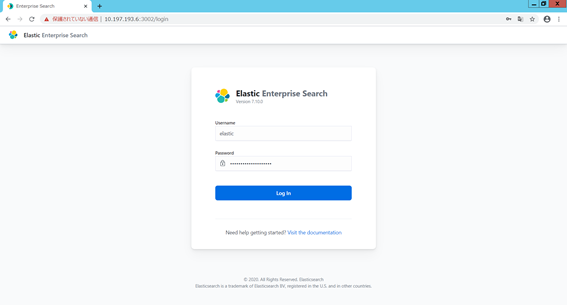
2. Elastic Enterprise Searchのログイン
Elasticユーザーのアカウントでログインします。
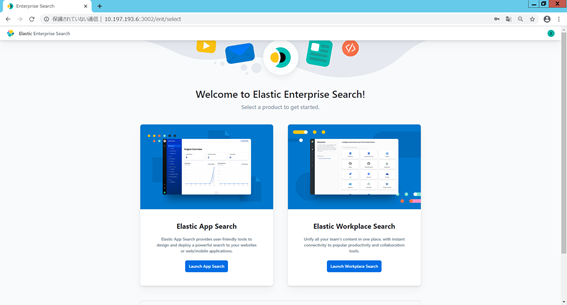
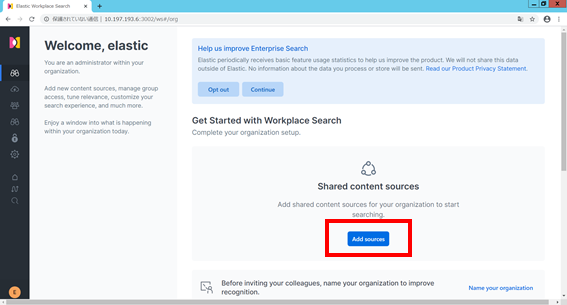
3. Elastic Workplace Searchの選択
Elastic Workplace Searchの画面を選択します。
4. データソースの追加
「Add sources」を選択します。
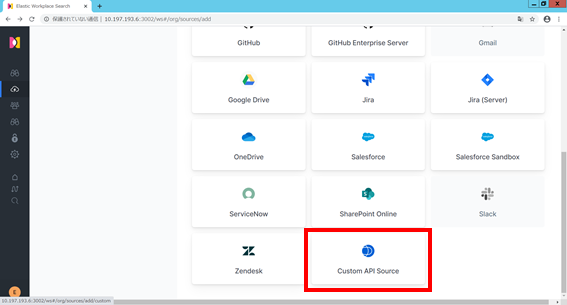
5. カスタムAPIソースを選択
社内からクラウド系には簡単に接続できないため、Custom API Sourceを利用します。
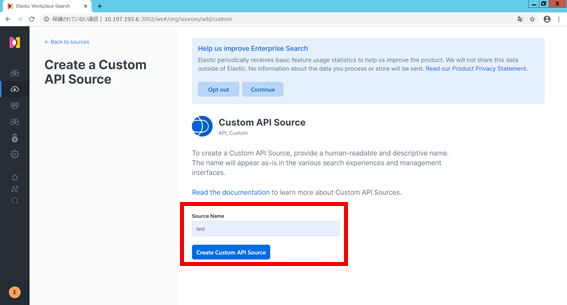
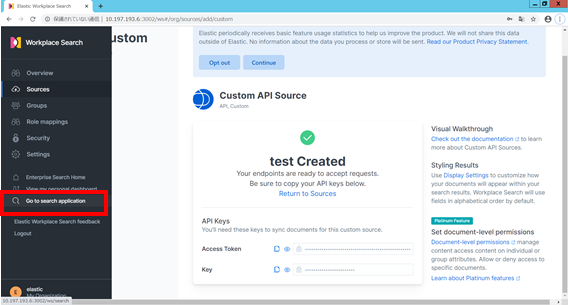
6. データソースの作成
ソース名を入力して、作成します。今回は「test」と入力します。
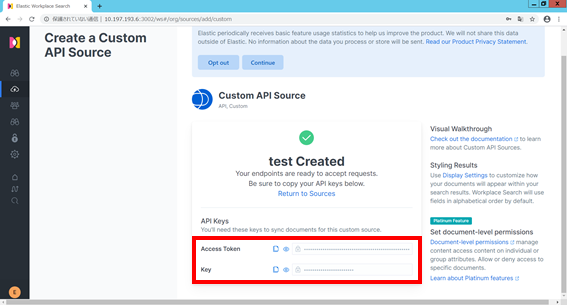
7. アクセストークンおよびキーをコピー
[Access token]および[key]の値をコピーします。今回の値は以下のようになります。
[key] ・・・ 5fbe41ba9f98f01c7eeab771
[Access token] ・・・ 99f2a2107e807f42596854a966193eb3189a35f65755b8333004276788761bb2
8. データの投入
Linux上で以下のコマンドを入力して、データを投入します。
curl -X POST http://10.197.193.6:3002/api/ws/v1/sources/5fbe41ba9f98f01c7eeab771/documents/bulk_create \
-H "Authorization: Bearer 99f2a2107e807f42596854a966193eb3189a35f65755b8333004276788761bb2" \
-H "Content-Type: application/json" \
-d '[
  {
    "id" : 0001,
    "title" : "冷蔵庫",
    "body" : "デジタルカタログ",
    "url" : "https://kadenfan.hitachi.co.jp/catalog/rei/book/index.html",
    "created_at": "2020-12-07T01:00:00+00:00",
    "type": "キッチン家電",
    "extension": "URL",
    "company": "Hitachi"
  },
  {
    "id" : 0002,
    "title" : "冷蔵庫",
    "body" : "カタログ",
    "url" : "https://kadenfan.hitachi.co.jp/catalog/pdf/refrigerator_201812.pdf",
    "created_at": "2020-12-07T02:00:00+00:00",
    "type": "キッチン家電",
    "extension": "PDF",
    "company": "Hitachi"
  },
  {
    "id" : 0003,
    "title" : "洗濯機",
    "body" : "デジタルカタログ",
    "url" : "https://kadenfan.hitachi.co.jp/catalog/wash/book/index.html",
    "created_at": "2020-12-07T03:00:00+00:00",
    "type": "生活家電",
    "extension": "URL",
    "company": "Hitachi"
  }
]'
9. 検索アプリケーション
[Go to search application]をクリックします。
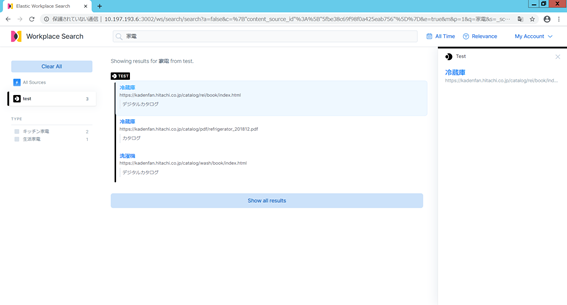
10. 検索
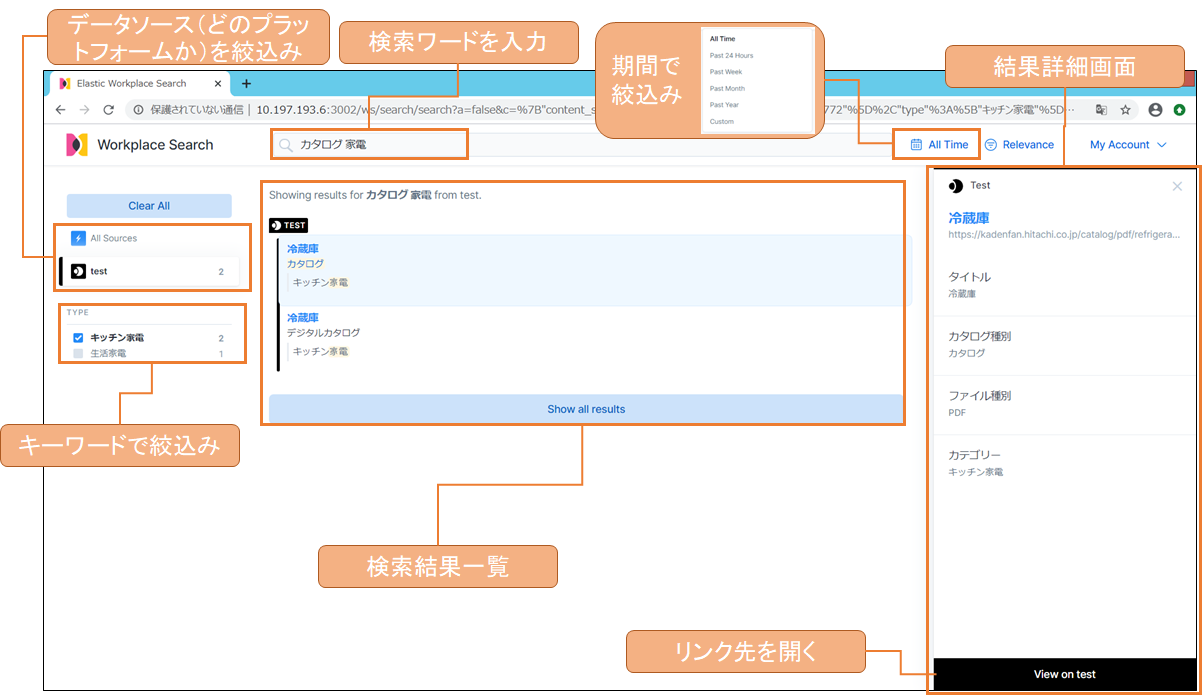
たとえば、家電と入力して、検索することができます。
デフォルトだと画面が寂しいので、少しカスタマイズしたいと思います。
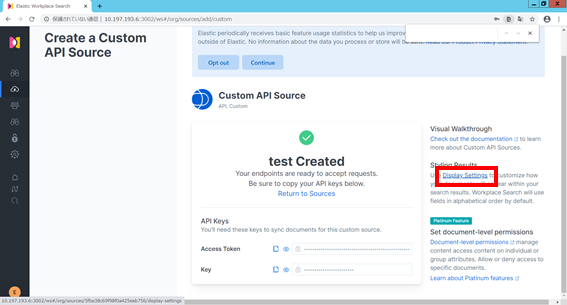
11. 検索画面のカスタマイズ
[Display Settings]をクリックします。
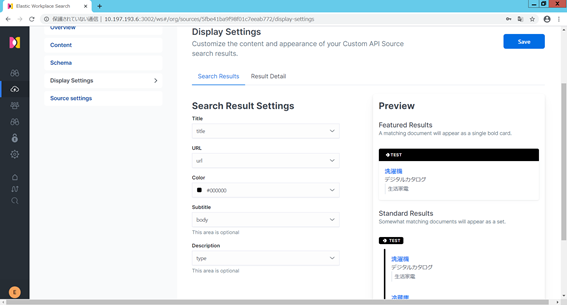
12. 検索一覧のカスタマイズ
色や、表示するフィールドをPreview画面を見ながら変更できます。
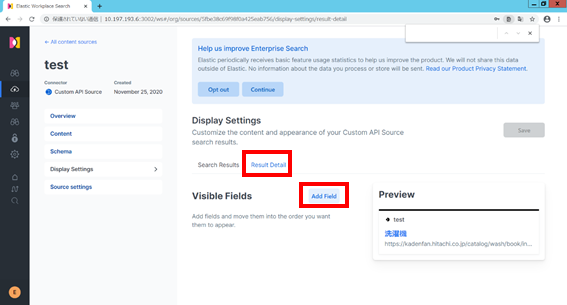
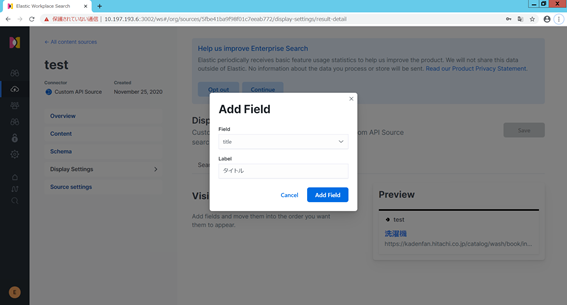
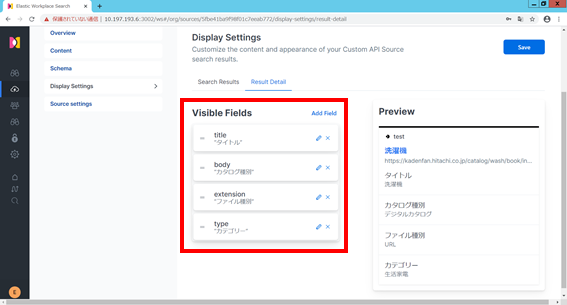
13. 検索結果の詳細画面のカスタマイズ
[Result Detail]を選択し、表示するフィールドをPreview画面を見ながら追加できます。
14. カスタマイズ後の検索
詳細画面にフィールド名が追加されました。
また、[View on test]をクリックすることで、URL先に飛ぶことができます。
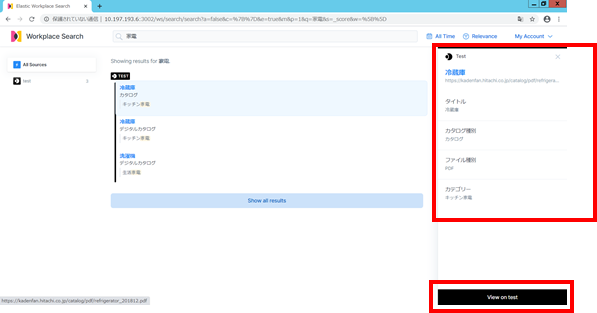
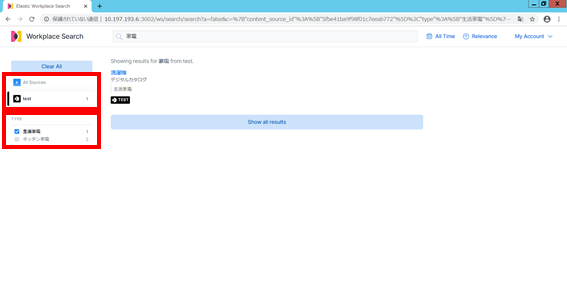
15. 検索の絞り込み
データソースや、[TYPE]を選択することで、検索結果をより絞り込むことができます。
おわりに
以上で見てきたように、Elastic Workplace Searchは簡単に構築、ドキュメント検索が行えるものとなっています。少しでも参考になれば幸いです。