はじめに
アドカレ10日目の記事になります。
昨日は @oyu さんの 業務でGitHubActionsを取り入れる上で苦労した点 でした。
明日は @sune2 さんの SpriteのPhysics Shapeを使ってuGUIで自由な形の当たり判定を作る です。
3Dゲーム開発を行なっていると、3Dモデルを使ったバナー作成などをクリエイターさんが扱う事があります。
今回はそういった素材用の画像書き出し処理をエンジニアがサポートできるような事を書いていきます。
環境
Unityバージョン
Unity: 2018.4.13f1
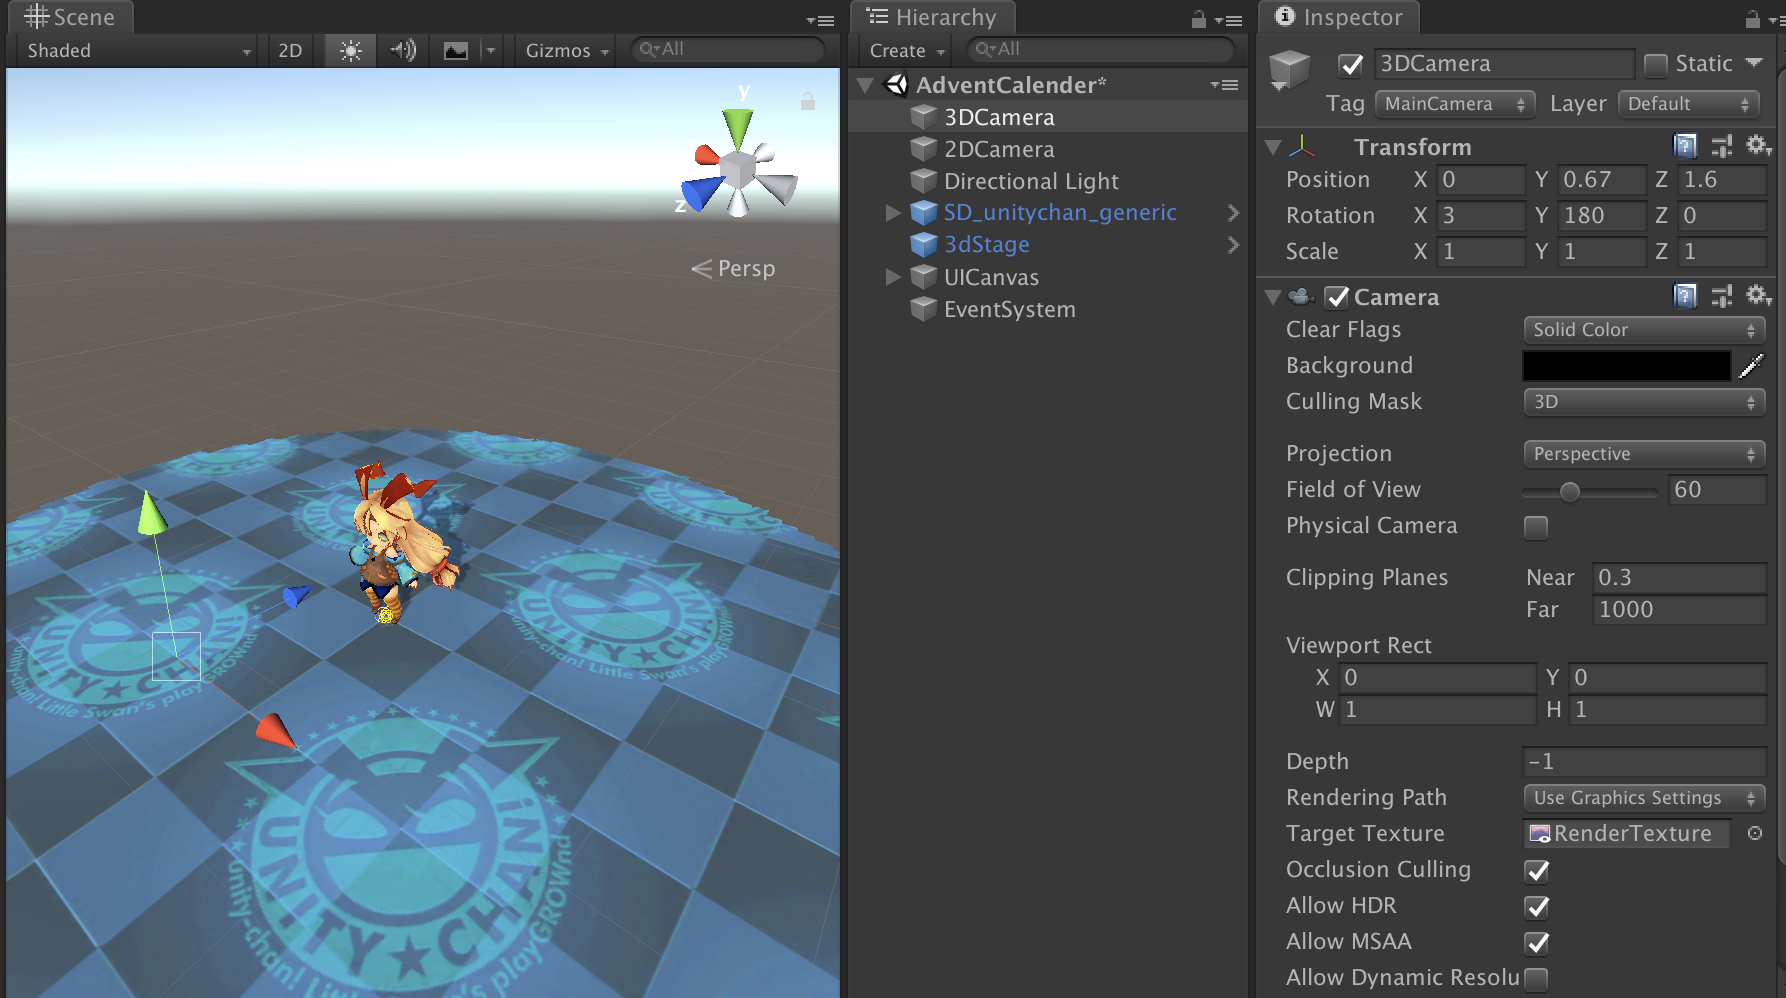
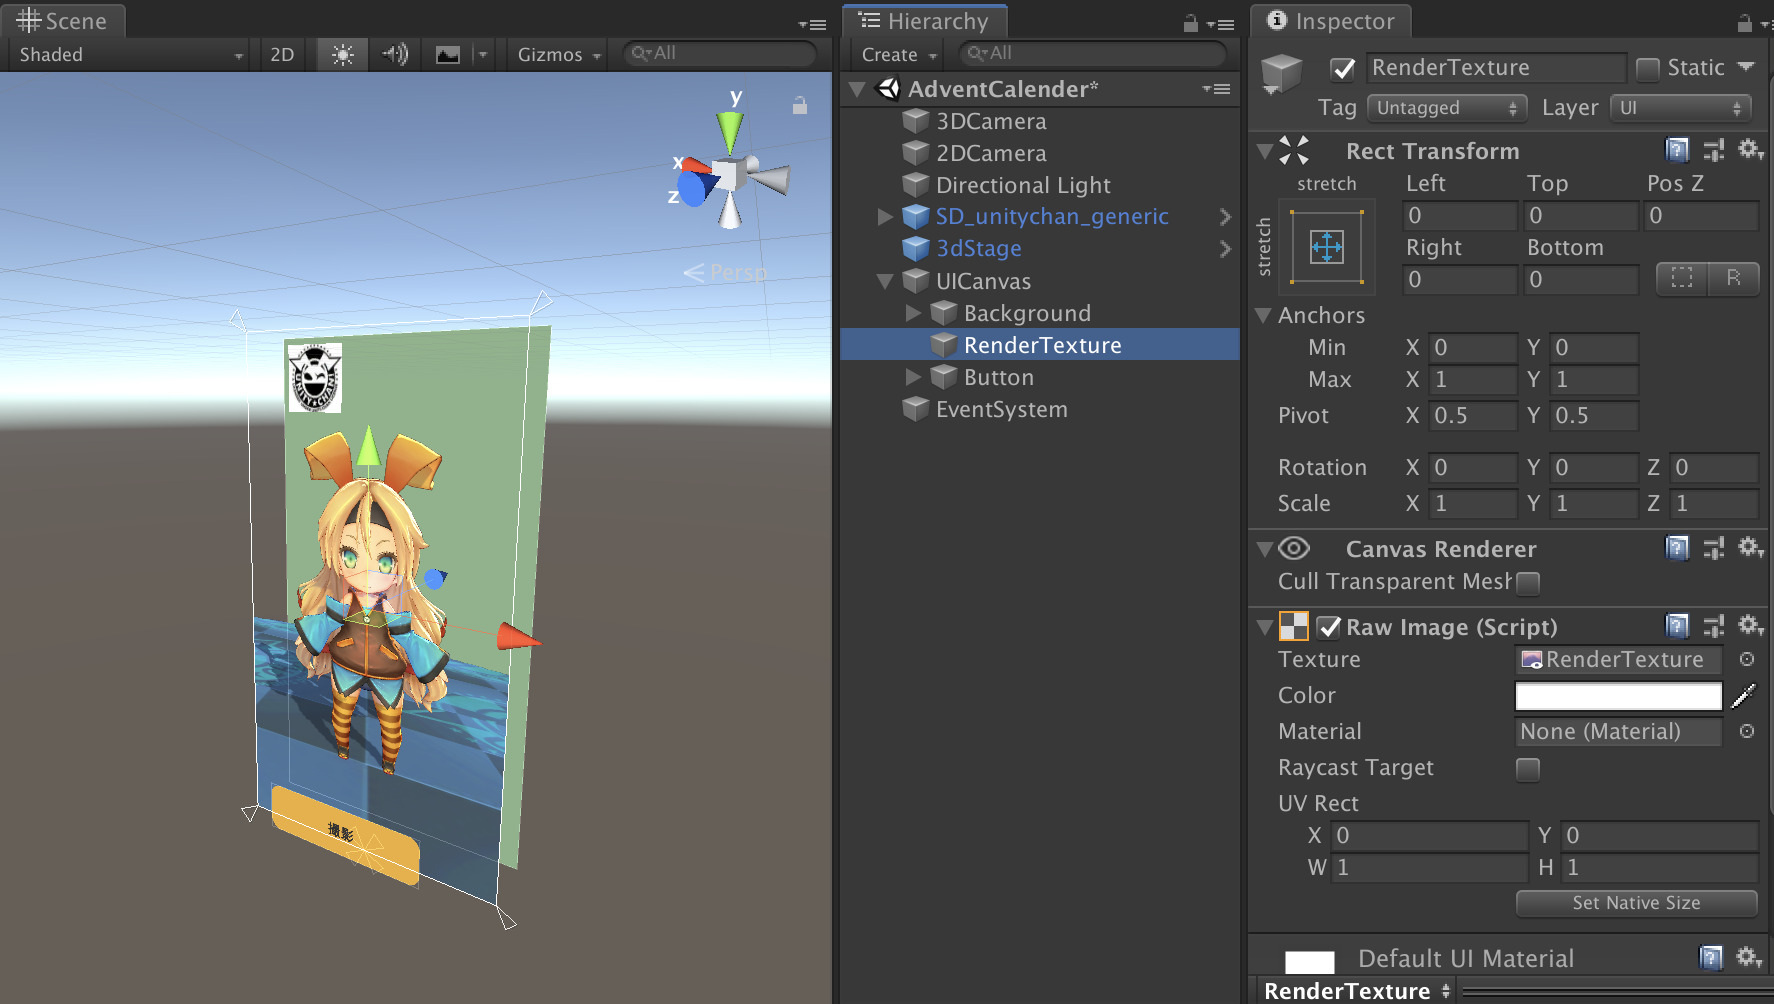
Scene構成
3D(モデル)の表示をRenderTextureで2D(UI)上に表示しています。
3Dカメラ表示
2Dカメラ表示
やりたい事
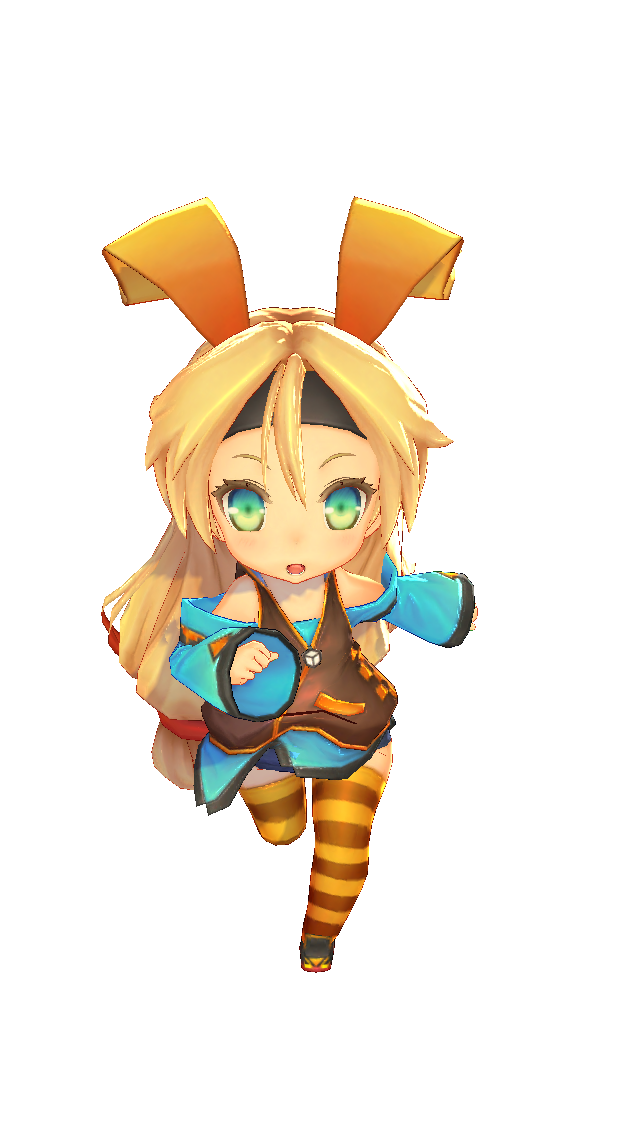
この画面から
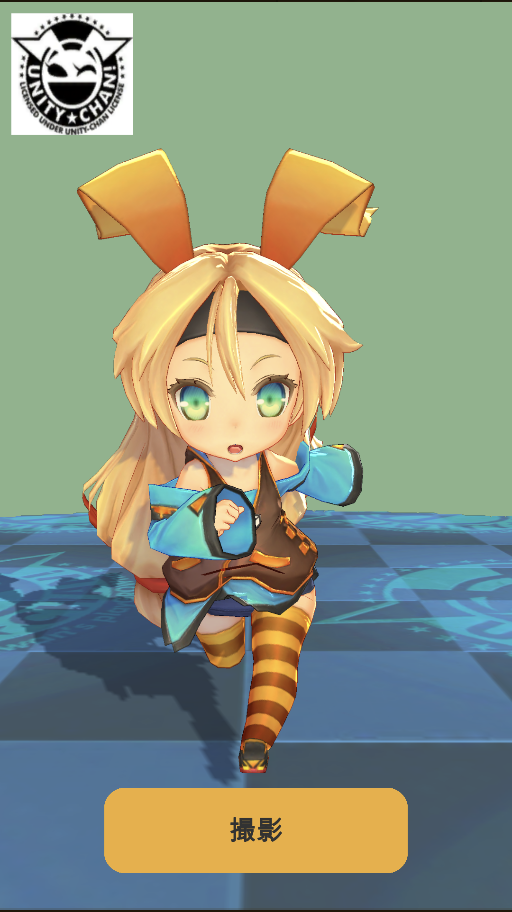
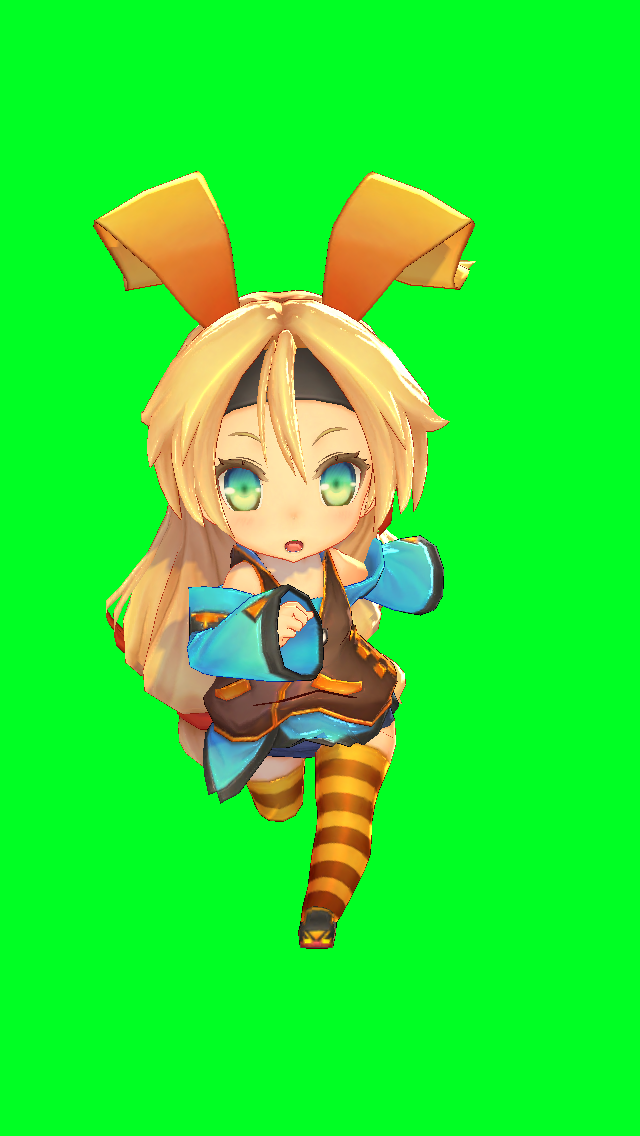
バックグリーンのものと透過画像を書き出します
画像書き出し方法
Unityからの画像書き出し方法ですが、ここではスクリプト(RenderTextureの写し)を使用した場合とUnityRecorderを使用する場合の2パターンを紹介します。
1.スクリプトで画像書き出し
using System.IO;
using UnityEngine;

public class Capture : MonoBehaviour
{
    /// <summary>
    /// 3D用カメラ
    /// </summary>
    [SerializeField]
    private Camera _3dCamera;

    /// <summary>
    /// 非アクティブにしたい対象(床)
    /// </summary>
    [SerializeField]
    private GameObject _3dObject;

    /// <summary>
    /// 書き出したい背景カラー
    /// </summary>
    [SerializeField]
    private Color _backgroundColor;

    public Texture2D GetCapture()
    {
        // 後から戻せるように背景色を退避
        var bgColor = _3dCamera.backgroundColor;
        // 背景変更する
        _3dCamera.backgroundColor = _backgroundColor;
        // いらないオブジェクトを非表示に
        _3dObject.SetActive(false);
        // 再描画する
        _3dCamera.Render();

        // RenderTextureを取得する
        var targetRt = _3dCamera.targetTexture;
        var width = targetRt.width;
        var height = targetRt.height;

        // 現在使用している描画データを退避
        var currentRt = RenderTexture.active;
        // 一時的に使用するRenderTextureを生成
        var workRt = RenderTexture.GetTemporary(width, height, 0);
        // 描画対象にセット
        RenderTexture.active = workRt;

        // RenderTextureに描画する
        {
            // 背景透過用にclearで塗りつぶす(描画対象範囲が同じなら不要)
            GL.Clear(true, true, Color.clear);

            Graphics.Blit(targetRt, workRt);
        }

        // 透過書き出しするのでAlphaも含める
        var format = TextureFormat.ARGB32;
        // Texture2Dに書き出す
        var resultTexture = new Texture2D(width, height, format, false);
        resultTexture.hideFlags = HideFlags.DontSave;
        resultTexture.ReadPixels(new Rect(0, 0, width, height), 0, 0, false);
        resultTexture.Apply();

        // 退避していたRenderTextureを戻す
        RenderTexture.active = currentRt;
        // 生成したRenderTextureを破棄
        RenderTexture.ReleaseTemporary(workRt);

        // 表示を戻す
        _3dCamera.backgroundColor = bgColor;
        _3dObject.SetActive(true);

        return resultTexture;
    }
}
流れとしては、
- 現在の表示設定を退避させる
- 表示設定を変更し、一時的なRenderTextureを生成
- 生成したRenderTextureにGLで描画
- RenderTextureの内容をTexture2Dに写す
- RenderTextureを破棄し、表示設定を戻す
ということを行なっています。
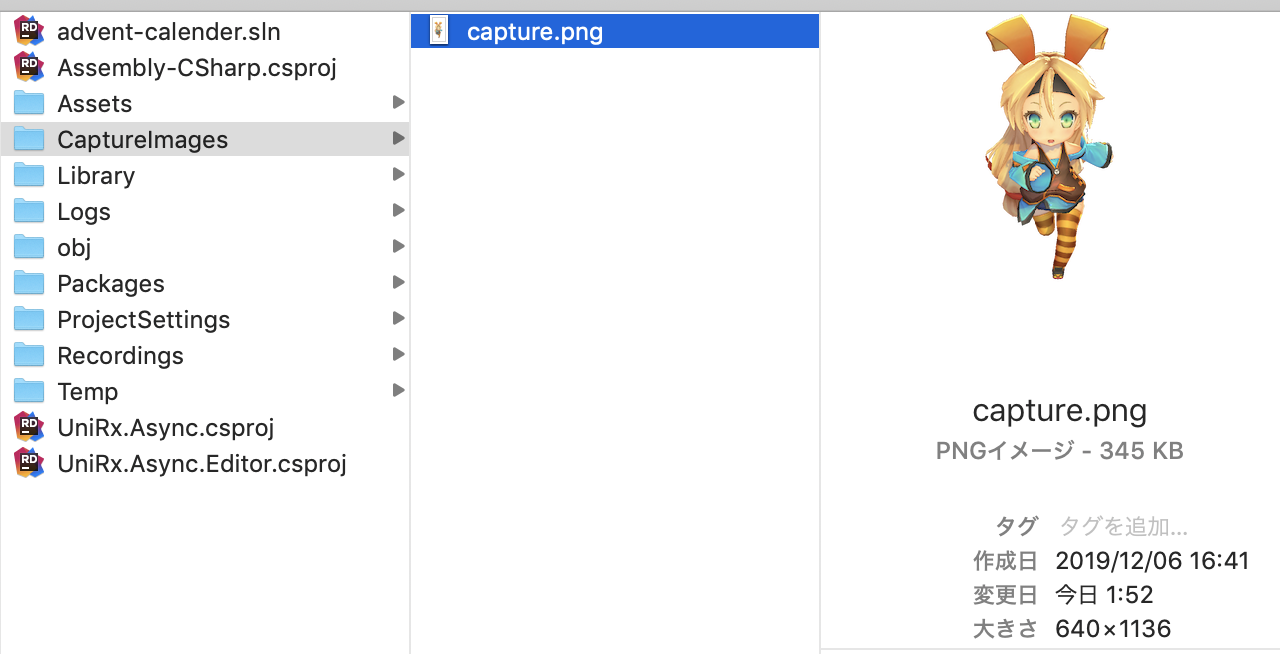
あとはここにファイル書き出しの処理を追加して、ButtonのOnClickアクションと繋げればBackgroundColorに設定したカラー背景で画像書き出しが出来ます
    /// <summary>
    /// 画像の保存フォルダ名
    /// </summary>
    private const string SAVE_FOLDER = "CaptureImages";

    /// <summary>
    /// uGUIのButtonから呼ぶ
    /// </summary>
    public void SaveCapture()
    {
        var tex = GetCapture();
        // 保存する画像名(同じ名前だと上書きされるので、複数取るなら連番にする)
        SaveImage("capture", tex);
    }

    /// <summary>
    /// Textureを画像書き出し
    /// </summary>
    private void SaveImage(string fileName, Texture2D tex)
    {
        if (!Directory.Exists(SAVE_FOLDER))
        {
            // Assetsと同階層(プロジェクトフォルダ直下)に作る
            Directory.CreateDirectory(SAVE_FOLDER);
        }

        var path = Path.Combine(SAVE_FOLDER, fileName);
        // 透過画像を扱うので、pngで保存
        File.WriteAllBytes($"{path}.png", tex.EncodeToPNG());
    }
書き出される画像のサイズはTexture2Dのサイズそのままなので、この処理の場合はカメラに設定してあるRenderTextureのサイズで書き出されます。

ちなみに、RenderTextureからTexture2Dへ写す処理は、Unity2018.2からAsyncGPUReadbackを使うことでも書き出す事ができるようです。
UniTaskを使用して実装した例が以下
    private async UniTask<Texture2D> GetCaptureAsync()
    {
        var bgColor = _3dCamera.backgroundColor;
        _3dCamera.backgroundColor = _backgroundColor;
        _3dObject.SetActive(false);
        _3dCamera.Render();

        var targetTexture = _3dCamera.targetTexture;
        var width = targetTexture.width;
        var height = targetTexture.height;

        var currentRt = RenderTexture.active;
        var workRt = RenderTexture.GetTemporary(width, height, 0);
        RenderTexture.active = workRt;

        // RenderTextureに描画する
        {
            // 背景透過用にclearで塗りつぶす(描画対象範囲が同じなら不要)
            GL.Clear(true, true, Color.clear);

            Graphics.Blit(targetRt, workRt);
        }

        // == ここまで同じ処理 ==

        var request = AsyncGPUReadback.Request(workRt);

        RenderTexture.active = currentRt;
        RenderTexture.ReleaseTemporary(workRt);

        _3dCamera.backgroundColor = bgColor;
        _3dObject.SetActive(true);

        // 非同期待機
        await UniTask.WaitUntil(() => request.done || request.hasError);

        if (request.hasError)
        {
            return null;
        }

        var format = TextureFormat.ARGB32;
        // Texture2Dに書き出す
        var resultTexture = new Texture2D(width, height, format, false);
        resultTexture.hideFlags = HideFlags.DontSave;

        var buffer = request.GetData<Color32>();
        resultTexture.SetPixels32(buffer.ToArray());
        resultTexture.Apply();

        return resultTexture;
    }
非同期処理の方が画像生成時に止まる・カクツクといった事が起こりにくいのでこちらの方が良さそうですが、Editorでしか試してないので実機は分かりません。
参考サイト様
・http://edom18.hateblo.jp/entry/2019/02/21/103056
・https://qiita.com/UnagiHuman/items/583219cb0366b758a7fe
2.Unity Recorderを使用して画像書き出し
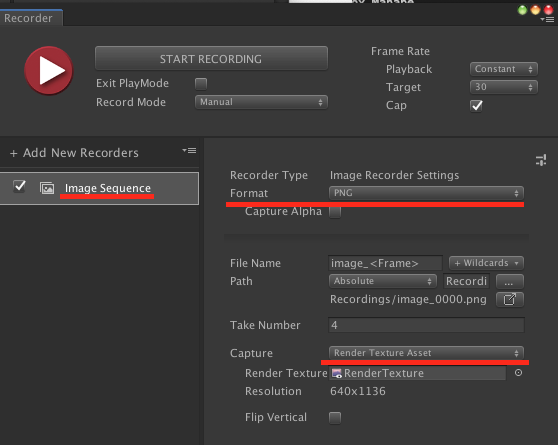
Editorを使用できる場合、Unity2018からPackage ManagerにあるUnity Recorderを使用することで上記画像を簡単に保存する事ができます。(Install方法についてははぶきます)
手順
-
Add New RecordersからImage Sequenceを選択します。 -
Captureの対象をGame ViewからRnder Texture Assetに変更します。 -
RenderTextureに3Dカメラで設定しているRenderTextureを設定します。 -
FormatをJPEGからPNGに変更します(Capture Alphaにチェックを入れなくても透過書き出しできた)。 - Game Sceneを実行し3DカメラのSolid Colorの値を書き出したい背景色に変更する。
-
START RECORDINGで指定したPathに保存されます。
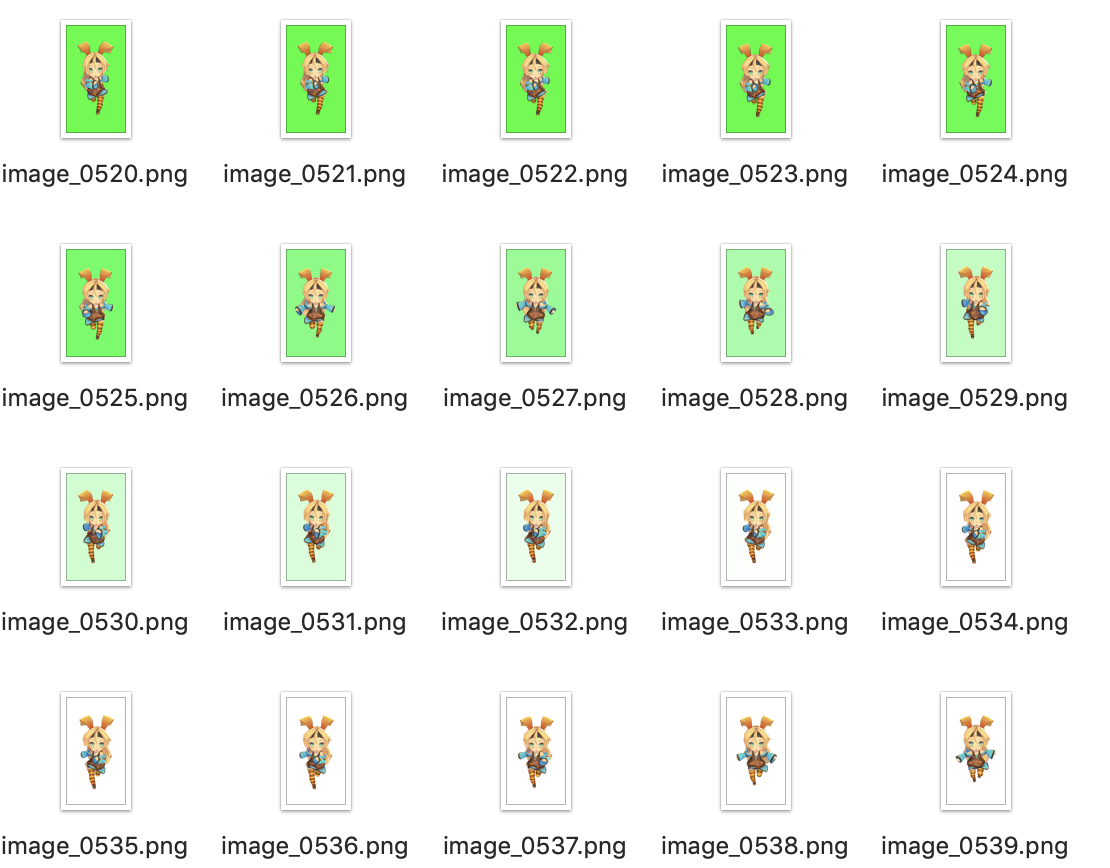
以下の状態になっていれば大丈夫だと思います。
キャプチャと書き出し結果
おまけ(スクリプト)
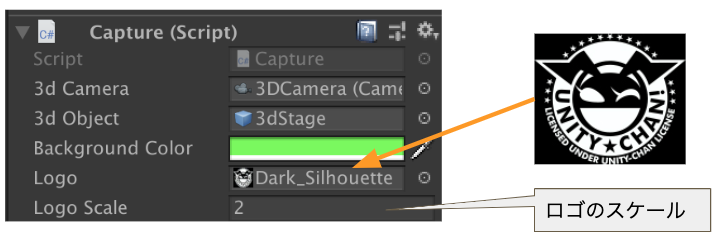
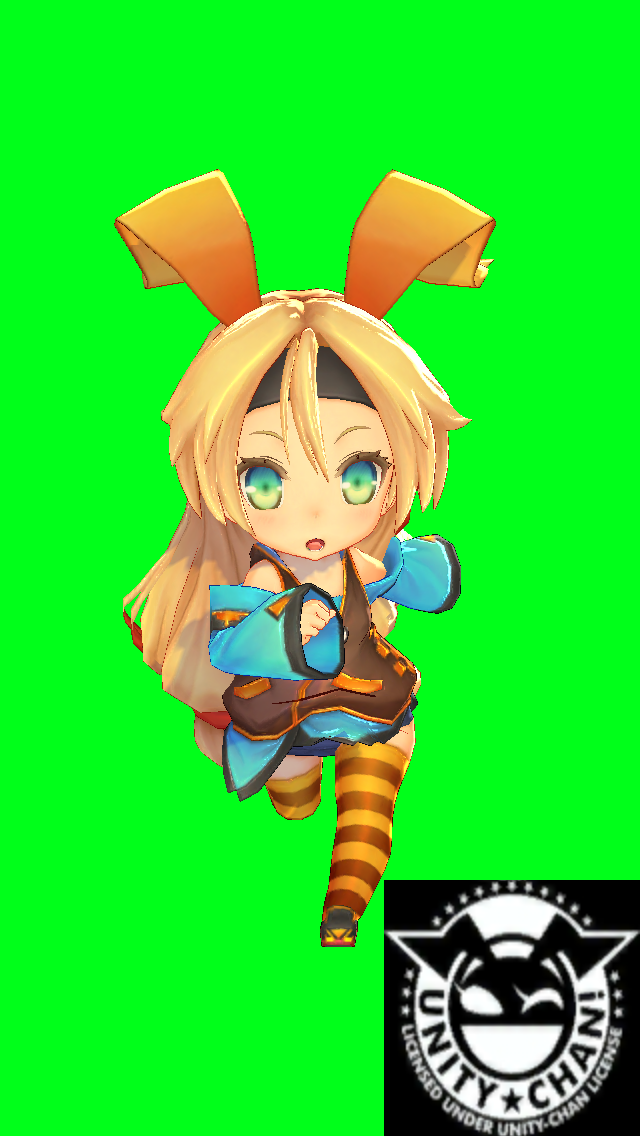
右下にロゴを追加する
RenderTextureに描画した後、ロゴを上書き描画する
    [SerializeField]
    private Texture2D _logo;

    [SerializeField]
    private float _logoScale;

// ~~RenderTexture処理内~~

    Graphics.Blit(targetRt, workRt);

    // ロゴが設定されていればロゴを描画する
    if (_logo != null)
    {
        GL.PushMatrix();
        GL.LoadPixelMatrix(-width * 0.5f, width * 0.5f, height * 0.5f, -height * 0.5f);

        // 右下に描画
        var rect = new Rect(
            width * 0.5f - _logo.width * _logoScale,
            height * 0.5f - _logo.height * _logoScale,
            _logo.width * _logoScale,
            _logo.height * _logoScale
        );
        Graphics.DrawTexture(rect, _logo);

        GL.PopMatrix();
    }

// ~~RenderTexture処理内~~
画像を縮小する
パターン1. RenderTextureのサイズを小さくする
パターン2. 画像を縮小して再生成する
    /// <summary>
    /// 縮小するか
    /// </summary>
    [SerializeField]
    private bool _isThumbnail;

    /// <summary>
    /// 縮小サイズ
    /// </summary>
    [SerializeField]
    private float _thumbnailScale;

    /// <summary>
    /// uGUIのButtonから呼ぶ
    /// </summary>
    public void SaveCapture()
    {
        var tex = GetCapture();
        // 完成画像を縮小指定なら縮小サイズにする
        if (_isThumbnail)
        {
            tex = CreateThumbnailTexture(tex, (int) (tex.width * _thumbnailScale), (int) (tex.height * _thumbnailScale));
        }

        SaveImage("capture", tex);
    }

    /// <summary>
    /// 縮小画像を作成する
    /// </summary>
    public Texture2D CreateThumbnailTexture(Texture2D origin, int thumbWidth, int thumbHeight, Material mat = null)
    {
        var currentRt = RenderTexture.active;

        // 縮小サイズでRenderTextureを作成
        var workRt = RenderTexture.GetTemporary(thumbWidth, thumbHeight, 0);
        RenderTexture.active = workRt;

        {
            GL.Clear(true, true, Color.clear);

            Graphics.Blit(origin, workRt);
        }

        // 透過させないならRGB24で
        var fullTex = new Texture2D(thumbWidth, thumbHeight, TextureFormat.RGB24, false);
        fullTex.hideFlags = HideFlags.DontSave;
        fullTex.ReadPixels(new Rect(0, 0, thumbWidth, thumbHeight), 0, 0, false);
        fullTex.Apply();

        RenderTexture.active = currentRt;
        RenderTexture.ReleaseTemporary(workRt);
        return fullTex;
    }
トリミングする
// ~~GL処理後~~
        Vector2Int resultSize = new Vector2Int(width, height);
        Vector2 trimStartPosition = new Vector2();
        if (_isTrim)
        {
            resultSize = _trimSize;
            trimStartPosition = _trimStartPosition;
        }

        // 透過書き出しするのでAlphaも含める
        var format = TextureFormat.ARGB32;
        // Texture2Dに書き出す
        var resultTexture = new Texture2D(resultSize.x, resultSize.y, format, false);
        resultTexture.hideFlags = HideFlags.DontSave;
        resultTexture.ReadPixels(new Rect(trimStartPosition.x, trimStartPosition.y, width, height), 0, 0, false);
        resultTexture.Apply();
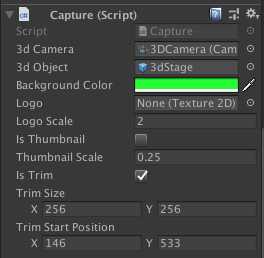
最終コード
using System.IO;
using UniRx.Async;
using UnityEngine;
using UnityEngine.Rendering;

public class Capture : MonoBehaviour
{
    /// <summary>
    /// 画像の保存フォルダ
    /// Assetsと同階層に作られる
    /// </summary>
    private const string SAVE_FOLDER = "CaptureImages";

    /// <summary>
    /// 3D用カメラ
    /// </summary>
    [SerializeField]
    private Camera _3dCamera;

    /// <summary>
    /// 非アクティブにしたい対象(床)
    /// </summary>
    [SerializeField]
    private GameObject _3dObject;

    /// <summary>
    /// 書き出したい背景カラー
    /// </summary>
    [SerializeField]
    private Color _backgroundColor;

    /// <summary>
    /// 右下に追加するロゴ
    /// </summary>
    [SerializeField]
    private Texture2D _logo;

    /// <summary>
    /// ロゴのスケール
    /// </summary>
    [SerializeField]
    private float _logoScale;

    /// <summary>
    /// 縮小するか
    /// </summary>
    [SerializeField]
    private bool _isThumbnail;

    /// <summary>
    /// 縮小サイズ
    /// </summary>
    [SerializeField]
    private float _thumbnailScale;

    /// <summary>
    /// トリミングするか
    /// </summary>
    [SerializeField]
    private bool _isTrim;

    /// <summary>
    /// トリミングサイズ
    /// </summary>
    [SerializeField]
    private Vector2Int _trimSize;

    /// <summary>
    /// トリミング開始地点(左下基準(0, 0))
    /// </summary>
    [SerializeField]
    private Vector2 _trimStartPosition;

    /// <summary>
    /// uGUIのButtonから呼ぶ
    /// </summary>
    public void SaveCapture()
    {
        var tex = GetCapture();
        // 完成画像を縮小指定なら縮小サイズにする
        if (_isThumbnail)
        {
            tex = CreateThumbnailTexture(tex, (int) (tex.width * _thumbnailScale), (int) (tex.height * _thumbnailScale));
        }

        SaveImage("capture", tex);
    }

    /// <summary>
    /// RenderTextureからTexture2Dを生成
    /// </summary>
    public Texture2D GetCapture()
    {
        // 後から戻せるように背景色を退避
        var bgColor = _3dCamera.backgroundColor;
        // 背景変更する
        _3dCamera.backgroundColor = _backgroundColor;
        // いらないオブジェクトを非表示に
        _3dObject.SetActive(false);
        // 再描画する
        _3dCamera.Render();

        // RenderTextureを取得する
        var targetRt = _3dCamera.targetTexture;
        var width = targetRt.width;
        var height = targetRt.height;

        // 現在使用している描画データを退避
        var currentRt = RenderTexture.active;
        // 一時的に使用するRenderTextureを生成
        var workRt = RenderTexture.GetTemporary(width, height, 0);
        // 描画対象にセット
        RenderTexture.active = workRt;

        // RenderTextureに描画する
        {
            // 背景透過用にclearで塗りつぶす(描画対象範囲が同じなら不要)
            GL.Clear(true, true, Color.clear);

            Graphics.Blit(targetRt, workRt);

            // ロゴが設定されていればロゴを描画する
            if (_logo != null)
            {
                GL.PushMatrix();
                GL.LoadPixelMatrix(-width * 0.5f, width * 0.5f, height * 0.5f, -height * 0.5f);

                // 右下に描画
                var rect = new Rect(
                    width * 0.5f - _logo.width * _logoScale,
                    height * 0.5f - _logo.height * _logoScale,
                    _logo.width * _logoScale,
                    _logo.height * _logoScale
                );
                Graphics.DrawTexture(rect, _logo);

                GL.PopMatrix();
            }
        }

        Vector2Int resultSize = new Vector2Int(width, height);
        Vector2 trimStartPosition = new Vector2();
        if (_isTrim)
        {
            resultSize = _trimSize;
            trimStartPosition = _trimStartPosition;
        }

        // 透過書き出しするのでAlphaも含める
        var format = TextureFormat.ARGB32;
        // Texture2Dに書き出す
        var resultTexture = new Texture2D(resultSize.x, resultSize.y, format, false);
        resultTexture.hideFlags = HideFlags.DontSave;
        resultTexture.ReadPixels(new Rect(trimStartPosition.x, trimStartPosition.y, width, height), 0, 0, false);
        resultTexture.Apply();

        // 退避していたRenderTextureを戻す
        RenderTexture.active = currentRt;
        // 生成したRenderTextureを破棄
        RenderTexture.ReleaseTemporary(workRt);

        // 表示を戻す
        _3dCamera.backgroundColor = bgColor;
        _3dObject.SetActive(true);

        return resultTexture;
    }

    /// <summary>
    /// 縮小画像を作成する
    /// </summary>
    public Texture2D CreateThumbnailTexture(Texture2D origin, int thumbWidth, int thumbHeight, Material mat = null)
    {
        var currentRt = RenderTexture.active;

        // 縮小サイズでRenderTextureを作成
        var workRt = RenderTexture.GetTemporary(thumbWidth, thumbHeight, 0);
        RenderTexture.active = workRt;

        {
            GL.Clear(true, true, Color.clear);

            Graphics.Blit(origin, workRt);
        }

        // 透過させないならRGB24で
        var fullTex = new Texture2D(thumbWidth, thumbHeight, TextureFormat.RGB24, false);
        fullTex.hideFlags = HideFlags.DontSave;
        fullTex.ReadPixels(new Rect(0, 0, thumbWidth, thumbHeight), 0, 0, false);
        fullTex.Apply();

        RenderTexture.active = currentRt;
        RenderTexture.ReleaseTemporary(workRt);
        return fullTex;
    }

    /// <summary>
    /// Textureを画像書き出し
    /// </summary>
    private void SaveImage(string fileName, Texture2D tex)
    {
        if (!Directory.Exists(SAVE_FOLDER))
        {
            Directory.CreateDirectory(SAVE_FOLDER);
        }

        var path = Path.Combine(SAVE_FOLDER, fileName);
        // 透過画像を扱うので、pngで保存
        File.WriteAllBytes($"{path}.png", tex.EncodeToPNG());
    }

    /// <summary>
    /// 非同期処理パターン
    /// </summary>
    private async UniTask<Texture2D> GetCaptureAsync()
    {
        var bgColor = _3dCamera.backgroundColor;
        _3dCamera.backgroundColor = _backgroundColor;
        _3dObject.SetActive(false);
        _3dCamera.Render();

        var targetRt = _3dCamera.targetTexture;
        var width = targetRt.width;
        var height = targetRt.height;

        var currentRt = RenderTexture.active;
        var workRt = RenderTexture.GetTemporary(width, height, 0);
        RenderTexture.active = workRt;

        // RenderTextureに描画する
        {
            // 背景透過用にclearで塗りつぶす(描画対象範囲が同じなら不要)
            GL.Clear(true, true, Color.clear);

            Graphics.Blit(targetRt, workRt);

            // ロゴが設定されていればロゴを描画する
            if (_logo != null)
            {
                GL.PushMatrix();
                GL.LoadPixelMatrix(-width * 0.5f, width * 0.5f, height * 0.5f, -height * 0.5f);

                // 右下に描画
                var rect = new Rect(
                    width * 0.5f - _logo.width * _logoScale,
                    height * 0.5f - _logo.height * _logoScale,
                    _logo.width * _logoScale,
                    _logo.height * _logoScale
                );
                Graphics.DrawTexture(rect, _logo);

                GL.PopMatrix();
            }
        }

        // == ここまで同じ処理 ==

        var request = AsyncGPUReadback.Request(workRt);

        RenderTexture.active = currentRt;
        RenderTexture.ReleaseTemporary(workRt);

        _3dCamera.backgroundColor = bgColor;
        _3dObject.SetActive(true);

        // 非同期待機
        await UniTask.WaitUntil(() => request.done || request.hasError);

        if (request.hasError)
        {
            return null;
        }

        var format = TextureFormat.ARGB32;
        // Texture2Dに書き出す
        var resultTexture = new Texture2D(width, height, format, false);
        resultTexture.hideFlags = HideFlags.DontSave;

        var buffer = request.GetData<Color32>();
        resultTexture.SetPixels32(buffer.ToArray());
        resultTexture.Apply();

        return resultTexture;
    }
}
まとめ
スクリプトで画像書き出しが出来るようになると、実機で3Dモデルの画像書き出しができるようになります。
もし、デザイナーさんが手動で透過処理をやっている場合は教えてみてはいかがでしょうか。
Unityに不慣れな方がいた場合はモデルキャプチャ用のツールを作ってみると大変喜ばれます。
ライセンス
© Unity Technologies Japan/UCL