必要なもの
- Raspberry Pi
- Raspberry Pi 3 model B+を使用しています
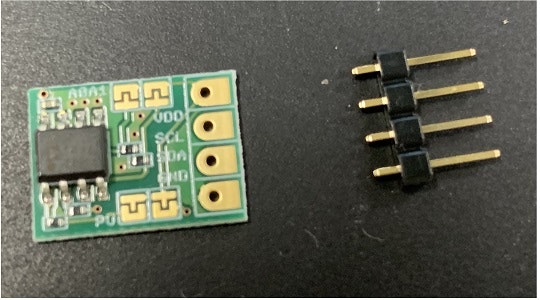
- 温度センサーモジュール ADT7410
- ブレッドボードおよびジャンパーワイヤ
- はんだとはんだこて
温度センサーモジュール ADT7410について
- アナログ・デバイセズ社の温度を取得できるモジュール
- 動作/測定温度は-55〜120℃
- I2Cバスに測定温度データを出力
- 詳しい情報はデータシートを参照
Raspberry Piの準備
使用しているRaspberry PiのOSバージョンは以下の通りです。
$ lsb_release -a
No LSB modules are available.
Distributor ID:	Raspbian
Description:	Raspbian GNU/Linux 10 (buster)
Release:	10
Codename:	buster
I2Cを有効化します。
$ sudo raspi-config
-> 5 Interfacing Options
--> P5 I2C
上記のようにCUIでconfigrationからI2Cを有効化します。
GUIで有効化する方法もあります。知りたい方は調べてください。
必要なパッケージをインストールします。
$ sudo apt-get install i2c-tools libi2c-dev python-smbus
温度センサーモジュールの準備とRaspberry Piとの接続
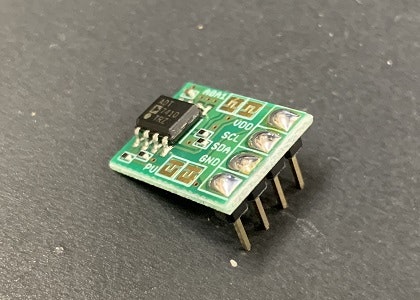
購入した温度センサーモジュールADT7410はピンが付けられていない状態なので、はんだ付けします。
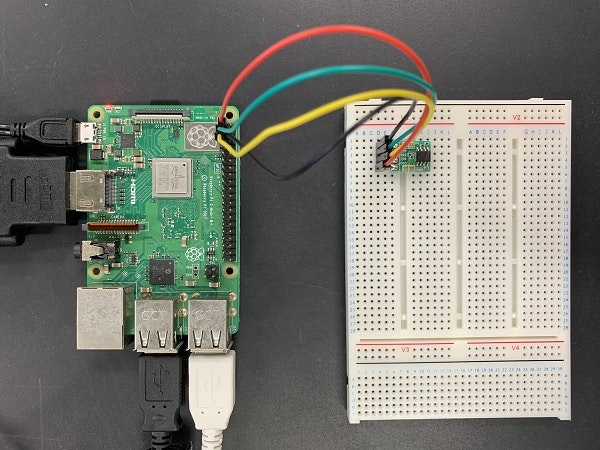
ブレッドボードを使用して以下のようにGPIOとモジュールを接続します。
接続する際には、Raspberry Piの電源は切りましょう。
- ADT7410(VDD) ⇔ GPIO2(3.3V)
- ADT7410(SCL) ⇔ GPIO5(SCL)
- ADT7410(SDA) ⇔ GPIO3(SDA)
- ADT7410(GND) ⇔ GPIO6(Ground)
(Raspberry PiのGPIOピン配置は https://pinout.xyz/ などを参照)
fritzingで配線図を書いてみました。

配線できたらRaspberry Piを起動して接続確認をします。
$ i2cdetect -y 1
     0  1  2  3  4  5  6  7  8  9  a  b  c  d  e  f
00:          -- -- -- -- -- -- -- -- -- -- -- -- --
10: -- -- -- -- -- -- -- -- -- -- -- -- -- -- -- --
20: -- -- -- -- -- -- -- -- -- -- -- -- -- -- -- --
30: -- -- -- -- -- -- -- -- -- -- -- -- -- -- -- --
40: -- -- -- -- -- -- -- -- 48 -- -- -- -- -- -- --
50: -- -- -- -- -- -- -- -- -- -- -- -- -- -- -- --
60: -- -- -- -- -- -- -- -- -- -- -- -- -- -- -- --
70: -- -- -- -- -- -- -- --
このように「48」が見えていたら接続は問題ありません。
なお、アドレスを48から変更したい場合はADT7410のA0、A1をはんだでショートさせると変えることができます。
0がオープン、1をショートした状態とすると、
- A1-A0: 0-0 (0x48) 今回の状態
- A1-A0: 0-1 (0x49)
- A1-A0: 1-0 (0x4A)
- A1-A0: 1-1 (0x4B)
となります。
複数個使う場合はアドレスを変更して使いましょう。
では接続ができましたので、温度を取得しましょう。
$ i2cget -y 1 0x48 0x00 w
0xd00c
0xd00cが温度です、と言っても意味がわかりませんよね。
計算方法は、
- 0xd00cの2バイト前後を入れ替えて0x0cd0
- 0x0cd0(0b110011010000)を3ビット右シフトして0b110011010
- 0b110011010をを16で割って10進数で表すと25.625
で求まり、25.625℃が温度です。
Pythonでプログラムすると以下のようになります。
# -*- coding: utf-8 -*-
import smbus

bus = smbus.SMBus(1)
address_adt7410 = 0x48
register_adt7410 = 0x00
configration_adt7410 = 0x03

# 13bitに設定して読み出し
bus.write_word_data(address_adt7410, configration_adt7410, 0x00)
word_data = bus.read_word_data(address_adt7410, register_adt7410)

# 2バイトの入れ替え
data = (word_data & 0xff00) >> 8 | (word_data & 0xff) << 8

# 3ビットの右シフト
data = data >> 3

# 16で割って温度に
print(data/16.)
16ビットで読み出すにはレジスターのコンフィギュレーションアドレス0x03に0x80を書き込みます。
# -*- coding: utf-8 -*-
import smbus

bus = smbus.SMBus(1)
address_adt7410 = 0x48
register_adt7410 = 0x00
configration_adt7410 = 0x03

# 16bitに設定して読み出し
bus.write_word_data(address_adt7410, configration_adt7410, 0x80)
word_data = bus.read_word_data(address_adt7410, register_adt7410)

# 2バイトの入れ替え
data = (word_data & 0xff00) >> 8 | (word_data & 0xff) << 8

# 128で割って温度に
print(data/128.)
それぞれ実行してやると温度を取得できます。
$ python adt7410_13bit.py
27.125
$ python adt7410_16bit.py
26.7109375
数値上は13bitだと0.0625℃、16bitだと0.0078℃のresolutionがあるということですが、そもそもの精度がそんなにあるとは思わないので、個人的には13bitで十分だと思います。