OPENAI APIの使い方
手順
OPENAI API KEYを発行する。
- まずは、以下の手順でOPENAI API KEYを発行する。
- 以下リンクにアクセスして、ログインする。
- 右上の「Dashboard」をクリック

- 左の「API KEY」をクリック

- 右の「Create New Key」をクリック

- Nameに適当な名前を書いて、Permissionsは適当に設定して、「Create Secret Key」をクリック。

- 出てきたAPI KEYをどこかにメモしておく
※出てきたAPI KEYは絶対に公開せず、秘密にする!
Chatにアクセスする
- ここでは,Pythonからのアクセス方法を記載する。
- 以下のコードは安全な環境で実行してください。
-
必要なパッケージをインストールする。
pip install openai -
以下のコードを実行し、OPENAI_API_KEYを入力する。
import getpass import os # コードにベタ打ちしないように、getpassで取得する。 # このコードを実行すると、入力画面になるので、そこで入力する。 os.environ["OPENAI_API_KEY"] = getpass.getpass("Enter your OpenAI API key: ") -
openai apiにアクセスする。
from openai import OpenAI client = OpenAI() def get_openai_response(system, user): response = client.chat.completions.create( model="gpt-4o", # 好きなモデル名を入れる messages=[ {"role": "system", "content": system}, # システムプロンプト {"role": "user", "content": user} # ユーザープロンプト ] seed=0, # シード: 再現性を高める temperature=0, # 温度: LLMの乱雑さをなくす ) return response.choices[0].message.content -
好きなプロンプトを入力する。
system_prompt = 'あなたは今からリンゴしか答えられません。'
user_prompt = 'しりとりの最初の単語といえば?'
get_openai_response(system_prompt, user_prompt)
参考
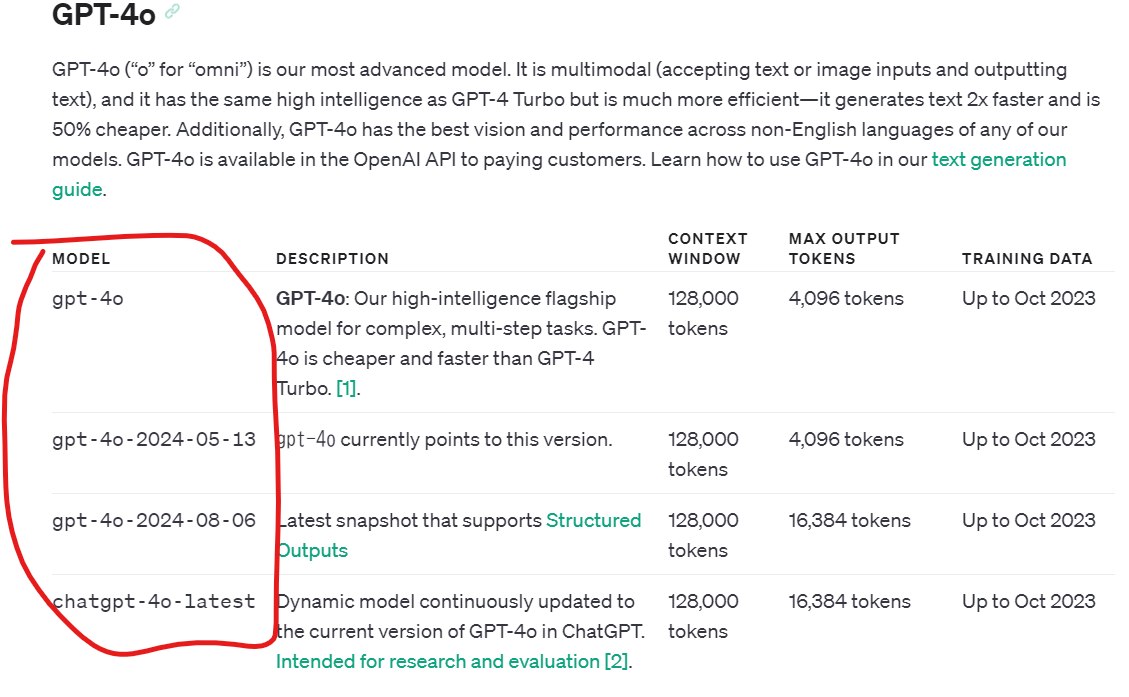
- モデル名は以下のサイトに書いてあります。
- 赤枠で囲った文字をモデル名として入力することで、使えます。
おまけ: RAG Assistantの作り方
(追記予定)
