Arduino Pro Micro(の互換機)でコピペキーボード
はじめに
Aliexpressよりキースイッチボードが届いたので、コピペ専用キーボードを作ってみることにしました。ArudinoのHIDサンプルは良くないため改良もしてます。
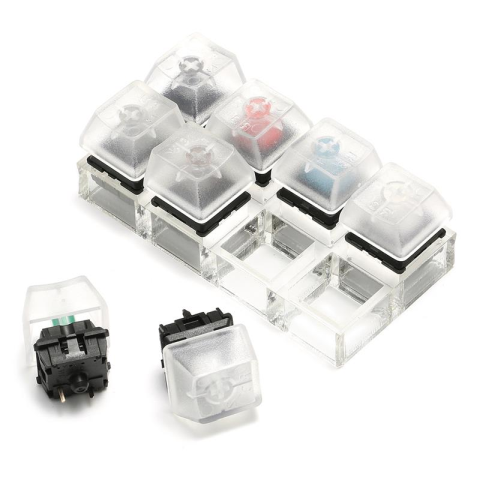
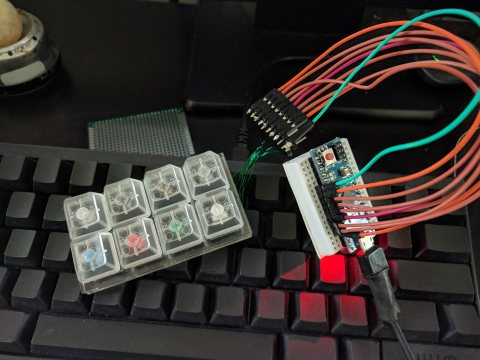
キーボードとデバッグ風景
キーボード
8キーのものを購入。CTRL+X,C,V以外にもA,Y,N,ENTERを付けたかったので。
デバッグ風景
接続はPIN2-9に接続して、スイッチONでグランドに落すようにしているだけです。
サンプルプログラムの問題点
下記はArduinoのサンプルから抜粋したHIDのキー入力のプログラム。ネットを確認すると、なにかをトリガ(スイッチ押下等)にして下記の手順でPCにキー入力データを送信しているものが大部分かと思われます。
      // CTRL-ALT-DEL:
      Keyboard.press(KEY_LEFT_CTRL);
      Keyboard.press(KEY_LEFT_ALT);
      Keyboard.press(KEY_DELETE);
      delay(100);
      Keyboard.releaseAll();
      //ALT-l:
      delay(2000);
      Keyboard.press(KEY_LEFT_ALT);
      Keyboard.press('l');
      Keyboard.releaseAll();
サンプルの特徴
サンプルの特徴としては、"完結している"ということ。トリガを検出したら、キー押下して、すこし待って、キーを戻すとなっています。
この問題点
これが問題になるのは、ループでキー入力を監視しているときにループの周期にてキー入力の回数が固定されてしまう点です。
Windowsでキーを押下しつづけるとわかりますが、キー押下にて即キー入力がなされ、一息ついて連続入力となります。これはWindowsが制御している点ですので、キーボードをエミュレートする場合はキーはキーに徹するべきです。キー入力を実現するためのサンプルであり、これはこれでわかりやすいのですが。
改良方法
ループではキースイッチの変化点をチェックして、変化が有ったら押下orリリースのコードを送出する、変化が無いならその状態を変更しない、というものです。
プログラム
実際のプログラムを掲載します。送出するキーコードが変なのは私がdvorak配列を使用しており、Windowsでdvorakを使用するのにレジストリを変更しているからです。この辺は適宜変更してください。
/*
  KeyboardAndMouseControl

 Controls the mouse from five pushbuttons on an Arduino Leonardo, Micro or Due.

 Hardware:
 * 5 pushbuttons attached to D2, D3, D4, D5, D6

 The mouse movement is always relative. This sketch reads
 four pushbuttons, and uses them to set the movement of the mouse.

 WARNING:  When you use the Mouse.move() command, the Arduino takes
 over your mouse!  Make sure you have control before you use the mouse commands.

 created 15 Mar 2012
 modified 27 Mar 2012
 by Tom Igoe

 this code is in the public domain
///////////////////////////////////////////////////////////////////////////////////////////
 Modified by Ikeda 09 Dec 2017
 */
# include <string.h>
# include "Keyboard.h"

// set pin numbers for the five buttons:
# define ButtonPin1 2
# define ButtonPin2 3
# define ButtonPin3 4
# define ButtonPin4 5
# define ButtonPin5 6
# define ButtonPin6 7
# define ButtonPin7 8
# define ButtonPin8 9


# define KEY1    KEY_LEFT_CTRL
# define KEY2    'b' // X
# define KEY3    'i' // C
# define KEY4    '.' // V
# define KEY5    'a'  // a
# define KEY6    't'  // Y
# define KEY7    'l'  // N
# define KEY8    KEY_RETURN  // ENTER

struct KEYSTATUS
{
    byte btn1;
    byte btn2;
    byte btn3;
    byte btn4;
    byte btn5;
    byte btn6;
    byte btn7;
    byte btn8;
};

KEYSTATUS stKeyCur;
KEYSTATUS stKeyOld;

void setup() // initialize the buttons' inputs:
{
    pinMode(ButtonPin1, INPUT_PULLUP);
    pinMode(ButtonPin2, INPUT_PULLUP);
    pinMode(ButtonPin3, INPUT_PULLUP);
    pinMode(ButtonPin4, INPUT_PULLUP);
    pinMode(ButtonPin5, INPUT_PULLUP);
    pinMode(ButtonPin6, INPUT_PULLUP);
    pinMode(ButtonPin7, INPUT_PULLUP);
    pinMode(ButtonPin8, INPUT_PULLUP);

    memset(&stKeyCur,0, sizeof(stKeyCur));
    memset(&stKeyOld,0, sizeof(stKeyOld));

    // initialize mouse control:
    Keyboard.begin();Keyboard.releaseAll();
}

void SetKeyStatus( KEYSTATUS *pKey )
{
    byte *pBtnSts = (byte*)pKey;
    int nKey[] = {ButtonPin1, ButtonPin2, ButtonPin3, ButtonPin4,
                    ButtonPin5, ButtonPin6, ButtonPin7, ButtonPin8};
    for( int i = 0; i < 8; i++)
    {
        pBtnSts[i] = !digitalRead(nKey[i]);
    }
}
void SendKeyCode( KEYSTATUS *pstKeySts, KEYSTATUS *pstKeyOld )
{
    byte *pBtnSts = (byte*)pstKeySts;
    byte *pBtnOld = (byte*)pstKeyOld;
    char chKey[] = {KEY1, KEY2, KEY3, KEY4, KEY5, KEY6, KEY7, KEY8};
    int nNumOfKeyDown = 0;
    for( int i = 0; i < 8; i++)
    {
        if(pBtnSts[i])          // 押下ボタン数をカウント
            nNumOfKeyDown ++;
        if( nNumOfKeyDown > 6 ) // 同時押しは6キーまで
            break;
        if( pBtnSts[i] != pBtnOld[i] )
        {
            (pBtnSts[i])?Keyboard.press(chKey[i]):Keyboard.release(chKey[i]);
        }

    }
}
void loop() {

    // キー状態の読み込み
    SetKeyStatus(&stKeyCur);

    if( memcmp( &stKeyCur, &stKeyOld, sizeof(stKeyCur))) //変化あり
    {
        SendKeyCode (&stKeyCur, &stKeyOld);
    }

    memcpy( &stKeyOld, &stKeyCur, sizeof(stKeyCur));
    delay(50);

}
カスタマイズ
説明は不要かと思いますが、ピンを変更する場合と送出するキーを変更する場合は下記を変更してください。
キー数を変更する場合はfor文のループ回数を変更してください。キーマトリックス用ではないのでArduinoのピン数によってキー数が制限されます。
// set pin numbers for the five buttons:
# define ButtonPin1 2
# define ButtonPin2 3
# define ButtonPin3 4
# define ButtonPin4 5
# define ButtonPin5 6
# define ButtonPin6 7
# define ButtonPin7 8
# define ButtonPin8 9


# define KEY1    KEY_LEFT_CTRL
# define KEY2    'b' // X
# define KEY3    'i' // C
# define KEY4    '.' // V
# define KEY5    'a'  // a
# define KEY6    't'  // Y
# define KEY7    'l'  // N
# define KEY8    KEY_RETURN  // ENTER
おわりに
これで通常のキーボードのように動作してくれます。
参考になれば幸甚です。
2017/12/09 Ikeda