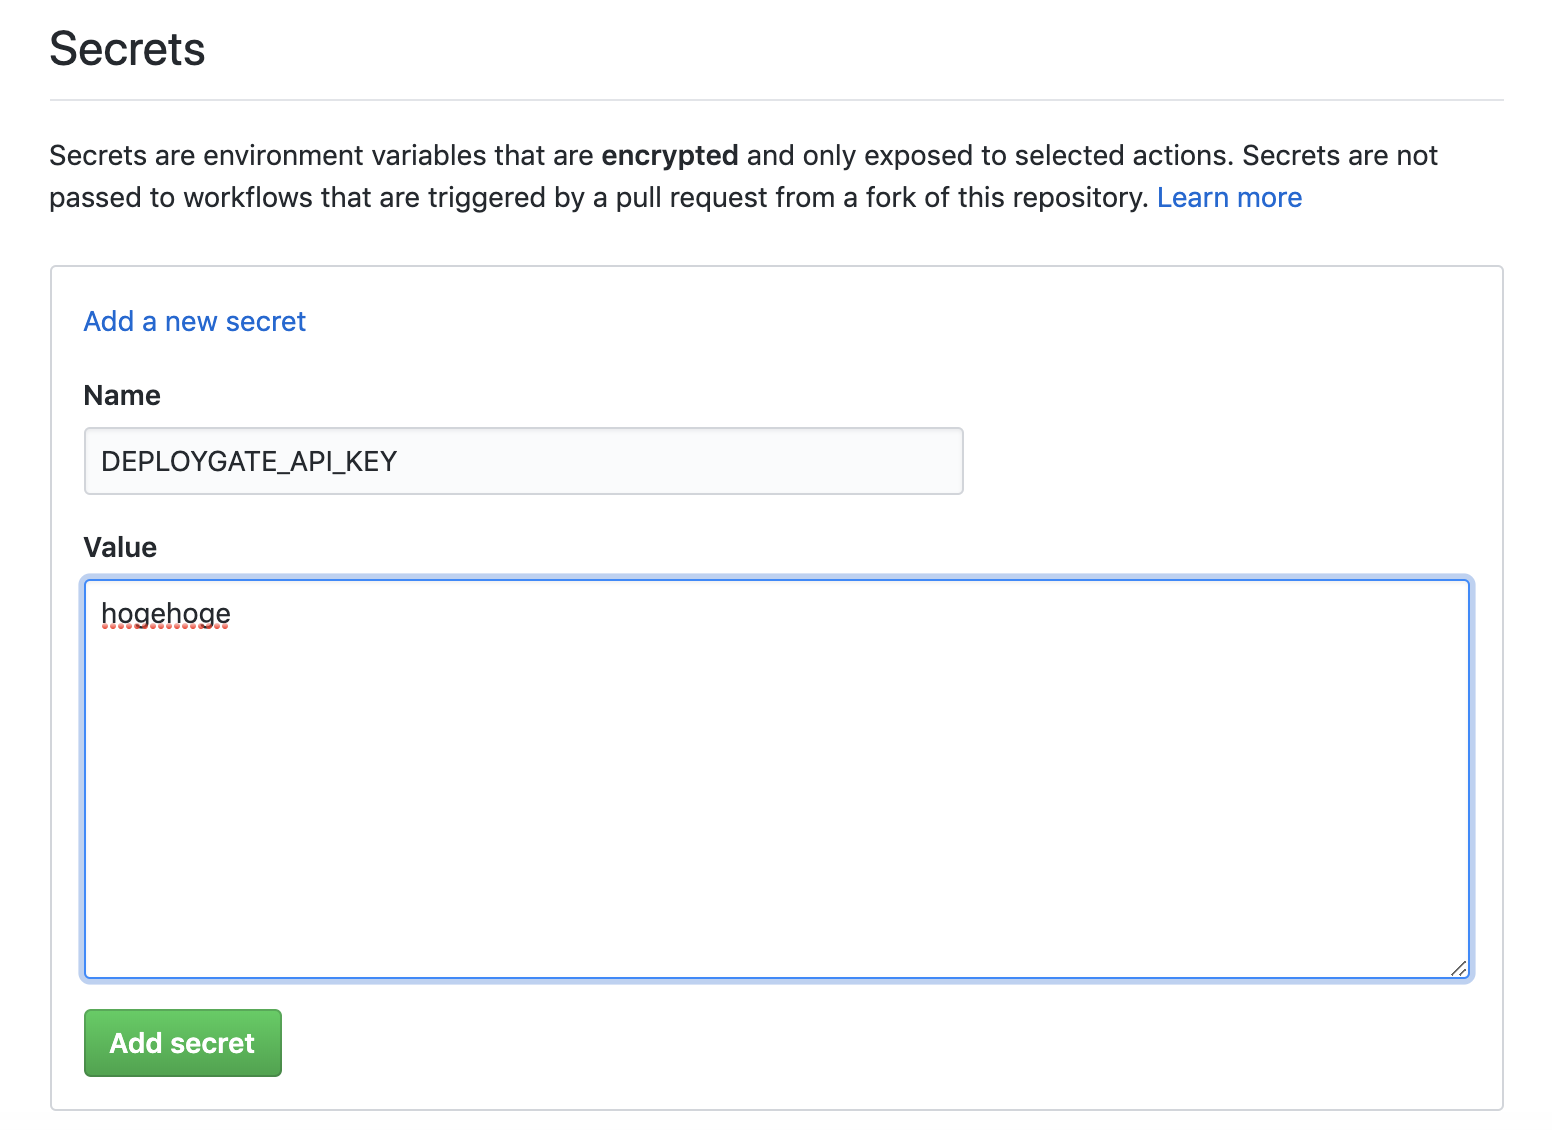
1.以下のDeployGateのAPIキーとユーザはGitHubのリポジトリページにあるSettings→Secretsから追加してください
DEPLOYGATE_API_KEY ・・・DeployGateのプロフィールページに記載されてます
DEPLOYGATE_USER ・・・DeployGateのユーザ名
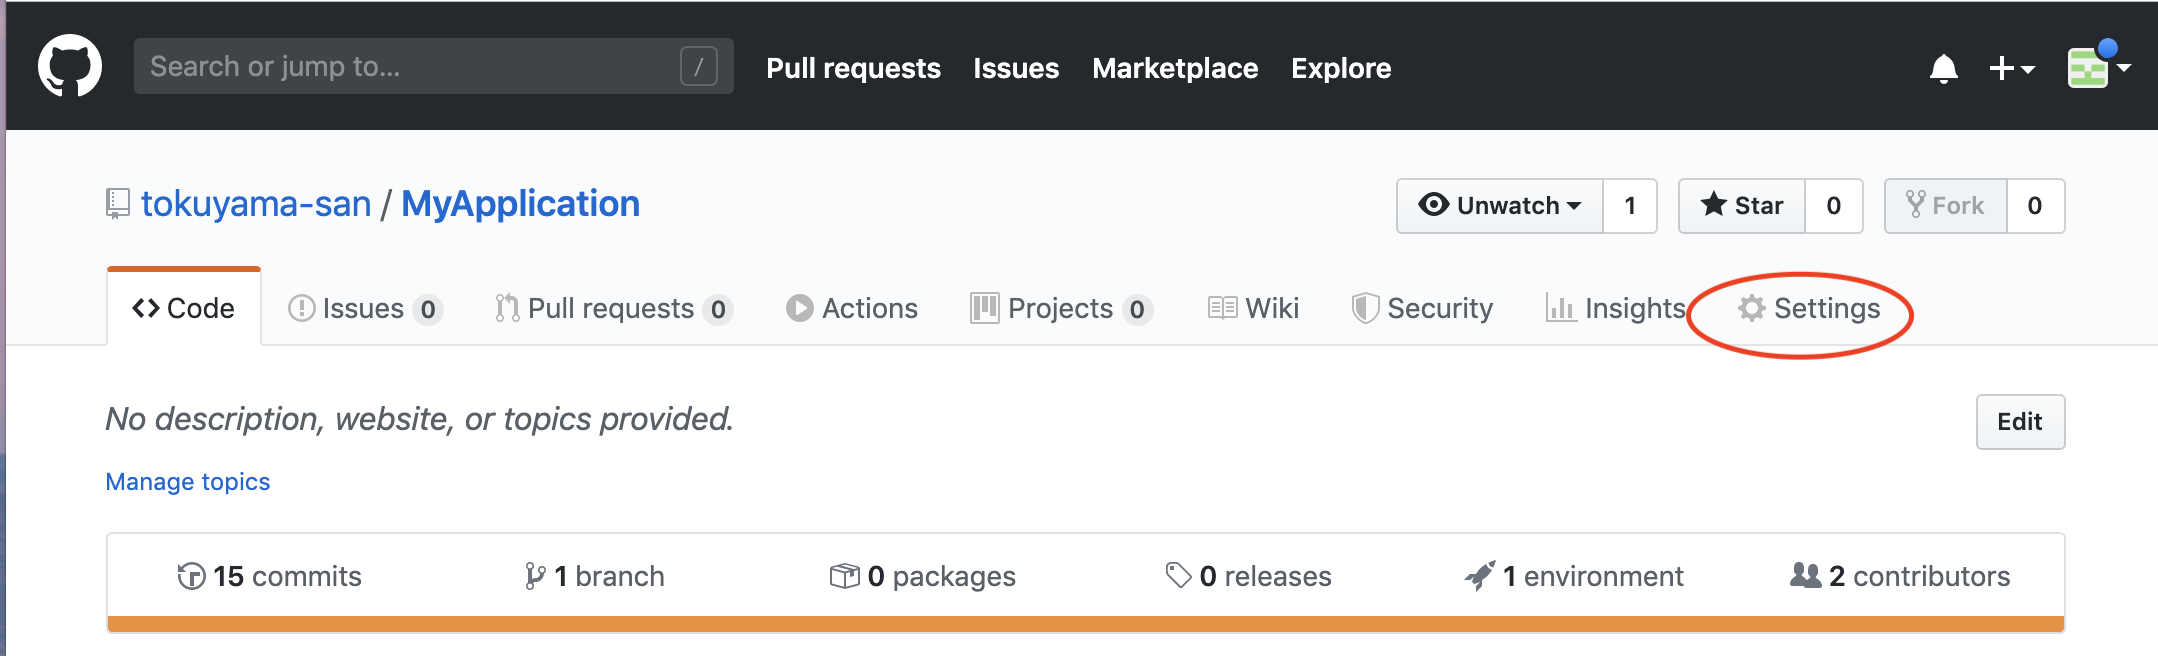
1.[Settings]をクリック
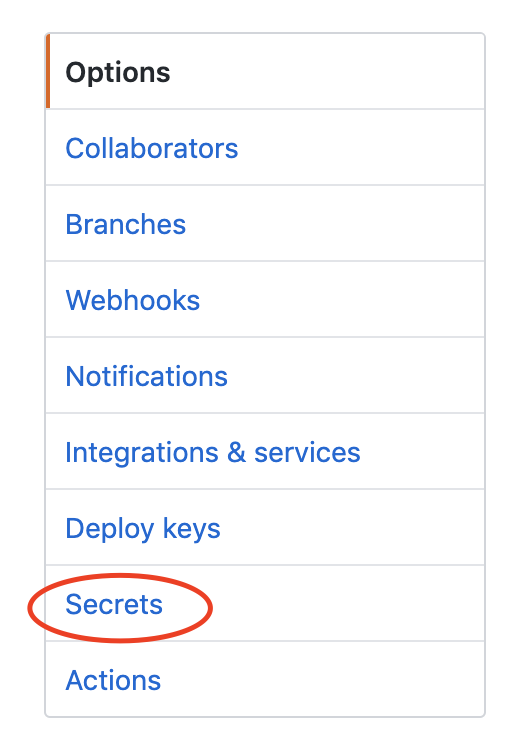
2.[Secrets]をクリック
3.以下の要領で[DEPLOYGATE_API_KEY]と[DEPLOYGATE_USER]を追加
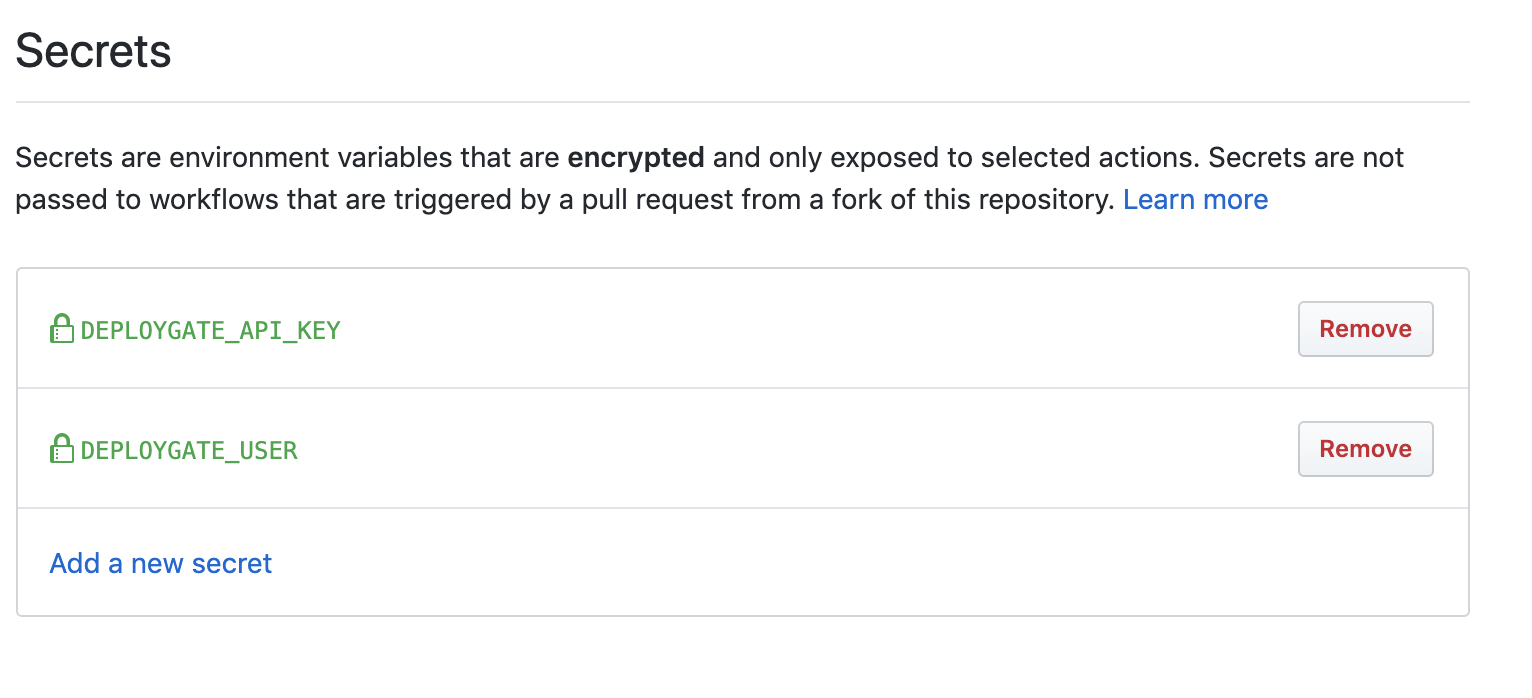
4.最終的にこのような感じ
2.GitHubのリポジトリページにあるActionsからymlファイルを追加します。
1.[Actions]をクリック

2.[Set up a workflow yourself]をクリック

3.プロジェクトルートに/.github/workflows/main.ymlがができるので以下の内容をコピペ
ymlファイルのファイル名はなんでも良い
main.yml
name: Android CI

on: [push]

jobs:
  build:

    runs-on: ubuntu-latest

    steps:
    - uses: actions/checkout@v1
    - name: set up JDK 1.8
      uses: actions/setup-java@v1
      with:
        java-version: 1.8
    # The following generates a debug APK
    - name: Build with Gradle
      run: ./gradlew assembleDebug
    # The following is running unit tests
    - name: Unit Test
      run: ./gradlew test
    # The following is uploading debug apk to the deploygate
    - name: Distribute App
      run: |
       curl \
        -H "Authorization: token ${{secrets.DEPLOYGATE_API_KEY}}" \
        -F "file=@app/build/outputs/apk/debug/app-debug.apk" \
        -F "message=Any message" \
        "https://deploygate.com/api/users/${{secrets.DEPLOYGATE_USER}}/apps"