はじめに ー 週末研究ノートとは?
個人的に研究的な活動をやるにあたり、オープンにしてみたら面白いかもと思い、自分が興味を持っている ざっくりテーマについて、これから、ゆるい週末研究を公開していこうと思います。(有識者の方のアドバイスも、ちょっとというかかなり期待してます!笑)
どこかの権威的な学会やジャーナルなどで発表する予定はないため、万が一、私の記事を利用する際には自己責任でお願いします。そんな人はいないと思いますが、念のため。
今回のサマリ (TL; DR)
- FastAPI 等で独自に作ったAPIをカスタムツール化するのってできるんだっけ?という疑問に答えます!
- もちろん、できます!
- では、どうやって?というのは、本記事に記載していますので、ご覧ください☆彡
環境
- Fast API 実行環境
- OS: Ubuntu 24.04.1 LTS
- IP: 192.168.2.5 (仮)とします
- Docker version 27.3.0, build e85edf8
- Python 3.10.12 / Poetry (version 1.8.3)
- FastAPI 0.115.0
- コードは、こちら
- Docker 環境の構築手順
※ 約1時間程度かかります
git clone https://github.com/tkosht/experiment.git
cd experiment
make
docker コンテナ構築後の Pythonライブラリのインストールに時間を要します
なので、backend/pyproject.tomlのインストール対象をコメントアウトすることで、時間短縮が可能です
- Docker 環境の構築手順
- OS: Ubuntu 24.04.1 LTS
- Dify 実行環境
- OS: Ubuntu 24.04.1 LTS
- Docker version 27.3.0, build e85edf8
- Dify github
- 2024/10/06 時点での最新版
今回の週末研究ノート
FastAPI の作成
Dify ドキュメントのAPI 拡張のサンプルコードをそのまま使います
from fastapi import Body, FastAPI, Header, HTTPException
from pydantic import BaseModel

app = FastAPI()


class InputData(BaseModel):
    point: str
    params: dict = {}


@app.post("/api/dify/receive")
async def dify_receive(data: InputData = Body(...), authorization: str = Header(None)):
    """
    DifyからのAPIクエリデータを受信します。
    """
    expected_api_key = "123456"  # TODO このAPIのAPIキー
    try:
        auth_scheme, _, api_key = authorization.partition(" ")

    except Exception as e:
        raise HTTPException(status_code=401, detail=f"Unauthorized {e}")

    if auth_scheme.lower() != "bearer" or api_key != expected_api_key:
        raise HTTPException(status_code=401, detail="Unauthorized")

    point = data.point

    # デバッグ用
    print(f"point: {point}")

    if point == "ping":
        return {"result": "pong"}
    if point == "app.external_data_tool.query":
        return handle_app_external_data_tool_query(params=data.params)
    # elif point == "{point name}":
    # TODO その他のポイントの実装

    raise HTTPException(status_code=400, detail="Not implemented")


def handle_app_external_data_tool_query(params: dict):
    app_id = params.get("app_id")
    tool_variable = params.get("tool_variable")
    inputs = params.get("inputs")
    query = params.get("query")

    # デバッグ用
    print(f"app_id: {app_id}")
    print(f"tool_variable: {tool_variable}")
    print(f"inputs: {inputs}")
    print(f"query: {query}")

    # TODO 外部データツールクエリの実装
    # 返り値は"result"キーを持つ辞書でなければならず、その値はクエリの結果でなければならない
    if inputs.get("location") == "London":
        return {
            "result": "City: London\nTemperature: 10°C\nRealFeel®: 8°C\nAir Quality: Poor\nWind Direction: ENE\nWind "
            "Speed: 8 km/h\nWind Gusts: 14 km/h\nPrecipitation: Light rain"
        }
    else:
        return {"result": "Unknown city"}
ここで、Dify のカスタムツールから実行されるときは、point が app.external_data_tool.query であることに注意しておく
また、expected_api_key の値は、Dify のカスタムツールを設定するときに使います
FastAPI を起動
make poetry
make[1]: ディレクトリ '/home/xxxx/pj/experiment' に入ります
docker compose up -d
[+] Running 1/0
 ✔ Container experiment.app  Running                                                                                                                                                     0.0s
runnning task @ backend: poetry
docker compose exec app bash -c "cd backend && make poetry"
Spawning shell within /home/devuser/workspace/backend/.venv
devuser@fb6f06346a6f:~/workspace/backend$ . /home/devuser/workspace/backend/.venv/bin/activate
(experiment-backend-py3.10) devuser@fb6f06346a6f:~/workspace/backend$
作業ディレクトリを変更して起動スクリプトを実行します
cd app/dify/
sh bin/webapi.sh
INFO:     Will watch for changes in these directories: ['/home/devuser/workspace/backend/app/dify/tools']
INFO:     Uvicorn running on http://0.0.0.0:8000 (Press CTRL+C to quit)
INFO:     Started reloader process [21526] using WatchFiles
INFO:     Started server process [21528]
INFO:     Waiting for application startup.
INFO:     Application startup complete.
FastAPI への接続確認
ターミナルで、以下のスクリプトを実行します
#! /usr/bin/sh

url=http://192.168.2.5:8000/api/dify/receive
api_key="123456"

curl -X POST -sSL $url \
    -H "Content-Type: application/json" \
    -H "Authorization: Bearer $api_key" \
     -d '
{
    "point": "ping"
}
'
{"result":"pong"}
{"result":"pong"} が表示されたらOKです
Dify でカスタムツールを設定する
Dify にログイン後、「カスタム」タブを選択します

↑で、「+カスタムツールを作成する」を実行すると、↓のような画面がでてきます
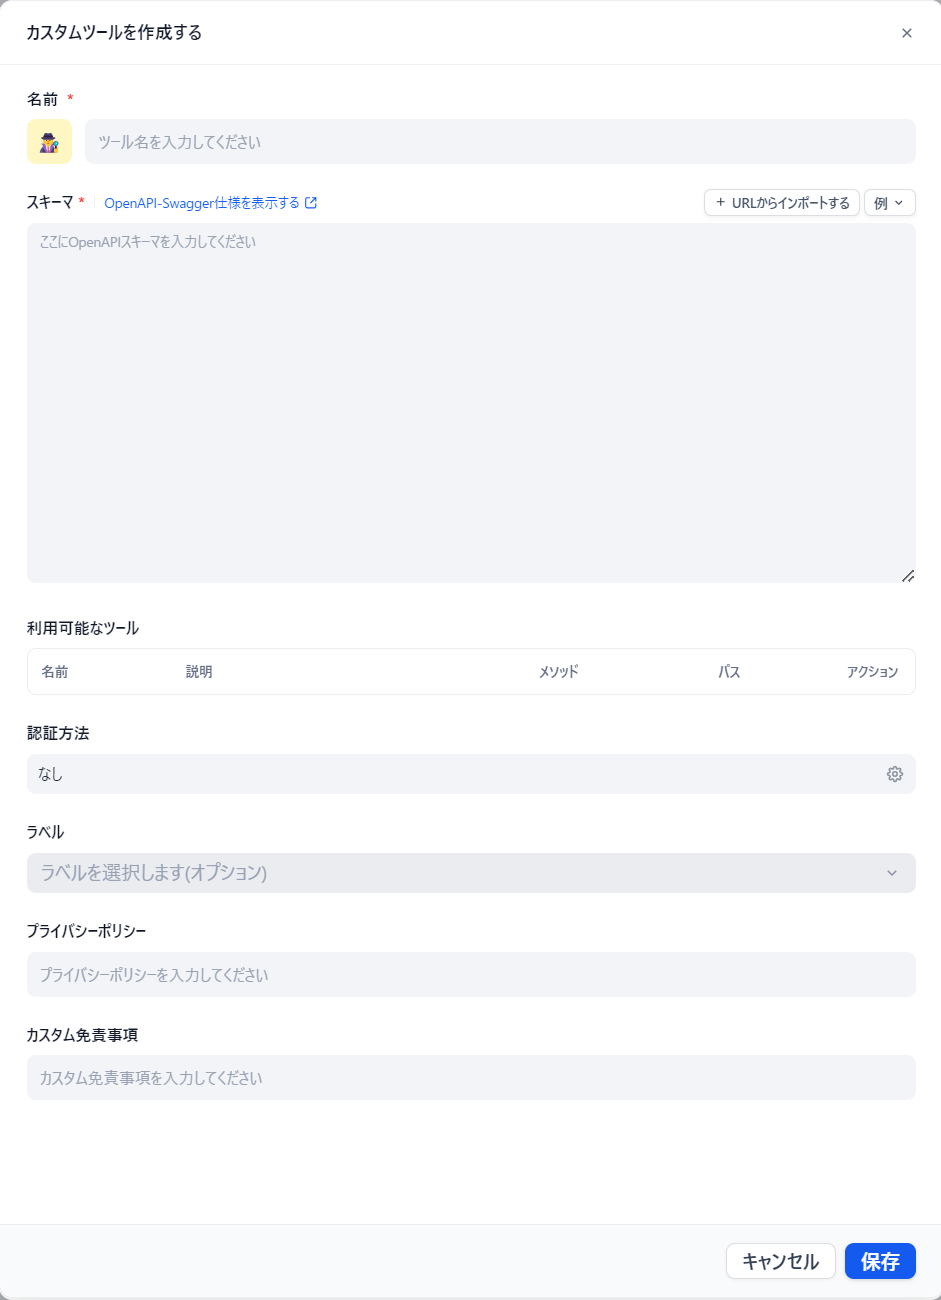
ツールの名前を設定
「名前」欄を任意に設定します
※ ここでは、「tools-test」という名称を設定します

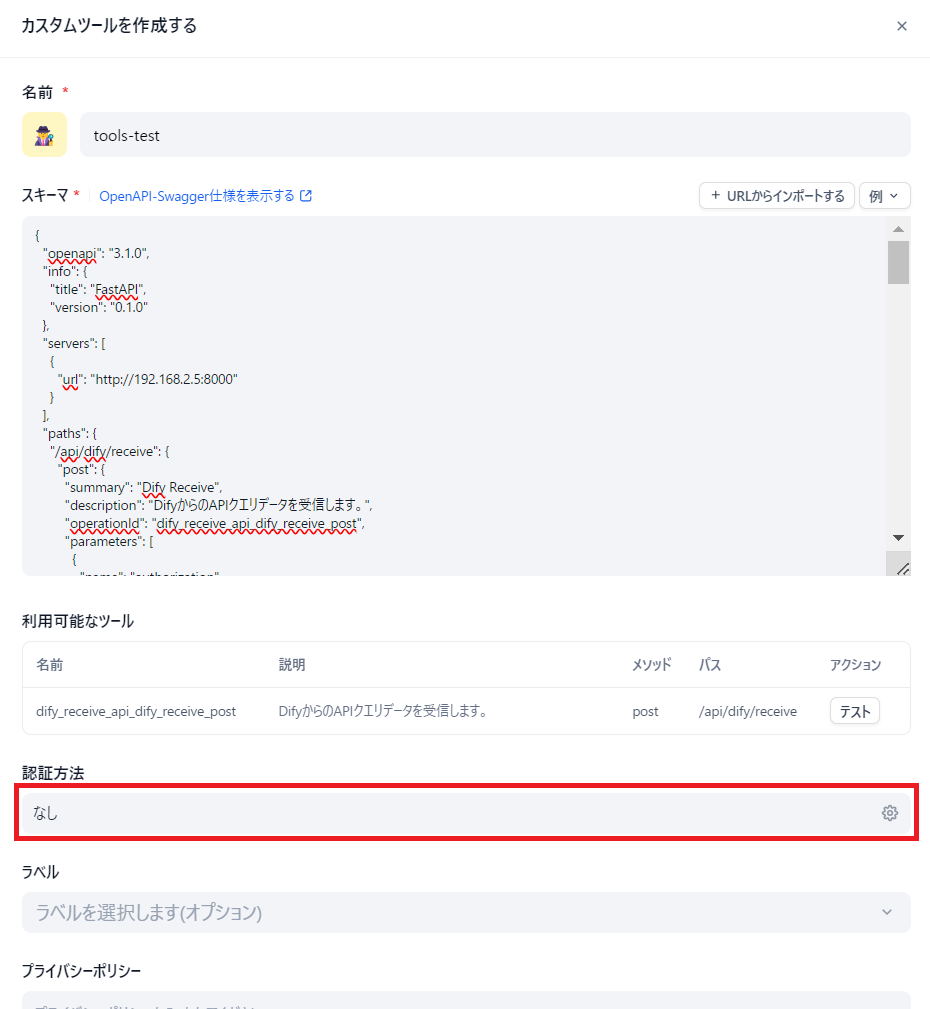
スキーマを設定
「スキーマ」欄に、JSON 形式の定義データを設定します。

スキーマの作成
ここで、現時点では、「+ URLからインポートする」から openapi.json を指定しても、スキーマチェックでエラーになるため、修正済の以下の JSON を使います(※ 上記FastAPI のサーバIPを 192.168.2.5、ポートを 8000 として設定しています )
{
  "openapi": "3.1.0",
  "info": {
    "title": "FastAPI",
    "version": "0.1.0"
  },
  "servers": [
    {
      "url": "http://192.168.2.5:8000"
    }
  ],
  "paths": {
    "/api/dify/receive": {
      "post": {
        "summary": "Dify Receive",
        "description": "DifyからのAPIクエリデータを受信します。",
        "operationId": "dify_receive_api_dify_receive_post",
        "parameters": [
          {
            "name": "authorization",
            "in": "header",
            "required": false,
            "schema": {
              "type": "string",
              "title": "Authorization"
            }
          }
        ],
        "requestBody": {
          "required": true,
          "content": {
            "application/json": {
              "schema": {
                "$ref": "#/components/schemas/InputData"
              }
            }
          }
        },
        "responses": {
          "200": {
            "description": "Successful Response",
            "content": {
              "application/json": {
                "schema": {

                }
              }
            }
          },
          "422": {
            "description": "Validation Error",
            "content": {
              "application/json": {
                "schema": {
                  "$ref": "#/components/schemas/HTTPValidationError"
                }
              }
            }
          }
        }
      }
    }
  },
  "components": {
    "schemas": {
      "HTTPValidationError": {
        "properties": {
          "detail": {
            "items": {
              "$ref": "#/components/schemas/ValidationError"
            },
            "type": "array",
            "title": "Detail"
          }
        },
        "type": "object",
        "title": "HTTPValidationError"
      },
      "InputData": {
        "properties": {
          "point": {
            "type": "string",
            "title": "Point"
          },
          "params": {
            "type": "object",
            "title": "Params"
          }
        },
        "type": "object",
        "required": [
          "point"
        ],
        "title": "InputData"
      },
      "ValidationError": {
        "properties": {
          "loc": {
            "items": {
              "anyOf": [
                {
                  "type": "string"
                },
                {
                  "type": "integer"
                }
              ]
            },
            "type": "array",
            "title": "Location"
          },
          "msg": {
            "type": "string",
            "title": "Message"
          },
          "type": {
            "type": "string",
            "title": "Error Type"
          }
        },
        "type": "object",
        "required": [
          "loc",
          "msg",
          "type"
        ],
        "title": "ValidationError"
      }
    }
  }
}
openapi.json の変更点
http://192.168.2.5:8000/openapi.json へアクセスし、"server" セクションを追加します
- 変更前
{
  "openapi": "3.1.0",
  "info": {
    "title": "FastAPI",
    "version": "0.1.0"
  },
  "paths": {
    "/api/dify/receive": {
      "post": {
      :
- 変更後
{
  "openapi": "3.1.0",
  "info": {
    "title": "FastAPI",
    "version": "0.1.0"
  },
  "servers": [
    {
      "url": "http://192.168.2.5:8000"
    }
  ],
  "paths": {
    "/api/dify/receive": {
      "post": {
      :
components/schemas/InputData の "params" の "default" を削除します(型チェックエラーになるため)
- 変更前
  "params": {
    "type": "object",
    "title": "Params",
    "default": {

    }
  }
- 変更後
  "params": {
    "type": "object",
    "title": "Params"
  }
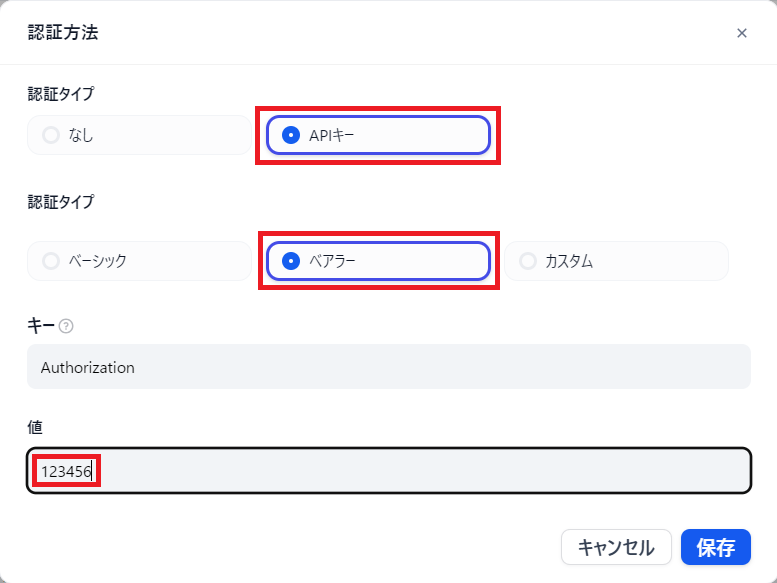
認証情報を設定
次に認証情報を設定します
- 「認証タイプ」は「APIキー」、「ベアラー」を選択します
- 「値」に、「123456」を設定します
- この値は、FastAPI のコード上でハードコードで設定していた値です
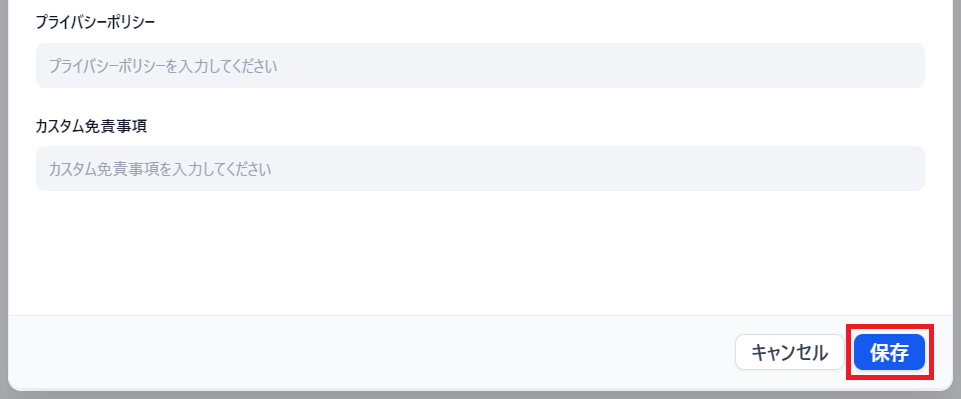
上記設定後、「保存」します

認証設定の動作確認
「利用可能なツール」の「テスト」を開きます

- 「point」パラメータの値に、「ping」を設定し、
- 「params」パラメータの値に、「{}」(空の辞書)を設定します
- 「テスト」を実行します


「テスト結果」に、{"result": "pong"} が表示されたら接続OKです
「テスト」ダイアログを閉じて、「保存」しておきます
以上で、カスタムツールの作成が完了です
ワークフローから作成したカスタムツールを設定する
では、実際に以下のようなワークフローを作成して、カスタムツールを利用してみます

※ 「DIFY_RECEIVE_API_DIFY_RECEI...」というノードが今回作成したツールです
ワークフローの yaml は、以下の通りです。
※ こちらからダウンロードできます
app:
  description: FastAPIへ接続するワークフロー
  icon: 🤖
  icon_background: '#FFEAD5'
  mode: workflow
  name: FastAPI接続ワークフロー
  use_icon_as_answer_icon: false
kind: app
version: 0.1.2
workflow:
  conversation_variables: []
  environment_variables: []
  features:
    file_upload:
      image:
        enabled: true
        number_limits: 3
        transfer_methods:
        - local_file
        - remote_url
    opening_statement: ''
    retriever_resource:
      enabled: true
    sensitive_word_avoidance:
      enabled: false
    speech_to_text:
      enabled: false
    suggested_questions: []
    suggested_questions_after_answer:
      enabled: false
    text_to_speech:
      enabled: false
      language: ''
      voice: ''
  graph:
    edges:
    - data:
        isInIteration: false
        sourceType: tool
        targetType: code
      id: 1728113691816-source-1728113825420-target
      source: '1728113691816'
      sourceHandle: source
      target: '1728113825420'
      targetHandle: target
      type: custom
      zIndex: 0
    - data:
        isInIteration: false
        sourceType: code
        targetType: end
      id: 1728113825420-source-1728114165252-target
      source: '1728113825420'
      sourceHandle: source
      target: '1728114165252'
      targetHandle: target
      type: custom
      zIndex: 0
    - data:
        isInIteration: false
        sourceType: start
        targetType: code
      id: 1728113681511-source-1728114754455-target
      source: '1728113681511'
      sourceHandle: source
      target: '1728114754455'
      targetHandle: target
      type: custom
      zIndex: 0
    - data:
        isInIteration: false
        sourceType: code
        targetType: tool
      id: 1728114754455-source-1728113691816-target
      source: '1728114754455'
      sourceHandle: source
      target: '1728113691816'
      targetHandle: target
      type: custom
      zIndex: 0
    nodes:
    - data:
        desc: ''
        selected: false
        title: 開始
        type: start
        variables:
        - label: location
          max_length: 48
          options:
          - London
          - NewYork
          - Tokyo
          required: true
          type: select
          variable: location
      height: 68
      id: '1728113681511'
      position:
        x: 80
        y: 282
      positionAbsolute:
        x: 80
        y: 282
      selected: false
      sourcePosition: right
      targetPosition: left
      type: custom
      width: 244
    - data:
        desc: ''
        provider_id: e139d00c-cc53-46c2-b15c-334832c15f13
        provider_name: api-tools
        provider_type: api
        selected: false
        title: dify_receive_api_dify_receive_post
        tool_configurations: {}
        tool_label: dify_receive_api_dify_receive_post
        tool_name: dify_receive_api_dify_receive_post
        tool_parameters:
          authorization:
            type: mixed
            value: '123456'
          params:
            type: mixed
            value: '{{#1728114754455.params#}}'
          point:
            type: mixed
            value: app.external_data_tool.query
        type: tool
      height: 41
      id: '1728113691816'
      position:
        x: 684
        y: 282
      positionAbsolute:
        x: 684
        y: 282
      selected: false
      sourcePosition: right
      targetPosition: left
      type: custom
      width: 244
    - data:
        code: "import json\n\n\ndef main(posted: str) -> str:\n    jsn = json.loads(posted)\n\
          \    return {\n        \"result\": jsn[\"result\"],\n    }\n"
        code_language: python3
        desc: ''
        outputs:
          result:
            children: null
            type: string
        selected: false
        title: コード Pickup the Result
        type: code
        variables:
        - value_selector:
          - '1728113691816'
          - text
          variable: posted
      height: 41
      id: '1728113825420'
      position:
        x: 988
        y: 282
      positionAbsolute:
        x: 988
        y: 282
      selected: false
      sourcePosition: right
      targetPosition: left
      type: custom
      width: 244
    - data:
        desc: ''
        outputs:
        - value_selector:
          - '1728113825420'
          - result
          variable: result
        selected: false
        title: 終了
        type: end
      height: 68
      id: '1728114165252'
      position:
        x: 1292
        y: 282
      positionAbsolute:
        x: 1292
        y: 282
      selected: false
      sourcePosition: right
      targetPosition: left
      type: custom
      width: 244
    - data:
        code: "import json\n\n\ndef main(location: str) -> dict:\n    return {\n \
          \       \"params\": json.dumps({\n            \"app_id\": \"dify-6d61f5c0-54af-471b-ba55-443c9219579a\"\
          ,\n            \"inputs\": {\"location\": location}\n        }),\n    }\n"
        code_language: python3
        desc: ''
        outputs:
          params:
            children: null
            type: string
        selected: false
        title: コード Convert  Location to Params
        type: code
        variables:
        - value_selector:
          - '1728113681511'
          - location
          variable: location
      height: 41
      id: '1728114754455'
      position:
        x: 384
        y: 282
      positionAbsolute:
        x: 384
        y: 282
      selected: true
      sourcePosition: right
      targetPosition: left
      type: custom
      width: 244
    viewport:
      x: -22
      y: 66.5
      zoom: 1
上記、yaml をファイルに保存して、「DSLファイルをインポート」で取り込むことでワークフローの作成をショートカットできます
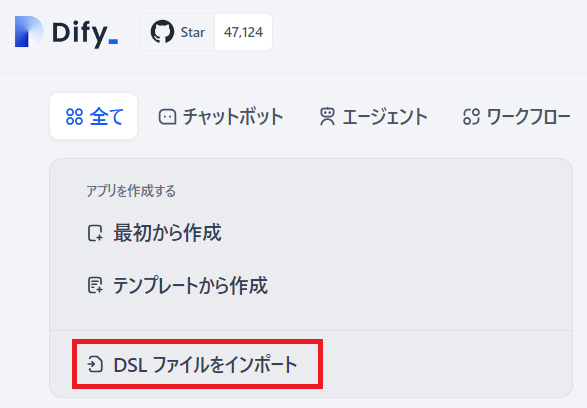
YAMLファイルのインポート後、↓のように、「FastAPI接続ワークフロー」が作成されます

開いて実行してみます

「Location」にて、「London」を選択します

「実行を開始」を実行します
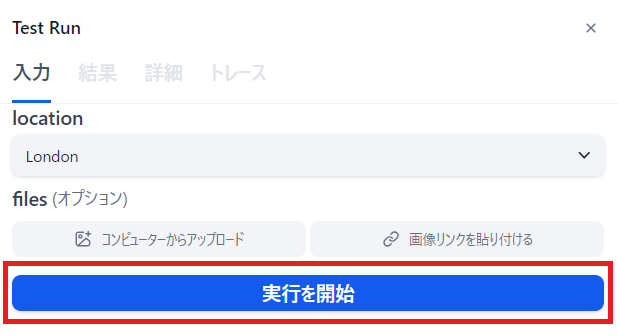
以下のように表示されれば、ワークフローの実行は成功です!

※ 「NewYork」や「Tokyo」を選択すると「Unknown city」が表示されます
まとめ
- FastAPI の
http://192.168.2.5:8000/openapi.jsonがそのまま使えないのが少しハマりました -
openapi.json以外は、特に躓きポイントはなかったです - 今回省略しましたが、作ったワークフローをさらにツールとしても使えるようにできますので、幅が広がります