環境
$ lsb_release -a
No LSB modules are available.
Distributor ID: Ubuntu
Description:    Ubuntu 14.04.3 LTS
Release:        14.04
Codename:       trusty

$ uname -a
Linux brix 3.19.0-42-generic #48~14.04.1-Ubuntu SMP Fri Dec 18 10:24:49 UTC 2015 x86_64 x86_64 x86_64 GNU/Linux

$ cat /proc/meminfo | grep ^Mem
MemTotal:       16306972 kB
MemFree:         1740880 kB
MemAvailable:   13819520 kB
参考
準備
vagrant-lxc環境
lxcをインストールする。
$ sudo aptitude install lxc lxc-templates cgroup-lite redir
vagrantパッケージをダウンロードしてインストールする。
※最新版は Download Vagrant - Vagrant で確認
$ wget https://releases.hashicorp.com/vagrant/1.8.1/vagrant_1.8.1_x86_64.deb
$ sudo dpkg -i vagrant_1.8.1_x86_64.deb
vagrant-lxcプラグインをインストールする。
$ vagrant plugin install vagrant-lxc
LXCコンテナ作成
$ mkdir ~/git/zulip-test
$ cd ~/git/zulip-test
$ vagrant init fgrehm/trusty64-lxc
A `Vagrantfile` has been placed in this directory. You are now
ready to `vagrant up` your first virtual environment! Please read
the comments in the Vagrantfile as well as documentation on
`vagrantup.com` for more information on using Vagrant.
作ったファイルをgitリポジトリに登録する。
$ git init
$ git add Vagrantfile
$ git commit -m INIT
ホスト名の設定を追加する。
$ vi Vagrantfile
--- a/Vagrantfile
+++ b/Vagrantfile
@@ -6,6 +6,8 @@
 # backwards compatibility). Please don't change it unless you know what
 # you're doing.
 Vagrant.configure(2) do |config|
+  config.vm.hostname = "zulip"
+
   # The most common configuration options are documented and commented below.
   # For a complete reference, please see the online documentation at
   # https://docs.vagrantup.com.
$ git add -u
$ git commit -m "add hostname"
ポート転送の設定を追加する。
$ vi Vagrantfile
--- a/Vagrantfile
+++ b/Vagrantfile
@@ -22,7 +22,8 @@ Vagrant.configure(2) do |config|
   # Create a forwarded port mapping which allows access to a specific port
   # within the machine from a port on the host machine. In the example below,
   # accessing "localhost:8080" will access port 80 on the guest machine.
-  # config.vm.network "forwarded_port", guest: 80, host: 8080
+  config.vm.network "forwarded_port", guest: 80, host: 10080, host_ip: "0.0.0.0"
+  config.vm.network "forwarded_port", guest: 443, host: 10443, host_ip: "0.0.0.0"

   # Create a private network, which allows host-only access to the machine
   # using a specific IP.
$ git add -u
$ git commit -m "add port forwarding"
初期設定を追加する。
$ vi Vagrantfile
--- a/Vagrantfile
+++ b/Vagrantfile
@@ -64,8 +68,5 @@ Vagrant.configure(2) do |config|
   # Enable provisioning with a shell script. Additional provisioners such as
   # Puppet, Chef, Ansible, Salt, and Docker are also available. Please see the
   # documentation for more information about their specific syntax and use.
-  # config.vm.provision "shell", inline: <<-SHELL
-  #   sudo apt-get update
-  #   sudo apt-get install -y apache2
-  # SHELL
+  config.vm.provision "shell", path: "bootstrap.sh"
 end
$ cat <<'EOS' > bootstrap.sh
# !/usr/bin/env bash

# HTTP_PROXY="proxy.example.com:8080"
# HTTPS_PROXY="$HTTP_PROXY"

# Exit if already bootstrapped
[ -f /etc/bootstrapped ] && exit

if [ -n "$HTTP_PROXY" ]; then
  echo "Setting HTTP Proxy for /etc/environment"
  cat <<EOS > /etc/environment
http_proxy="http://$HTTP_PROXY/"
https_proxy="https://$HTTPS_PROXY/"
EOS

  echo "Setting HTTP Proxy for /etc/apt/apt.conf"
  test ! -f /etc/apt/apt.conf; touch /etc/apt/apt.conf
  cat <<EOS > /etc/apt/apt.conf
Acquire::http::proxy "http://$HTTP_PROXY/";
Acquire::https::proxy "https://$HTTPS_PROXY/";
EOS

  if test -d /home/vagrant; then
    echo "Setting HTTP Proxy for cURL in Vagrant user directory"
    cat <<EOS > /home/vagrant/.curlrc
proxy = $HTTP_PROXY
EOS
  fi
fi

echo "Setting Timezone"
echo "Asia/Tokyo" > /etc/timezone
dpkg-reconfigure --frontend noninteractive tzdata

echo "Setting Package"
apt-get -q install -y aptitude
aptitude -q update
aptitude -q safe-upgrade -y

date > /etc/bootstrapped
EOS
$ git add -u
$ git add bootstrap.sh
$ git commit -m "add provisioning scripts"
コンテナを起動する。
$ vagrant up --provider lxc
コンテナの状態を確認する。
$ vagrant status
Current machine states:

default                   running (lxc)

The VM is running. To stop this VM, you can run `vagrant halt` to
shut it down forcefully, or you can run `vagrant suspend` to simply
suspend the virtual machine. In either case, to restart it again,
simply run `vagrant up`.
インストール
SSL証明書作成
コンテナに接続する。
$ vagrant ssh
秘密鍵を作成する。
$ mkdir pki
$ cd pki
$ openssl genrsa -des3 -passout pass:x -out server.pass.key 4096
$ openssl rsa -passin pass:x -in server.pass.key -out zulip.key
$ rm server.pass.key
サーバ証明書を作成する。
※何も入力せず全てEnterで済ませた。
$ openssl req -new -key zulip.key -out server.csr
You are about to be asked to enter information that will be incorporated
into your certificate request.
What you are about to enter is what is called a Distinguished Name or a DN.
There are quite a few fields but you can leave some blank
For some fields there will be a default value,
If you enter '.', the field will be left blank.
-----
Country Name (2 letter code) [AU]:
State or Province Name (full name) [Some-State]:
Locality Name (eg, city) []:
Organization Name (eg, company) [Internet Widgits Pty Ltd]:
Organizational Unit Name (eg, section) []:
Common Name (e.g. server FQDN or YOUR name) []:
Email Address []:

Please enter the following 'extra' attributes
to be sent with your certificate request
A challenge password []:
An optional company name []:
$ openssl x509 -req -days 365 -in server.csr -signkey zulip.key -out zulip.combined-chain.crt
$ rm server.csr
秘密鍵とサーバ証明書をコピーする。
$ sudo cp zulip.key /etc/ssl/private/zulip.key
$ sudo cp zulip.combined-chain.crt /etc/ssl/certs/zulip.combined-chain.crt
zulipインストール
zulipをダウンロードする。
※最新版は Index of /dist/releases/ で確認
$ sudo -i
root# cd ~
root# wget https://www.zulip.com/dist/releases/zulip-server-latest.tar.gz
root# tar -xf zulip-server-latest.tar.gz
root# mv zulip-server-1.3.* /root/zulip
インストールスクリプトを実行する。
※インストール時のログは /var/log/zulip/install.log に記録される。
root# /root/zulip/scripts/setup/install
zulipの設定を変更する。(変更しないと起動しない)
※example.com を localhost.local に変更した。
root# mv /etc/zulip/settings.py /etc/zulip/settings.py.org
root# cp /etc/zulip/settings.py.org /etc/zulip/settings.py
root# vi /etc/zulip/settings.py
--- /etc/zulip/settings.py.org  2016-01-22 13:24:53.000000000 +0900
+++ /etc/zulip/settings.py      2016-02-06 11:26:59.449070748 +0900
@@ -7,18 +7,18 @@

 # The user-accessible Zulip hostname for this installation, e.g.
 # zulip.example.com
-EXTERNAL_HOST = 'zulip.example.com'
+EXTERNAL_HOST = 'zulip.home.local'

 # The email address for the person or team who maintain the Zulip
 # Voyager installation. Will also get support emails. (e.g. zulip-admin@example.com)
-ZULIP_ADMINISTRATOR = 'zulip-admin@example.com'
+ZULIP_ADMINISTRATOR = 'zulip-admin@home.local'

 # The domain for your organization, e.g. example.com
-ADMIN_DOMAIN = 'example.com'
+ADMIN_DOMAIN = 'home.local'

 # Enable at least one of the following authentication backends.
 AUTHENTICATION_BACKENDS = (
-#                           'zproject.backends.EmailAuthBackend', # Email and password; see SMTP setup below
+                           'zproject.backends.EmailAuthBackend', # Email and password; see SMTP setup below
 #                           'zproject.backends.ZulipRemoteUserBackend', # Local SSO
 #                           'zproject.backends.GoogleMobileOauth2Backend', # Google Apps, setup below
 #                           'zproject.backends.ZulipLDAPAuthBackend', # LDAP, setup below
@@ -72,10 +72,10 @@
 EMAIL_PORT = 587
 EMAIL_USE_TLS = True
 # The email From address to be used for automatically generated emails
-DEFAULT_FROM_EMAIL = "Zulip <zulip@example.com>"
+DEFAULT_FROM_EMAIL = "Zulip <zulip@home.local>"
 # The noreply address to be used as Reply-To for certain generated emails.
 # Messages sent to this address should not be delivered anywhere.
-NOREPLY_EMAIL_ADDRESS = "noreply@example.com"
+NOREPLY_EMAIL_ADDRESS = "noreply@home.local"

 # A list of strings representing the host/domain names that this
 # Django site can serve. You should reset it to be a list of
@@ -199,7 +199,7 @@
 # use.  It should be one of the following:
 #   %s@zulip.example.com (for local delivery)
 #   username+%s@example.com (for polling if EMAIL_GATEWAY_LOGIN=username@example.com)
-EMAIL_GATEWAY_PATTERN = ""
+EMAIL_GATEWAY_PATTERN = "%s@home.local"
 #
 # If you are using local delivery, EMAIL_GATEWAY_PATTERN is all you need
 # to change in this file.  You will also need to enable the Zulip postfix
実行
root# su zulip -c /home/zulip/deployments/current/scripts/setup/initialize-database
zulipのプロセス状態を確認する。
root# supervisorctl status
process-fts-updates              RUNNING    pid 14498, uptime 0:00:49
zulip-django                     RUNNING    pid 14484, uptime 0:00:50
zulip-senders:zulip-events-message_sender-0 RUNNING    pid 14599, uptime 0:00:39
zulip-senders:zulip-events-message_sender-1 RUNNING    pid 14606, uptime 0:00:39
zulip-senders:zulip-events-message_sender-2 RUNNING    pid 14613, uptime 0:00:38
zulip-senders:zulip-events-message_sender-3 RUNNING    pid 14620, uptime 0:00:37
zulip-senders:zulip-events-message_sender-4 RUNNING    pid 14591, uptime 0:00:40
zulip-tornado                    RUNNING    pid 14485, uptime 0:00:50
zulip-workers:zulip-deliver-enqueued-emails RUNNING    pid 14542, uptime 0:00:45
zulip-workers:zulip-events-confirmation-emails RUNNING    pid 14528, uptime 0:00:46
zulip-workers:zulip-events-digest_emails RUNNING    pid 14570, uptime 0:00:42
zulip-workers:zulip-events-email_mirror RUNNING    pid 14554, uptime 0:00:43
zulip-workers:zulip-events-error_reports RUNNING    pid 14535, uptime 0:00:46
zulip-workers:zulip-events-feedback_messages RUNNING    pid 14584, uptime 0:00:40
zulip-workers:zulip-events-missedmessage_mobile_notifications RUNNING    pid 14563, uptime 0:00:43
zulip-workers:zulip-events-missedmessage_reminders RUNNING    pid 14577, uptime 0:00:41
zulip-workers:zulip-events-signups RUNNING    pid 14521, uptime 0:00:47
zulip-workers:zulip-events-slowqueries RUNNING    pid 14547, uptime 0:00:44
zulip-workers:zulip-events-user-activity RUNNING    pid 14514, uptime 0:00:48
zulip-workers:zulip-events-user-activity-interval RUNNING    pid 14507, uptime 0:00:48
zulip-workers:zulip-events-user-presence RUNNING    pid 14500, uptime 0:00:49
ユーザを作成する。
root# su - zulip
$ cd ~/deployments/current
$ ./manage.py create_user --this-user-has-accepted-the-tos --domain home.local zulip@home.local 'Zulip'
 localhost zulip@home.local 'Zulip'
2016-01-04 05:32:14,711 INFO     SimpleQueueClient connected (connecting took 0.013s)
パスワードを設定する。
$ ./manage.py changepassword zulip@home.local
Changing password for user 'zulip@home.local'
Password:
Password (again):
Password changed successfully for user 'zulip@home.local'
管理者権限を設定する。(必要に応じて)
$ ./manage.py knight -f zulip@home.local
Done!
$ ./manage.py show_admins home.local
Admins:

  zulip@home.local (Zulip)

You can use the "knight" management command to knight admins.
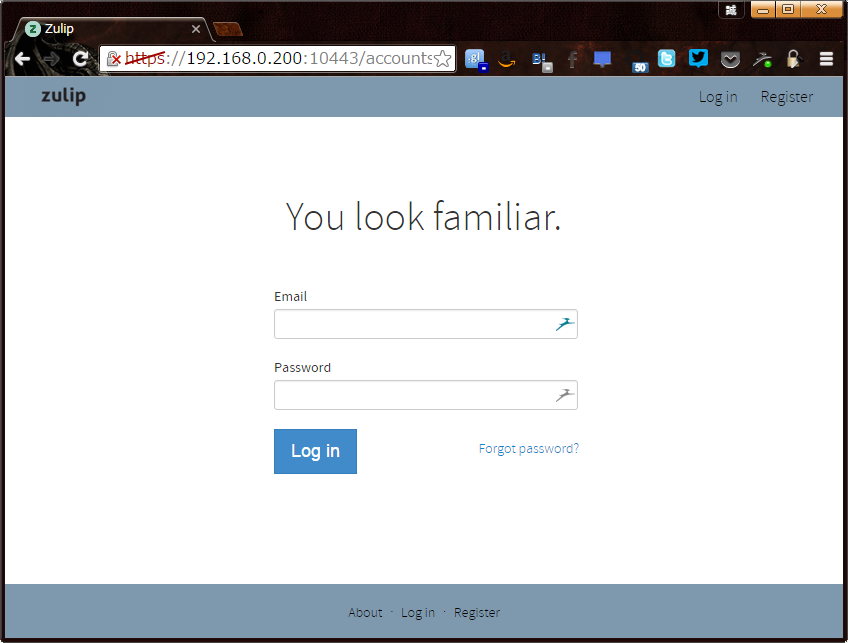
アクセスできることを確認する。
【参考】LDAP認証の設定について
会社ではActive Directoryで認証することの方が多いので、参考情報としてメモしておきます。
- Reference — django-auth-ldap 1.2.7 documentation
- ディレクトリサービスの仕組みと活用(6):LDAPプログラミングの基本 - @IT
- 管理者のためのActive Directory入門:第8回 Active Directoryの導入後の作業 (2/3) - @IT
LDAP_APPEND_DOMAIN = Noneの場合、%(user)sはログイン情報(メールアドレス)が渡されて、LDAP_APPEND_DOMAIN = 'ドメイン文字列'の場合、%(user)sはログイン情報(メールアドレス)のアカウント部分のみが渡されるようです。(推測)
# LDAP認証を有効にする
AUTHENTICATION_BACKENDS = (
#                           'zproject.backends.EmailAuthBackend', # Email and password; see SMTP setup below
#                           'zproject.backends.ZulipRemoteUserBackend', # Local SSO
#                           'zproject.backends.GoogleMobileOauth2Backend', # Google Apps, setup below
                            'zproject.backends.ZulipLDAPAuthBackend', # LDAP, setup below
    )

# ドメインコントローラの指定
AUTH_LDAP_SERVER_URI = "ldaps://dc.example.com"
AUTH_LDAP_BIND_DN = "ldapuser@example.com"
AUTH_LDAP_BIND_PASSWORD = "ldap_password"

# ADアカウントのEmailAddress属性でマッチさせる場合
AUTH_LDAP_USER_SEARCH = LDAPSearch("ou=users,dc=example,dc=com",
    ldap.SCOPE_SUBTREE, "(&(objectClass=person)(objectClass=user)(mail=%(user)s))")
LDAP_APPEND_DOMAIN = None

# ADアカウント@ドメイン名でマッチさせる場合
AUTH_LDAP_USER_SEARCH = LDAPSearch("ou=users,dc=example,dc=com",
    ldap.SCOPE_SUBTREE, "(sAMAccountName=%(user)s)")
LDAP_APPEND_DOMAIN = 'example.com'

# ADアカウントのEmailAddress属性またはユーザログオン名でマッチさせる場合(未確認)
AUTH_LDAP_USER_SEARCH = LDAPSearch("ou=users,dc=example,dc=com",
    ldap.SCOPE_SUBTREE, "(&(objectClass=person)(objectClass=user)(|(mail=%(user)s)(userPrincipalName=%(user)s)))")
LDAP_APPEND_DOMAIN = None
ADアカウントに設定されているメールアドレスは以下のコマンドで確認できます。「サーバにログオンする権限がないからアドレスが確認できない」などといった恥ずかしい発言をしないように。
Get-ADUser username -Properties EmailAddress
補足
サーバ再起動後に動かなくなる
インストール直後は動いているのに、サーバ(LXCコンテナ)を再起動すると、zulipのプロセスが起動しなくなってしまった。正確にはプロセス起動途中でエラー終了し、再起動を繰り返している状態となっている。
pythonの再起動による負荷でサーバが騒音を出している状態なのでzulipを停止する。
root# supervisorctl stop all
各プロセスのログファイル内容を確認した。
root# cd /var/log/zulip
root# while read f
do
  echo "| $f | $(tail -n 1 $f) |"
done <<EOS
fts-updates.log
django.log
events-message_sender.log
tornado.log
events-deliver_enqueued_emails.log
events-confirmation-emails.log
events-digest_emails.log
events-email_mirror.log
events-error_reports.log
events-feedback_messages.log
events-missedmessage_mobile_notifications.log
events-missedmessage_reminders.log
events-signups.log
events-slow_queries.log
events-user-activity.log
events-user-activity-interval.log
events-user-presence.log
EOS
| ログファイル | ログファイルの末尾 |
|---|---|
| fts-updates.log | 2016-01-04 23:56:02,046 INFO: Not in recovery; listening for FTS updates |
| django.log | 2016-01-04 05:34:18,819 INFO 127.0.0.1 GET 200 52ms (db: 1ms/1q) /accounts/login/ (unauth via ?) |
| events-message_sender.log | pika.exceptions.AMQPConnectionError: 1 |
| tornado.log | pika.exceptions.AMQPConnectionError: 1 |
| events-deliver_enqueued_emails.log | |
| events-confirmation-emails.log | pika.exceptions.AMQPConnectionError: 1 |
| events-digest_emails.log | pika.exceptions.AMQPConnectionError: 1 |
| events-email_mirror.log | pika.exceptions.AMQPConnectionError: 1 |
| events-error_reports.log | pika.exceptions.AMQPConnectionError: 1 |
| events-feedback_messages.log | pika.exceptions.AMQPConnectionError: 1 |
| events-missedmessage_mobile_notifications.log | pika.exceptions.AMQPConnectionError: 1 |
| events-missedmessage_reminders.log | pika.exceptions.AMQPConnectionError: 1 |
| events-signups.log | pika.exceptions.AMQPConnectionError: 1 |
| events-slow_queries.log | pika.exceptions.AMQPConnectionError: 1 |
| events-user-activity.log | pika.exceptions.AMQPConnectionError: 1 |
| events-user-activity-interval.log | pika.exceptions.AMQPConnectionError: 1 |
| events-user-presence.log | pika.exceptions.AMQPConnectionError: 1 |
pika.exceptions.AMQPConnectionError の記録数を確認した。
root# cd /var/log/zulip
root# while read f
do
  echo "| $f | $(grep -c pika.exceptions.AMQPConnectionError $f) |"
done <<EOS
fts-updates.log
django.log
events-message_sender.log
tornado.log
events-deliver_enqueued_emails.log
events-confirmation-emails.log
events-digest_emails.log
events-email_mirror.log
events-error_reports.log
events-feedback_messages.log
events-missedmessage_mobile_notifications.log
events-missedmessage_reminders.log
events-signups.log
events-slow_queries.log
events-user-activity.log
events-user-activity-interval.log
events-user-presence.log
EOS
| ログファイル | AMQPConnectionErrorの記録数 |
|---|---|
| fts-updates.log | 0 |
| django.log | 0 |
| events-message_sender.log | 3496 |
| tornado.log | 694 |
| events-deliver_enqueued_emails.log | 0 |
| events-confirmation-emails.log | 692 |
| events-digest_emails.log | 692 |
| events-email_mirror.log | 696 |
| events-error_reports.log | 694 |
| events-feedback_messages.log | 694 |
| events-missedmessage_mobile_notifications.log | 693 |
| events-missedmessage_reminders.log | 696 |
| events-signups.log | 696 |
| events-slow_queries.log | 692 |
| events-user-activity.log | 691 |
| events-user-activity-interval.log | 696 |
| events-user-presence.log | 690 |
pika.exceptions.AMQPConnectionErrorを調べたら、RabbitMQへの接続失敗時に記録されているらしい。
RabbitMQのサービス稼働状況を確認したら、ステータスが表示されずにエラーメッセージのような文字列が表示された。
root# service rabbitmq-server status
{error_logger,{{2016,1,5},{0,12,33}},"Protocol: ~tp: register/listen error: ~tp~n",["inet_tcp",econnrefused]}
{error_logger,{{2016,1,5},{0,12,33}},crash_report,[[{initial_call,{net_kernel,init,['Argument__1']}},{pid,<0.21.0>},{registered_name,[]},{error_info,{exit,{error,badarg},[{gen_server,init_it,6,[{file,"gen_server.erl"},{line,320}]},{proc_lib,init_p_do_apply,3,[{file,"proc_lib.erl"},{line,239}]}]}},{ancestors,[net_sup,kernel_sup,<0.10.0>]},{messages,[]},{links,[#Port<0.93>,<0.18.0>]},{dictionary,[{longnames,false}]},{trap_exit,true},{status,running},{heap_size,610},{stack_size,27},{reductions,818}],[]]}
{error_logger,{{2016,1,5},{0,12,33}},supervisor_report,[{supervisor,{local,net_sup}},{errorContext,start_error},{reason,{'EXIT',nodistribution}},{offender,[{pid,undefined},{name,net_kernel},{mfargs,{net_kernel,start_link,[[rabbitmqctl6360,shortnames]]}},{restart_type,permanent},{shutdown,2000},{child_type,worker}]}]}
{error_logger,{{2016,1,5},{0,12,33}},supervisor_report,[{supervisor,{local,kernel_sup}},{errorContext,start_error},{reason,{shutdown,{failed_to_start_child,net_kernel,{'EXIT',nodistribution}}}},{offender,[{pid,undefined},{name,net_sup},{mfargs,{erl_distribution,start_link,[]}},{restart_type,permanent},{shutdown,infinity},{child_type,supervisor}]}]}
{error_logger,{{2016,1,5},{0,12,33}},crash_report,[[{initial_call,{application_master,init,['Argument__1','Argument__2','Argument__3','Argument__4']}},{pid,<0.9.0>},{registered_name,[]},{error_info,{exit,{{shutdown,{failed_to_start_child,net_sup,{shutdown,{failed_to_start_child,net_kernel,{'EXIT',nodistribution}}}}},{kernel,start,[normal,[]]}},[{application_master,init,4,[{file,"application_master.erl"},{line,133}]},{proc_lib,init_p_do_apply,3,[{file,"proc_lib.erl"},{line,239}]}]}},{ancestors,[<0.8.0>]},{messages,[{'EXIT',<0.10.0>,normal}]},{links,[<0.8.0>,<0.7.0>]},{dictionary,[]},{trap_exit,true},{status,running},{heap_size,376},{stack_size,27},{reductions,117}],[]]}
{error_logger,{{2016,1,5},{0,12,33}},std_info,[{application,kernel},{exited,{{shutdown,{failed_to_start_child,net_sup,{shutdown,{failed_to_start_child,net_kernel,{'EXIT',nodistribution}}}}},{kernel,start,[normal,[]]}}},{type,permanent}]}
{"Kernel pid terminated",application_controller,"{application_start_failure,kernel,{{shutdown,{failed_to_start_child,net_sup,{shutdown,{failed_to_start_child,net_kernel,{'EXIT',nodistribution}}}}},{kernel,start,[normal,[]]}}}"}

Crash dump was written to: erl_crash.dump
Kernel pid terminated (application_controller) ({application_start_failure,kernel,{{shutdown,{failed_to_start_child,net_sup,{shutdown,{failed_to_start_child,net_kernel,{'EXIT',nodistribution}}}}},{k
サービス再起動してもfailとなる。
root# service rabbitmq-server restart
 * Restarting message broker rabbitmq-server
   ...fail!
エラーログはepmdデーモンが起動していない場合に出力されることが多いらしい。
確かに動いていない。
root# ps -ef | grep epmd
root 1980 1710 0 00:34 pts/0 00:00:00 grep --color=auto epmd
rabbitmq-serverを直接実行すると動いた。
root# rabbitmq-server
              RabbitMQ 3.2.4. Copyright (C) 2007-2013 GoPivotal, Inc.
  ##  ##      Licensed under the MPL.  See http://www.rabbitmq.com/
  ##  ##
  ##########  Logs: /var/log/rabbitmq/rabbit@vagrant-base-trusty-amd64.log
  ######  ##        /var/log/rabbitmq/rabbit@vagrant-base-trusty-amd64-sasl.log
  ##########
              Starting broker... completed with 0 plugins.
rabbitmq-server を一旦終了してepmdを確認したら、実行されていた。
^C
Session terminated, terminating shell...
BREAK: (a)bort (c)ontinue (p)roc info (i)nfo (l)oaded
       (v)ersion (k)ill (D)b-tables (d)istribution
q
 ...terminated.
# ps -ef | grep epmd
rabbitmq  5525     1  0 00:36 ?        00:00:00 /usr/lib/erlang/erts-5.10.4/bin/epmd -daemon
root      6349  1710  0 00:40 pts/0    00:00:00 grep --color=auto epmd
rabbitmq-serverサービスを起動する。
root# service rabbitmq-server start
 * Starting message broker rabbitmq-server
   ⇒このままプロンプトが返ってこない。
プロンプトが返ってこないのでCtrl+Cで終了した。
rabbitmq-serverプロセスは動いているが、サービス起動処理を中断しているため、OSからはサービスとして管理できない状態になっている。
root# service rabbitmq-server status
Status of node 'rabbit@vagrant-base-trusty-amd64' ...
Error: unable to connect to node 'rabbit@vagrant-base-trusty-amd64': nodedown

DIAGNOSTICS
===========

nodes in question: ['rabbit@vagrant-base-trusty-amd64']

hosts, their running nodes and ports:
- vagrant-base-trusty-amd64: [{rabbit,60246},{rabbitmqctl12423,49036}]

current node details:
- node name: 'rabbitmqctl12423@vagrant-base-trusty-amd64'
- home dir: /var/lib/rabbitmq
- cookie hash: Xg1UdNy+NWeYCIOhHZ5fxg==
zulipのプロセスを起動する。
root# supervisorctl start all
処置
サーバ起動時に以下の操作を行えばzulipを使用できる状態になる。
root# rabbitmq-server- Ctrl+Cで終了
root# service rabbitmq-server start- Ctrl+Cで終了
RabbitMQの起動スクリプトがダメなのか、RabbitMQの設定を間違っているのか、原因を調べる必要あり。気が向いたらそのうち調べる。
upstart起動スクリプトに置き換えた (2016/01/30)
SystemV起動スクリプトを無効にする。
$ sudo update-rc.d rabbitmq-server disable
update-rc.d: warning:  start runlevel arguments (none) do not match rabbitmq-server Default-Start values (2 3 4 5)
update-rc.d: warning:  stop runlevel arguments (none) do not match rabbitmq-server Default-Stop values (0 1 6)
 Disabling system startup links for /etc/init.d/rabbitmq-server ...
 Removing any system startup links for /etc/init.d/rabbitmq-server ...
   /etc/rc0.d/K20rabbitmq-server
   /etc/rc1.d/K20rabbitmq-server
   /etc/rc2.d/S20rabbitmq-server
   /etc/rc3.d/S20rabbitmq-server
   /etc/rc4.d/S20rabbitmq-server
   /etc/rc5.d/S20rabbitmq-server
   /etc/rc6.d/K20rabbitmq-server
 Adding system startup for /etc/init.d/rabbitmq-server ...
   /etc/rc0.d/K20rabbitmq-server -> ../init.d/rabbitmq-server
   /etc/rc1.d/K20rabbitmq-server -> ../init.d/rabbitmq-server
   /etc/rc6.d/K20rabbitmq-server -> ../init.d/rabbitmq-server
   /etc/rc2.d/K80rabbitmq-server -> ../init.d/rabbitmq-server
   /etc/rc3.d/K80rabbitmq-server -> ../init.d/rabbitmq-server
   /etc/rc4.d/K80rabbitmq-server -> ../init.d/rabbitmq-server
   /etc/rc5.d/K80rabbitmq-server -> ../init.d/rabbitmq-server
upstart起動スクリプトを作成する。
$ cat <<'EOS' | sudo tee /etc/init/rabbitmq-server.conf
description "Enable AMQP service provided by RabbitMQ"

start on runlevel [2345]
stop on runlevel [!2345]

respawn limit 10 5

env DAEMON=/usr/sbin/rabbitmq-server
env HOME=/var/lib/rabbitmq

setuid rabbitmq
setgid rabbitmq

exec ${DAEMON}
EOS
設定を反映する。
$ sudo initctl reload-configuration
$ sudo initctl list | grep rabbitmq
サービスを起動する。
$ sudo initctl start rabbitmq-server
$ sudo initctl status rabbitmq-server
ログを確認する。
$ sudo tail /var/log/rabbitmq/startup_log
              RabbitMQ 3.2.4. Copyright (C) 2007-2013 GoPivotal, Inc.
  ##  ##      Licensed under the MPL.  See http://www.rabbitmq.com/
  ##  ##
  ##########  Logs: /var/log/rabbitmq/rabbit@vagrant-base-trusty-amd64.log
  ######  ##        /var/log/rabbitmq/rabbit@vagrant-base-trusty-amd64-sasl.log
  ##########
              Starting broker... completed with 0 plugins.