React + Redux について調べると、多くの解説記事が Actions の説明から始まっていました。
公式ドキュメントでも同様で、Actions の説明から始まっています。
それらを読むと Actions や Action Creators がどのような役割を担っているのか分かりましたが、「具体的にどのように使われるのか?」という部分がなかなか理解できませんでした。
これは、私にとって Redux を使った基本的な状態管理の方法を理解する障害になっていたと思います。
Actions、Reducers、 Store 、React Component の連携などドキュメントを繰り返し読み、サンプルコードを色々と変更しながら動かしました。
そのうち、**「Actions を起点」として考えるより「Reducers を起点」**に考えた方が、私にとって全体の流れがイメージしやすく、 Actions や Action Creators がどのように使われるのかを理解する事ができました。
あくまでも私にとって理解しやすかった考え方ですが、自身の振り返りと、もし同じように Redux の基本的な使い方の理解に悩んでいる方への助けになればと思って、「Reducers を起点」 に考えるReact + Redux での状態管理を記事にします。
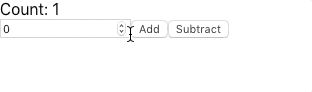
この記事では、このような簡単なカウンターアプリを作成します。
はじめに create-react-app を使用してプロジェクトを作成し、redux と react-redux を追加します。
npx create-react-app redux-demo
cd redux-demo/
npm i redux react-redux
Reducers とは
Reducers は新しいState(アプリケーションの状態)を作る為の関数です。
この Reducers が新しい State をつくる為には、以下の2つの情報が必要です。
- 現在の State (または、State の初期値)
- State の変更に必要なデータ
仮にカウンターの状態を管理する為に、{value: 1}という State が存在しているとします。
2を足して新しい State をつくる為に{value: 2}という情報を受取る場合を考えてみます。
| 現在の State (または、State の初期値) |
Stateの変更に必要なデータ |
|---|---|
| {value: 1} | {value: 2} |
現在の State である{value: 1}とStateの変更に必要なデータである{value: 2}を足す事で{value: 3}という新しい State を作り出すのが Reducers の役割です。
これをコードに置き換えてみます。
/**
 * 第一引数の state → 現在の State (または、State の初期値)
 * 第二引数の action → State の変更に必要なデータ
 *
 * 実際に Reducers として定義しなけれないけない関数とは異なる点を注意してください。
 **/

const counter = (state = {value: 1}, action) => {
  return {
    value: state.value + action.value,
  }
}

console.log(counter(undefined, {value: 2})) // {value: 3}
このコードでは、常に足し算しかできません。
Reducers は新しいState(アプリケーションの状態)を作る為の関数なので、引き算もできるようにコードを変更していきます。
/**
 * 第一引数の state → 現在の State (または、State の初期値)
 * 第二引数の action → State の変更に必要なデータ
 **/

const counter = (state = {value: 1}, action) =>  {
  switch(action.type) {
    case 'ADD':
      return {value: state.value + action.value};
    case 'SUBTRACT':
      return {value: state.value - action.value};
    default:
      return state;
  }
}

console.log(counter(undefined, {type: 'ADD', value: 2})); // {value: 3}
console.log(counter(undefined, {type: 'SUBTRACT', value: 2})); // {value: -1}
第二引数のactionにtypeプロパティを与える事で関数内で処理を分岐する事ができました。
先ほど書いた関数が Reducers と呼ばれているものです。
不要な記述を削除してこちらをsrc/reducers/index.jsに保存します。
const counter = (state = {value: 1}, action) =>  {
  switch(action.type) {
    case 'ADD':
      return {value: state.value + action.value};
    case 'SUBTRACT':
      return {value: state.value - action.value};
    default:
      return state;
  }
}
Reducers は、「現在の State(または、State の初期値)」と「State の変更に必要なデータ」を受け取り、新しい状態を返却します。
この Reducers をアプリケーションの状態を包括的に管理する Store に登録し、実行されると Store に State が登録・更新されます。
Actions とは
すでに Reducers を作成する時に引数の名前として使用しておりますが、Actions は Reducers の第二引数に渡すオブジェクトの事です。
Reducers の説明をする時は、「State の変更に必要なデータ」と表現していました。
Reducers は、action.typeに登録された文字列によって、どのような変更を行う処理か分岐する内容です。
その為、Actions は必ずtypeプロパティを持っている必要があります。
// Actionsの例
{
  type: 'ADD',
  value: 2
}

{
  type: 'SUBTRACT',
  value: 2
}
この Actions は、Action Creators と呼ばれる関数で作ります。
export const ADD = 'ADD'
export const SUBTRACT = 'SUBTRACT'

export const add = (value) => {
  return {
    type: ADD,
    value: value
  }
}

export const subtract = (value) => {
  return {
    type: SUBTRACT,
    value: value
  }
}
先頭のこの2行は、Reducers の switch 文の case 句でも使用したいのでエクスポートします。
export const ADD = 'ADD'
export const SUBTRACT = 'SUBTRACT'
エクスポートした定数を Reducers 側でインポートして、case 句の条件として使用します。
import { ADD, SUBTRACT } from '../actions'

/**
 * 第一引数の state → 現在の State (または、State の初期値)
 * 第二引数の action → State の変更に必要なデータ
 **/

const counter = default (state = {value: 1}, action) =>  {
  switch(action.type) {
    case ADD:
      return {value: state.value + action.value};
    case SUBTRACT:
      return {value: state.value - action.value};
    default:
      return state;
  }
}
続いて、こちらのエクスポートしている2つの関数が Action Creators です。
Action Creators は、最低でもtypeプロパティをもったオブジェクトを返す関数です。
Action を作成するのに必要な情報(今回の場合は、足し算もしくは引き算に使用する数字)を引数として受け取り、オブジェクトをリターンします。
export const add = (value) => {
  return {
    type: ADD,
    value: value
  }
}

export const subtract = (value) => {
  return {
    type: SUBTRACT,
    value: value
  }
}
この記事の Reducers の段落の最後の方でこのように記載していました。
この Reducers をアプリケーションの状態を包括的に管理する Store に登録し、実行されると Store に State が登録・更新されます。
Store に登録した Reducers は、この Action Creators が Actions を返却するときに実行されます。
Action Creators は、React Component側でイベントハンドラと結びつけます。
結びつけたイベントが発生したタイミングで、Action Creators が実行され Actions が返却されます。
こちらのコードは、後ほど紹介します。
Reducers の分割・統合
Reducers を Store に登録する前にファイルを分割します。
実際のアプリケーションでは、様々な状態を管理する為、多くの Reducers が必要です。
Reducers を分けて管理し、複数の Reducers を読み込めるようにします。
src/reducers/index.jsをコピーしてsrc/reducers/counter.jsを作成します
cp src/reducers/index.js src/reducers/counter.js
src/reducers/counter.jsに記述した Reducers は、src/reducers/index.jsでインポートして使うのでエクスポートします。
import { ADD, SUBTRACT } from '../actions'

/**
 * 第一引数の state → 現在の State (または、State の初期値)
 * 第二引数の action → State の変更に必要なデータ
 **/

export default (state = {value: 1}, action) =>  {
  switch(action.type) {
    case ADD:
      return {value: state.value + action.value};
    case SUBTRACT:
      return {value: state.value - action.value};
    default:
      return state;
  }
}
src/reducers/index.jsでは、Reducers をインポートし combineReducers() で一つにまとめます。
import { combineReducers } from 'redux'
import counter from './counter'

export default combineReducers({counter})
今回はcounter.jsのみですが、複数ある場合はこのように登録します。
export default combineReducers({counter, hoge, fuga})
これで分割した Reducers を一つに統合する事ができました。
統合した Reducers は、Storeに登録する為にエクスポートしています。
Store を作成して Reducers を登録
アプリケーション全体の状態を一元管理する Store を作成し、React アプリケーションと紐付ける為にこちらのモジュールをsrc/index.jsでインポートします。
import { createStore } from 'redux'
import { Provider } from 'react-redux'
import reducers from './reducers'
インポートしたモジュールで Store を作成し、React アプリケーションと紐付けします。
import React from 'react';
import ReactDOM from 'react-dom';
import { createStore } from 'redux'
import { Provider } from 'react-redux'
import reducers from './reducers'
import './index.css';
import App from './App';
import * as serviceWorker from './serviceWorker';

// store の作成
// createStore 関数を引数に reducers を渡して実行
const store = createStore(reducers)

// インポートした Provider コンポーネントで root コンポーネントをラップします。
// Provider コンポーネントに props として store を渡す事で、 React アプリケーションと Store を紐付け
ReactDOM.render(
  (
    <Provider store={store}>
      <App />
    </Provider>
  ),
  document.getElementById('root')
);

// If you want your app to work offline and load faster, you can change
// unregister() to register() below. Note this comes with some pitfalls.
// Learn more about service workers: https://bit.ly/CRA-PWA
serviceWorker.unregister();
React Component で Store の State 使用する
React Component から Action Creators を実行する
React Component を Store と接続する為にconnect()を使用します。
connect()の引数としてmapStateToPropsとmapDispatchToPropsを渡すと、React Component 内で必要な State と Action Creators を this.props を経由して使用する事ができます。
import React, { Component } from 'react'
import { connect } from 'react-redux'
import { add, subtract } from './actions'

class App extends Component {
  constructor (props) {
    super(props)

    this.state = {
      value: 0,
    }
  }

  handleChange = (e) => {
    this.setState({
      value: parseInt(e.currentTarget.value),
    })
  }

  render () {
    const {value, add, subtract} = this.props
    return (
      <div className="App">
        <div>Count: {value}</div>
        <form onSubmit={(e) => e.preventDefault()}>
          <label><input type="number" value={this.state.value} onChange={(e) => this.handleChange(e)}/></label>
          <button type="button" onClick={() => add(this.state.value)}>Add</button>
          <button type="button" onClick={() => subtract(this.state.value)}>Subtract</button>
        </form>
      </div>
    )
  }
}

const mapStateToProps = state => state.counter
const mapDispatchToProps = {add, subtract}

export default connect(mapStateToProps, mapDispatchToProps)(App)
Props として渡された Action Creators を Add ボタン と Subtract ボタンのイベントハンドラに指定します。
それぞれのボタンがクリックされた時に Component が保持しているthis.state.valueを引数に受け取って Action Creators が実行されます。
全体の流れ
全体の流れはこのようなイメージです。
Component 内の要素にイベントハンドラとして Action Creators を指定する
↓
イベントが発生したタイミングで Action Creators が実行され Action が発行される
↓
発行された Action を引数に含めて Reducers が実行される
↓
Reducers が新しい State を生成して Store へ反映する
まとめ
はじめは、Reduxの機能が互いにどんな関係にあるのかが分からず理解するのが難しかったです。
Reducers から Redux を考えると Action や Action Creators がどうような使われ方をするのかイメージしやすいのではないでしょうか。
私自身 Redux は触り始めたばかりなので、記事中に間違いや不備があれば教えて頂けると喜びます!