やりたいこと
・Listの背景色をつける
・削除可能にする
・タップ時のアクションを作る
・ContextMenu で長押し/3D Touch時のアクションを作る
Listを作成
🐶、🐱、🐊の3つを表示する高さが 50 のList を作成します
id: \.self となっているのはこの記事で紹介しています
struct someView: View {
    @State var animals: [String] = ["🐶", "🐱", "🐊"]
    var body: some View {
        List {
            ForEach(animals, id: \.self) { animal in
                HStack {
                    Text(animal)
                        .padding(.all)
                    Spacer()
                }
            }
            .frame(height: 50)
        }
    }
}

Listに背景色をつける
背景色は.listRowBackgruondで指定します
struct someView: View {
    @State var animals: [String] = ["🐶", "🐱", "🐊"]
    var body: some View {
        List {
            ForEach(animals, id: \.self) { animal in
                HStack {
                    Text(animal)
                        .padding(.all)
                    Spacer()
                }
            }
            .frame(height: 50)
            // 背景色設定
            .listRowBackground(Color.gray)
        }
    }
}
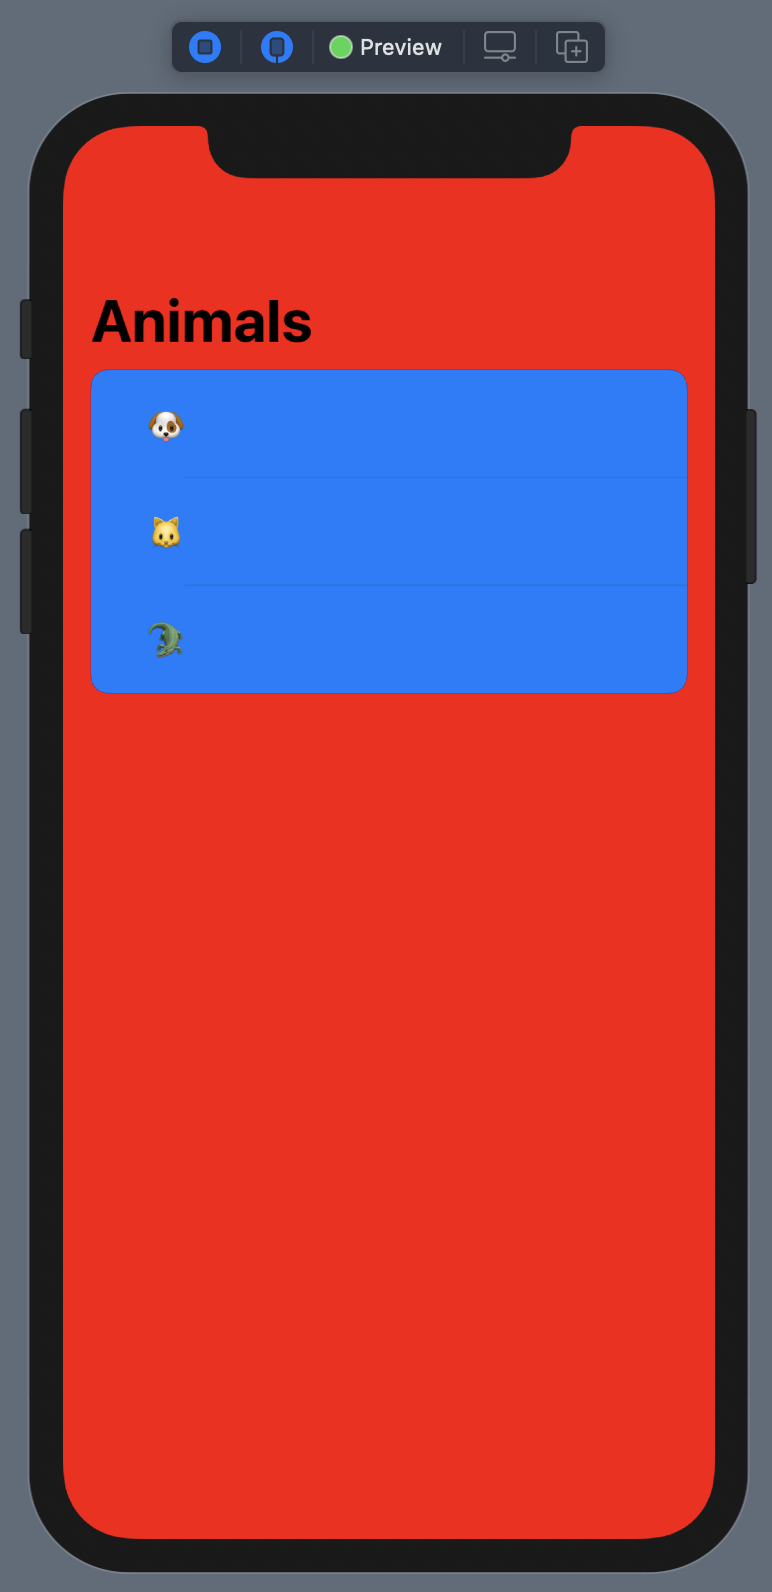
この時、Viewの背景色も合わせて変えたいという時はイニシャライザでTableViewの背景色を透明にしてZStack等を使うと良いです
struct someView: View {
    @State var animals: [String] = ["🐶", "🐱", "🐊"]
    init() {
        UITableView.appearance().backgroundColor = .clear
    }
    var body: some View {
        NavigationView {
            ZStack {
                Color(.red).edgesIgnoringSafeArea(.all)
                List {
                    ForEach(animals, id: \.self) { animal in
                        HStack {
                            Text(animal)
                                .padding(.all)
                            Spacer()
                        }

                    }
                    .frame(height: 50)
                    .listRowBackground(Color.blue)
                }.navigationTitle("Animals")
            }
        }
    }
}

削除メソッド
ForEachメソッドの最後にonDeleteメソッドをつけると左へスワイプできるようになります
この時、offsets(IndexSet)が引数として与えられます
struct someView: View {
    @State var animals: [String] = ["🐶", "🐱", "🐊"]
    var body: some View {
        List {
            ForEach(animals, id: \.self) { animal in
                HStack {
                    Text(animal)
                        .padding(.all)
                    Spacer()
                }
            }
            // 削除メソッド
            .onDelete(perform: delete)
            .frame(height: 50)
            .listRowBackground(Color.gray)
        }
    }

    func delete(at offsets: IndexSet) {
        animals.remove(atOffsets: offsets)
    }
}

タップを可能にする
HStackに対して、.onTapGestureを設定します
この時、このままだとText()をタップしないとタップ判定されないようになってしまうので、contentShapeを指定することにより、タップ領域を広げリストのコンテンツをタップすると判定されるようにします
struct someView: View {
    @State var animals: [String] = ["🐶", "🐱", "🐊"]
    var body: some View {
        List {
            ForEach(animals, id: \.self) { animal in
                HStack {
                    Text(animal)
                        .padding(.all)
                    Spacer()
                }
                // タップ判定領域を指定
                .contentShape(RoundedRectangle(cornerRadius: 5))
                // タップした時にtapActionを実行
                .onTapGesture {
                    tapAction(animal)
                }
            }
            .onDelete(perform: delete)
            .frame(height: 50)
            .listRowBackground(Color.gray)
        }
    }

    func tapAction(_ selection: String) {
        animals.append(selection)
    }

    func delete(at offsets: IndexSet) {
        animals.remove(atOffsets: offsets)
    }
}

長押しContextMenu
HStackに対して.contextMenuを設定すると長押しした際にメニューが表示されるようになります
ContextMenuの中にMenuを入れ子のようにすることもできます
struct someView: View {
    @State var animals: [String] = ["🐶", "🐱", "🐊"]
    var body: some View {
        List {
            ForEach(animals, id: \.self) { animal in
                HStack {
                    Text(animal)
                        .padding(.all)
                    Spacer()
                }
                .contentShape(RoundedRectangle(cornerRadius: 5))
                .onTapGesture {
                    tapAction(animal)
                }
                // 長押しした時のアクション
                .contextMenu(ContextMenu(menuItems: {
                    Menu("More") {
                        Button(action: {
                            tapAction(animal)
                        }) {
                            Text("Add")
                            Image(systemName: "plus")
                        }
                    }
                    Text("Like")
                }))
            }
            .onDelete(perform: delete)
            .frame(height: 50)
            .listRowBackground(Color.gray)
        }
    }

    func tapAction(_ selection: String) {
        animals.append(selection)
    }

    func delete(at offsets: IndexSet) {
        animals.remove(atOffsets: offsets)
    }
}
