記事の目的
Amazon API Gateway と Swagger の組み合わせでAPI開発する情報はいくつかありますが、どれもAPI GatewayがREST APIだったりSwaggerがOAS2だったりと、最新とは言えないため、HTTP API + OAS3のパターンでご紹介していきたいと思います。
はじめに
REST API と HTTP API の違い
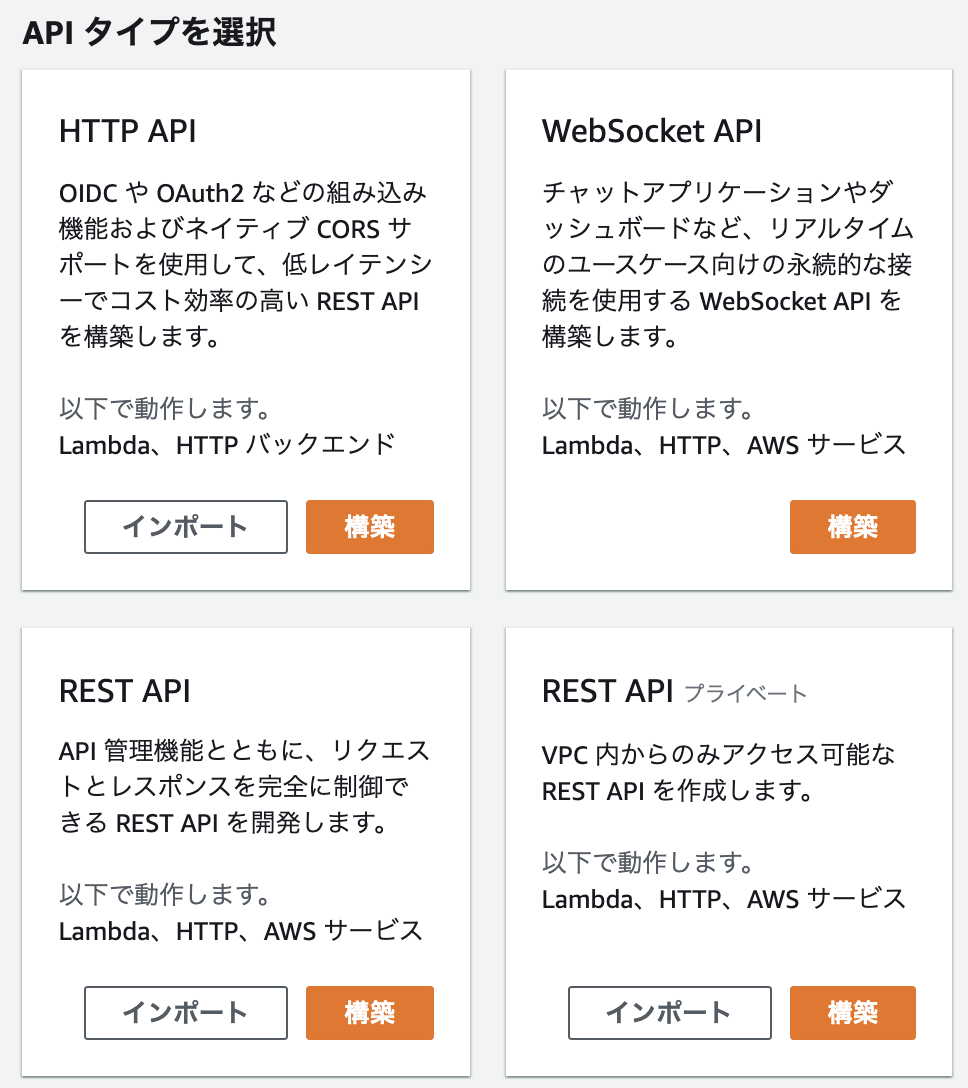
AWSマネジメントコンソールから見ると、API Gatewayで新しいAPIを作成する際は、HTTP APIとREST APIを選択可能です。簡単に言うと、HTTP API のほうがお手軽ですが、詳細な設定が省かれています。また、HTTP APIを選択するとRESTFullAPIを作れないと思ってしまいがちですが、HTTP APIを選択してもRESFullAPIを作成可能です。
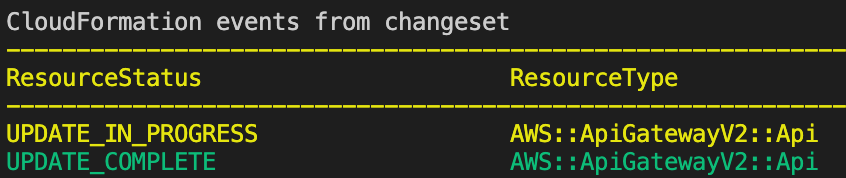
Cloud Formationのデプロイ時のログからも、HTTP APIが新しいもの(v2)だということがわかるかと思います。
Swaggerとは
REST APIに関わる様々なツール、フレームワークを含むオープンソースコミュニティです。
今回はその中でも、Open API Specification 3.0に基づいて記載することでドキュメントを自動生成することのできる「Swagger Editor」を使います。
ただし今回はドキュメントの自動生成が目的というよりも構文チェックをするという目的のほうが強いです。
https://editor.swagger.io/
参考)https://news.mynavi.jp/itsearch/article/devsoft/3854
作るもの
JWTオーソライザーの付いたLambda統合のAPIを1本作ります。
SAMを使っていきますが、中でもAPIの生成に関わるtemplate.yamlとswagger.yamlについて紹介していきます。
template.yaml
ポイントは以下の通りです。
- HTTP API の生成には「AWS::Serverless::HttpApi」を使用する。
- DefinitionUriにtemplate.yamlと同じ階層に配置したswaggerファイル(後述)を参照する
- StageVariablesにswaggerファイルに渡す必要のある関数名を定義しておく
- AWS::Serverless::FunctionのEventsはHTTP APIのApiIdを参照するだけでよい
非常にスッキリまとまりますね。細かい設定は全てOpenAPIのファイルの方に書き込んでいくためです。
AWSTemplateFormatVersion: 2010-09-09
Transform: AWS::Serverless-2016-10-31

Globals:
  Function:
    Runtime: python3.8
    Handler: handler.lambda_handler

Resources:
  sampleAPI:
    Type: AWS::Serverless::HttpApi
    Properties:
      DefinitionUri: swagger.yaml
      StageVariables:
        Sample: !Ref sampleFunction

  sampleFunction:
    Type: AWS::Serverless::Function
    Properties:
      CodeUri: lambda_source/sample
      Events:
        sampleAPI:
          Type: HttpApi
          Properties:
            ApiId: !Ref sampleAPI
余談)Eventsも全てのLambda関数で共通になるのでGlobalにまとめたかったのですができませんでした...。
swagger.yaml
ポイントは以下の通りです。
- openapiは"3.0.1"を指定する。(API Gateway側とバージョンをあわせるため。)
- オーソライザーの設定はx-amazon-apigateway-authorizerを使う
- リンク先に詳細が記載されているので一読すると良いと思う。
- この記載でCognitoIdpで発行するIdTokenを検証可能。
- Lambda統合の設定はx-amazon-apigateway-integrationを使う
- 特にURIの設定がポイント。リージョンやアカウントIDなどは使用できる変数を使ってURIを組み立てる。関数名は、temlate.yamlであらかじめ作ったStageVariableを使う。
- URIの設定に使える変数は https://docs.aws.amazon.com/apigateway/latest/developerguide/import-api-aws-variables.html に記載がある。
- httpMethodはPOST固定。
- データ構造はschemasにまとめて定義する。パラメータとして使うときは必要ないけれども、返ってくるときは必要な、例えばidやtimestampのような項目はreadOnlyを指定することで、ドキュメント上もうまく解釈される。
openapi: "3.0.1"

info:
  title: "Sample API"
  description: "サンプルのAPI"
  version: "1.0.0"

tags:
  - name: "Sample"
    description: "サンプルのグループ"

paths:
  /sample/{id}:
    get:
      tags:
        - "Sample"
      summary: "getSample"
      description: "サンプルを取得します。"
      operationId: "getSample"
      parameters:
        - name: "id"
          in: "path"
          description: "ユニークなIDを指定します。"
          required: true
          schema:
            type: "string"
      security:
        - CognitoAuth: []
      responses:
        "200":
          description: "成功"
          content:
            application/json:
              schema:
                $ref: "#/components/schemas/SampleSchema"
        "404":
          description: "指定されたIDのSampleが見つかりません。"
      x-amazon-apigateway-integration:
        payloadFormatVersion: "2.0"
        type: "aws_proxy"
        httpMethod: "POST"
        uri: "arn:${AWS::Partition}:apigateway:${AWS::Region}:lambda:path/2015-03-31/functions/arn:${AWS::Partition}:lambda:${AWS::Region}:${AWS::AccountId}:function:${stageVariables.SampleFunction}/invocations"

components:
  securitySchemes:
    CognitoAuth:
      type: "openIdConnect"
      openIdConnectUrl: "https://cognito-idp.ap-northeast-1.amazonaws.com/ap-northeast-1_ABCDEFGHI/.well-known/openid-configuration"
      x-amazon-apigateway-authorizer:
        type: "jwt"
        jwtConfiguration:
          audience:
            - "sample"
        identitySource: "$request.header.Authorization"

  schemas:
    SampleSchema:
      type: "object"
      required:
        - id
      properties:
        id:
          type: "string"
          description: "ユニークなIDです。"
          example: "abcd-1234"
          readOnly: true
        text:
          type: "string"
          description: "文字列が入ります。"
          example: "文字列"

x-amazon-apigateway-importexport-version: "1.0"
最後に
いかがでしたでしょうか。
HTTP API は REST API よりシンプルですし、Open API 3.0 も 2.0 よりシンプルになりました。
現状オーソライザーはAPIに一つしかアタッチできないため、今後複数のオーソライザーをアタッチすることができるようになるなどするともっと使いやすくなるなと感じています。
自動生成されるドキュメントが見てみたい場合は、swagger editorに上記yamlの中身をコピペしてみてください。
それではよいAPIライフを。