TensorflowLiteでObjectDetectionして結果を取り出す流れをPythonで実装していきます。
インプット画像の作成(変換)や出力の取り出しの記事が少ない気がしますので、その部分を重点的に書いていこうと思います。
モデルはSSDを使います。
モデルのダウンロード
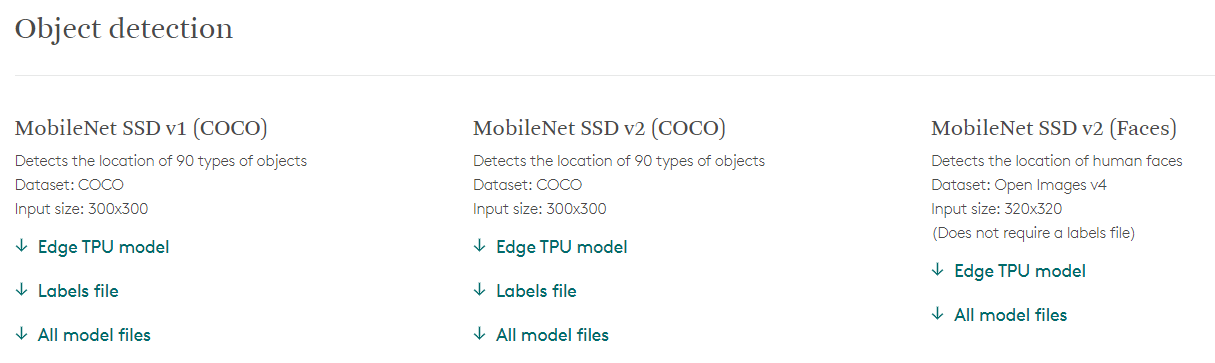
https://coral.ai/models/ からMobileNet SSD v2 (COCO)をダウンロードします。
モデルをインポート
# TensorFlowのセットアップ
tflite_interpreter_quant = tf.lite.Interpreter("mobilenet_ssd_v2_coco.tflite")

# TnsorFlowの準備
input_details = tflite_interpreter_quant.get_input_details()
output_details = tflite_interpreter_quant.get_output_details()

tflite_interpreter_quant.allocate_tensors()
ここは教科書通りです。
いろんな方が解説されていらっしゃると思いますので、今更詳しく書く必要はないと思いますが、予めimport tensorflow as tfしておいてtf.lite.Interpreter()で先ほどダウンロードしたモデルを読み込んでいます。
インプット画像を生成
入力と結果のフォーマットの確認
まずは入力のフォーマットがどうなっているか、見てみます。
input_details = tflite_interpreter_quant.get_input_details()
output_details = tflite_interpreter_quant.get_output_details()

tflite_interpreter_quant.allocate_tensors()

print(input_details)
print(output_details)
↓結果
[{'name': 'normalized_input_image_tensor', 'index': 260, 'shape': array([  1, 300, 300,   3], dtype=int32), 'shape_signature': array([  1, 300, 300,   3], dtype=int32), 'dtype': <class 'numpy.uint8'>, 'quantization': (0.0078125, 128), 'quantization_parameters': {'scales': array([0.0078125], dtype=float32), 'zero_points': array([128], dtype=int32), 'quantized_dimension': 0}, 'sparsity_parameters': {}}]
[{'name': 'TFLite_Detection_PostProcess', 'index': 252, 'shape': array([], dtype=int32), 'shape_signature': array([], dtype=int32), 'dtype': <class 'numpy.float32'>, 'quantization': (0.0, 0), 'quantization_parameters': {'scales': array([], dtype=float32), 'zero_points': array([], dtype=int32), 'quantized_dimension': 0}, 'sparsity_parameters': {}}, {'name': 'TFLite_Detection_PostProcess:1', 'index': 253, 'shape': array([], dtype=int32), 'shape_signature': array([], dtype=int32), 'dtype': <class 'numpy.float32'>, 'quantization': (0.0, 0), 'quantization_parameters': {'scales': array([], dtype=float32), 'zero_points': array([], dtype=int32), 'quantized_dimension': 0}, 'sparsity_parameters': {}}, {'name': 'TFLite_Detection_PostProcess:2', 'index': 254, 'shape': array([], dtype=int32), 'shape_signature': array([], dtype=int32), 'dtype': <class 'numpy.float32'>, 'quantization': (0.0, 0), 'quantization_parameters': {'scales': array([], dtype=float32), 'zero_points': array([], dtype=int32), 'quantized_dimension': 0}, 'sparsity_parameters': {}}, {'name': 'TFLite_Detection_PostProcess:3', 'index': 255, 'shape': array([], dtype=int32), 'shape_signature': array([], dtype=int32), 'dtype': <class 'numpy.float32'>, 'quantization': (0.0, 0), 'quantization_parameters': {'scales': array([], dtype=float32), 'zero_points': array([], dtype=int32), 'quantized_dimension': 0}, 'sparsity_parameters': {}}]
入力
どうやら入力については(1, 300, 300, 3)を引数に取るようです。
左からインデックス、縦横のピクセル数、チャンネル数になっていると想像できます。チャンネル数が3ということはアルファチャネルはなしですね。出力
出力はよくわからないですが、入力さえあっていれば嫌でも結果を返してくるだろうということで、この時点では無視しましょう。
画像のフォーマット
pillow( https://pillow.readthedocs.io/en/stable/ )を使っています。
image = Image.open(IMAGE)
image = image.convert("RGB")
image = np.asarray(image)
image = np.expand_dims(image, axis=0)
image = image.astype(np.uint8)
image = Image.open(IMAGE)は、PILをImageという名前でimportしてあるので、pillowを使って画像を読み込んでいるだけです。
この時点だとprint(image)の結果は
<PIL.PngImagePlugin.PngImageFile image mode=RGBA size=300x300 at 0x7FA07C28CDA0>
となり、ただのpillowのオブジェクトであることがわかります。これをテンソルに加工していきます。
先ほどの
print(image)の結果からわかるようにRGBA画像になっているので
image.convert("RGB")を実行します。pillowのオブジェクトをnparray形式に変換します。
np.asarray(image)でnumpyの配列に変換します。
これで(300, 300, 3)というテンソルが得られます。
しかし惜しい、入力は(1, 300, 300, 3)です。階数が足りません。np.expand_dims(image, axis=0)で次元を1つ追加します。axis=0は先頭という意味で、axis=1とかにしてしまうと(300, 1, 300, 3)とかになってしまうので注意しましょう。この時点で(1, 300, 300, 3)が得られますが、あと一つ罠があります。試しに中の変数の型を見てみます。
print(type(image[0][0][0]))としてみたところ<class 'numpy.ndarray'>と返ってきました。最初に確かめた入力のフォーマットを思い出すと…
'dtype': <class 'numpy.uint8'>ということで、dtypeはuint8であるべきらしいです。なので最後はimage.astype(np.uint8)でめでたく入力のフォーマットに一致する画像のテンソルを作れます。
推論を実行
tflite_interpreter_quant.set_tensor(input_details[0]['index'], input_image)
tflite_interpreter_quant.invoke()
先ほど加工した画像をセットして実行します。
結果取得
get_tensor()で推論結果を取得します。
bounding_box = tflite_interpreter_quant.get_tensor(output_details[0]['index'])
これで取得できたと思ったのですが、output_details[0]のところ、[0]以外にもデータが入っていました。
これが結構詰まりました。
まずoutput_details[0]['index']で取得したテンソルは
(1, 20, 4)となっていて、実際にはこんな感じでした。
print(bounding_box)
#[[[ 0.0930326   0.43300357  0.9896145   0.9608575 ]
#  [ 0.18842193  0.09933007  0.978639    0.981086  ]
#  [ 0.38330662  0.03300582  0.5305568   0.44970757]
#  [ 0.2487431   0.02555282  0.53777933  0.49594003]
#  [ 0.16961151  0.00904268  0.9974231   0.5565388 ]
#  [ 0.36940032  0.03733853  0.79658216  0.5140052 ]
#  [ 0.3439526   0.01805535  0.6514255   0.47762087]
#  [ 0.35995206  0.00402209  0.9909817   0.7478162 ]
#  [ 0.13035287  0.0739985   0.57565475  0.4024626 ]
#  [ 0.14640327  0.03814623  0.5658522   0.5898222 ]
#  [ 0.36123142  0.15068471  0.5655992   0.3242483 ]
#  [ 0.5863842  -0.0181309   0.99645805  0.80495036]
#  [ 0.34924442  0.22027299  0.83642465  0.4693487 ]
#  [ 0.28385845  0.27717593  0.7099129   0.9870126 ]
#  [ 0.14741789  0.17930935  0.57674384  0.46834558]
#  [ 0.18660273 -0.01425777  0.53373     0.15616399]
#  [ 0.76986504 -0.00273257  0.9979068   0.14723223]
#  [ 0.391814    0.00660795  0.99167323  0.44632885]
#  [ 0.31647977  0.33945334  0.9983989   0.6755371 ]
#  [ 0.1310431   0.16323662  0.5582249   0.8627913 ]]]
他の人のコードなどを見てわかったポイントは以下の通りです。
- 4列はそれぞれBoundingBoxの座標を表している
- 全て1以下なのは座標を全てHeightまたはWidthで割っているため。HeightやWidthをかければ元に戻る
- マイナスがあるのはBoundingBoxが画像からはみ出しているため。不要ならマイナスは0にしてしまっていい。同じ理由でたぶん1以上がでることもあるはず
- 20行あるのはこの検知器が最大20個までオブジェクトを確率付きで返すため
- 今回使ったモデルの場合左から順に
(y min, x min, y max, y max)
ラベルはoutput_details[1]['index']に、確率はoutput_details[2]['index']に入っています。
# ラベル
rabel = tflite_interpreter_quant.get_tensor(output_details[1]['index'])

# 確率 0~1
probability = tflite_interpreter_quant.get_tensor(output_details[2]['index'])

# 確率に対する抽出条件の真理値表
condition_probability = probability > 0.9

# ラベルに対する抽出条件の真理値表
condition_rabel = rabel == 0

# 確率とラベルの複合条件の心理値表
conditions = np.logical_and(condition_probability, condition_rabel)

# 確率とラベルの複合条件の心理値表を元にBoundingBoxをフィルターする
output = bounding_box[conditions]
probability > 0.9でスレッショルド0.9以下の検知を切り捨てています。
更にrabel == 0で今回は人物の検知のみを抽出しています。
その論理和を取った真理値表でBoundingBoxの行列をフィルタすることで、「90%以上の確率で人」のBoundingBoxのみが含まれた行列を得ます。
あとはOpenCVやPillowで描画するなどなど。
まとめ
インプット画像の作り方と結果の抽出をコード付きで記事にしてみました。
指摘、質問等ございましたらコメントください。