前提
Monacaで開発していて、Android 5.2以上、プッシュ通知のアイコンの仕様が変わっていますよってご存知の方が多いかと思います。
アイコンが白くなったり、今まできれいに表示してアイコンが急にできなくなったり、多いではないかと思います。
今回その対応をまとめましたので、ぜひご参考になればと思います。
使う前提は 「monaca」と「ニフティクラウドmobile backend (mBaaS)」サービスで説明します。
プッシュ通知プロジェクト
基本的にmonacaもmBaaSも無料サービスであり、プッシュ通知機能もこのドキュメントの通り実施するば、すぐできちゃいます。
※アプリのアイコン設定しました!

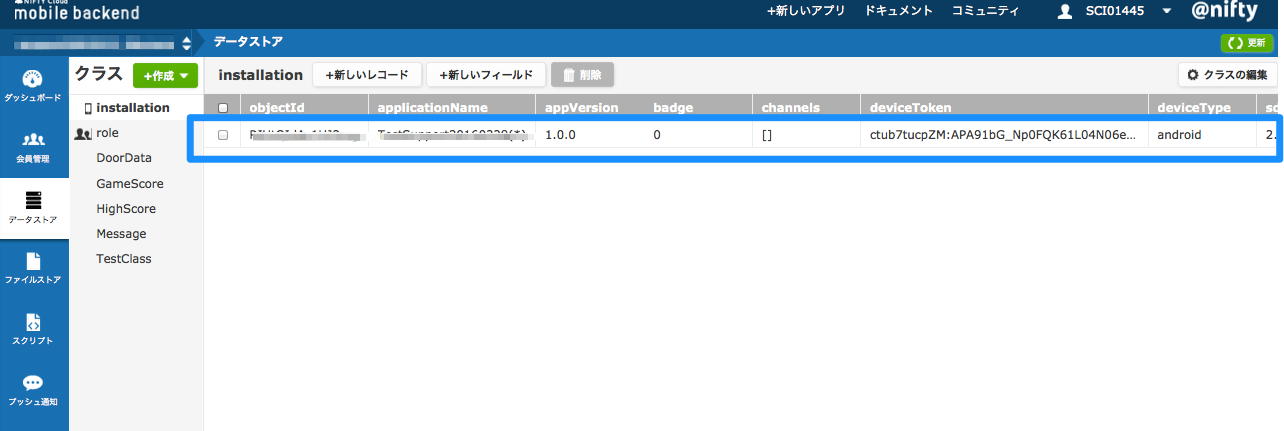
最初にアプリを起動すると、端末登録されます。
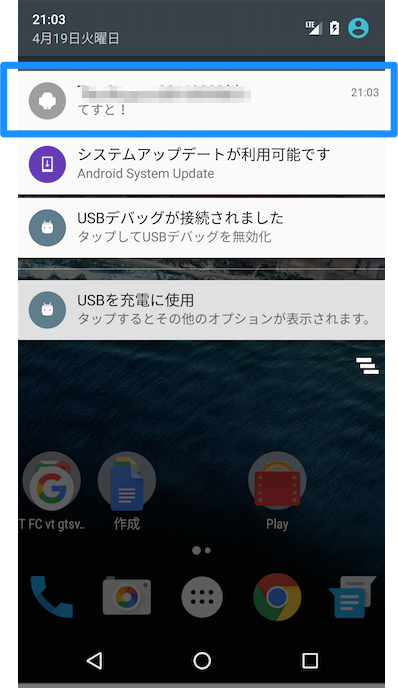
プッシュ通知を送ってみると(Cordova5.2, push plugin 2.0, Android 6)確かに白くなっています。
原因
Android 5.0からの設定
http://developer.android.com/about/versions/android-5.0-changes.html
[Notifications] > [Material design style]
Notifications are drawn with dark text atop white (or very light) backgrounds to match the new material design widgets. Make sure that all your notifications look right with the new color scheme. If your notifications look wrong, fix them:

    Use setColor() to set an accent color in a circle behind your icon image.
    Update or remove assets that involve color. The system ignores all non-alpha channels in action icons and in the main notification icon. You should assume that these icons will be alpha-only. The system draws notification icons in white and action icons in dark gray.
つまり、白くなっているのは仕様ですよ、と色がないアイコンを使うことと、色を変えたいならgetColorで背景色を変えます。
ではこれから色の背景を変える方法を説明します。
手順
- 手動でpluginをインポート
- CustomReceiverを追加
- plugin.xmlを修正
1. 手動でpluginをインポト
- こちらのURLから「Download zip」 を選択し、ファイルをダウンロードします。
- Monacaでメニュー「設定」>「Cordovaプラグインの管理」
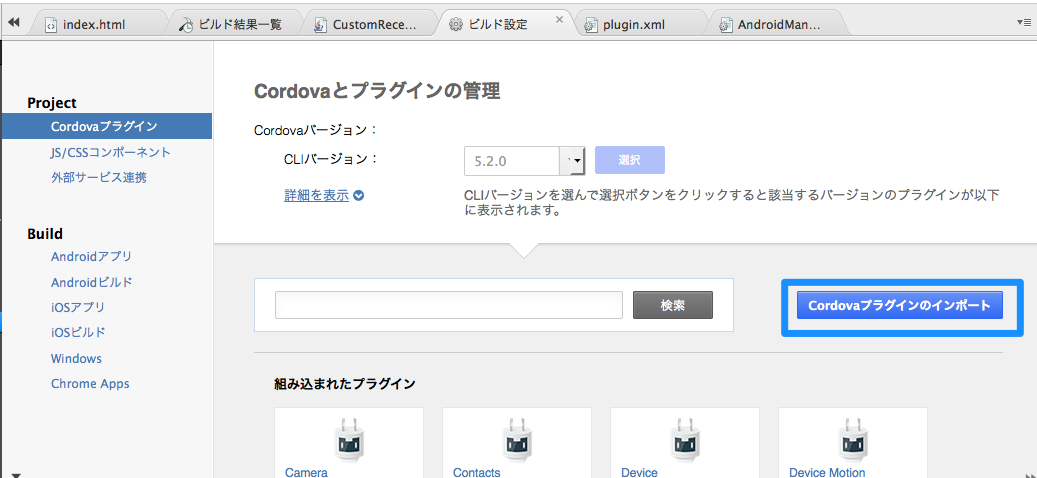

上記ダウンロードしたzipを選択し、インポートします。
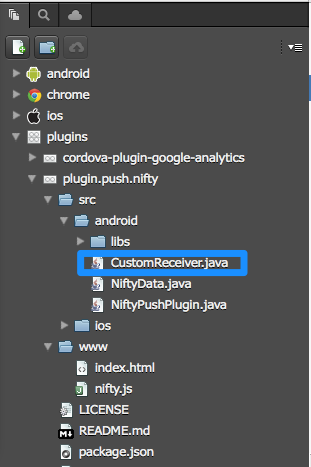
2. CustomReceiverを追加
Monacaで以下のように新規ファイルを作成します。ファイル名は[CustomReceiver.java]にします。
CustomReceiver.javaは以下のように実装しています
package com.example.helloworld; //Your package name

import android.app.NotificationManager;
import android.app.PendingIntent;
import android.content.BroadcastReceiver;
import android.content.Context;
import android.content.Intent;
import android.media.RingtoneManager;
import android.os.Build;
import android.support.v4.app.NotificationCompat;

public class CustomReceiver extends BroadcastReceiver {
    @Override
    public void onReceive(Context context, Intent intent) {
        //ペイロードされるデータを抜き取る
        String message = intent.getStringExtra("message") ;

        NotificationCompat.Builder builder = new NotificationCompat.Builder(context)
                .setSound(RingtoneManager.getDefaultUri(RingtoneManager.TYPE_NOTIFICATION))
                .setSmallIcon(context.getApplicationInfo().icon)
                .setAutoCancel(true)
                .setVibrate(new long[]{0, 200, 100, 200})
                .setColor(0x0FBB12) //背景色を設定
                .setContentTitle("タイトル")
                .setContentText(message);
         NotificationManager notificationManager =
         (NotificationManager) context.getSystemService(Context.NOTIFICATION_SERVICE);
         notificationManager.notify(-1, builder.build());
    }
  }
3. plugin.xmlを修正
Pluginの設定ファイルを修正します。上記のCustomReceiverを呼ぶように指定する必要あるので!
修正前
            <receiver
                android:name="com.nifty.cloud.mb.core.NCMBGcmReceiver"
                android:exported="true"
                android:permission="com.google.android.c2dm.permission.SEND">
                <intent-filter>
                    <action android:name="com.google.android.c2dm.intent.RECEIVE"/>
                    <category android:name="$PACKAGE_NAME"/>
                </intent-filter>
            </receiver>
修正後
            <receiver
                android:name="CustomReceiver"
                android:permission="com.google.android.c2dm.permission.SEND" >
                <intent-filter>
                    <action android:name="com.google.android.c2dm.intent.RECEIVE" />
                    <category android:name="$PACKAGE_NAME" />
                </intent-filter>
            </receiver>
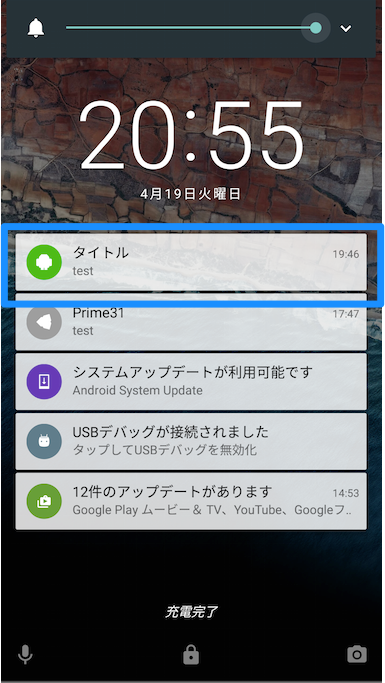
結果を見てみよう
プッシュ通知を送ってみると、背景色は色ついていました!
最後に
難しかったのはアイコンの画像設定はAndroidのようにRの中にあるわけではなく、色々試しながらやった感じでした。
プラグインってかなりblackboxでわからないまま、native code をいじっていましたので、やっとできて、色々勉強になりました!
面白かったのはアイコンはすごくシンプルにはなっていますが、プッシュ通知を長押しすると、アイコンちゃんと表示します!仕様はすごい変わっていますね!さすがAndroid!
今回は試してたので、参考になれば嬉しいです!