実際にチュートリアルをやってみて
http://facebook.github.io/react-native/docs/tutorial.html#content
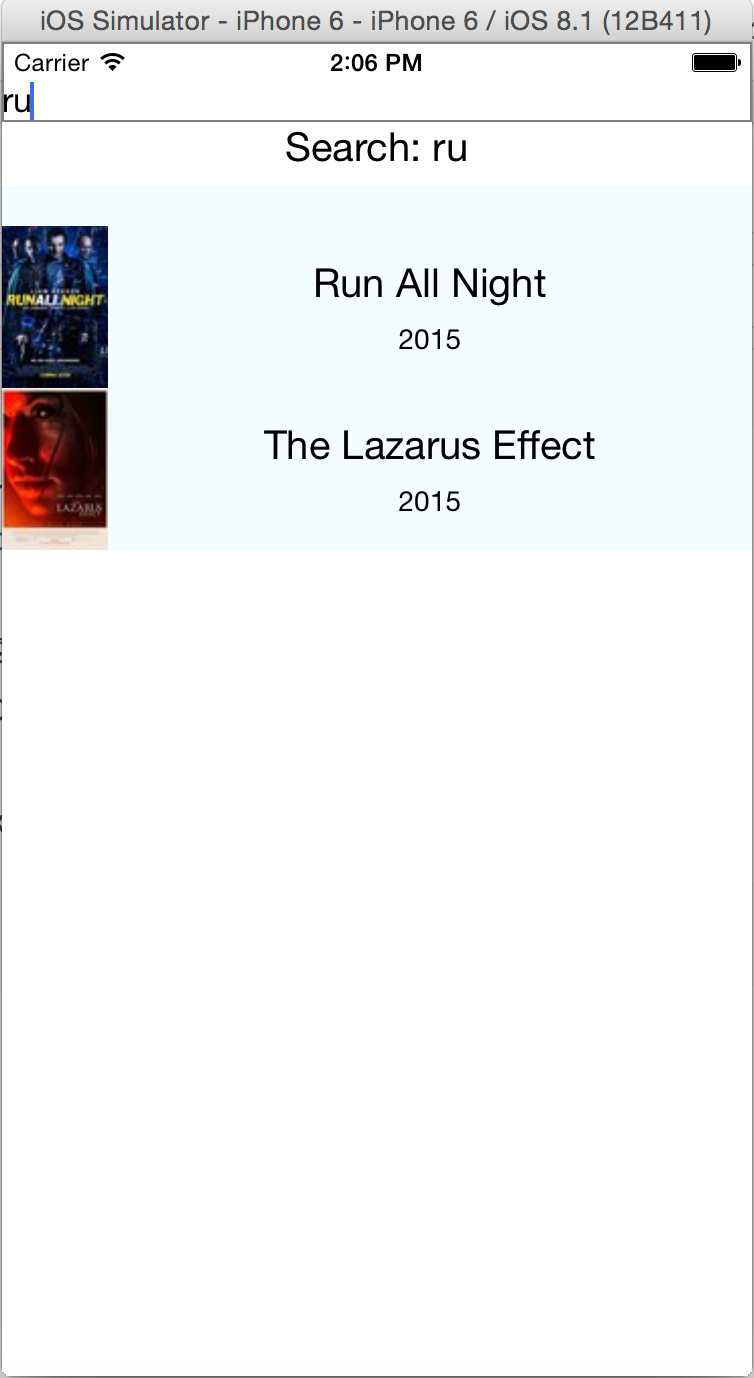
入力に対して画面を変更するといったことをやってみたかったのでメモ
上記チュートリアルの Final source code から修正してみる
TextInputに入力した文字列で検索、Movieを絞り込む
index.ios.js
/**
 * Sample React Native App
 * https://github.com/facebook/react-native
 */
'use strict';

var React = require('react-native');
var {
  AppRegistry,
  Image,
  ListView,
  StyleSheet,
  Text,
  TextInput,
  View,
} = React;

var API_KEY = '7waqfqbprs7pajbz28mqf6vz';
var API_URL = 'http://api.rottentomatoes.com/api/public/v1.0/lists/movies/in_theaters.json';
var PAGE_SIZE = 25;
var PARAMS = '?apikey=' + API_KEY + '&page_limit=' + PAGE_SIZE;
var REQUEST_URL = API_URL + PARAMS;

var AwesomeProject = React.createClass({
  getInitialState: function() {
    return {
      dataSource: new ListView.DataSource({
        rowHasChanged: (row1, row2) => row1 !== row2,
      }),
      movies: [],
      loaded: false,
      input: "",
    };
  },

  componentDidMount: function() {
    this.fetchData();
  },

  fetchData: function() {
    fetch(REQUEST_URL)
      .then((response) => response.json())
      .then((responseData) => {
        this.setState({
          dataSource: this.state.dataSource.cloneWithRows(responseData.movies),
          movies: responseData.movies,
          loaded: true,
        });
      })
      .done();
  },

  searchMovie: function(text) {
    var filteredMovies = this.state.movies.filter((movie) => movie.title.match(new RegExp(text, "i")))
    return this.setState({
      input: text,
      dataSource: this.state.dataSource.cloneWithRows(filteredMovies)
    });
  },

  render: function() {
    if (!this.state.loaded) {
      return this.renderLoadingView();
    }

    return (
      <View>
        <TextInput style={styles.textInput} onChangeText={this.searchMovie} />
        <Text style={styles.text}>{this.state.input == "" ? "" : "Search: " + this.state.input}</Text>
        <ListView
          dataSource={this.state.dataSource}
          renderRow={this.renderMovie}
          style={styles.listView}
        />
      </View>
    );
  },

  renderLoadingView: function() {
    return (
      <View style={styles.container}>
        <Text>
          Loading movies...
        </Text>
      </View>
    );
  },

  renderMovie: function(movie) {
    return (
      <View style={styles.container}>
        <Image
          source={{uri: movie.posters.thumbnail}}
          style={styles.thumbnail}
        />
        <View style={styles.rightContainer}>
          <Text style={styles.title}>{movie.title}</Text>
          <Text style={styles.year}>{movie.year}</Text>
        </View>
      </View>
    );
  },
});

var styles = StyleSheet.create({
  container: {
    flex: 1,
    flexDirection: 'row',
    justifyContent: 'center',
    alignItems: 'center',
    backgroundColor: '#F5FCFF',
  },
  rightContainer: {
    flex: 1,
  },
  title: {
    fontSize: 20,
    marginBottom: 8,
    textAlign: 'center',
  },
  text: {
    fontSize: 20,
    marginBottom: 8,
    textAlign: 'center',
    backgroundColor: '#FFFFFF'
  },
  year: {
    textAlign: 'center',
  },
  thumbnail: {
    width: 53,
    height: 81,
  },
  listView: {
    paddingTop: 20,
    backgroundColor: '#F5FCFF',
  },
  textInput: {
    marginTop: 20,
    height: 40,
    borderColor: 'gray',
    borderWidth: 1
  }
});

AppRegistry.registerComponent('AwesomeProject', () => AwesomeProject);
APIで取ってきたデータを別途this.state.moviesに保存したが、
もしかしたらdataSourceから取得した方がいいのかもしれない
なんにせよthis.stateを変更するだけで、コードの見通しがよくなりそうなので
もう少しいろいろ試してみたい