Amplifyは、高速でアプリを開発できる開発プラットフォームです。
Amplifyで作成したVue.jsアプリでLINEとのログイン連携を試したので、メモしておきます。
Googleとのログイン連携はこちら
作成したもの
LINEアカウントの入力部分は動画編集でトリム(削除)しています。
ソースコードの全量はGitHubにあります。
https://github.com/Thirosue/amplify-sns-fedaration
前提
-
Amplifyの設定が完了していること(amplify configure、amplify initおよびamplify pushが済んでいること) -
Amplifyで作成したVue.jsアプリが存在すること(aws-amplifyとaws-amplify-vueの導入・設定が済んでいること)
Amplifyの状態は以下のとおり(amplify status)
$ amplify status

Current Environment: prod

| Category | Resource name | Operation | Provider plugin |
| -------- | ------------- | --------- | --------------- |
Amplifyのバージョンはv4系
% amplify -v
4.21.3
Amplifyの設定はこちらを参照してください。
AWS 怠惰なプログラマ向けお手軽アプリ開発手法 2019
https://feature-webpush.dma9ecr5ksxts.amplifyapp.com/
手順
LINEとのログイン連携の手順は以下のとおりです。
- LINE側(
LINE Developers)の設定 - 認証モジュールの追加(
amplify add auth) -
CongnitoのLINE連携(OpenID Connect)設定 - LINE側(
LINE Developers)にリダイレクトURLの設定
1. LINE側(LINE Developers)の設定
Step1. LINE Developers ( https://developers.line.biz/ja/ ) にログインします
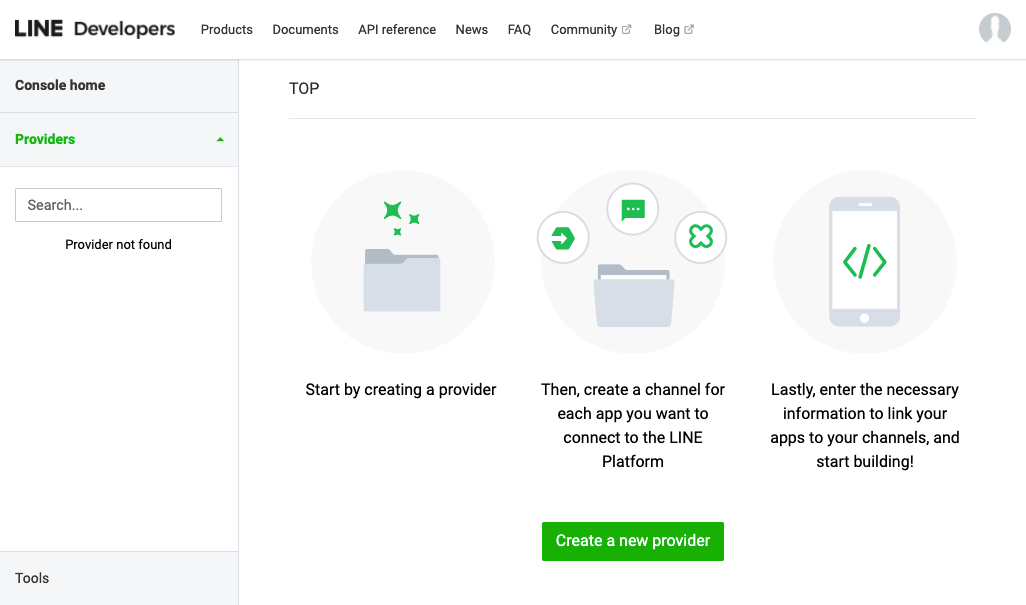
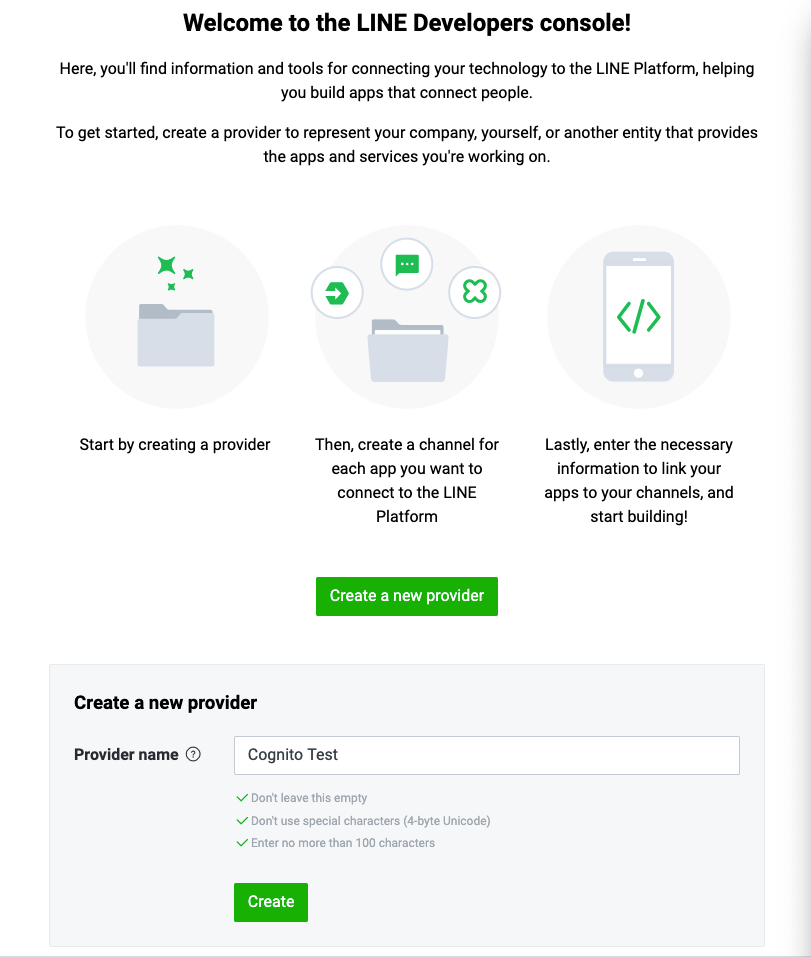
Step2. プロバイダーを作成します。
プロバイダーを作成します。
Step3. チャンネルを作成します。
少しわかりづらいですが、「Create a LINE Login channel」を選択し、チャンネルを作成します。
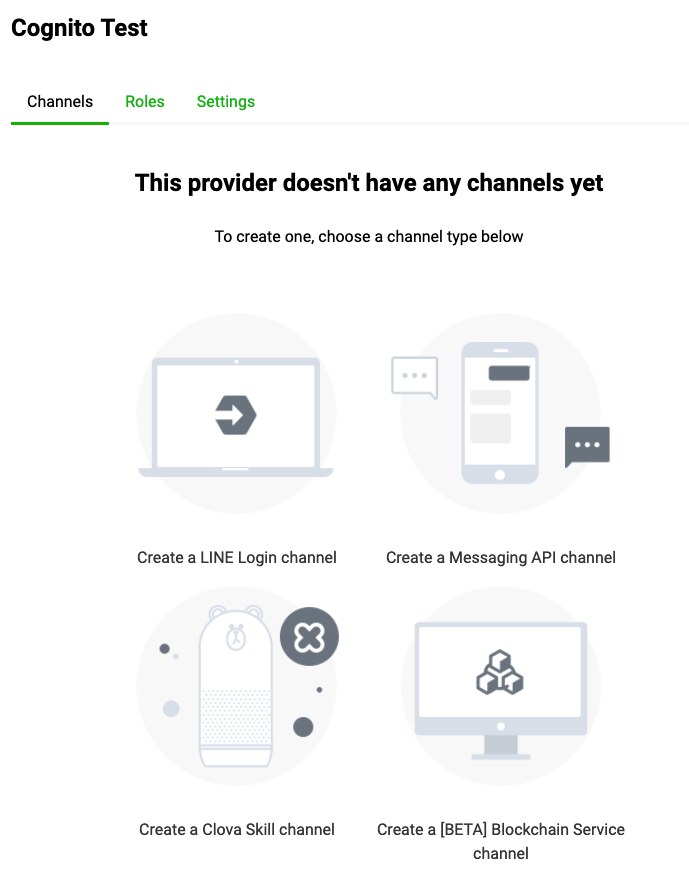
チャンネル名やメールアドレスなどの必須項目を入力し、作成します。
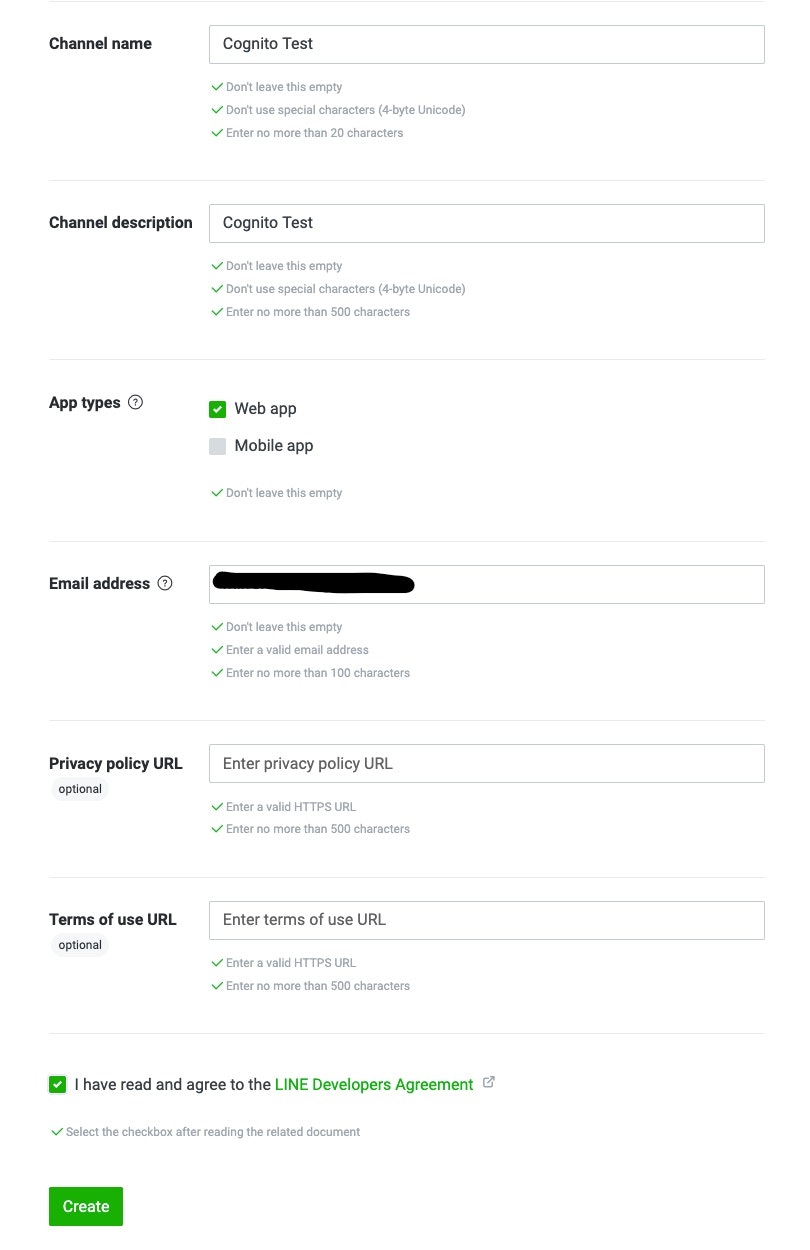
作成したチャンネルの「チャンネル ID(Channel ID)」と「チャンネル シークレット(Channel secret)」は3. Congnito のLINE連携(OpenID Connect)設定で利用するので、メモしておきましょう。
2. 認証モジュールの追加(amplify add auth)
認証機能をコマンドライン(Amplify CLI)で追加していきます。
以下コマンドで認証モジュール(Cognito)を追加します。
amplify add auth
Step1. Do you want to use the default authentication and security configuration? (Use arrow keys)
Default configuration with Social Provider (Federation)を選択
 Do you want to use the default authentication and security configuration?
  Default configuration
❯ Default configuration with Social Provider (Federation)
  Manual configuration
  I want to learn more.
Step2. How do you want users to be able to sign in? (Use arrow keys)
どれでもいいですが、Usernameを選択
 How do you want users to be able to sign in? (Use arrow keys)
❯ Username
  Email
  Phone Number
  Email or Phone Number
  I want to learn more.
Step3. Do you want to configure advanced settings? (Use arrow keys)
Yes, I want to make some additional changes.を選択
 Do you want to configure advanced settings?
  No, I am done.
❯ Yes, I want to make some additional changes.
Step4. What attributes are required for signing up?
Emailの選択を外して、Nameを有効にする
 What attributes are required for signing up?
 ◯ Gender (This attribute is not supported by Login With Amazon.)
 ◯ Locale (This attribute is not supported by Facebook, Google.)
 ◯ Given Name (This attribute is not supported by Login With Amazon.)
❯◉ Name
 ◯ Nickname (This attribute is not supported by Facebook, Google, Login With Amazon.)
 ◯ Phone Number (This attribute is not supported by Facebook, Login With Amazon.)
 ◯ Preferred Username (This attribute is not supported by Facebook, Google, Login With Amazon.)
選択結果は以下のとおり
What attributes are required for signing up? Name
Step5. Do you want to enable any of the following capabilities? (Press <space> to select, <a> to toggle all, <i> to invert selection)
デフォルト(未選択)のまま進む
Step6. What domain name prefix do you want to use?
ドメインの接頭辞はデフォルトのまま進む(※デフォルトの値が設定されていることを確認して進む)
What domain name prefix do you want to use? amplifysnsfedarationyyyyyyy-xxxxxxx
Step7. Enter your redirect signin URI:
ローカルで試すので、http://localhost:8080/を入力
Enter your redirect signin URI: http://localhost:8080/
Step8. Do you want to add another redirect signin URI (y/N)
ローカルで試すので、その他のリダイレクトURLは不要
Do you want to add another redirect signin URI (y/N) N
Step9. Enter your redirect signout URI:
ローカルで試すので、http://localhost:8080/を入力
Enter your redirect signout URI: http://localhost:8080/
Step10. ? Do you want to add another redirect signout URI (y/N)
ローカルで試すので、その他のサインアウトURLは不要
? Do you want to add another redirect signout URI (y/N) N
Step11. Select the social providers you want to configure for your user pool: (Press <space> to select, <a> to toggle all, <i> to invert selection)
LINE(OpenID Connect)はAmplify CLIでサポートされていない(version 4.21.3)ので、デフォルトのまま進む。
Select the social providers you want to configure for your user pool:
Step12. 設定の反映(AWSリソースの作成)
以下コマンドで設定を反映(AWSリソースの作成)します。
amplify push
実行結果
正常に認証モジュールが追加されていることを以下コマンド(amplify status)で確認します。
$ amplify status

Current Environment: prod

| Category | Resource name                | Operation | Provider plugin   |
| -------- | ---------------------------- | --------- | ----------------- |
| Auth     | amplifysnsfedarationXXXXXXXX | No Change | awscloudformation |
設定の全量
% amplify add auth
Using service: Cognito, provided by: awscloudformation

 The current configured provider is Amazon Cognito.

 Do you want to use the default authentication and security configuration? Default configuration with Social Provider (Federation)
 Warning: you will not be able to edit these selections.
 How do you want users to be able to sign in? Username
 Do you want to configure advanced settings? Yes, I want to make some additional changes.
 Warning: you will not be able to edit these selections.
 What attributes are required for signing up? Name
 Do you want to enable any of the following capabilities?
 What domain name prefix do you want to use? amplifysnsfedarationyyyyyyy-xxxxxxx
 Enter your redirect signin URI: http://localhost:8080/
? Do you want to add another redirect signin URI No
 Enter your redirect signout URI: http://localhost:8080/
? Do you want to add another redirect signout URI No
 Select the social providers you want to configure for your user pool:
Successfully added resource amplifysnsfedarationdff223d9 locally

Some next steps:
"amplify push" will build all your local backend resources and provision it in the cloud
"amplify publish" will build all your local backend and frontend resources (if you have hosting category added) and provision it in the cloud

hirosue@PC876 amplify-sns-fedaration % amplify push
✔ Successfully pulled backend environment prod from the cloud.
3. CongnitoのLINE連携(OpenID Connect)設定
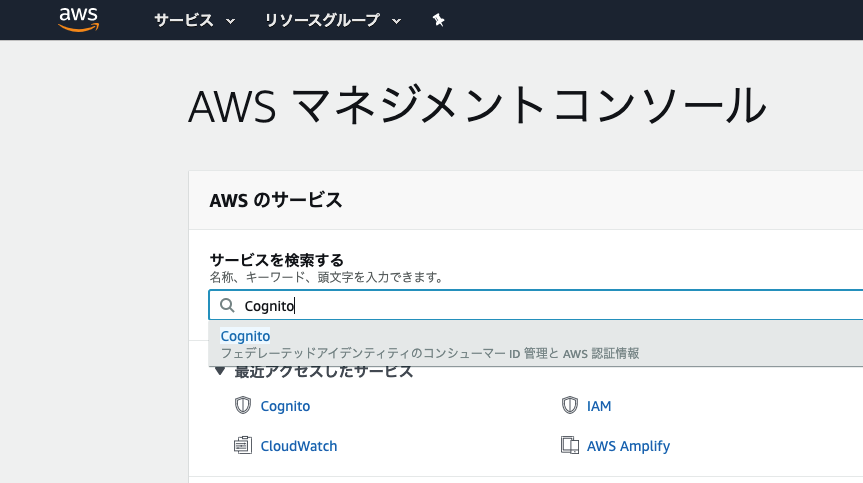
Step1. AWSにログインして、Cognitoのサービスページに移動します。
Step2. ユーザプールを選択します。
「ユーザープールの管理」を選択し、
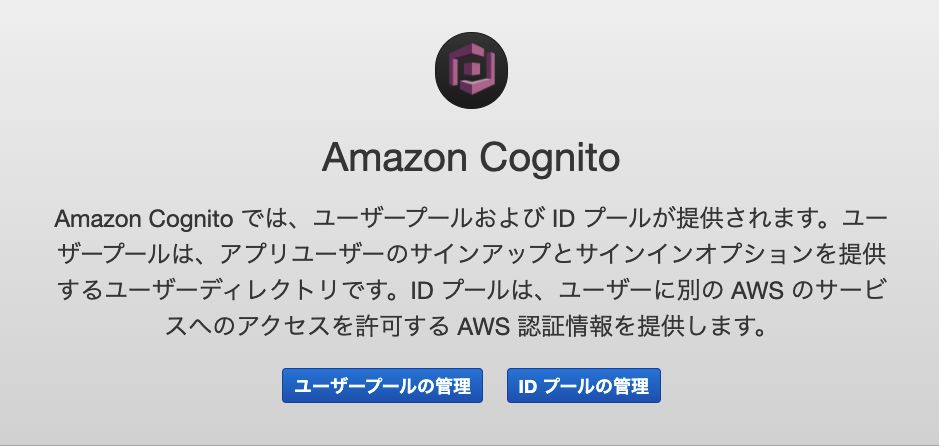
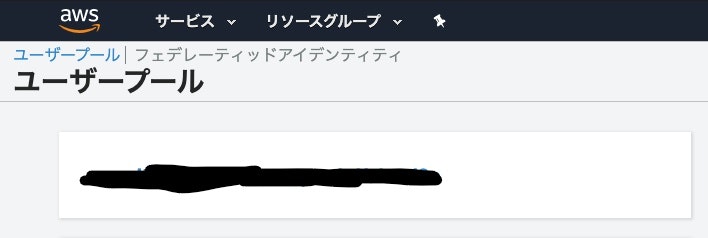
2. 認証モジュールの追加で作成した「ユーザープール」を選択します。
対象の「ユーザープール」の名称は、Amplifyの状態(amplify status)で確認したリソース名(Resource name)で始まります。
Step3. 「ID プロバイダー」(OpenID Connect)を追加します。
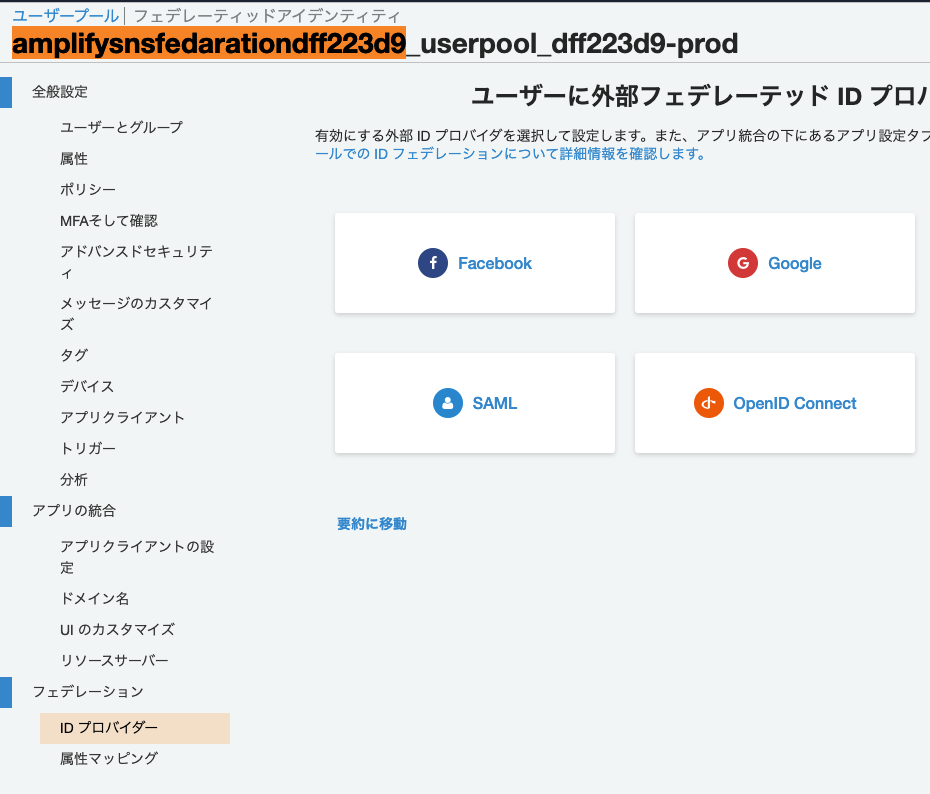
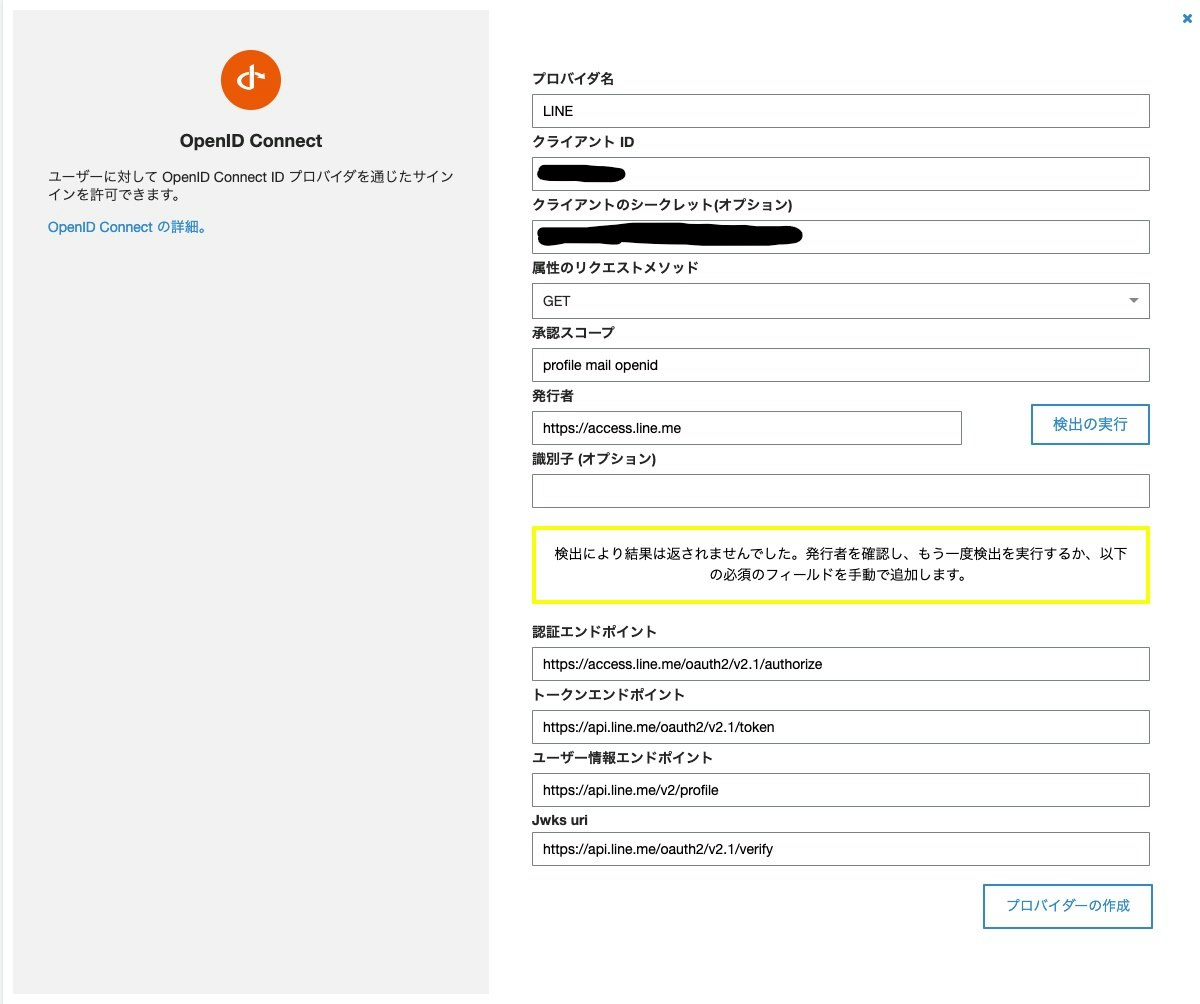
図のとおり入力します。
| 項目名 | 値 |
|---|---|
| プロバイダ名 |
LINE(任意の値) |
| クライアントID | (1. LINE側(LINE Developers)の設定で設定した「チャンネル ID(Channel ID)」) |
| クライアントのシークレット(オプション) | (1. LINE側(LINE Developers)の設定で「チャンネル シークレット(Channel secret)」 |
| 属性のリクエストメソッド |
GET(デフォルトのまま) |
| 承認スコープ |
profile mail openid |
| 発行者 |
https://access.line.me |
| 識別子(オプション) | - |
| 認証エンドポイント |
https://access.line.me/oauth2/v2.1/authorize |
| トークンエンドポイント |
https://api.line.me/oauth2/v2.1/token |
| ユーザー情報エンドポイント |
https://api.line.me/v2/profile |
| Jwks uri |
https://api.line.me/oauth2/v2.1/verify |
- (参考リンク)LINEとの連携設定
Step4. Step3で作成した「ID プロバイダー」(OpenID Connect)の属性マッピングを変更します。
2. 認証モジュールの追加で作成した「ユーザープール」はName属性が必須であるため、sub⇆Nameのマッピングを追加します。
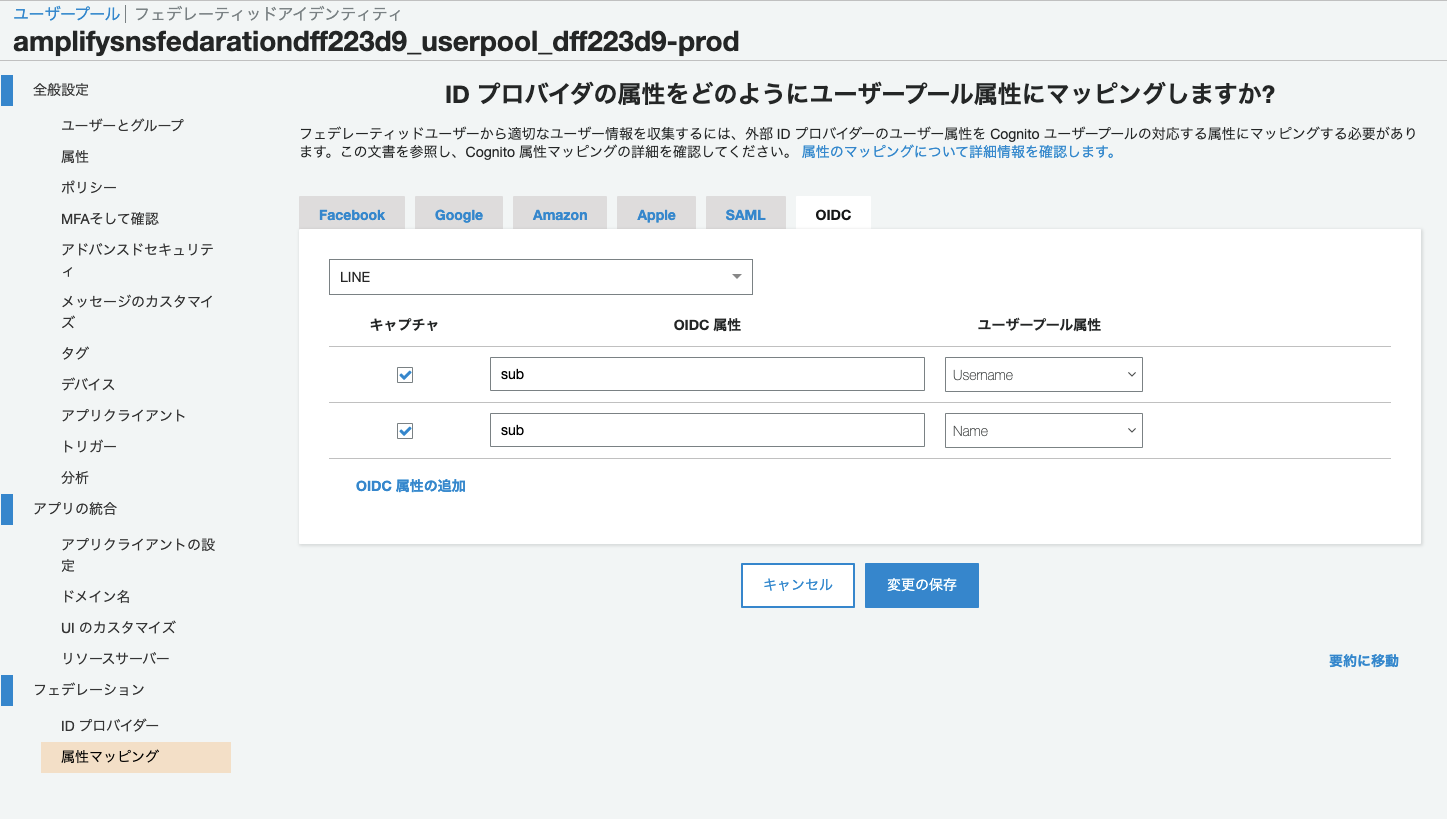
- (参考)「ユーザープール」の設定
What attributes are required for signing up? Name
Step5. アプリクライアントの設定でLINEログインを有効化します。
作成されている2つのアプリクライアント(xxxxxxxxxxxxxx_app_clientおよびxxxxxxxxxxxxxx_app_clientWeb)に対し、LINE連携を有効化します(チェックして保存する)。

4. LINE側(LINE Developers)にリダイレクトURLの設定
1. LINE側(LINE Developers)の設定で作成した「プロバイダー」にCognitoで作成された認証のリダイレクトURLを設定します。
Step1. Amplifyの設定ファイル(aws-exports.js)を確認して、Cognitoのドメインを確認します。
2. 認証モジュールの追加の結果作成された、Amplifyの設定ファイル(aws-exports.js)のCognitoのドメインの箇所を確認します。
% cat src/aws-exports.js | grep domain
        "domain": "amplifysnsfedarationyyyyyyy-xxxxxxx-prod.auth.ap-northeast-1.amazoncognito.com",
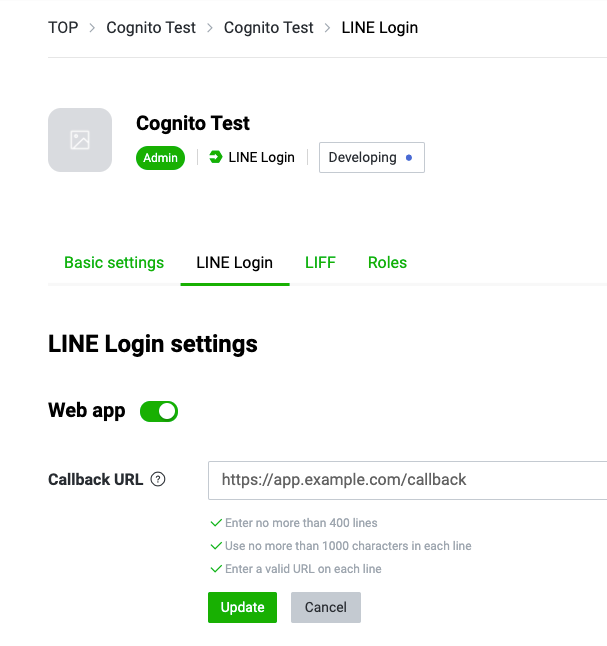
Step2. 1. LINE側(LINE Developers)の設定で作成した「プロバイダー」にCognitoで作成された認証のリダイレクトURLを設定します。
「TOP」-「Cognito Test」-「Cognito Test」-「LINE Login」と移動して、リダイレクトURL(CallBack URL)を入力します。
設定する値はhttps://(Step1で確認したドメイン)/oauth2/idpresponseです。
上の例の場合は、https://amplifysnsfedarationyyyyyyy-xxxxxxx-prod.auth.ap-northeast-1.amazoncognito.com/oauth2/idpresponseとなります。
アプリケーションの修正
App.vueを修正します。
ログインに付随する細かい処理(ダイアログ出力、状態の管理(ローディング、サインイン)など)の説明は割愛します。
詳細は、全量のソースコード(GitHub)を確認してください。
https://github.com/Thirosue/amplify-sns-fedaration
htmlの修正
「LINEでログイン」のリンクを追加
<a href="#" @click="signIn('LINE')">LINEでログイン</a>
サインインで画面切り替え
サインイン状態(signedIn)で表示を切り替えます。
      <!-- サインイン状態はstoreかdataに設定する -->
      <template v-if="signedIn">
        <h1>Logged in</h1>
        <a href="#" @click="signOut"><font color="gray">Sign Out</font></a>
      </template>
      <template v-else>
        <amplify-authenticator v-bind:authConfig="authConfig" />
        <ul>
          <li><a href="#" @click="signIn('LINE')">LINEでログイン</a></li>
        </ul>
      </template>
methodの追加
ログイン処理を追加します。
import { Auth, Hub } from "aws-amplify";
//(...中略...)

  methods: {
    async signIn(provider) {
      this.$store.dispatch("loading", true); //処理中表示(処理開始)
      const res = await Auth.federatedSignIn({ provider });
      console.log(res);
    },
イベントフックを追加
import { Auth, Hub } from "aws-amplify";
//(...中略...)

  async beforeCreate() {
    //サインインイベントフックを追加
    Hub.listen("auth", async (data) => {
      switch (data.payload.event) {
        case "signIn": { // サインインイベントをフック
          const cognitoUser = await Auth.currentAuthenticatedUser();
          console.log(`signed in ... ${cognitoUser.username}`);
          this.$store.dispatch("signedIn", true);
          this.$store.dispatch("loading", false); //処理中表示(処理終了)
          Swal.fire({ // ダイアログ表示
            position: "top-end",
            icon: "success",
            title: "ログインしました",
            showConfirmButton: false,
            timer: 1500,
          });
          break;
        }
        default:
          break;
      }
    });
  },
確認
アプリケーションの起動
以下コマンド(yarn serve)でアプリケーションを起動します
yarn serve
http://localhost:8080/へアクセスして確認します。
「LINEでログイン」リンクをクリックすると、LINEへログインした後、ログイン後状態に遷移します。