1. Download Template
1.1. Update Template Repository
最新のTemplateリストに更新するのであれば、この手順を実行する。
Proxmox nodeにログインする。Web UIからアクセスするならば、画面左のServer ViewでNodeを選び、右上の「>? Shell」ボタンを押下する。

Linux pve02 6.8.12-4-pve #1 SMP PREEMPT_DYNAMIC PMX 6.8.12-4 (2024-11-06T15:04Z) x86_64

The programs included with the Debian GNU/Linux system are free software;
the exact distribution terms for each program are described in the
individual files in /usr/share/doc/*/copyright.

Debian GNU/Linux comes with ABSOLUTELY NO WARRANTY, to the extent
permitted by applicable law.
Last login: Sun Jan 26 19:44:12 JST 2025 from 192.168.100.100 on pts/0
root@pve02:~#
pveam update でリポジトリを更新する。
root@pve02:~# pveam update
update successful
root@pve02:~#
pveam available で一覧表示。
root@pve02:~# pveam available
mail            proxmox-mail-gateway-8.1-standard_8.1-1_amd64.tar.zst
mail            proxmox-mailgateway-7.3-standard_7.3-1_amd64.tar.zst
system          almalinux-9-default_20240911_amd64.tar.xz
system          alpine-3.18-default_20230607_amd64.tar.xz
(省略)
1.2 Download Ubuntu 24.10 Container Template
Web UI の画面左の Server View で CT Template を有効にしてある Storage を選択し、右ペインのCT Templateを選択する。
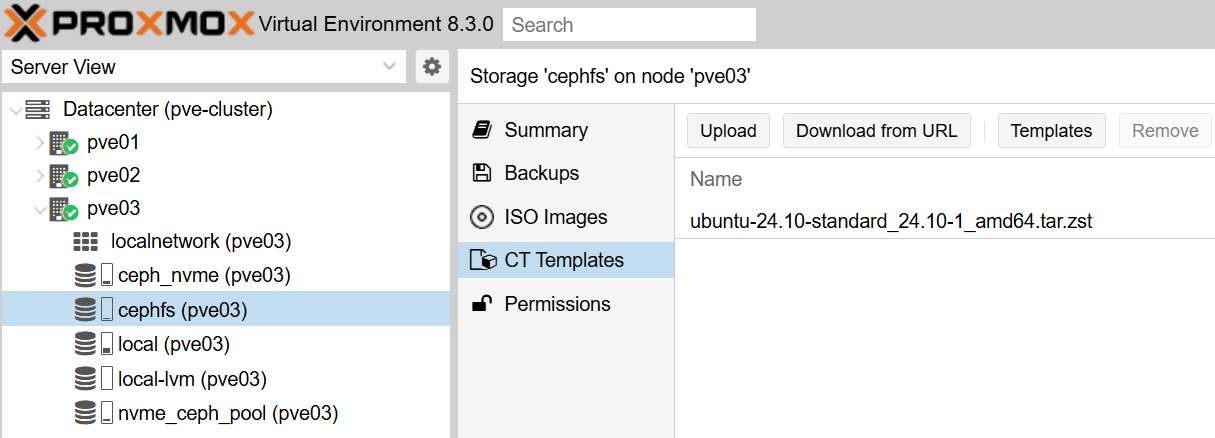
「Templates」 ボタンを押下するとTemplates一覧ウィンドウが開くので、SearchにUbuntuと入れる。

ubuntu-24.10-standardを選択し、「Download」ボタンを押下する。

2. Create Container
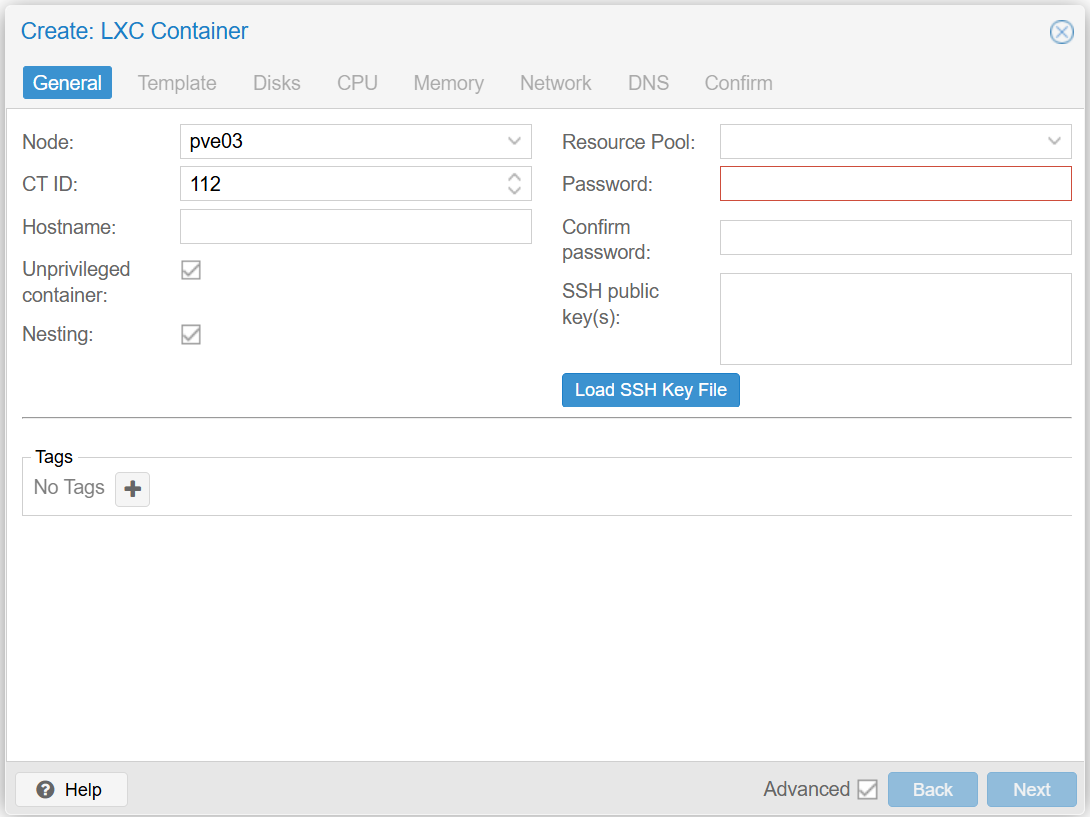
Web UI の画面左の Server View でContainerを作りたいノードを選択し、画面右上の「Create CT」ボタンを押下する。

HostnameとPasswordとConfirm passwordは最低限入力し、Nextボタンを押下する。Unprivileged containerは非特権コンテナ有効/無効で二重否定になるので判りにくいが、通常はチェックを入れて非特権モード(保護モード)にして作成する。
Yes(チェックあり) は、コンテナーが特権なし (制限あり、より安全) であることを意味する。
No(チェックなし) は、コンテナーが特権付き (制限が少なく、リスクが高い) であることを意味する。
Passwordはrootのパスワード。root以外のユーザーを使いrootを無効にする等をしたければContainer作成後に行う。
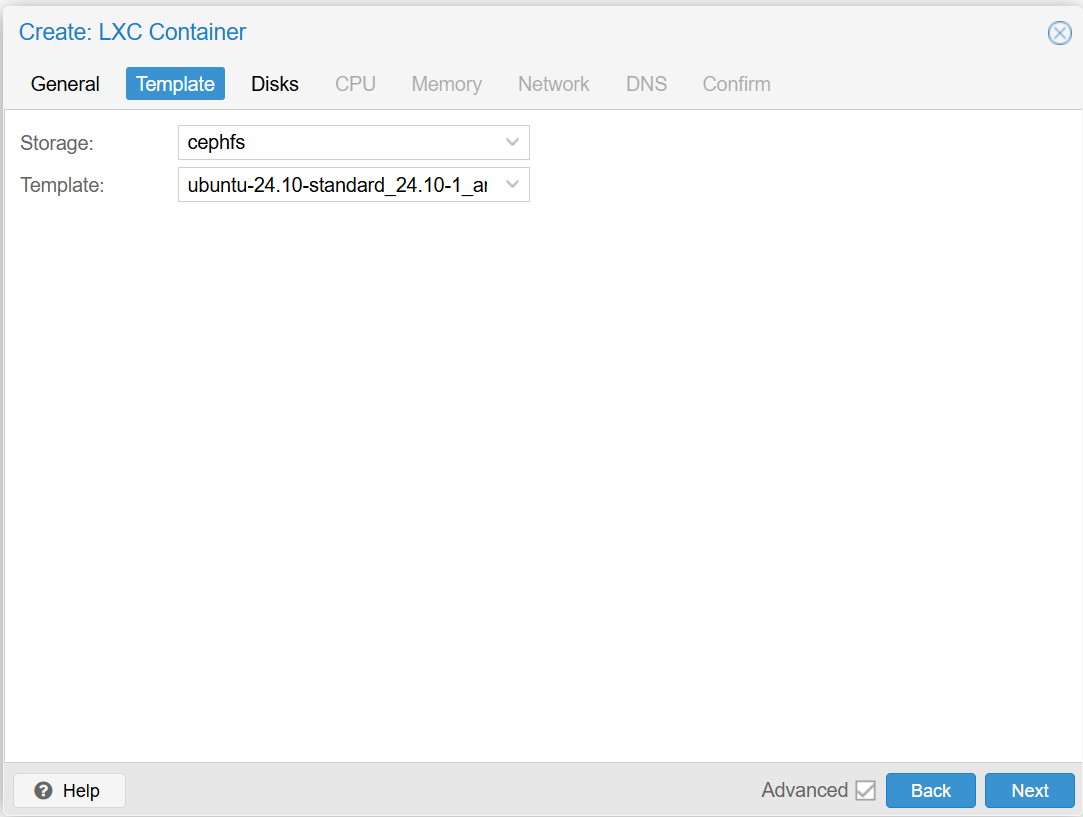
先ほど Container Template をダウンロードした Storage を選択すると、ダウンロードしたTemplateが選択できるはずです。「Next」ボタンを押下します。
仮想Diskを置くVolume Storageを選択し、Disk sizeを指定し、「Next」ボタンを押下する。下図ではceph冗長ストレージを選択している。Disk sizeはデフォルトで 8GiB になっているが、そのままで良い。Ubuntu 24.10 Container 作成直後の Disk 使用量は 673.07MiB であった。apt upgradeを実行すると1GiBを超える。

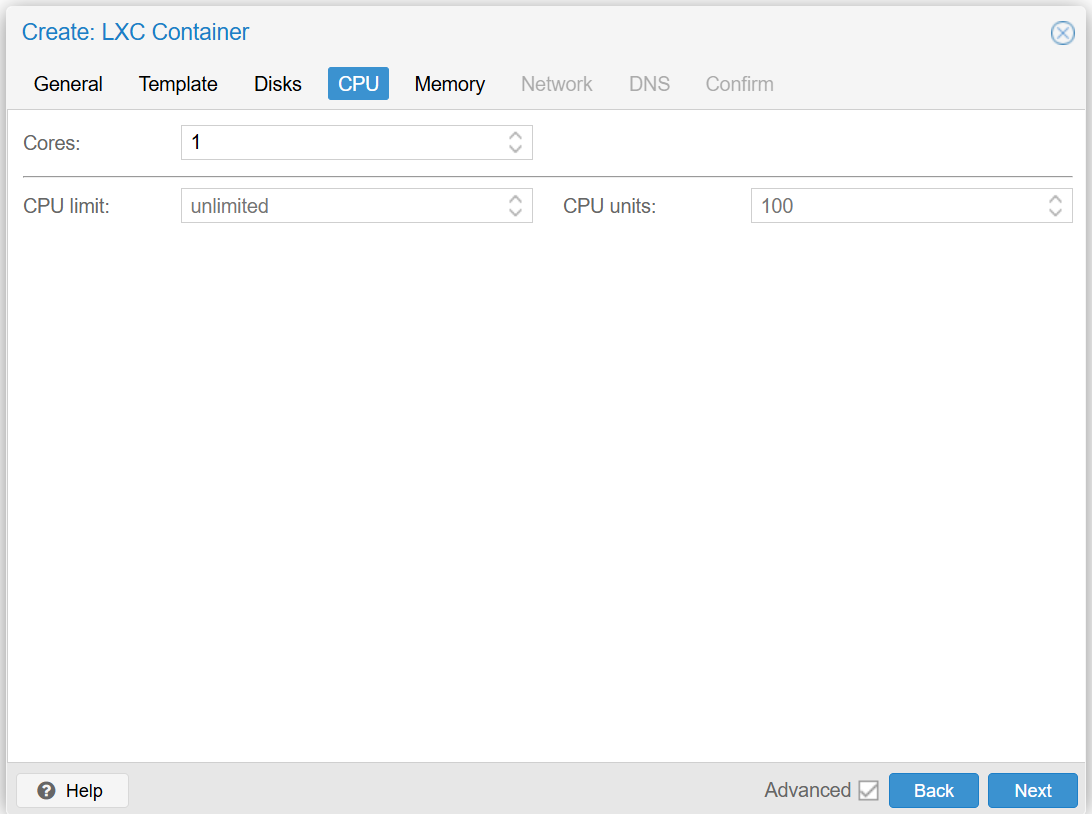
CPU Coresは使いたい量を指定し、「Next」ボタンを押下する。単に Container を作成するだけならデフォルトの1で構わない。
Memoryも使いたい量を指定し、「Next」ボタンを押下する。Container自身が消費するのは50MiB程度であるので、とりあえず Container を作成するだけであればデフォルトの512MiBで問題ない。Swapは判らなければMemoryと同サイズを指定しておく。

ContainerのIPアドレスとゲートウェイIPアドレスをここで指定し、「Next」ボタンを押下する。IPv4/CIDRは、192.168.1.1/24のようなネットワークアドレス部のビット桁数を指定する書式。

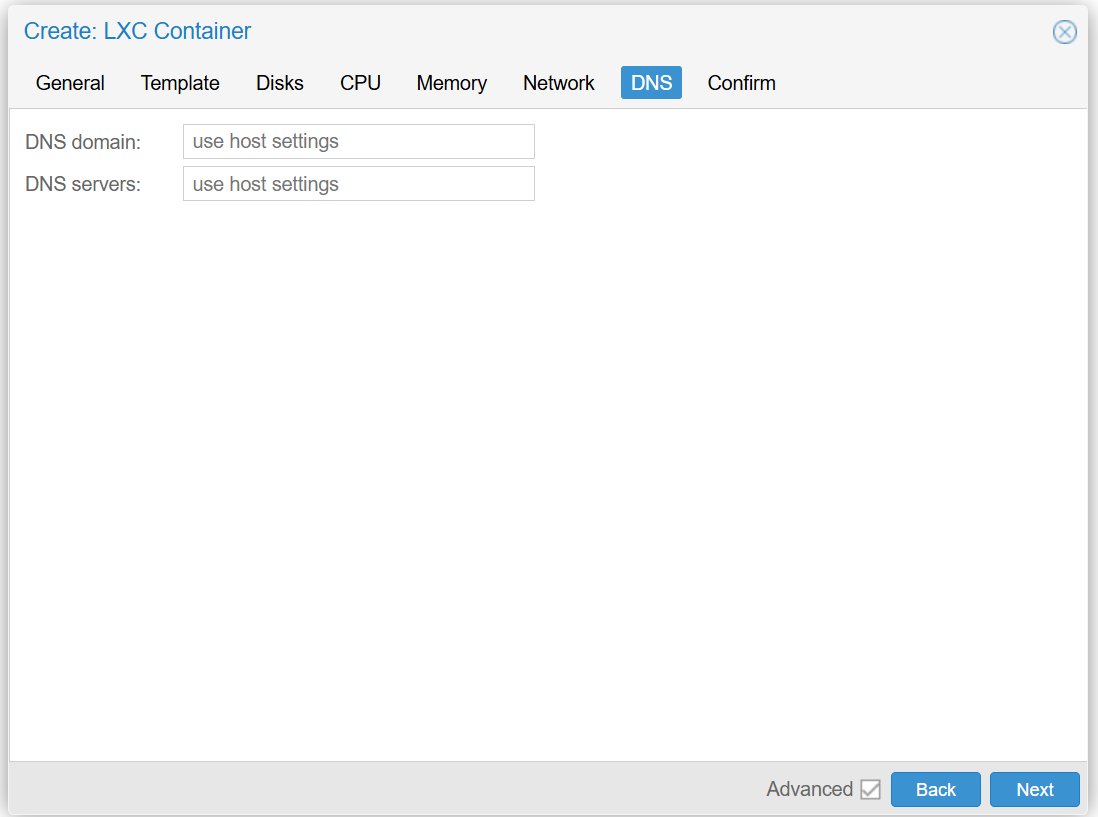
DNSサーバーの指定をここで行う。DNS domainは自分が所属するネットワーク・ドメイン。example.comなど。host名だけで名前解決しようとした際に自動的に補完されるドメイン名になる。DNS serversは複数台ある場合はカンマで区切って列挙する。
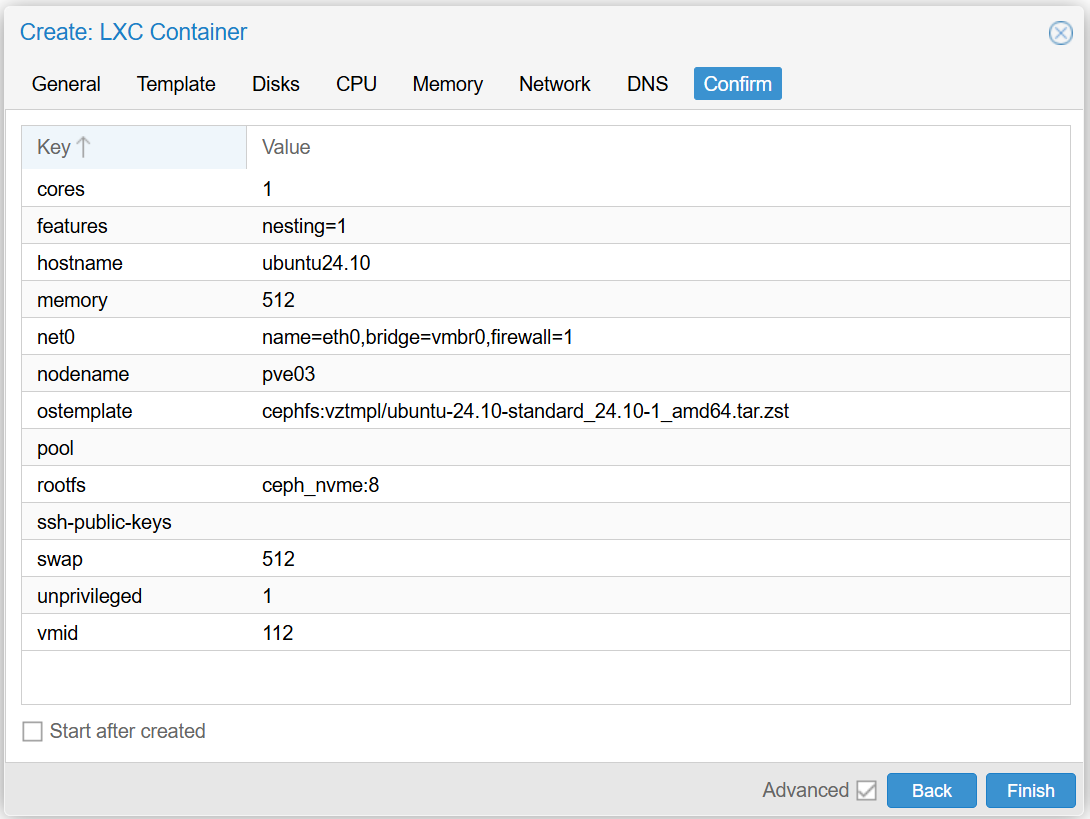
これまでに入力した設定情報が表示される。「Finish」ボタンを押下すると、Container作成が始まる。
暫くするとContainer作成が完了する。TASK OKと表示されていれば完了。
/dev/rbd0
Creating filesystem with 2097152 4k blocks and 524288 inodes
Filesystem UUID: 92227162-bdcd-481f-8d16-a05a99612cec
Superblock backups stored on blocks:
	32768, 98304, 163840, 229376, 294912, 819200, 884736, 1605632
extracting archive '/mnt/pve/cephfs/template/cache/ubuntu-24.10-standard_24.10-1_amd64.tar.zst'
Total bytes read: 570439680 (545MiB, 60MiB/s)
Detected container architecture: amd64
Creating SSH host key 'ssh_host_ecdsa_key' - this may take some time ...
done: SHA256:xxxxxxxxxxxxxxxxxxxxxxxxxxxxxxxxxxxxxxxxxxx root@ubuntu24
Creating SSH host key 'ssh_host_rsa_key' - this may take some time ...
done: SHA256:xxxxxxxxxxxxxxxxxxxxxxxxxxxxxxxxxxxxxxxxxxx root@ubuntu24
Creating SSH host key 'ssh_host_dsa_key' - this may take some time ...
done: xxxxxxxxxxxxxxxxxxxxxxxxxxxxxxxxxxxxxxxxxxxxxxxxxx root@ubuntu24
Creating SSH host key 'ssh_host_ed25519_key' - this may take some time ...
done: SHA256:xxxxxxxxxxxxxxxxxxxxxxxxxxxxxxxxxxxxxxxxxxx root@ubuntu24
TASK OK