はじめに
本記事は Qiita AdventCalendar2022 Elixir vol9 11日目の記事です
学習済みのHuggingfaceのモデルをAxonで動かすBumbleBeeをLivebook上で動く環境を作り、Stable Diffusionを実際に動かしてみました
Bumblebeeとは
Bumblebee provides pre-trained and transformer Neural Network models on top of Axon. It includes integration with 🤗 Models, allowing anyone to download and perform Machine Learning tasks with few lines of code.
ニューラルネットワークのフレームワークであるAxonで動く学習済みモデルを提供するライブラリ
学習済みモデルとして
画像分類のResNet、ConvNeXT, ViT
テキスト分類のrobelta, bert
テキスト生成のGPT2, BART
テキストからの画像生成にStable diffusion
この他にも多数のモデルが実行可能です
この記事ではStable Diffusion (v1.4)を動かします
Livebookとは
簡単に言えば Elixir版のJupyterNotebookです
Livebook is a web application for writing interactive and collaborative code notebooks.
サイトによるとLivebookはコラボレーションもできるElixir対話的実行環境を提供するWebアプリケーションと紹介しています
環境
実行した環境
Apple M1 Max
メモリ 32
OS macOS 12.6.1
Elixir 1.14.2
Erlang 25.0.4
環境構築
Elixirのバージョン指定があるので言語の環境から構築していきます
言語のバージョン管理にはasdfを使います
brew install asdf
コマンド一発です
次に各言語のプラグインを追加します
Erlangのインストール
プラグインを追加してオプションを指定して 25.0.4をインストールします
asdf plugin add erlang https://github.com/asdf-vm/asdf-erlang.git
export KERL_CONFIGURE_OPTIONS="--disable-debug --without-javac"
asdf install erlang 25.0.4
Elixirのインストール
プラグインを追加して、インストールしたErlangに合わせてインストールします
asdf plugin-add elixir https://github.com/asdf-vm/asdf-elixir.git
asdf install elixir 1.14.2-otp-25
インストールしたらパッケージマネージャー周りの設定をします
以下のコマンドを実行してください
mix local.hex
mix local.rebar
Livebookのセットアップ
githubからクローンして実行します
git clone https://github.com/livebook-dev/livebook.git
cd livebook
mix deps.get --only prod

MIX_ENV=prod mix phx.server
実行したら認証トークン付きのURLがコンソールに表示されるのでそちらをコピペしてください
Stable Diffusionの実行
基本はこちらに沿ってやっていきます
setupセルに 使用するライブラリを追加してインストールを開始します
Mix.install([
  {:bumblebee, "~> 0.1.0"},
  {:nx, "~> 0.4.1"},
  {:exla, "~> 0.4.1"},
  {:kino, "~> 0.8.0"}
])

Nx.global_default_backend(EXLA.Backend)
引数に渡すいろいろを作ります
repository_id = "CompVis/stable-diffusion-v1-4"

{:ok, tokenizer} = Bumblebee.load_tokenizer({:hf, "openai/clip-vit-large-patch14"})

{:ok, clip} = Bumblebee.load_model({:hf, repository_id, subdir: "text_encoder"})

{:ok, unet} =
  Bumblebee.load_model({:hf, repository_id, subdir: "unet"},
    params_filename: "diffusion_pytorch_model.bin"
  )

{:ok, vae} =
  Bumblebee.load_model({:hf, repository_id, subdir: "vae"},
    architecture: :decoder,
    params_filename: "diffusion_pytorch_model.bin"
  )

{:ok, scheduler} = Bumblebee.load_scheduler({:hf, repository_id, subdir: "scheduler"})
{:ok, featurizer} = Bumblebee.load_featurizer({:hf, repository_id, subdir: "feature_extractor"})
{:ok, safety_checker} = Bumblebee.load_model({:hf, repository_id, subdir: "safety_checker"})
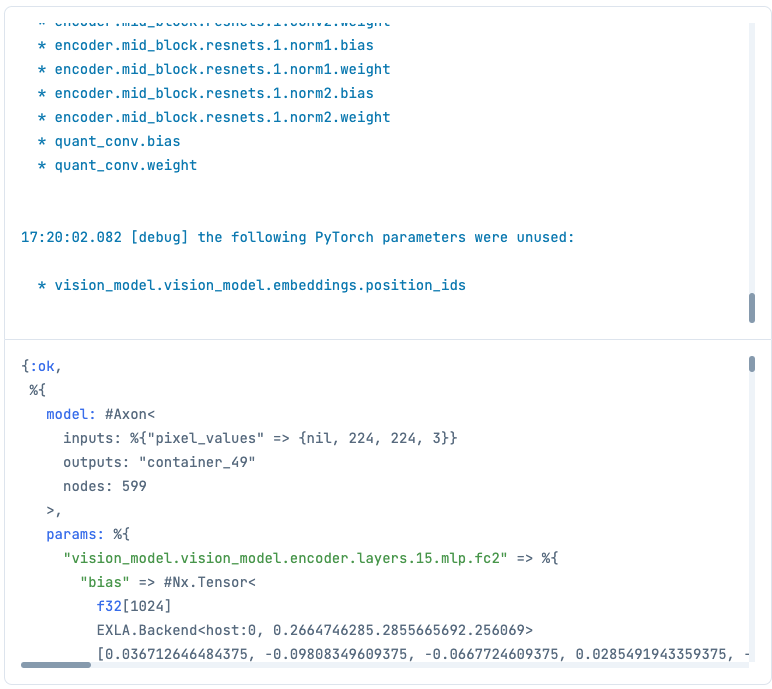
長い長い学習済みモデルのダウンロードが終わると、いくつかニューラルネットワークさ生成されます
上で作ったいろいろを引数に渡してネットワークを作成します
作成したらモデルを生成する時に入力するpromptをいれるフォームを作成します
画像増やしたい時はnum_images_per_promptを4とかにしてください
serving =
Bumblebee.Diffusion.StableDiffusion.text_to_image(clip, unet, vae, tokenizer, scheduler,
num_steps: 20,
num_images_per_prompt: 2,
safety_checker: safety_checker,
safety_checker_featurizer: featurizer,
compile: [batch_size: 1, sequence_length: 60],
defn_options: [compiler: EXLA]
)
text_input =
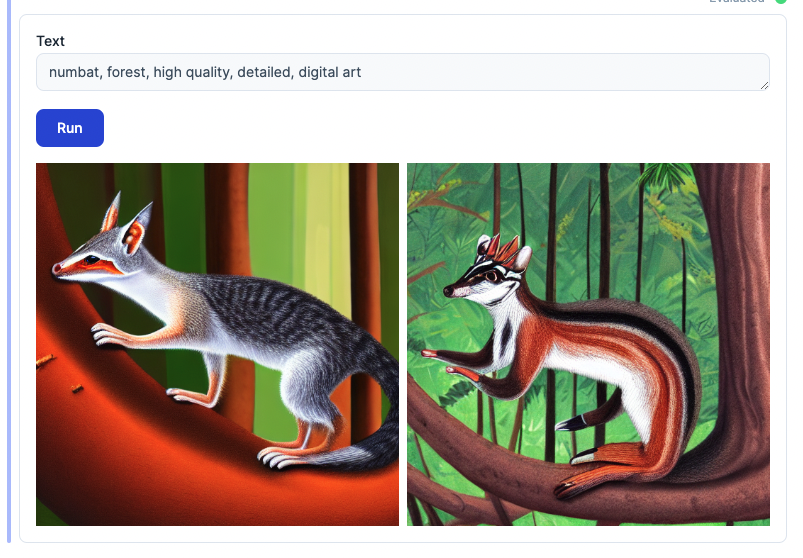
Kino.Input.text("Prompt", default: "numbat, forest, high quality, detailed, digital art")
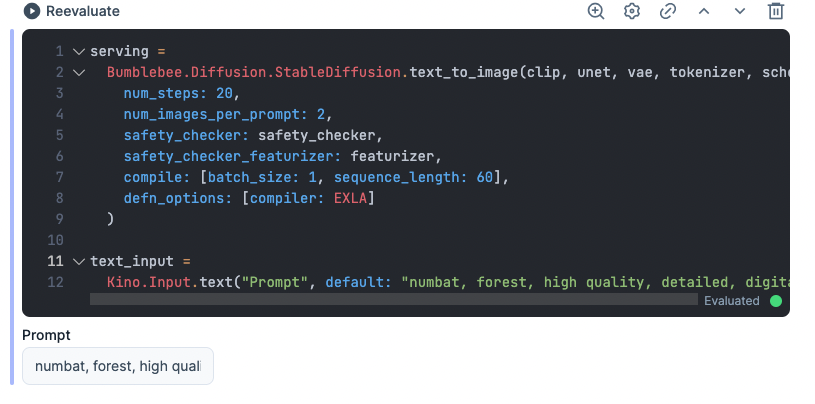
デフォルトで呪文が入っているようなのでそのまま実行します
prompt = Kino.Input.read(text_input)

output = Nx.Serving.run(serving, prompt)

for result <- output.results do
  Kino.Image.new(result.image)
end
|> Kino.Layout.grid(columns: 2)
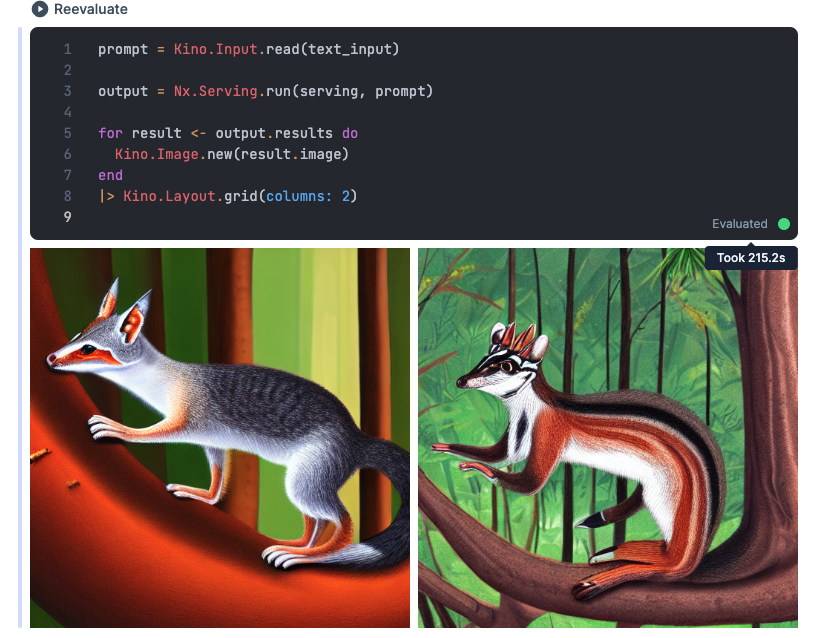
3分ほどで画像ができました!
スマートセルで超お手軽に使う
色々やってきましたが、実はスマートセルを使うことで簡単にできます
setupに以下を追加します
Mix.install(
  [
    {:bumblebee, "~> 0.1.0"},
    {:nx, "~> 0.4.1"},
    {:exla, "~> 0.4.1"},
    {:kino, "~> 0.8.0"},
    {:kino_bumblebee, "~> 0.1.0"} # これ
  ],
  config: [nx: [default_backend: EXLA.Backend]]
)

Nx.global_default_backend(EXLA.Backend)
+ smartを押すといくつか出てくるので Nerural Network task を選択します
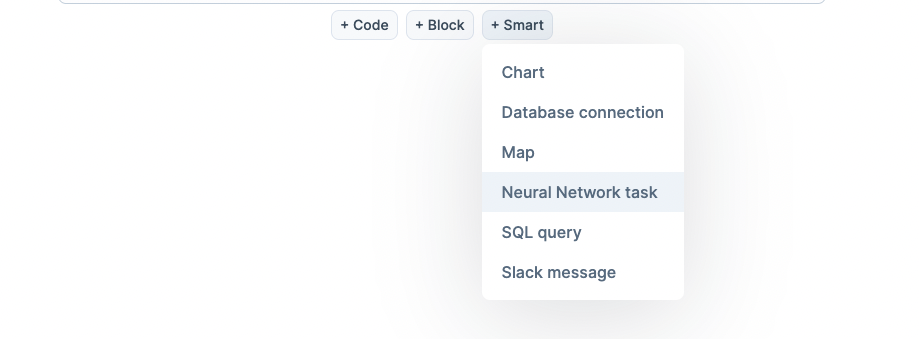
押すとこんなのが出てくるので taskを text-to-imageに変更すると
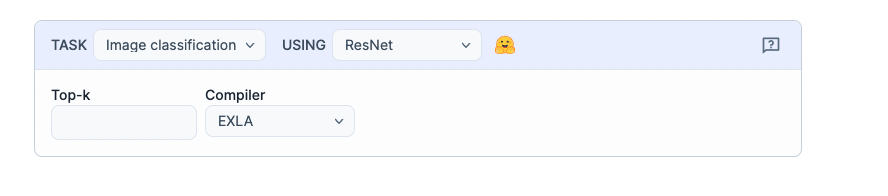
切り替わるので evaluateボタンを押してください

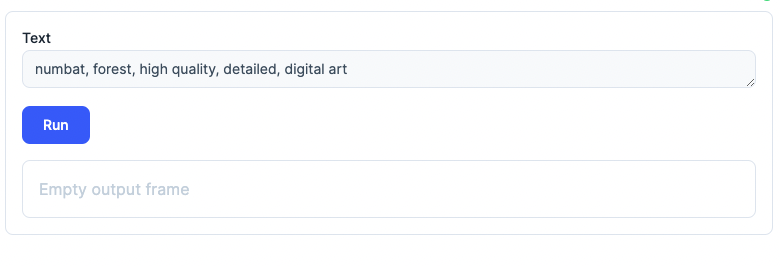
完了すると入力フォームが出てくるので、呪文を入れてRUNすると画像が生成されます!
最後に
bumblebeeを使って簡単にstable diffusionをCPUモード実行することができました!
GPUも試した見てのですが、 RTX3060ではメモリが足りず途中で失敗しました
現在チューニング中とのことで、注視して待ちます!
だれかRTX3090等の24GBメモリのGPUで試していただけたらなーとおもます
githubにこれ以外にクラス分類をwebアプリケーションフレームワークのPhoenixに組み込む例があったりAI/MLをアプリに組み込むのがとても簡単になっています
この機会にElixir/Phoenixに入門してはいかがでしょうか?
本記事は以上になりますありがとうございました
参考サイト
https://qiita.com/zacky1972/items/e0c1f8edb4117f61663f
https://github.com/elixir-nx/bumblebee/blob/main/notebooks/stable_diffusion.livemd
https://github.com/elixir-nx/bumblebee
https://github.com/livebook-dev/livebook