1. 初めに
ここ最近グラフデータベースを触れる機会が多くなったので、備忘録としてNeo4jやOracle Graph Server & Client(PGX)の環境構築や可視化等の簡易的な使い方を纏めておこうと思い投稿します。特に両製品の比較を目的としたメリデメは書かず、それぞれの機能にフォーカスして色々試してみたいと思います。なお、筆者はグラフデータベース領域を専門としたプロフェッショナルではないことをあらかじめご理解ください。
本投稿のGoalと構成
Goal
- Neo4jをインストールし、データセット:C.elegansを可視化する
- PGXをインストールし、データセット:C.elegansを可視化する
主な構成
-
前半:Neo4j (neo4j-4.2.1)、後半:PGX (Oracle Graph Server 21.1.0)
-
Neo4j編
- データセット説明(CSVをそのまま使う)
- AWS上でNeoインストール (neo4j.confなど)
- Cypherクエリを投げて可視化+アルゴリズム試行
-
PGX編
- データセット説明 (RDBMS ⇨ Graph Server(PGX)へ)
- OCI上でPGXインストール (pgx.confなど)
- PGQLを投げて可視化+アルゴリズム試行
- AutoRefreshを試す
-
まとめ
- 思ったこと等
2. Neo4j編
2.1 データセット説明(CSVをそのまま使う)
今回は、カエノラブディティス・エレガンスと呼ばれる線虫のニューロンやシナプスの神経ネットワークデータを使用します。
下記からC.elegansのデータをダウンロードし、SCP等でインスタンスに配置します。
C.elegans
2.2 AWS上でNeoインストール (neo4j.confなど)
2.2.1 EC2環境を準備
tharashi@ORCL:~$ ssh ec2

       __|  __|_  )
       _|  (     /   Amazon Linux 2 AMI
      ___|\___|___|

https://aws.amazon.com/amazon-linux-2/
2 package(s) needed for security, out of 5 available
Run "sudo yum update" to apply all updates.

ec2-user@ip-172-31-40-233 ~]$ sudo yum install java-11-amazon-corretto
ec2-user@ip-172-31-40-233 ~]$ java -version
openjdk version "11.0.9.1" 2020-11-04 LTS
OpenJDK Runtime Environment Corretto-11.0.9.12.1 (build 11.0.9.1+12-LTS)
OpenJDK 64-Bit Server VM Corretto-11.0.9.12.1 (build 11.0.9.1+12-LTS, mixed mode)
[ec2-user@ip-172-31-40-233 ~]$
2.2.2 Neo4jをEC2へインストール(To install Neo4j Community Edition as root:)
[root@ip-172-31-40-233 ~]# yum install neo4j-4.2.1 -y
...
Total                                                                                        16 MB/s | 111 MB  00:00:06
Running transaction check
Running transaction test
Transaction test succeeded
Running transaction
  Installing : cypher-shell-4.2.2-1.noarch                                                                              1/2
  Installing : neo4j-4.2.1-1.noarch                                                                                     2/2
  Verifying  : neo4j-4.2.1-1.noarch                                                                                     1/2
  Verifying  : cypher-shell-4.2.2-1.noarch                                                                              2/2

Installed:
  neo4j.noarch 0:4.2.1-1

Dependency Installed:
  cypher-shell.noarch 0:4.2.2-1

Complete!
2.2.3 Neo4jをインストール後、構成ファイルを確認
[root@ip-172-31-40-233 ~]# vi /etc/neo4j/neo4j.conf

# *****************************************************************
# Neo4j configuration
#
# For more details and a complete list of settings, please see
# https://neo4j.com/docs/operations-manual/current/reference/configuration-settings/
# *****************************************************************

# The name of the default database
# dbms.default_database=neo4j

# Paths of directories in the installation.
dbms.directories.data=/var/lib/neo4j/data
dbms.directories.plugins=/var/lib/neo4j/plugins
dbms.directories.logs=/var/log/neo4j
dbms.directories.lib=/usr/share/neo4j/lib
dbms.directories.run=/var/run/neo4j
# dbms.directories.transaction.logs.root=data/transactions
...

[その他]
※ /etc/bin/内には、デフォルトで下記3つ存在する
neo4j
neo4j-admin
neo4j-import
2.2.4 デフォルトの70行目をアンコメント
/etc/neo4j/neo4j.conf
64 #*****************************************************************
65 # Network connector configuration
66 #*****************************************************************
67
68 # With default configuration Neo4j only accepts local connections.
69 # To accept non-local connections, uncomment this line:
70 dbms.default_listen_address=0.0.0.0
2.2.5 Neo4jのadminパスワードを変更
[root@ip-172-31-40-233 ~]# neo4j-admin set-initial-password <your_password>
Changed password for user 'neo4j'.
2.2.6 Neo4jのサービスを起動
[root@ip-172-31-40-233 ~]# systemctl status neo4j
● neo4j.service - Neo4j Graph Database
   Loaded: loaded (/usr/lib/systemd/system/neo4j.service; disabled; vendor preset: disabled)
   Active: inactive (dead)
[root@ip-172-31-40-233 ~]# systemctl start neo4j
[root@ip-172-31-40-233 ~]# systemctl status neo4j
● neo4j.service - Neo4j Graph Database
   Loaded: loaded (/usr/lib/systemd/system/neo4j.service; disabled; vendor preset: disabled)
   Active: active (running) since Sat 2021-01-09 13:48:26 UTC; 2s ago
 Main PID: 3896 (java)
   CGroup: /system.slice/neo4j.service
           └─3896 /usr/bin/java -cp /var/lib/neo4j/plugins:/etc/neo4j:/usr/share/neo4j/lib/*:/var/lib/neo4j/plugins/* -XX...

Jan 09 13:48:27 ip-172-31-40-233.ap-northeast-1.compute.internal neo4j[3896]: Directories in use:
Jan 09 13:48:27 ip-172-31-40-233.ap-northeast-1.compute.internal neo4j[3896]: home:         /var/lib/neo4j
Jan 09 13:48:27 ip-172-31-40-233.ap-northeast-1.compute.internal neo4j[3896]: config:       /etc/neo4j
Jan 09 13:48:27 ip-172-31-40-233.ap-northeast-1.compute.internal neo4j[3896]: logs:         /var/log/neo4j
Jan 09 13:48:27 ip-172-31-40-233.ap-northeast-1.compute.internal neo4j[3896]: plugins:      /var/lib/neo4j/plugins
Jan 09 13:48:27 ip-172-31-40-233.ap-northeast-1.compute.internal neo4j[3896]: import:       /var/lib/neo4j/import
Jan 09 13:48:27 ip-172-31-40-233.ap-northeast-1.compute.internal neo4j[3896]: data:         /var/lib/neo4j/data
Jan 09 13:48:27 ip-172-31-40-233.ap-northeast-1.compute.internal neo4j[3896]: certificates: /var/lib/neo4j/certificates
Jan 09 13:48:27 ip-172-31-40-233.ap-northeast-1.compute.internal neo4j[3896]: run:          /var/run/neo4j
Jan 09 13:48:27 ip-172-31-40-233.ap-northeast-1.compute.internal neo4j[3896]: Starting Neo4j.
2.2.7 CypherのShellに入る
root@ip-172-31-40-233 bin]# ./cypher-shell -d system
username: neo4j
password: *************
Connected to Neo4j 4.2.0 at neo4j://localhost:7687 as user neo4j.
Type :help for a list of available commands or :exit to exit the shell.
Note that Cypher queries must end with a semicolon.
neo4j@system>
neo4j@system>
neo4j@system>
2.2.8 Neo4jのブラウザへ
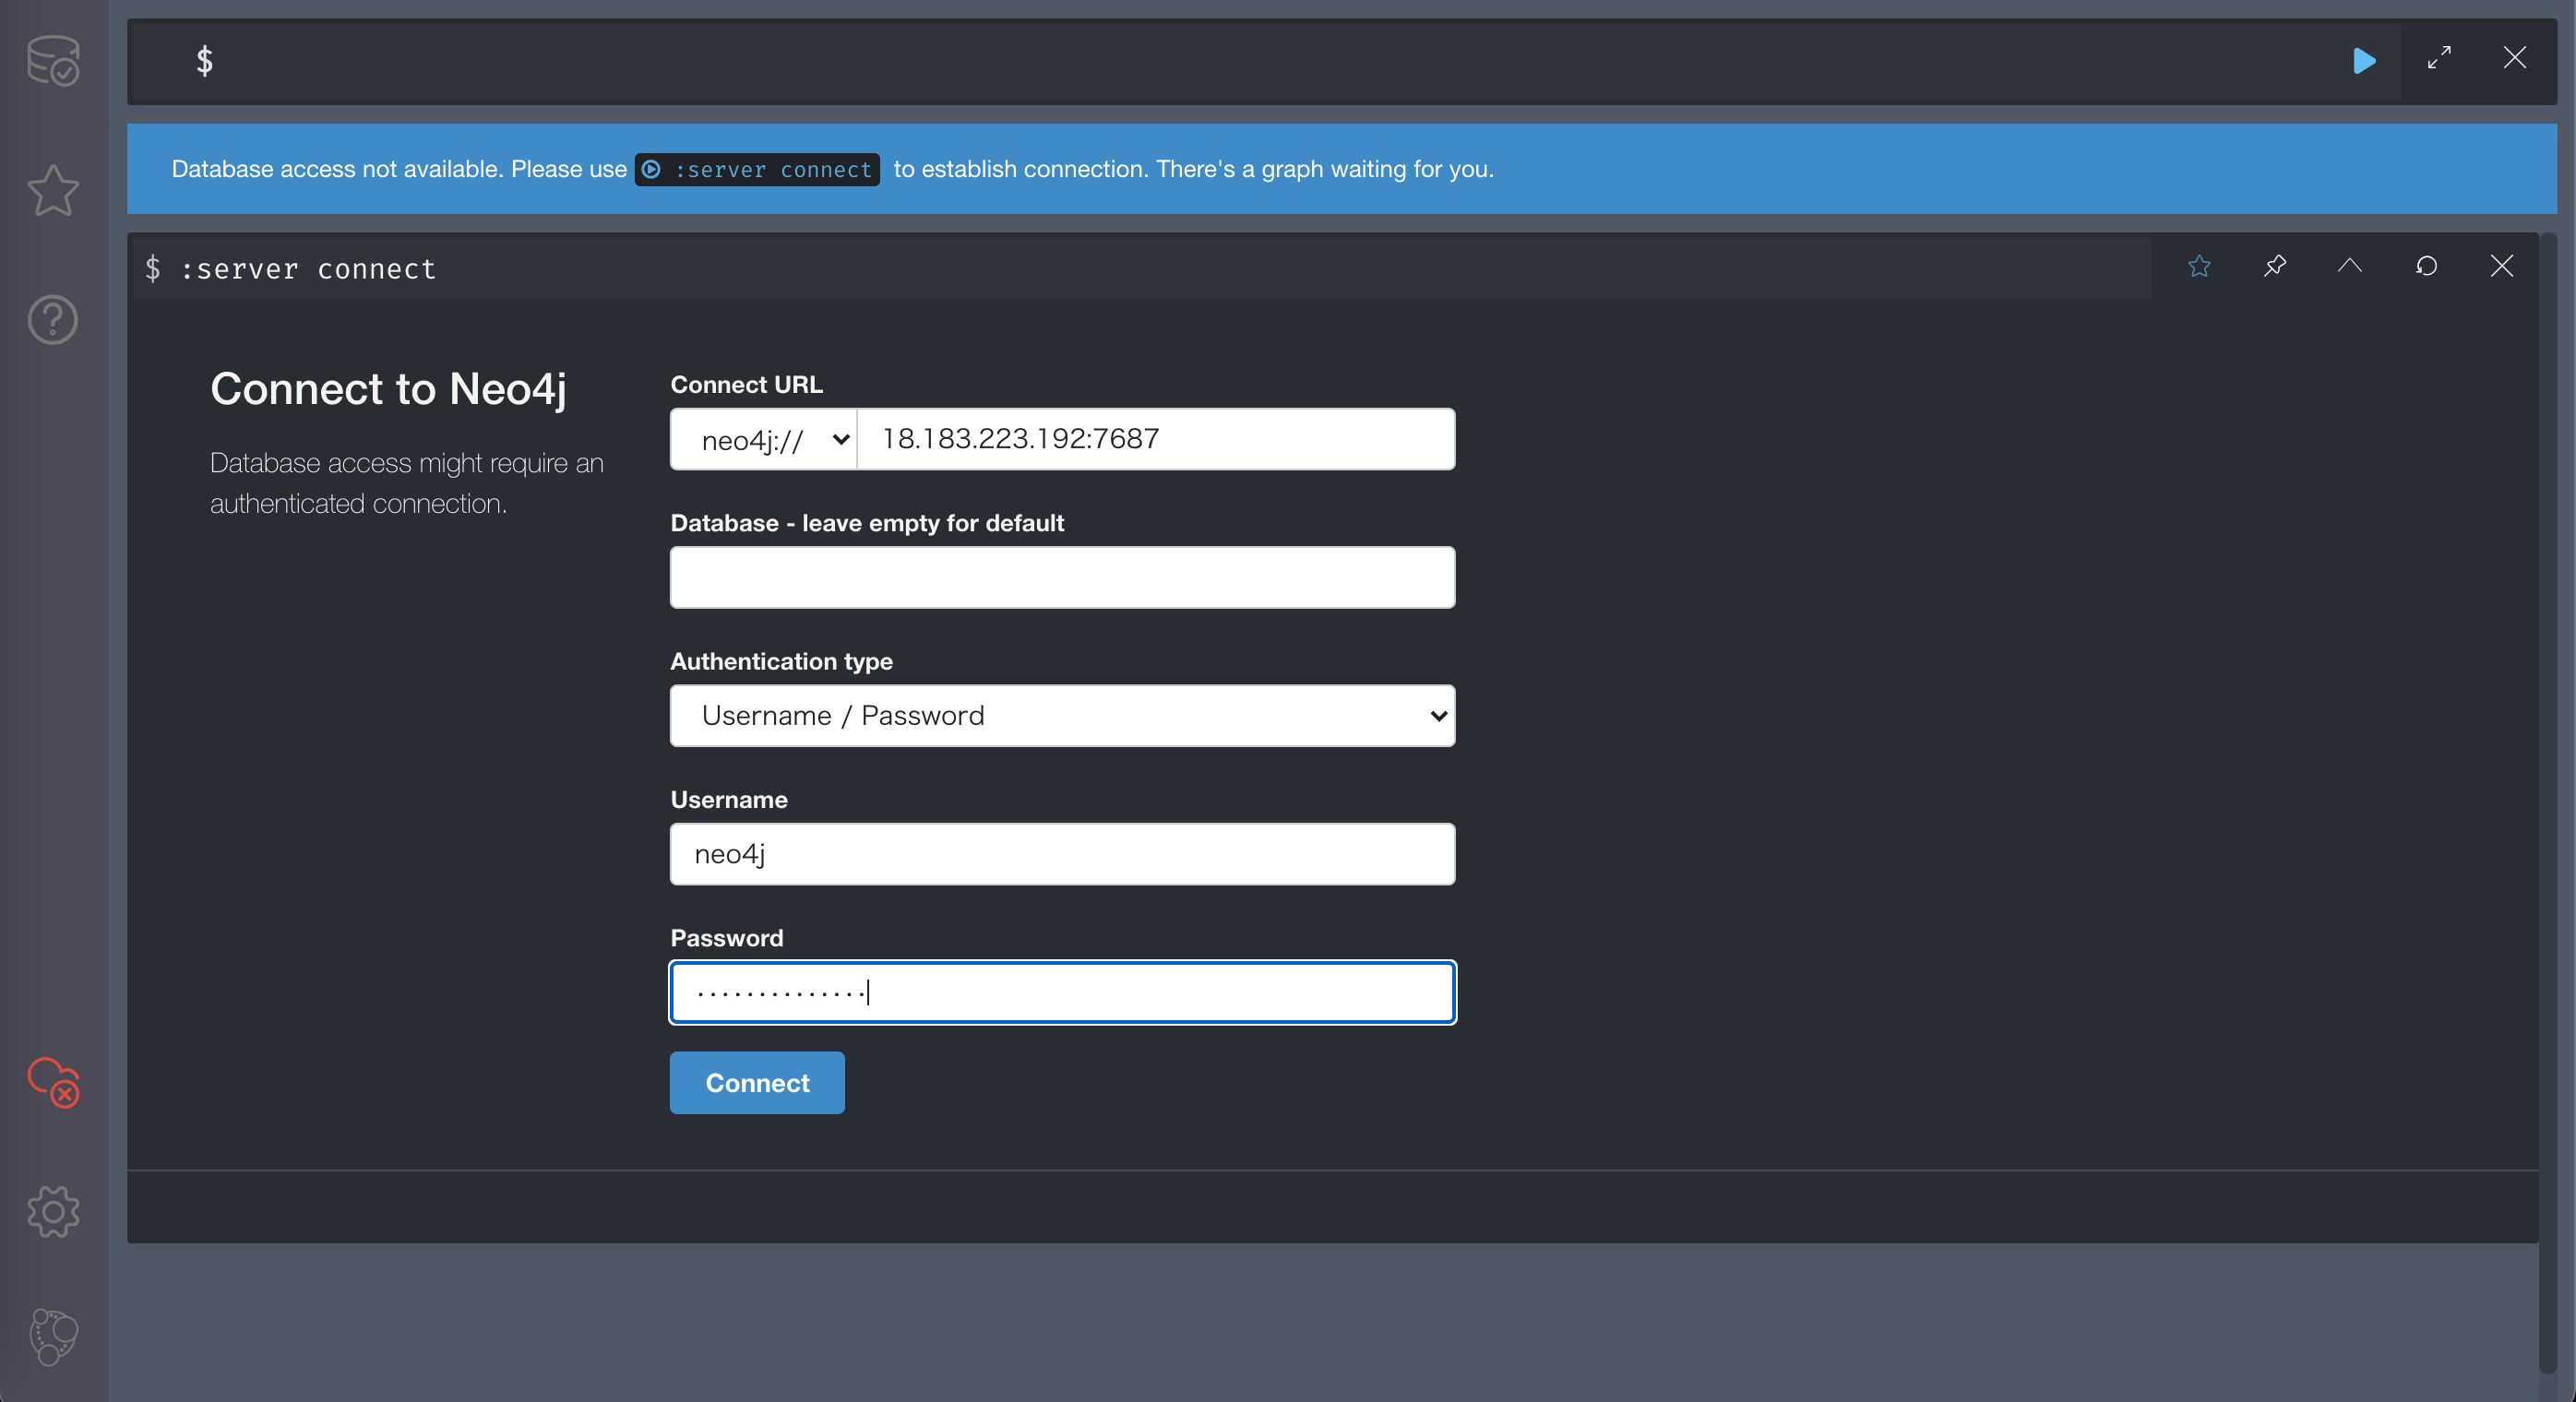
http://18.183.223.190:7474/browser/ を叩いてneo4jのブラウザに入れます。
Username, Passwordについてはneo4j-adminコマンドで設定したものを入力します。
2.2.9 C.elegansのデータをImport用ディレクトリへ配置(SCPなど)
[root@ip-172-31-40-233 tmp]# cd /var/lib/neo4j/import
[root@ip-172-31-40-233 import]# ls
C_elegans_node.csv  C_elegans_reration.csv
2.2.10 C.elegansのデータをロード
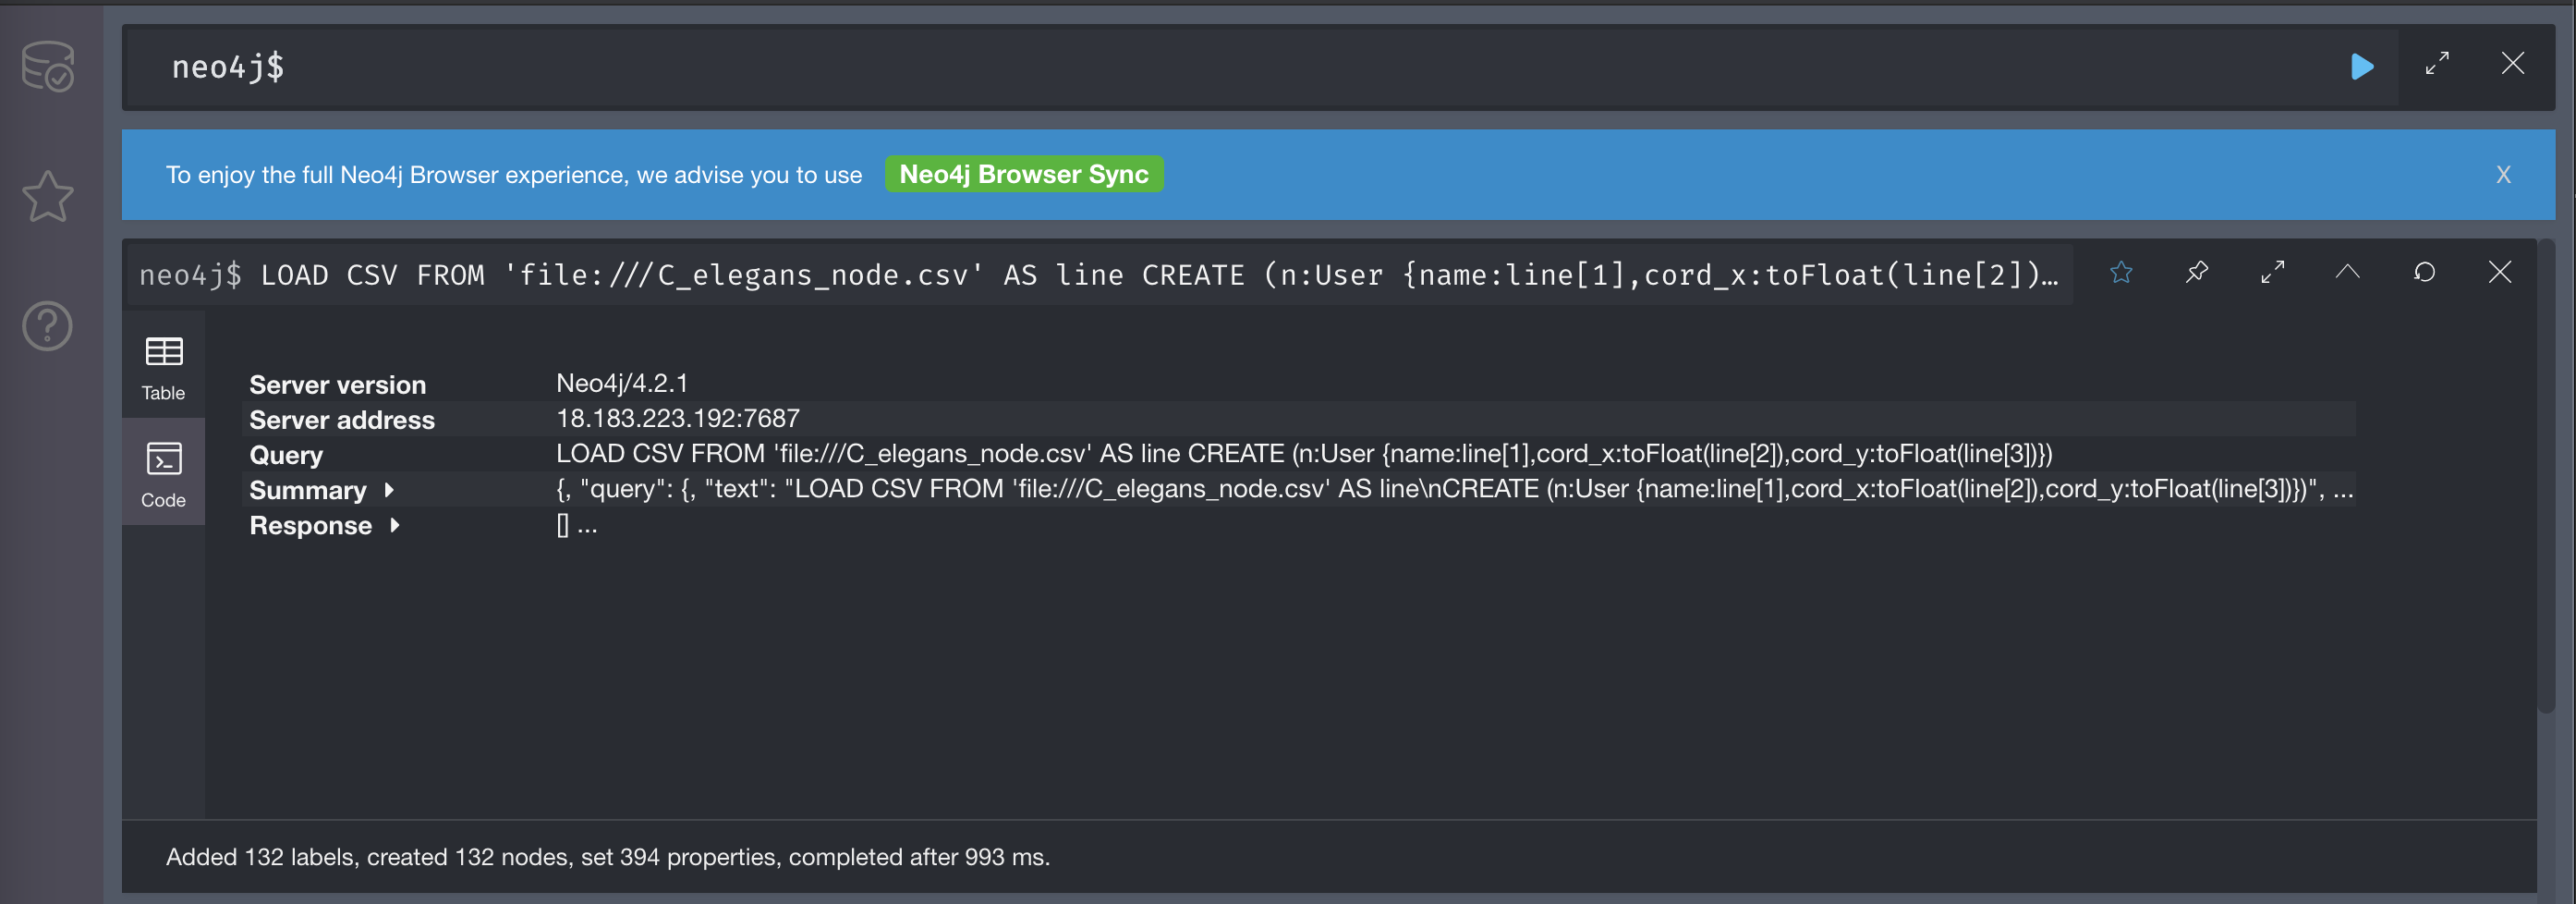
LOAD CSV WITH HEADERS FROM 'file:///C_elegans_node.csv' AS line
CREATE (n:User {user_id:toInteger(line.node_id),name:line.name,cord_x:toFloat(line.posx),cord_y:toFloat(line.posy)})
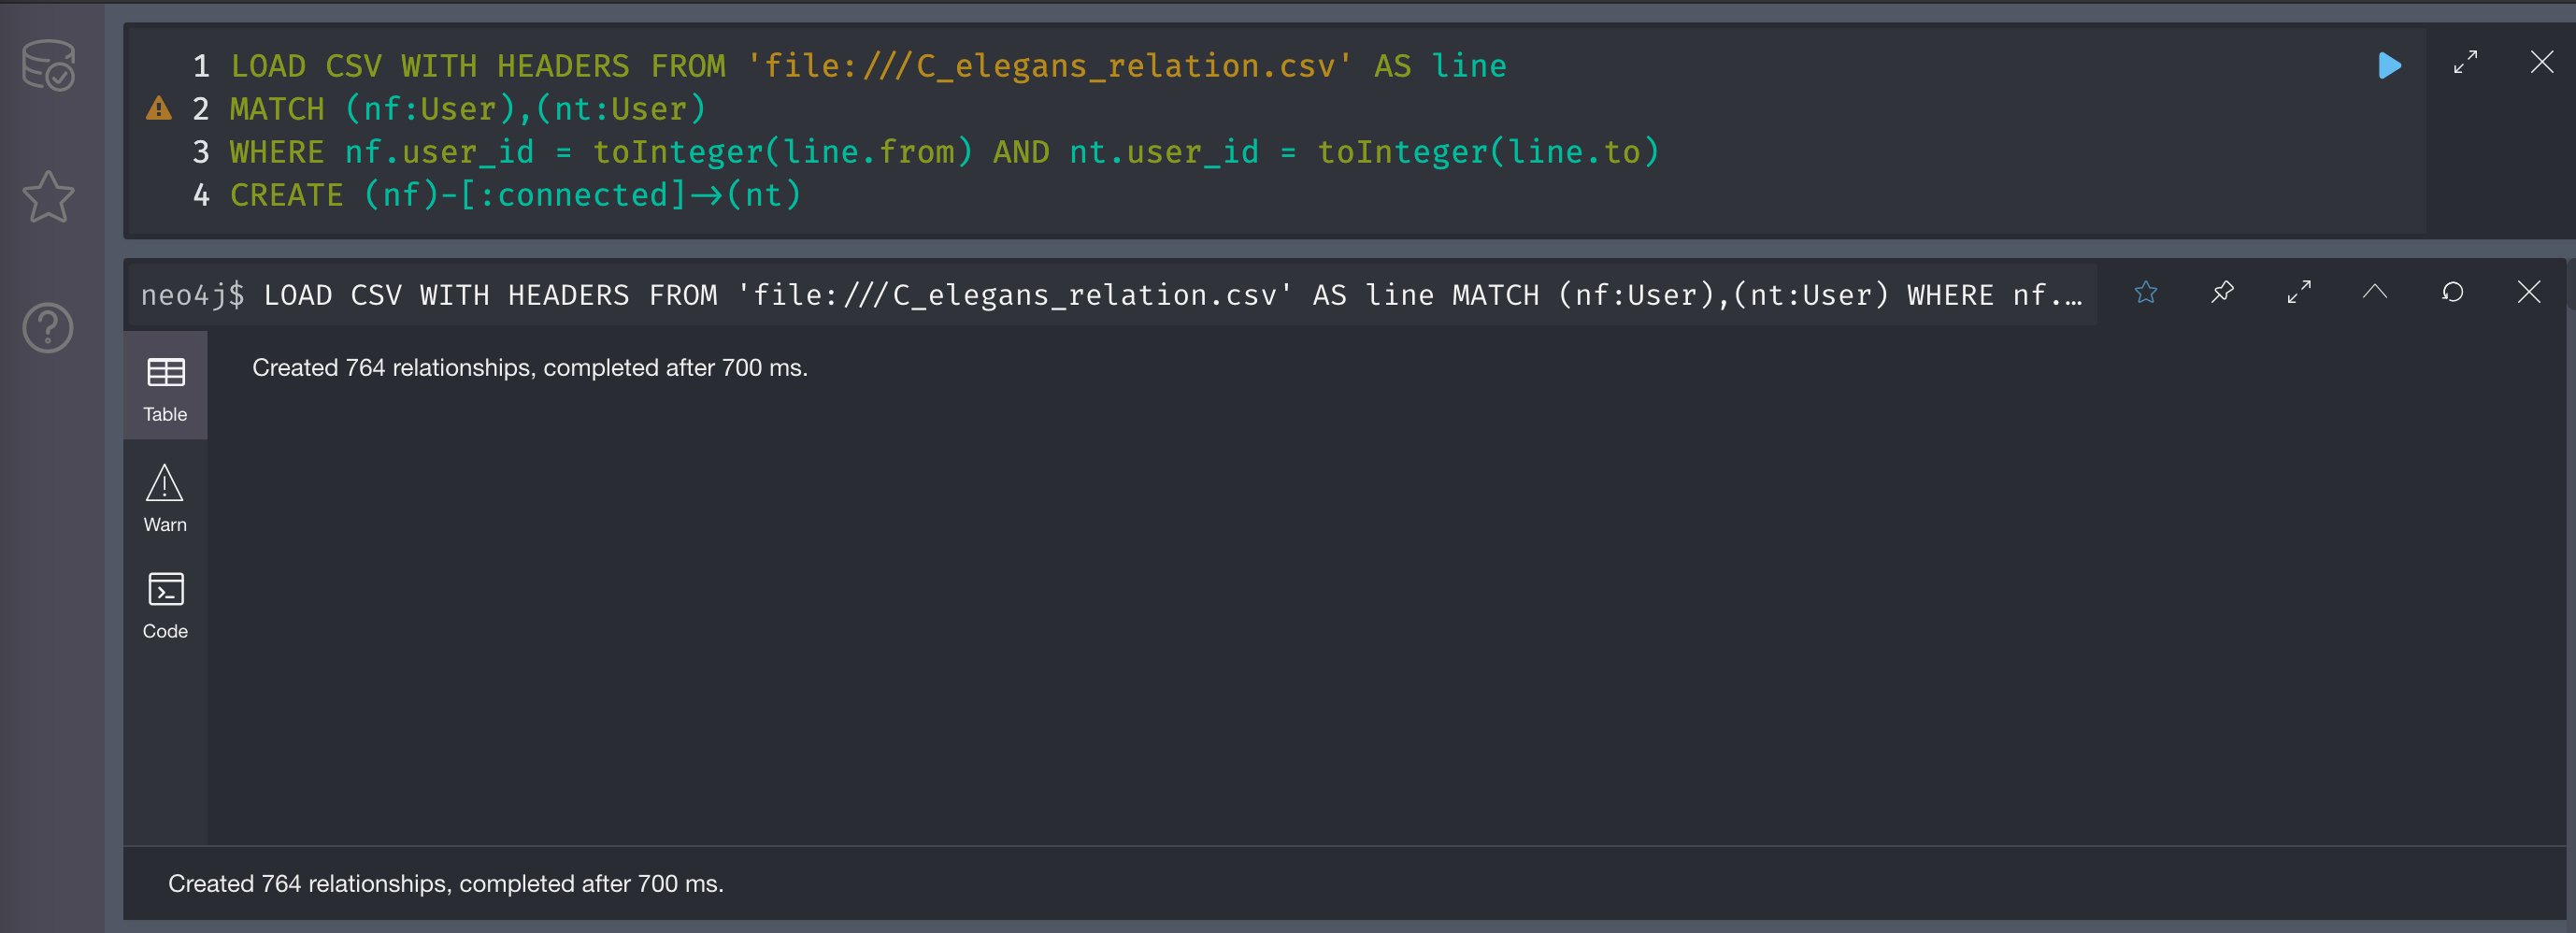
LOAD CSV WITH HEADERS FROM 'file:///C_elegans_relation.csv' AS line
MATCH (nf:User {user_id:toInteger(line.from)}), (nt:user_User {id:toInteger(line.to)})
CREATE (nf)-[:connected]->(nt)
データロードの際のブラウザ画面は下記のようになる。
基本的にCypherクエリを打てる環境はブラウザ内で完結する。
2.3 Cypherクエリを投げて可視化+アルゴリズム試行
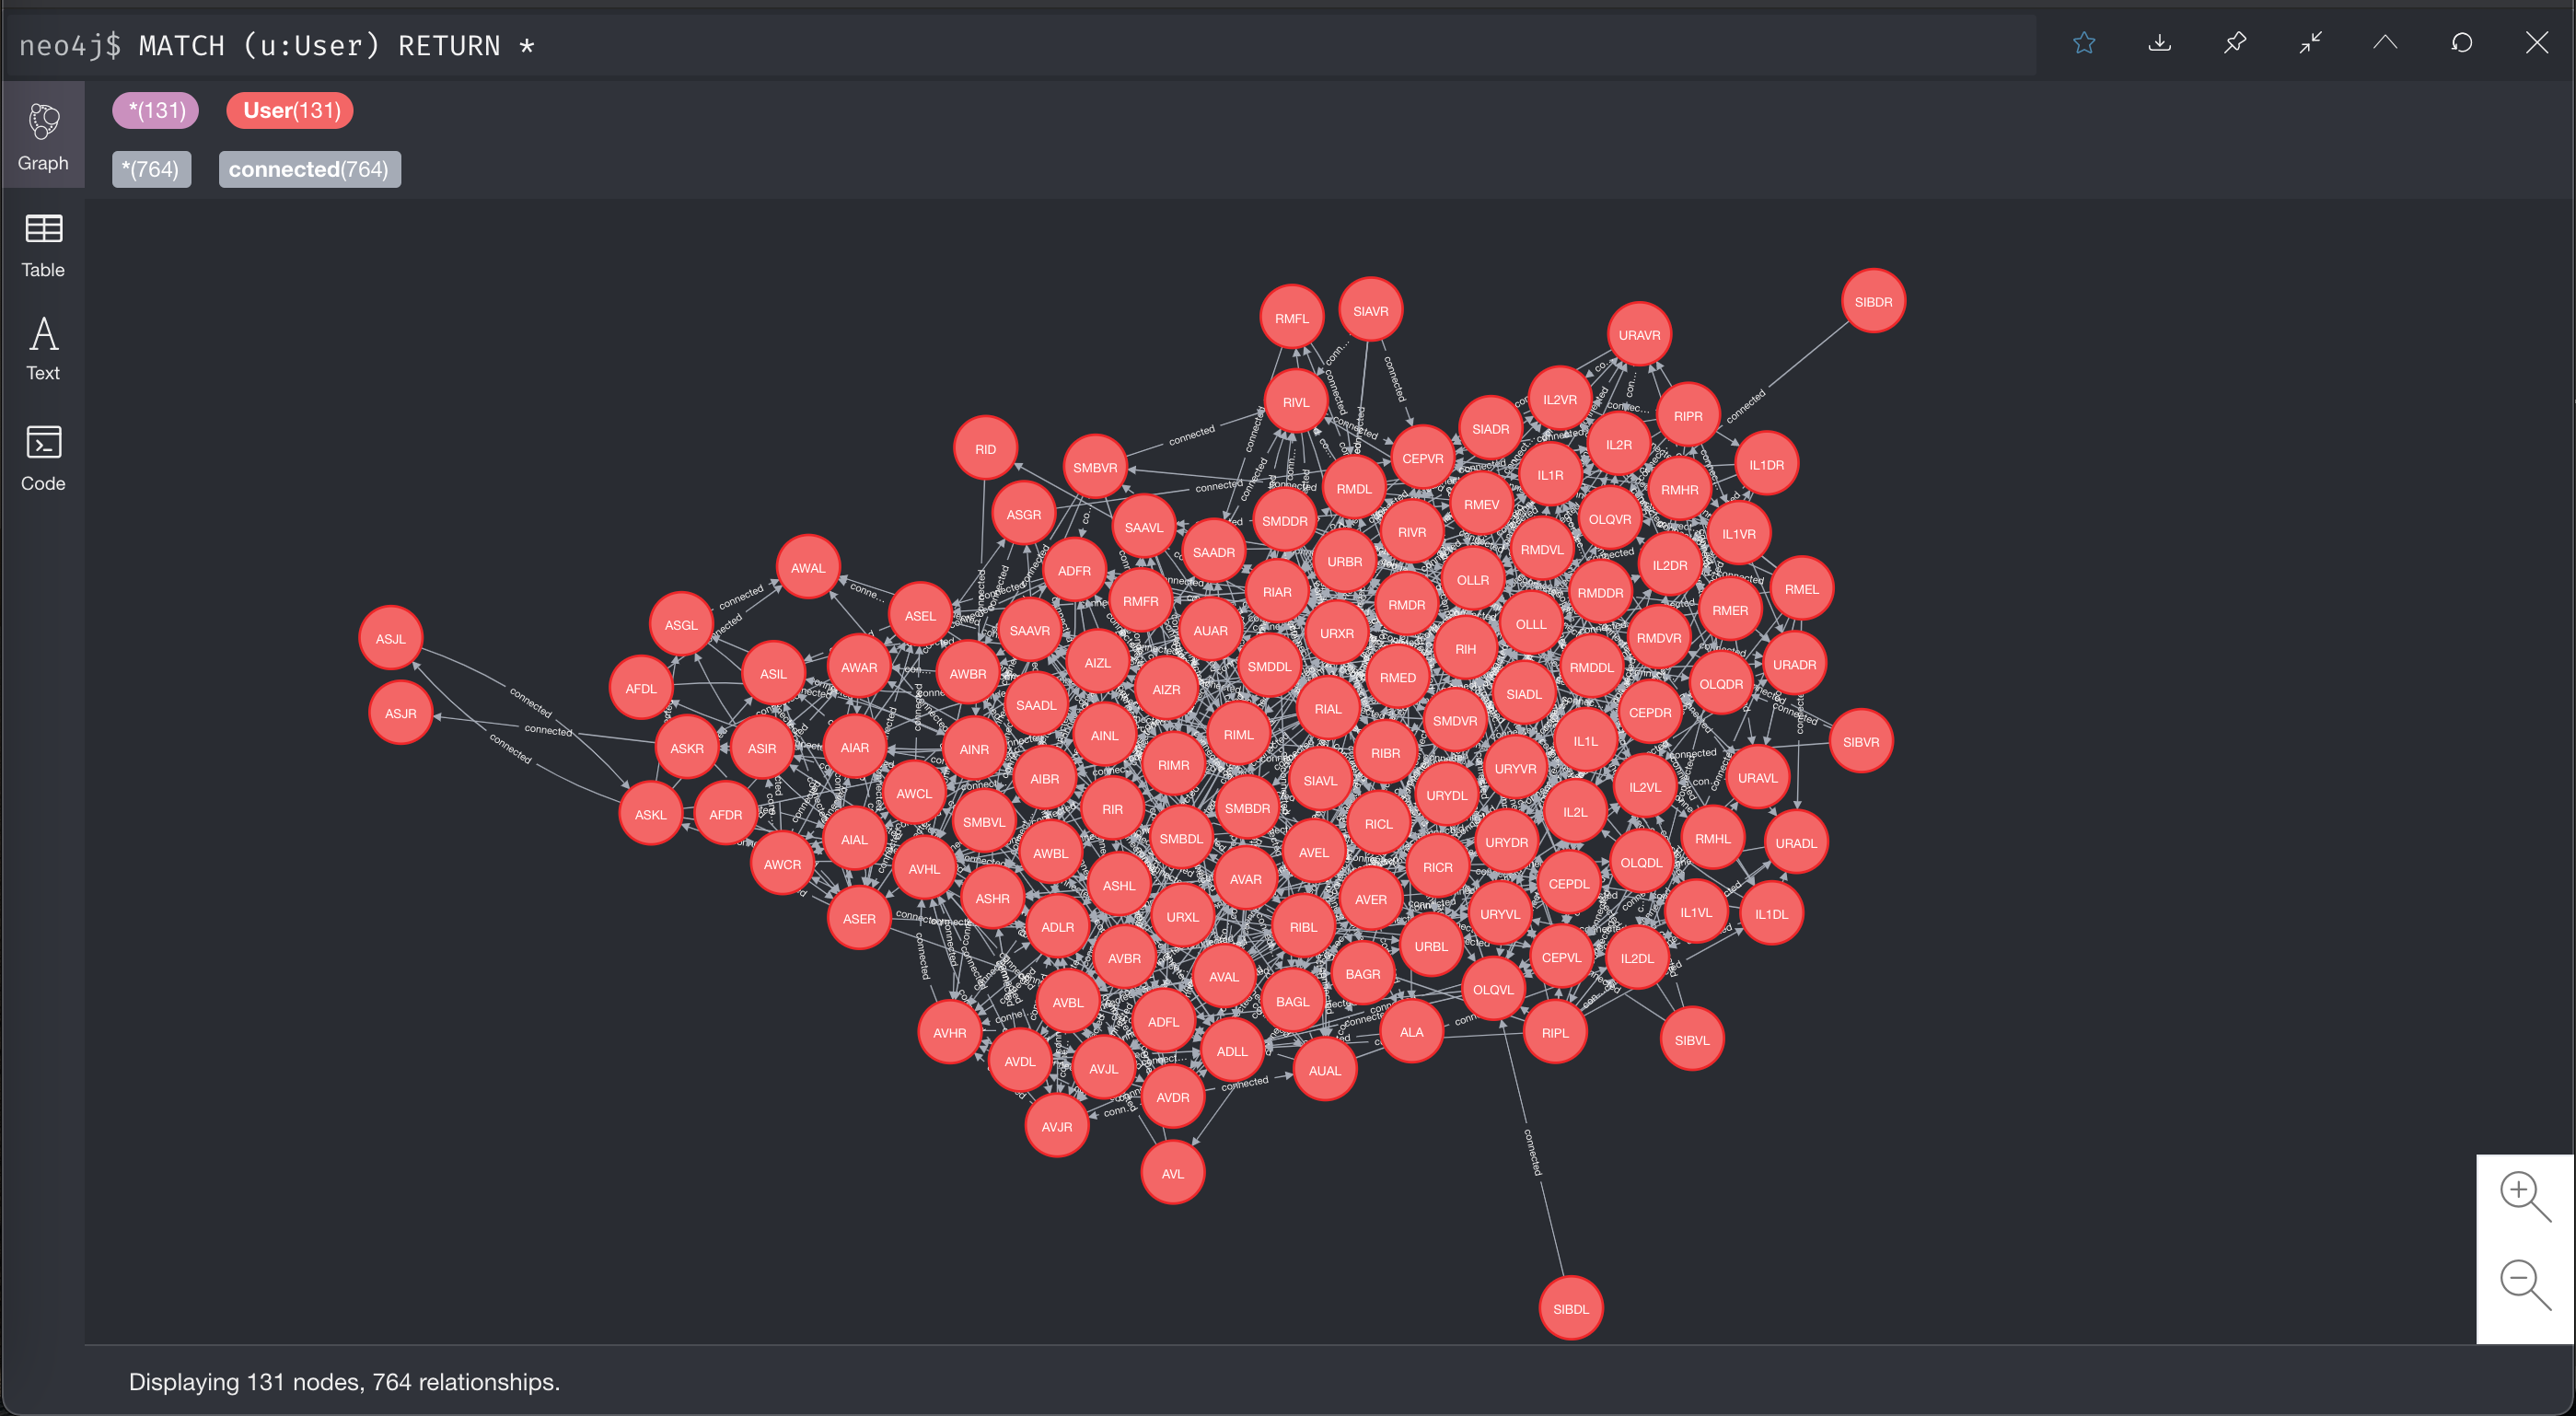
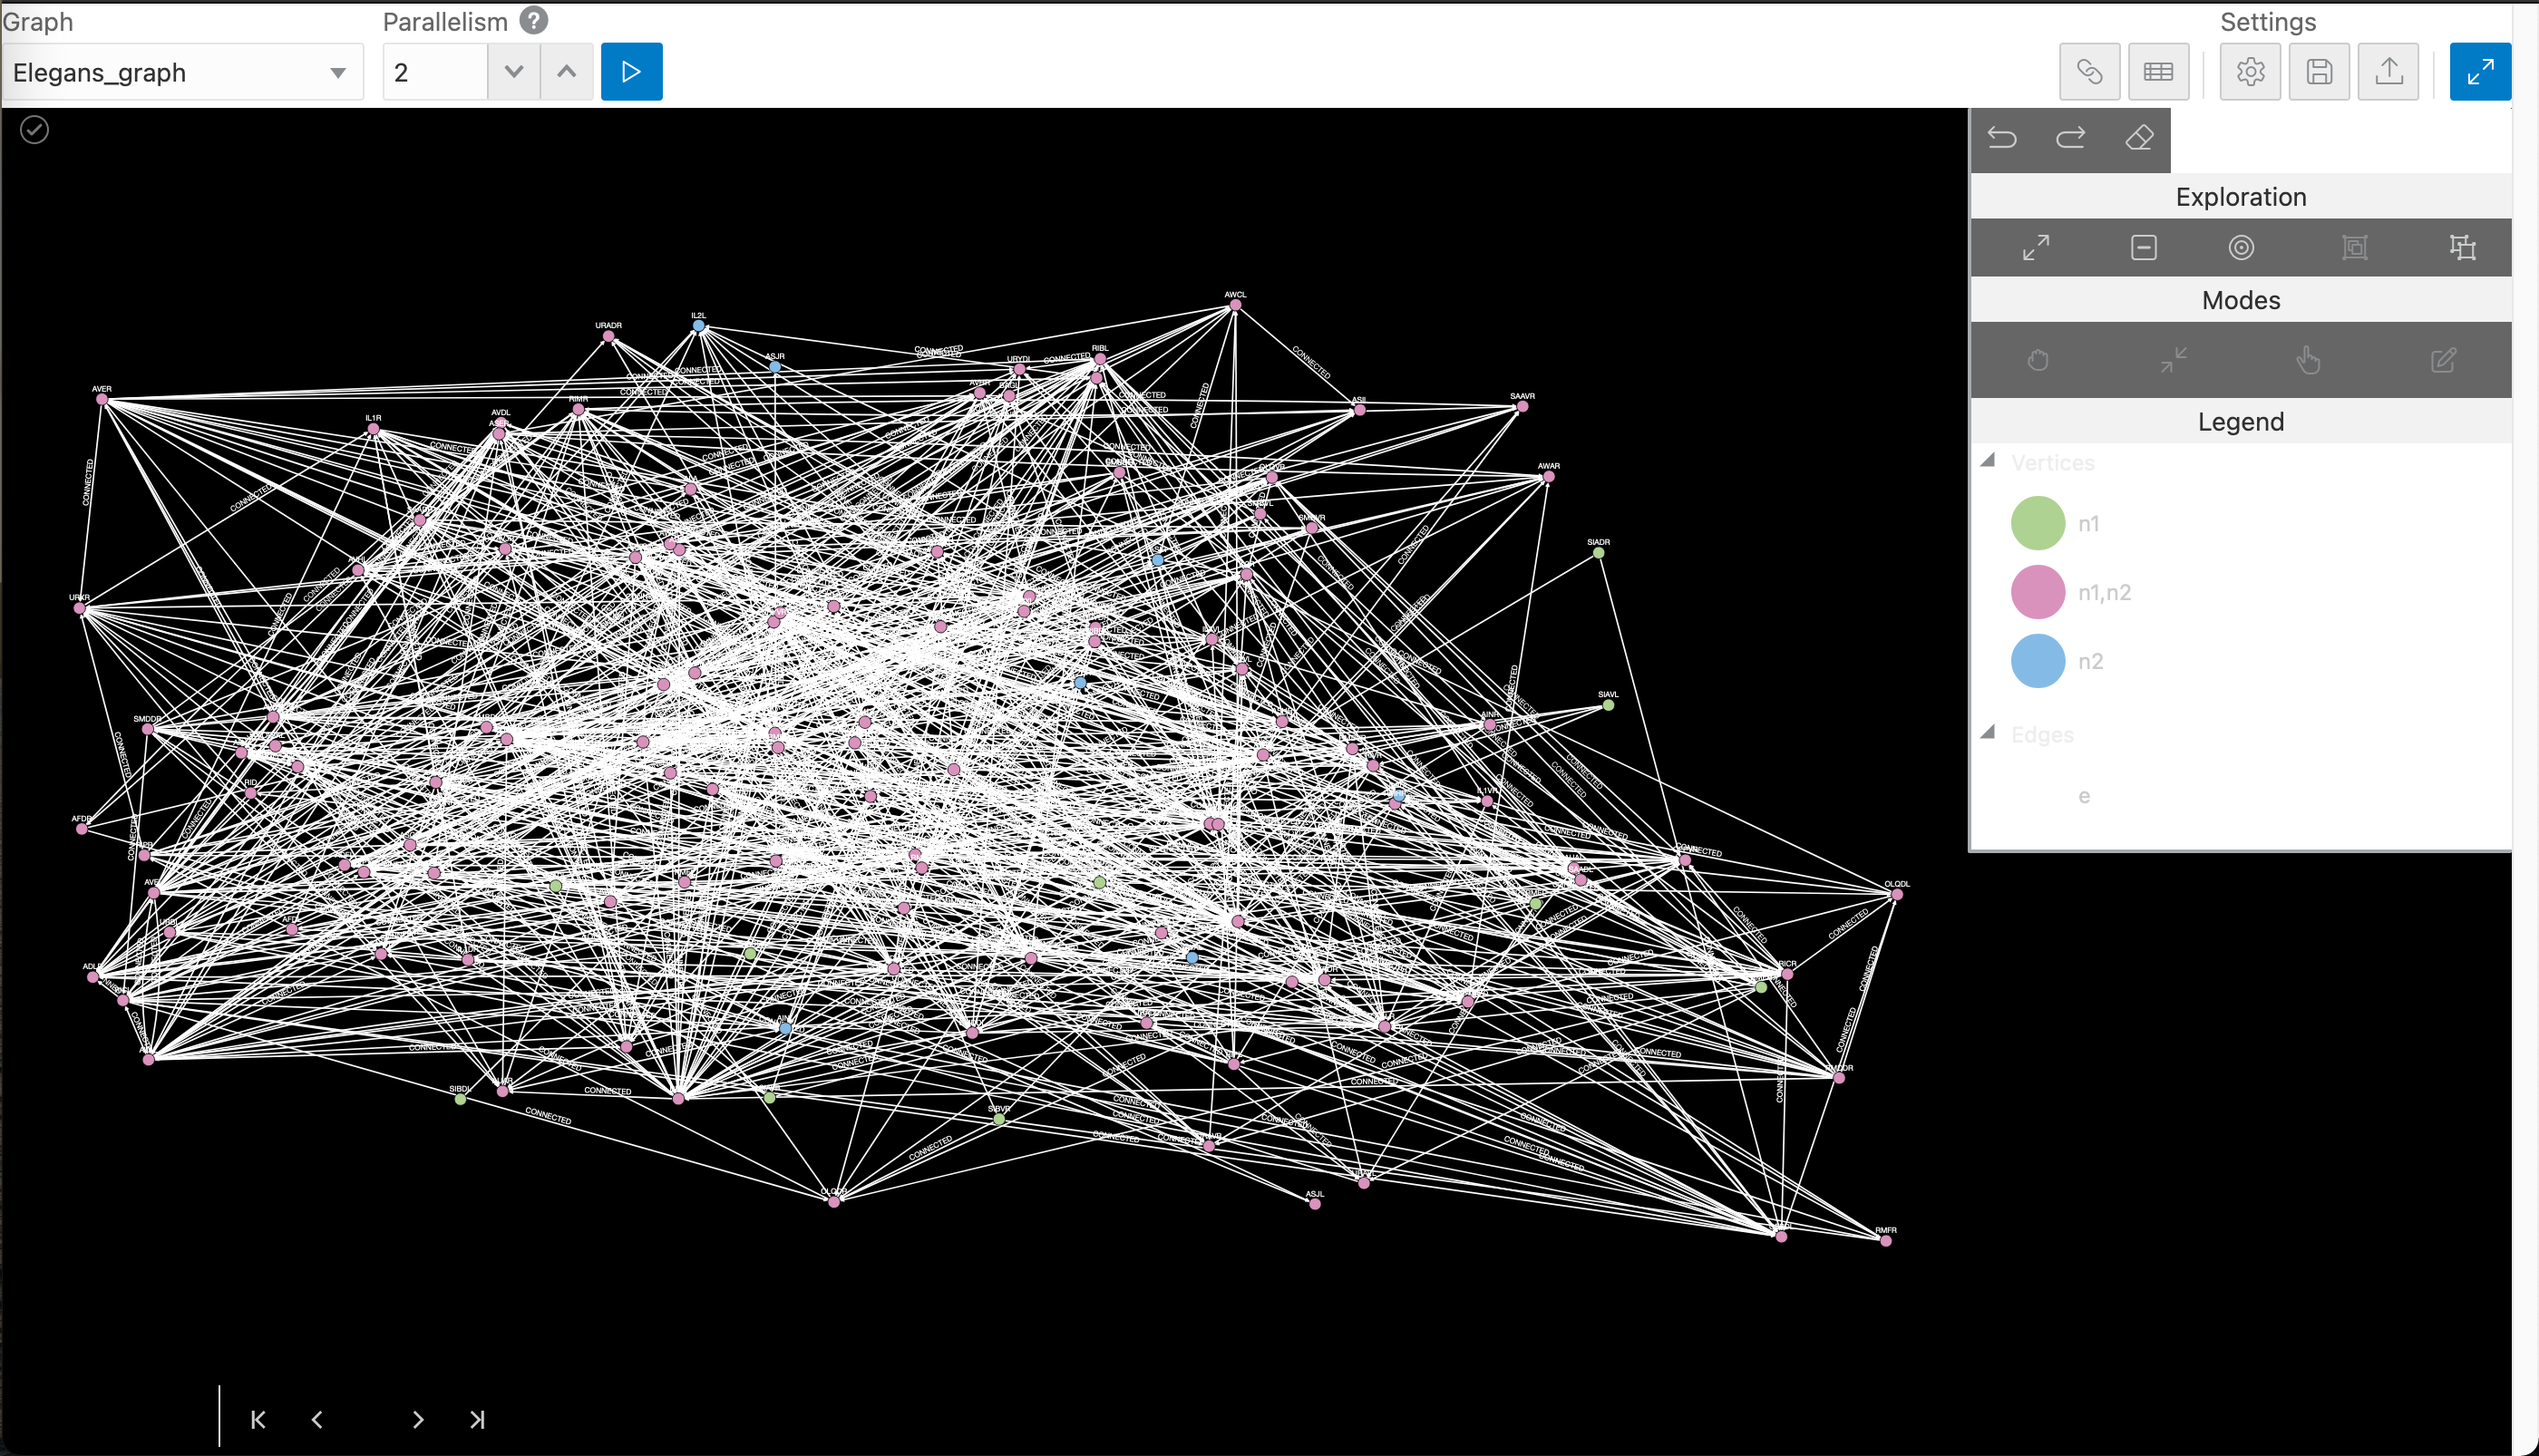
2.3.1 C.elegansを可視化
もっともシンプルなCypherクエリを投げると、下図のような可視化になります。
特に可視化の設定などをいじってないにも関わらずこれだけの可視化ができるのはとても便利です。
2.3.2 いくつかアルゴリズムを試行
2.3.2.1 次数中心性(特定のノードに関連するエッジの多さ)
エッジの多さを計算するためにEdge数をCOUNTします。
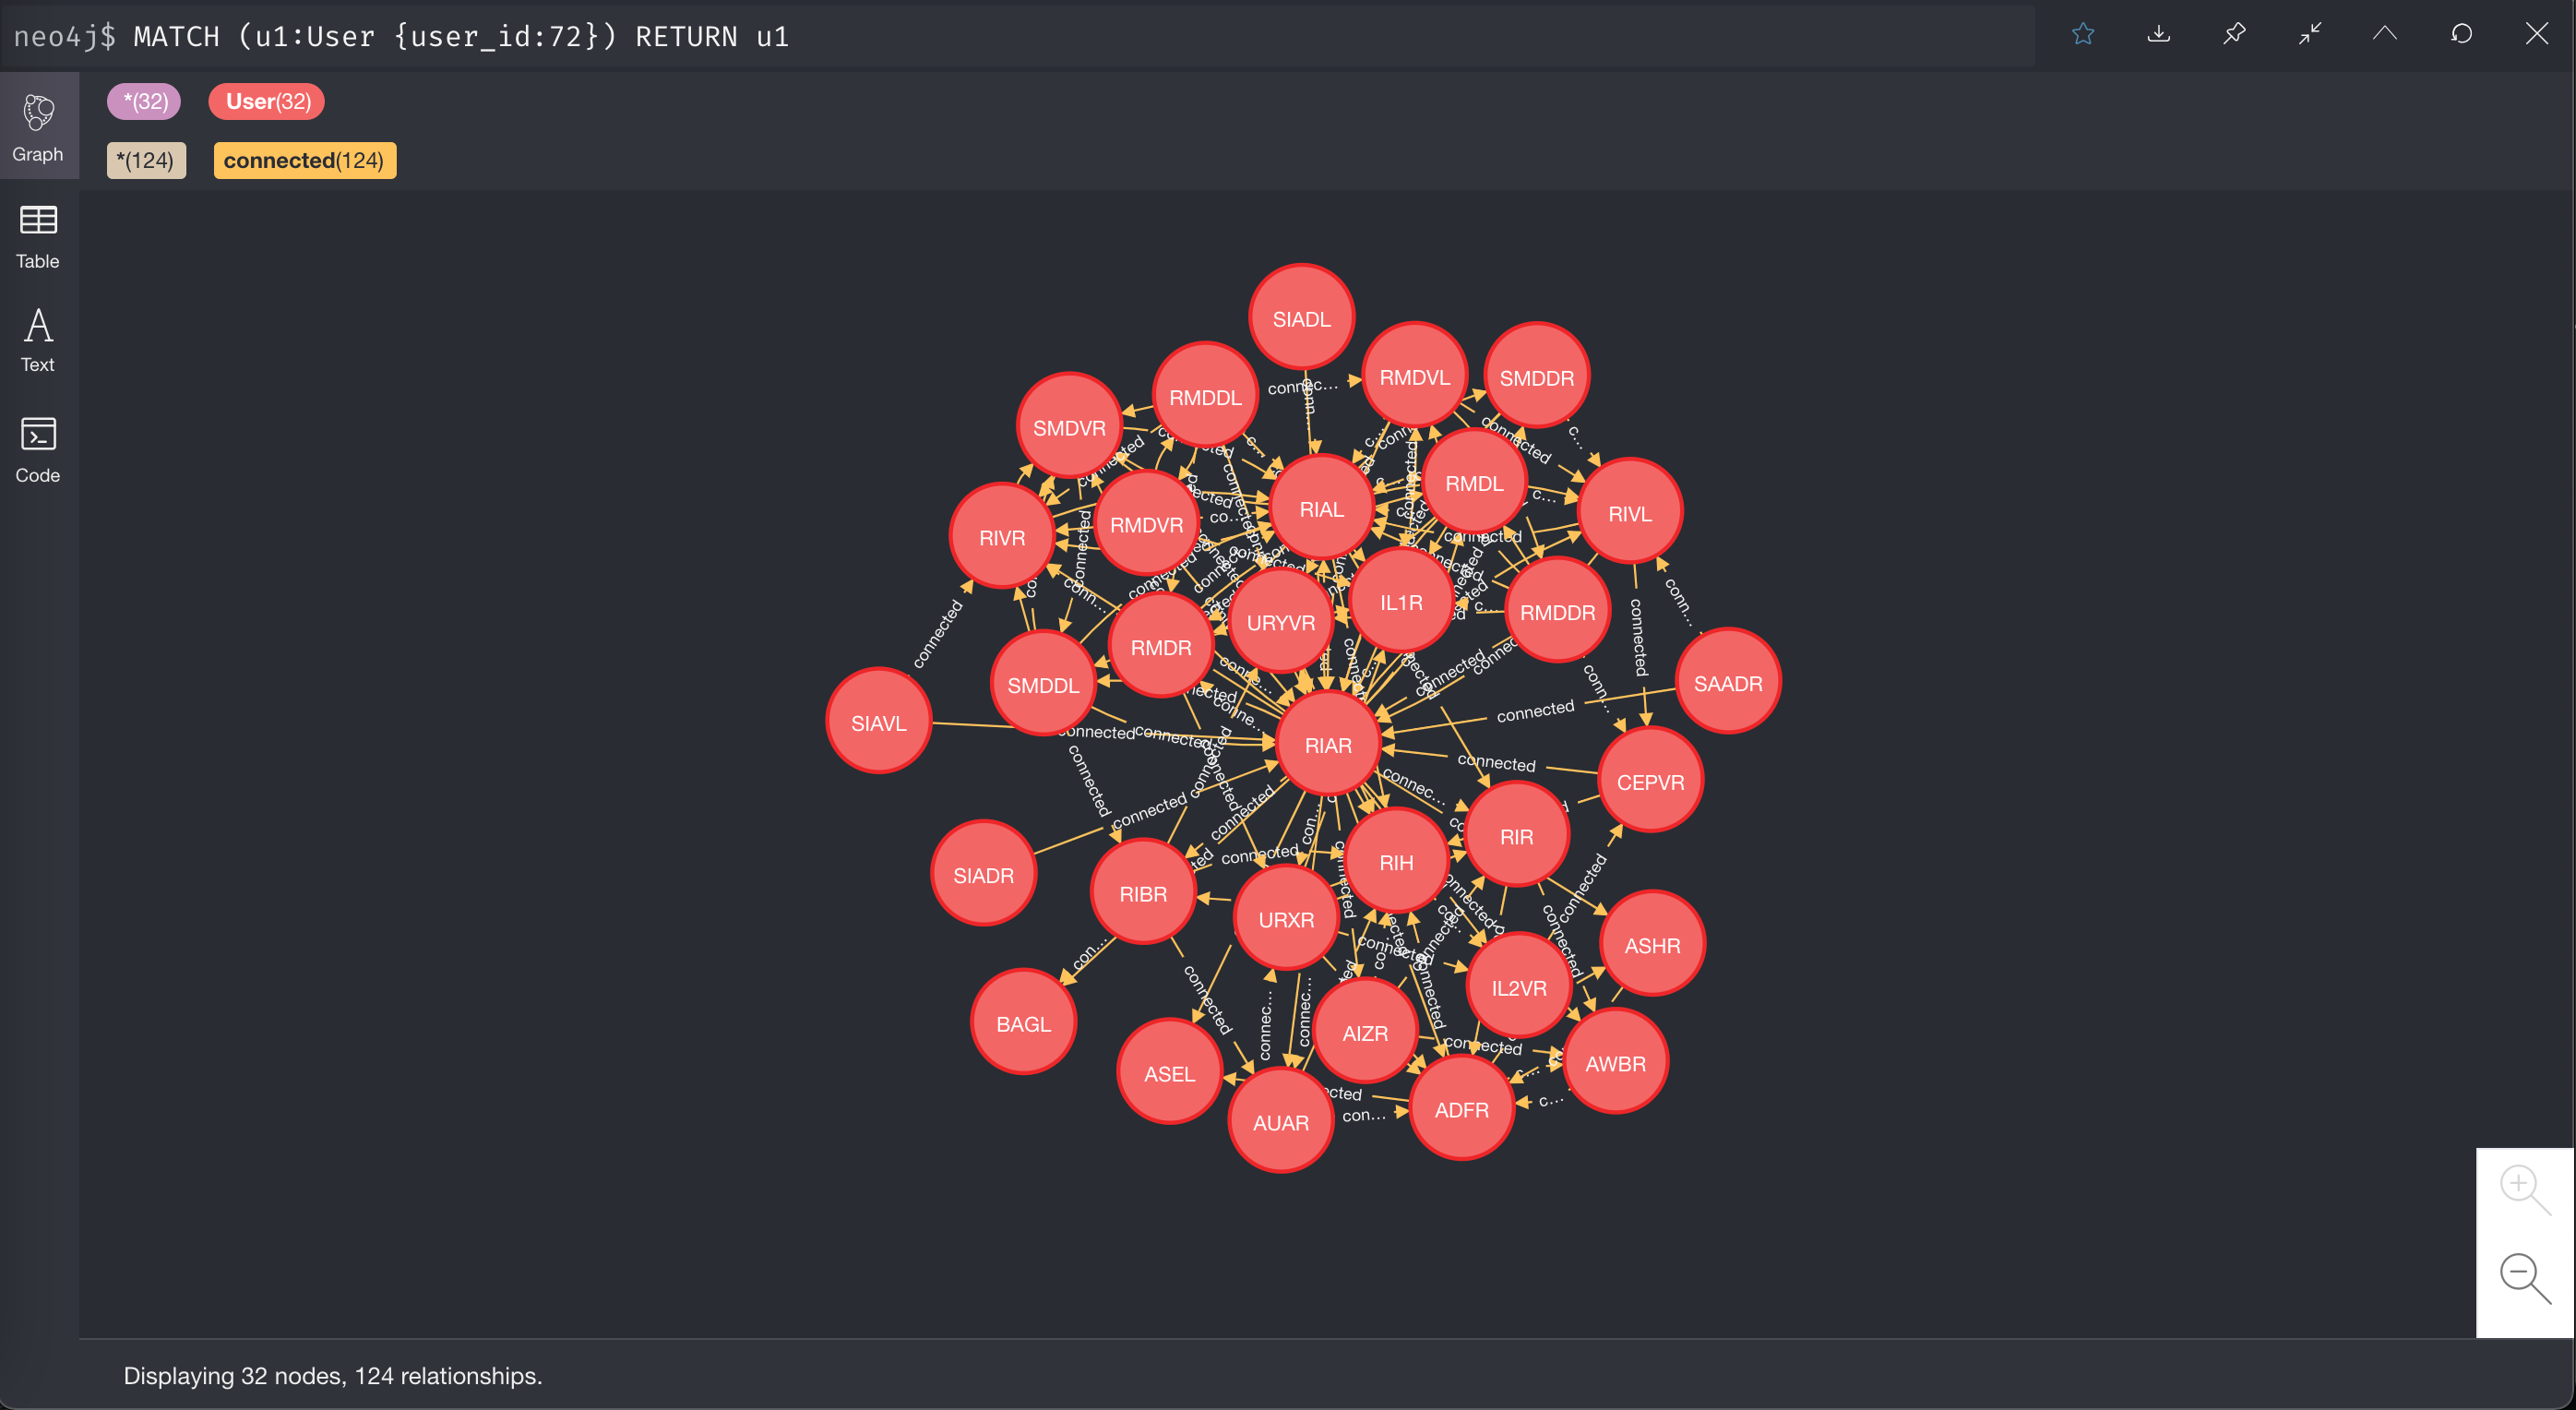
今回のクエリにより、user_id=72のものが最も高いノードとなることがわかります。
MATCH (u1:User)-[e:connected]->(u2:User)
  RETURN u1, count(e) AS degree
  ORDER BY degree
  DESC LIMIT 3
//[結果]
╒══════════════════════════════════════════════════════════════════════╤════════╕
│"u1"                                                                  │"degree"│
╞══════════════════════════════════════════════════════════════════════╪════════╡
│{"name":"RIAR","cord_y":-0.0046538271360000005,"user_id":72,"cord_x":0│22      │
│.08989234568832001}                                                   │        │
├──────────────────────────────────────────────────────────────────────┼────────┤
│{"name":"RIAL","cord_y":-0.00393520658304,"user_id":71,"cord_x":0.0895│21      │
│2595038912001}                                                        │        │
├──────────────────────────────────────────────────────────────────────┼────────┤
│{"name":"AVER","cord_y":0.00318419750784,"user_id":35,"cord_x":0.08401│20      │
│382717568001}                                                         │        │
上記の結果から、user_id=72のノードをフィルタしたクエリを投げてみます。
"RIAR"というNAMEプロパティを持つNODE周りのエッジ数が多いことが読み取れます。
2.3.2.2 コミュニティ検出(グラフ上でのクラスタリング)
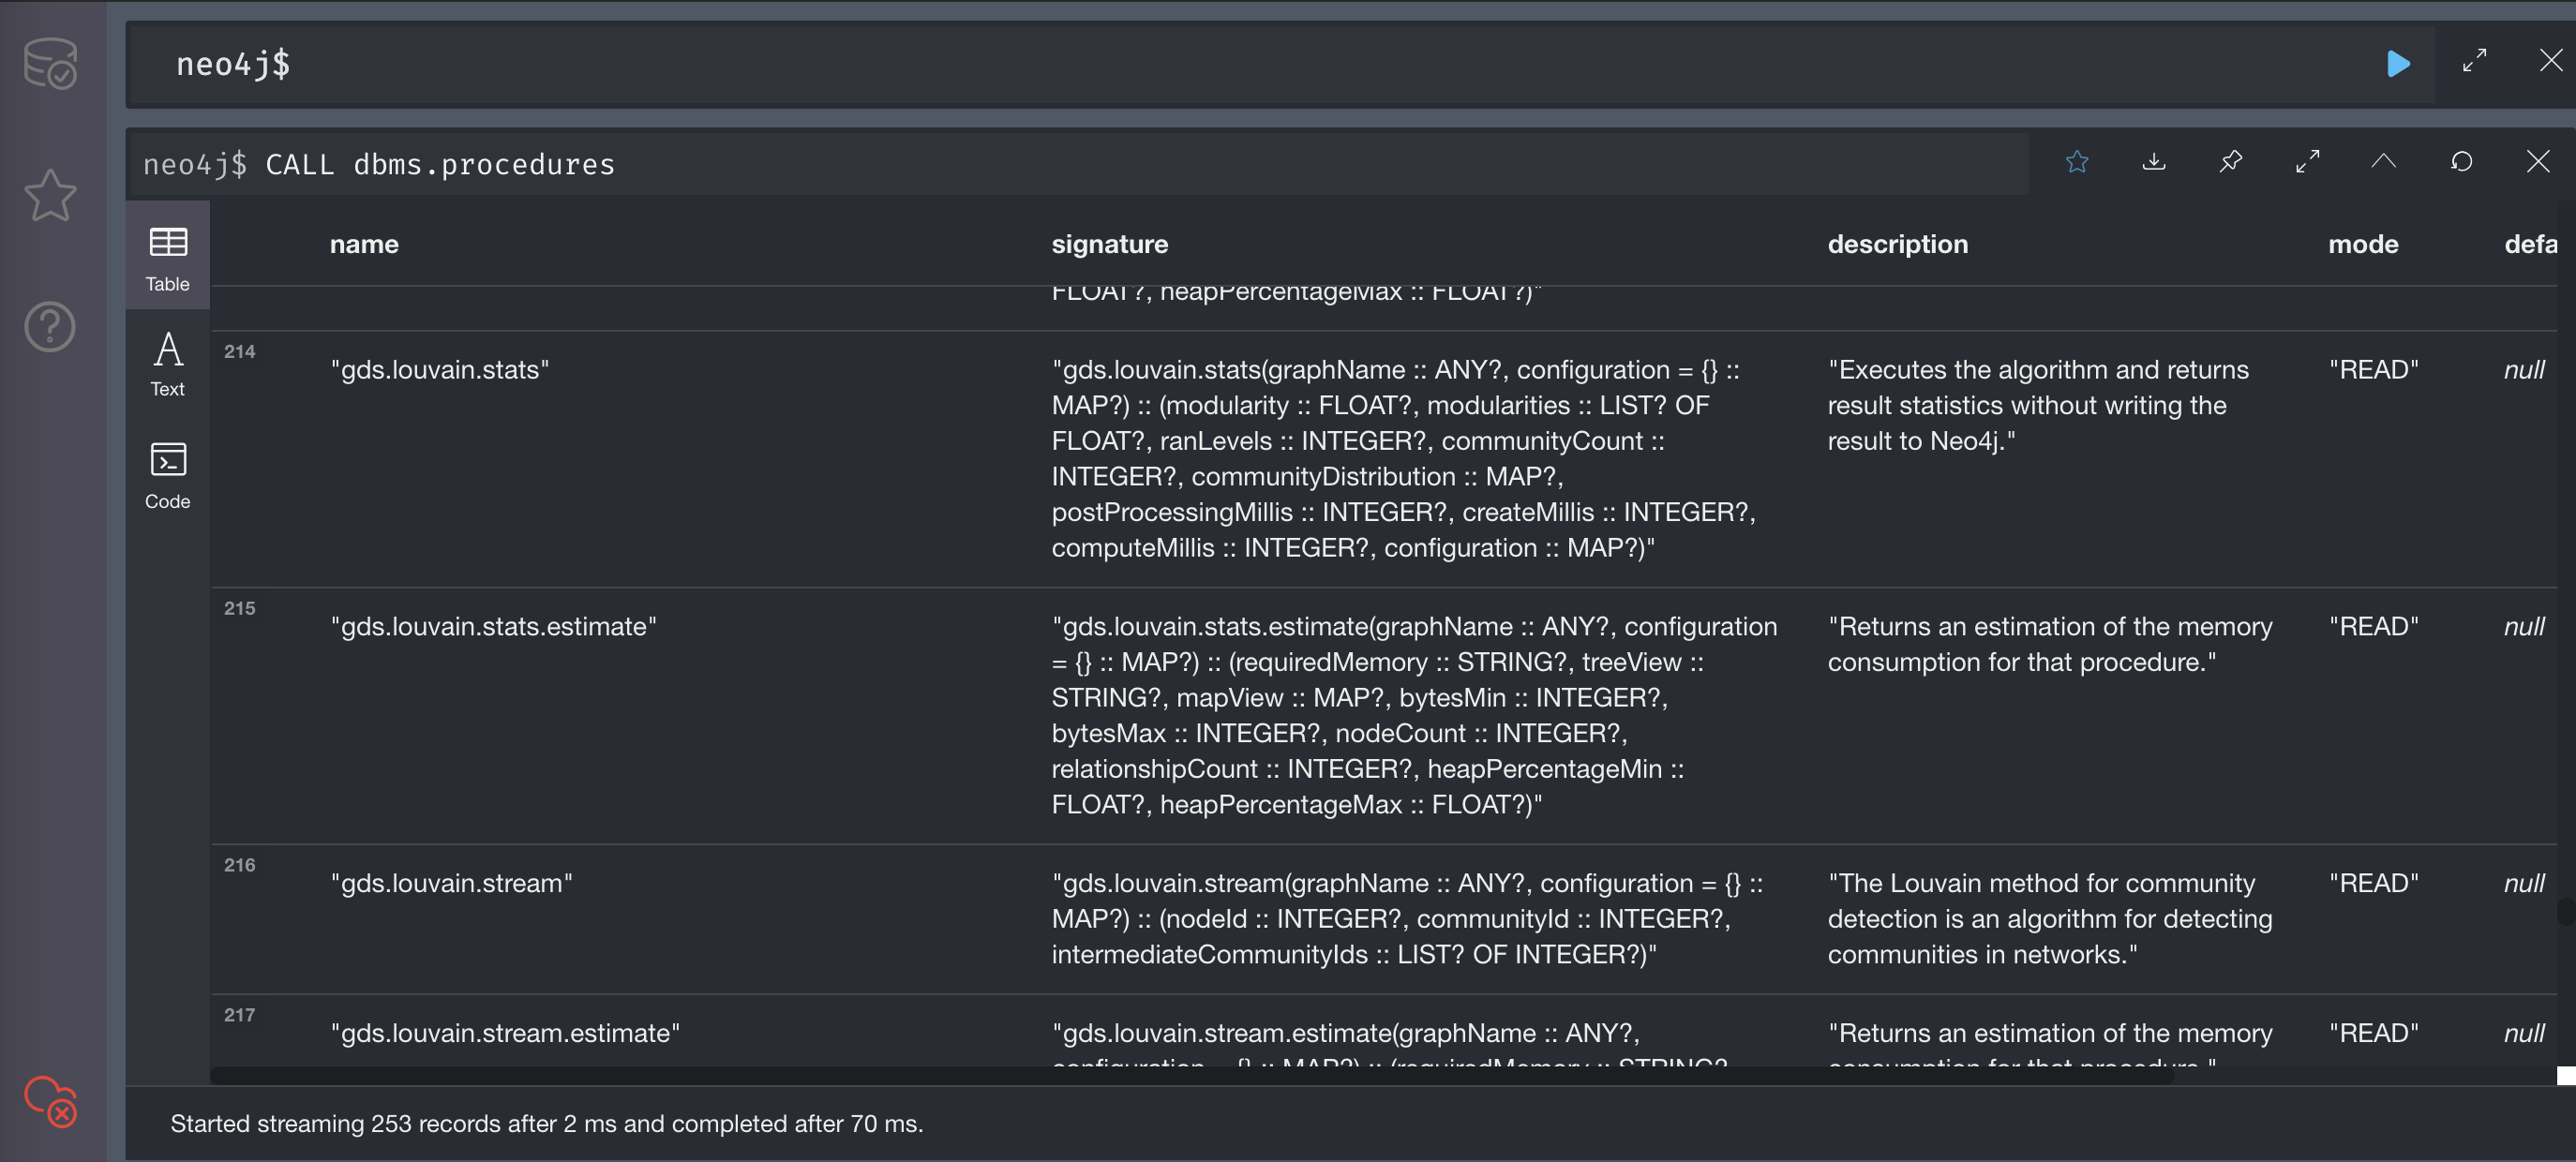
コミュニティ検出のアルゴリズムを使用するために、/var/lib/neo4j/plugins にプラグイン(.jar)を入れます。マニュアルを見ると、graph-algorithms-algo-3.5.4.0.jar (NG: https://github.com/neo4j-contrib/neo4j-graph-algorithms/releases) は、現在depricatedとありました。今回のNeo4jのVersionでdeprecated版を使ったところ、Neo4jが立ち上がリませんでした(ログを見るとわかります)。そのため、下記の Neo4j Graph Data Science Library( GDS )を使用します。ダウンロードして.jarを/var/lib/neo4j/plugins配下に入れます。
[root@ip-172-31-40-233 tmp]# cd /var/lib/neo4j/plugins
[root@ip-172-31-40-233 plugins]# ls
README.txt  neo4j-graph-data-science-1.4.1-standalone.jar

[root@ip-172-31-40-233 plugins]# vim /etc/neo4j/neo4j.conf
--[Before]
# dbms.security.procedures.unrestricted=my.extensions.example,my.procedures.*
# dbms.security.procedures.allowlist=apoc.coll.*,apoc.load.*,gds.*

--[After]
dbms.security.procedures.unrestricted=gds.*
dbms.security.procedures.allowlist=gds.*

[root@ip-172-31-40-233 plugins]# systemctl start neo4j
下記のdbms.procedureでgdsが入ったことを確認できます。
CALL gds.graph.create(
    'C_elegan_Graph',
    'User',
    {
        connected: {
            orientation: 'NATURAL' //向きを指定
        }
    },{
        nodeProperties: 'cord_y'
    }
)
これで、C_elegan_Graphという名前でカタログに登録されたので、GDSが使えるようになります。今回はアルゴリズム: louvainを用います。モジュラリティ(分割されたコミュニティ内のエッジの数と、コミュニティ間同士のエッジの数との比較により、高密度でサブセットを形成しているかどうか)も算出します。
CALL gds.louvain.stats('C_elegan_Graph')
YIELD communityCount
// 結果
╒════════════════╕
│"communityCount"│
╞════════════════╡
│10              │
└────────────────┘


CALL gds.louvain.mutate('C_elegan_Graph', { mutateProperty: 'communityId' })
YIELD communityCount, modularity, modularities
// 結果
╒════════════════╤══════════════════╤════════════════════╕
│"communityCount"│"modularity"      │"modularities"      │
╞════════════════╪══════════════════╪════════════════════╡
│10              │0.2876531619199035│[0.2876531619199035]│
└────────────────┴──────────────────┴────────────────────┘
2.3.2.3 グラフエンべディング(Graph Embedding)
グラフエンベディング(グラフ上の性質を反映させるように、ノードごとに数値ベクトルを割り当てる)も試してみます。ここでは2次元にします。
CALL gds.alpha.node2vec.stream('C_elegan_Graph', {walkLength: 50,walksPerNode:20,embeddingDimension: 2})

//結果
╒════════╤════════════════════════════════════════════╕
│"nodeId"│"embedding"                                 │
╞════════╪════════════════════════════════════════════╡
│171     │[-0.5261988639831543,-1.1787532567977905]   │
├────────┼────────────────────────────────────────────┤
│172     │[-0.3521956503391266,-1.2334128618240356]   │
├────────┼────────────────────────────────────────────┤
│173     │[-1.0288382768630981,-1.0470720529556274]   │
├────────┼────────────────────────────────────────────┤
│174     │[0.7258012294769287,-1.7890225648880005]    │
3. Oracle Graph Server & Client ( PGX )
3.1 データセット説明 (RDBMS ⇨ Graph Server(PGX)へ)
Neo4jと同じく 2.1 のデータセットを用います。
オブジェクトストレージから外部表として、Autonomous DBに格納します。
※ Neo4j同様に、ローカルファイルとしてグラフにロードすることも可能であるが、今回はDBからのAuto Reflesh機能を試したいため、いったんDBへリレーショナル形式で格納
3.2 OCI上でPGXインストール (pgx.confなど)
3.2.1 Compute(VM)環境を構築
[opc@kix-graph-server ~]$ cat /etc/oracle-release
Oracle Linux Server release 7.9
[opc@kix-graph-server ~]$ sudo su
[root@kix-graph-server opc]#
[root@kix-graph-server ~]# java -version
java version "15.0.2" 2021-01-19
Java(TM) SE Runtime Environment (build 15.0.2+7-27)
Java HotSpot(TM) 64-Bit Server VM (build 15.0.2+7-27, mixed mode, sharing)
今回は現時点で最新版のjdk-15.0.2_linux-x64_bin.rpmをインストールしておきます。
LTSのJava SE11 (LTS)でも可能です。
3.2.2 Oracle Graph Server 21.1.0 をCompute(VM)にインストール
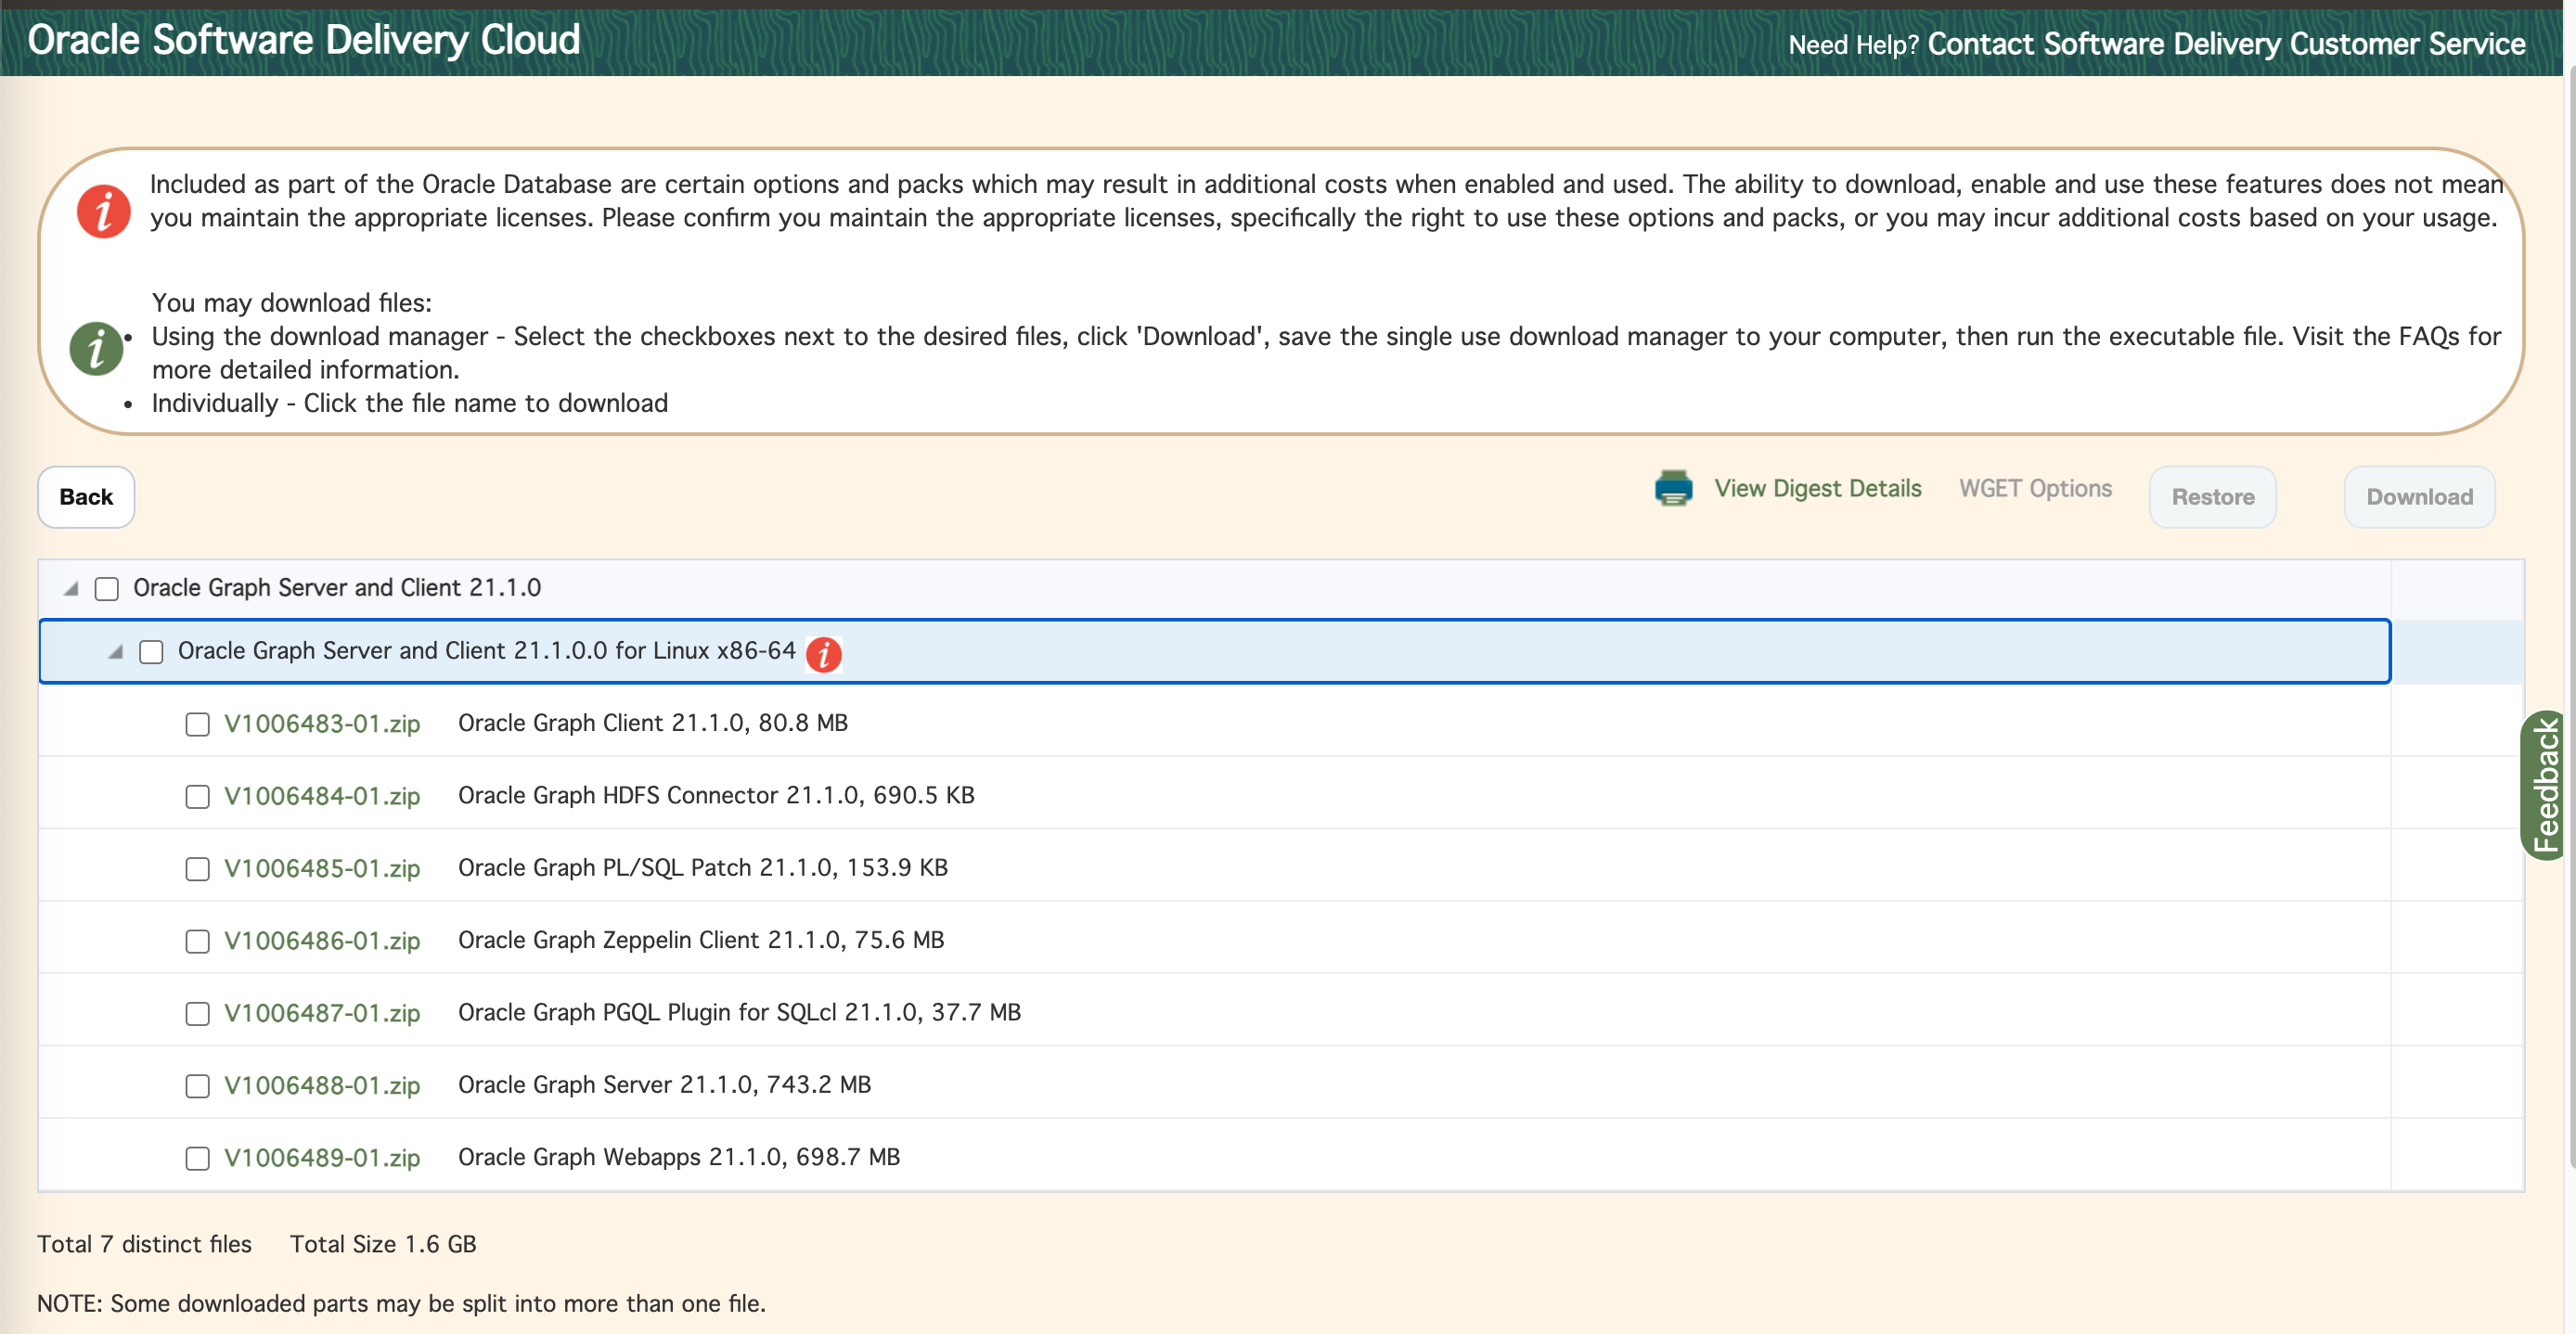
edeliveryからOracle Graph Server and Client 21.1.0に関連するファイルをインストールできる。
[root@kix-graph-server tmp]# rpm -ivh oracle-graph-21.1.0.x86_64.rpm
準備しています...              ################################# [100%]
更新中 / インストール中...
1:oracle-graph-0:21.1.0-0          ################################# [100%]
Starting post-installation process ...
1. Creating temp directory /opt/oracle/graph/pgx/tmp_data
2. Creating log directory /var/log/oracle/graph
3. Installing Python client ...
3. Generating demo certificate ...
`ca_certificate.pem' の所有者を root:root から oraclegraph:oraclegraph へ変更しました
`ca_key.pem' の所有者を root:root から oraclegraph:oraclegraph へ変更しました
`server_certificate.pem' の所有者を root:root から oraclegraph:oraclegraph へ変更しました
`server_key.pem' の所有者を root:root から oraclegraph:oraclegraph へ変更しました
`server_key_traditional.pem' の所有者を root:root から oraclegraph:oraclegraph へ変更しました
Certificates successfully generated in /etc/oracle/graph
Post-installation process completed
3.2.3 Graph用のユーザ(pgx_user)を作成してoraclegraphグループへ追加
[root@kix-graph-server ~]# useradd pgx_user
[root@kix-graph-server ~]# id pgx_user
uid=1001(pgx_user) gid=1001(pgx_user) groups=1001(pgx_user)

[root@kix-graph-server ~]# usermod -a -G oraclegraph pgx_user
[root@kix-graph-server ~]# id pgx_user
uid=1001(pgx_user) gid=1001(pgx_user) groups=1001(pgx_user),992(oraclegraph)
3.2.4 AutonomousDBのWalletをComputeに配置
[root@kix-graph-server tmp]# mkdir -p /etc/wallet
[root@kix-graph-server tmp]# mv Wallet_PGXATP_oraora.zip
[root@kix-graph-server wallet]# unzip Wallet_PGXATP_oraora.zip
Archive:  Wallet_PGXATP_oraora.zip
  inflating: README
  inflating: cwallet.sso
  inflating: tnsnames.ora
  inflating: truststore.jks
  inflating: ojdbc.properties
  inflating: sqlnet.ora
  inflating: ewallet.p12
  inflating: keystore.jks
[root@kix-graph-server wallet]# ls
README                    cwallet.sso  keystore.jks      sqlnet.ora    truststore.jks
Wallet_PGXATP_oraora.zip  ewallet.p12  ojdbc.properties  tnsnames.ora
3.2.5 pgx.conf/server.confを編集する
[pgx_user@kix-graph-server ~]# cat /etc/oracle/graph/pgx.conf
{
  "allow_idle_timeout_overwrite": true,
  "allow_local_filesystem": false,
  "allow_task_timeout_overwrite": true,
  "authorization": [{
    "pgx_role": "GRAPH_ADMINISTRATOR",
    "pgx_permissions": []
  }, {
    "pgx_role": "GRAPH_DEVELOPER",
    "pgx_permissions": []
  }],
  "enable_gm_compiler": true,
  "enterprise_scheduler_config": {
    "analysis_task_config": {
      "priority": "MEDIUM",
      "weight": "<no-of-CPUs>",
      "max_threads": "<no-of-CPUs>"
    },
    "fast_analysis_task_config": {
      "priority": "HIGH",
      "weight": 1,
      "max_threads": "<no-of-CPUs>"
    },
    "num_io_threads_per_task": "<no-of-CPUs>"
  },
  "graph_algorithm_language": "JAVA",
  "in_place_update_consistency_model": "ALLOW_INCONSISTENCIES",
  "java_home_dir": "<system-java-home-dir>",
  "max_active_sessions": 1024,
  "max_queue_size_per_session": -1,
  "max_snapshot_count": 0,
  "memory_cleanup_interval": 60,
  "preload_graphs": [],
  "pgx_realm": {
    "implementation": "oracle.pg.identity.DatabaseRealm",
    "options": {
      "jdbc_url": "jdbc:oracle:thin:@pgxatp_low?TNS_ADMIN=/etc/wallet",←ココ
      "token_expiration_seconds": 3600,
      "connect_timeout_milliseconds": 10000,
      "connection_pool_cleanup_interval_secs": 10,
      "max_pool_size": 64,
      "max_num_users": 512,
      "max_num_token_refresh": 24
    }
  },
  "release_memory_threshold": 0.25,
  "session_idle_timeout_secs": 14400,
  "session_task_timeout_secs": 0,
  "strict_mode": true,
  "tmp_dir": "/tmp"
}
[pgx_user@kix-graph-server ~]$ cd /etc/oracle/graph/
[pgx_user@kix-graph-server graph]$ ls
ca_certificate.pem  log4j2-server.xml  pgx.conf          server_certificate.pem  server_key.pem
ca_key.pem          log4j2.xml         server.auth.conf  server.conf             wallets
[pgx_user@kix-graph-server graph]$ cat server.conf
{
  "port": 7007,
  "enable_tls": false,←ココ
  "enable_client_authentication": false,
  "server_private_key": "/etc/oracle/graph/server_key.pem",
  "server_cert": "/etc/oracle/graph/server_certificate.pem",
  "ca_certs": [],
  "working_dir": "/opt/oracle/graph/pgx/tmp_data"
}
3.2.6 Graph Serverの認証認可の設定
SQL> CREATE ROLE graph_developer;
ロールが作成されました。

SQL> CREATE ROLE graph_administrator;
ロールが作成されました。

SQL> CREATE USER DB_PGX_USER IDENTIFIED BY パスワード TEMPORARY TABLESPACE TEMP;
ユーザーが作成されました。

SQL> GRANT CREATE SESSION TO DB_PGX_USER;
権限付与が成功しました。

SQL> GRANT graph_developer TO DB_PGX_USER;
権限付与が成功しました。

SQL> GRANT graph_administrator TO DB_PGX_USER;
権限付与が成功しました。

-- ※確認用SQL(ADMINで)
-- SELECT * FROM DBA_SYS_PRIVS where grantee='DB_PGX_USER';
-- SELECT * FROM dba_role_privs where grantee='DB_PGX_USER';
DECLARE
  PRAGMA AUTONOMOUS_TRANSACTION;
  role_exists EXCEPTION;
  PRAGMA EXCEPTION_INIT(role_exists, -01921);
  TYPE graph_roles_table IS TABLE OF VARCHAR2(50);
  graph_roles graph_roles_table;
BEGIN
  graph_roles := graph_roles_table(
    'GRAPH_DEVELOPER',
    'GRAPH_ADMINISTRATOR',
    'PGX_SESSION_CREATE',
    'PGX_SERVER_GET_INFO',
    'PGX_SERVER_MANAGE',
    'PGX_SESSION_READ_MODEL',
    'PGX_SESSION_MODIFY_MODEL',
    'PGX_SESSION_NEW_GRAPH',
    'PGX_SESSION_GET_PUBLISHED_GRAPH',
    'PGX_SESSION_COMPILE_ALGORITHM',
    'PGX_SESSION_ADD_PUBLISHED_GRAPH');
  FOR elem IN 1 .. graph_roles.count LOOP
  BEGIN
    dbms_output.put_line('create_graph_roles: ' || elem || ': CREATE ROLE ' || graph_roles(elem));
    EXECUTE IMMEDIATE 'CREATE ROLE ' || graph_roles(elem);
  EXCEPTION
    WHEN role_exists THEN
      dbms_output.put_line('create_graph_roles: role already exists. continue');
    WHEN OTHERS THEN
      RAISE;
    END;
  END LOOP;
EXCEPTION
  when others then
    dbms_output.put_line('create_graph_roles: hit error ');
    raise;
END;
/
3.2.7 Graph Server(PGX)の起動
[root@kix-graph-server ~]# systemctl start pgx
[root@kix-graph-server ~]# systemctl status pgx
● pgx.service - Oracle Graph In-Memory Server
   Loaded: loaded (/etc/systemd/system/pgx.service; disabled; vendor preset: disabled)
   Active: active (running) since 土 2021-01-23 11:14:20 GMT; 1s ago
 Main PID: 18792 (bash)
   CGroup: /system.slice/pgx.service
           ├─18792 /bin/bash start-server
           └─19196 java -Dlog4j.configurationFile=/etc/oracle/graph/log4j2-server.xml -Doracle.jdbc.fanEnabled=false -cp ...

 1月 23 11:14:20 kix-graph-server systemd[1]: Started Oracle Graph In-Memory Server.
 1月 23 11:14:20 kix-graph-server bash[18792]: tput: No value for $TERM and no -T specified
 1月 23 11:14:20 kix-graph-server bash[18792]: tput: No value for $TERM and no -T specified
 1月 23 11:14:20 kix-graph-server bash[18792]: tput: No value for $TERM and no -T specified
 1月 23 11:14:20 kix-graph-server bash[18792]: tput: No value for $TERM and no -T specified
[root@kix-graph-server ~]#
3.2.8 Graph Server接続用のトークンを取得
[pgx_user@kix-graph-server ~]$ curl -X POST -H 'Content-Type: application/json' -d '{"username": "db_pgx_user", "password": "パスワード"}' http://localhost:7007/auth/token
{"access_token":"eyJraWQiOiJ...6n8Q","token_type":"bearer","expires_in":14400}
3.2.9 Graph Serverへ接続
[pgx_user@kix-graph-server ~]$ ls -lah /opt/oracle/graph/bin
total 20K
drwxr-xr-x.  2 root root          66 Jan 23 10:35 .
drwxr-xr-x. 10 root root        4.0K Jan 23 10:35 ..
-rwxr-xr-x.  1 root oraclegraph 2.3K Jan 22 18:07 opg
-rwxr-xr-x.  1 root oraclegraph 2.1K Jan 22 18:07 opg-groovy
-rwxr-xr-x.  1 root oraclegraph 2.3K Jan 22 18:07 opg-jshell
-rwxr-xr-x.  1 root oraclegraph 1.8K Jan 22 18:07 opgpy
[pgx_user@kix-graph-server ~]$
[pgx_user@kix-graph-server ~]$ cd /opt/oracle/graph/bin
[pgx_user@kix-graph-server bin]$ ./opg-jshell --base_url http://localhost:7007
Jan 23, 2021 11:30:49 AM java.util.prefs.FileSystemPreferences$1 run
INFO: Created user preferences directory.

enter authentication token (press Enter for no token):  --[先ほど取得したTokenを貼り付ける]
For an introduction type: /help intro
Oracle Graph Server Shell 21.1.0
Variables instance, session, and analyst ready to use.
opg-jshell>
3.2.10 前述したリレーショナル表(外部表から表作成)を作っておく
GRANT DWROLE to DB_PGX_USER;
GRANT UNLIMITED TABLESPACE to DB_PGX_USER;

-- 外部表用のクレデンシャルを作成
BEGIN
DBMS_CLOUD.CREATE_CREDENTIAL(
credential_name =>'DB_PGX_USER_CRED',
username=>'fmshgj3@gmail.com',
password=>'t[ylRHM47]mr2(RrM#dC');
END;

-- Node表
BEGIN
   DBMS_CLOUD.CREATE_EXTERNAL_TABLE(
   table_name =>'T_NODES',
   credential_name =>'DB_PGX_USER_CRED',
   file_uri_list =>'https://objectstorage.ap-tokyo-1.oraclecloud.com/n/nrp0revii2zt/b/bucket1/o/NODEC_elegans_node.csv',
   format => json_object('type' value 'csv','ignoremissingcolumns' value 'true', 'skipheaders' value '1'),
   column_list => 'id NUMBER, name VARCHAR2(40), posx NUMBER, posy NUMBER');
END;
/

-- Edge表
BEGIN
   DBMS_CLOUD.CREATE_EXTERNAL_TABLE(
   table_name =>'T_EDGES',
   credential_name =>'DB_PGX_USER_CRED',
   file_uri_list =>'https://objectstorage.ap-tokyo-1.oraclecloud.com/n/nrp0revii2zt/b/bucket1/o/EDGEC_elegans_reration.csv',
   format => json_object('type' value 'csv','ignoremissingcolumns' value 'true', 'skipheaders' value '1'),
   column_list => 'from_id NUMBER, to_id NUMBER');
END;

-- 今回のリレーショナル表を作成(Primary key追加)
CREATE TABLE TBL_EDGES AS SELECT * FROM T_NODES;
CREATE TABLE TBL_EDGES AS SELECT * FROM T_EDGES;
ALTER TABLE TBL_NODES ADD PRIMARY KEY(id);
ALTER TABLE T_EDGES ADD PRIMARY KEY(from_id);

-- Primary Keyを追加しない場合、下記が出るため
例外: oracle.pg.rdbms.pgql.PgqlToSqlException:
Table STAGE.T_NODES does not exist or does not have a primary key, please provide one
3.2.11 PGスキーマ(PG Schema)表を作成
[root@kix-graph-server graph]# cat create_pg.pgql
Create Property Graph Elegans_graph
VERTEX TABLES (
  TBL_NODES LABEL NODE PROPERTIES (id, name, posx, posy)
)
EDGE TABLES (
  TBL_EDGES
   SOURCE KEY ( from_id ) REFERENCES TBL_NODES
   DESTINATION KEY ( to_id ) REFERENCES TBL_NODES
   LABEL CONNECTED NO PROPERTIES
)
opg-jshell> var username="DB_PGX_USER";
opg-jshell> var password="パスワード";
opg-jshell> var jdbc_url="jdbc:oracle:thin:@pgxatp_low?TNS_ADMIN=/etc/wallet";
opg-jshell> var conn = DriverManager.getConnection(jdbc_url, username, password);
opg-jshell> var pgql = PgqlConnection.getConnection(conn)
opg-jshell> conn.setAutoCommit(false)
opg-jshell> pgql.prepareStatement(Files.readString(Paths.get("/opt/oracle/graph/create_pg.pgql"))).execute()
opg-jshell> Consumer<String> query = q -> {
...>   try(var s = pgql.prepareStatement(q)){
...>     s.execute();
...>     s.getResultSet().print();
...>   }catch(Exception e){
...>     throw new RuntimeException(e);
...>   }
...> }
opg-jshell> query.accept("select count(n) from Elegans_graph match(n)");
+----------+
| count(n) |
+----------+
| 131      |
+----------+
opg-jshell> query.accept("select count(e) from Elegans_graph match()-[e]->()");
+----------+
| count(e) |
+----------+
| 764      |
+----------+
3.3 PGQLを投げて可視化+アルゴリズム試行
3.3.1 PGスキーマのGraphをPGXへロードする(RDBMS→GraphServer(PGX))
opg-jshell> Supplier<GraphConfig> pgxConfig = () -> { return GraphConfigBuilder.forPropertyGraphRdbms()
...>   .setName("Elegans_graph")
...>   .addVertexProperty("ID", PropertyType.INTEGER)
...>   .addVertexProperty("NAME", PropertyType.STRING)
...>   .addVertexProperty("POSX", PropertyType.FLOAT)
...>   .addVertexProperty("POSY", PropertyType.FLOAT)
...>   .setPartitionWhileLoading(PartitionWhileLoading.BY_LABEL)
...>   .setLoadVertexLabels(true)
...>   .setLoadEdgeLabel(true)
...>   .build(); }
pgxConfig ==> $Lambda$840/0x000000010018c440@656c356c

// readGraphWithPropertiesでAPIでインメモリ側にGraphをもっていく
opg-jshell> var graph = session.readGraphWithProperties(pgxConfig.get())
graph ==> PgxGraph[name=Elegans_graph,N=131,E=764,created=1610848075827]
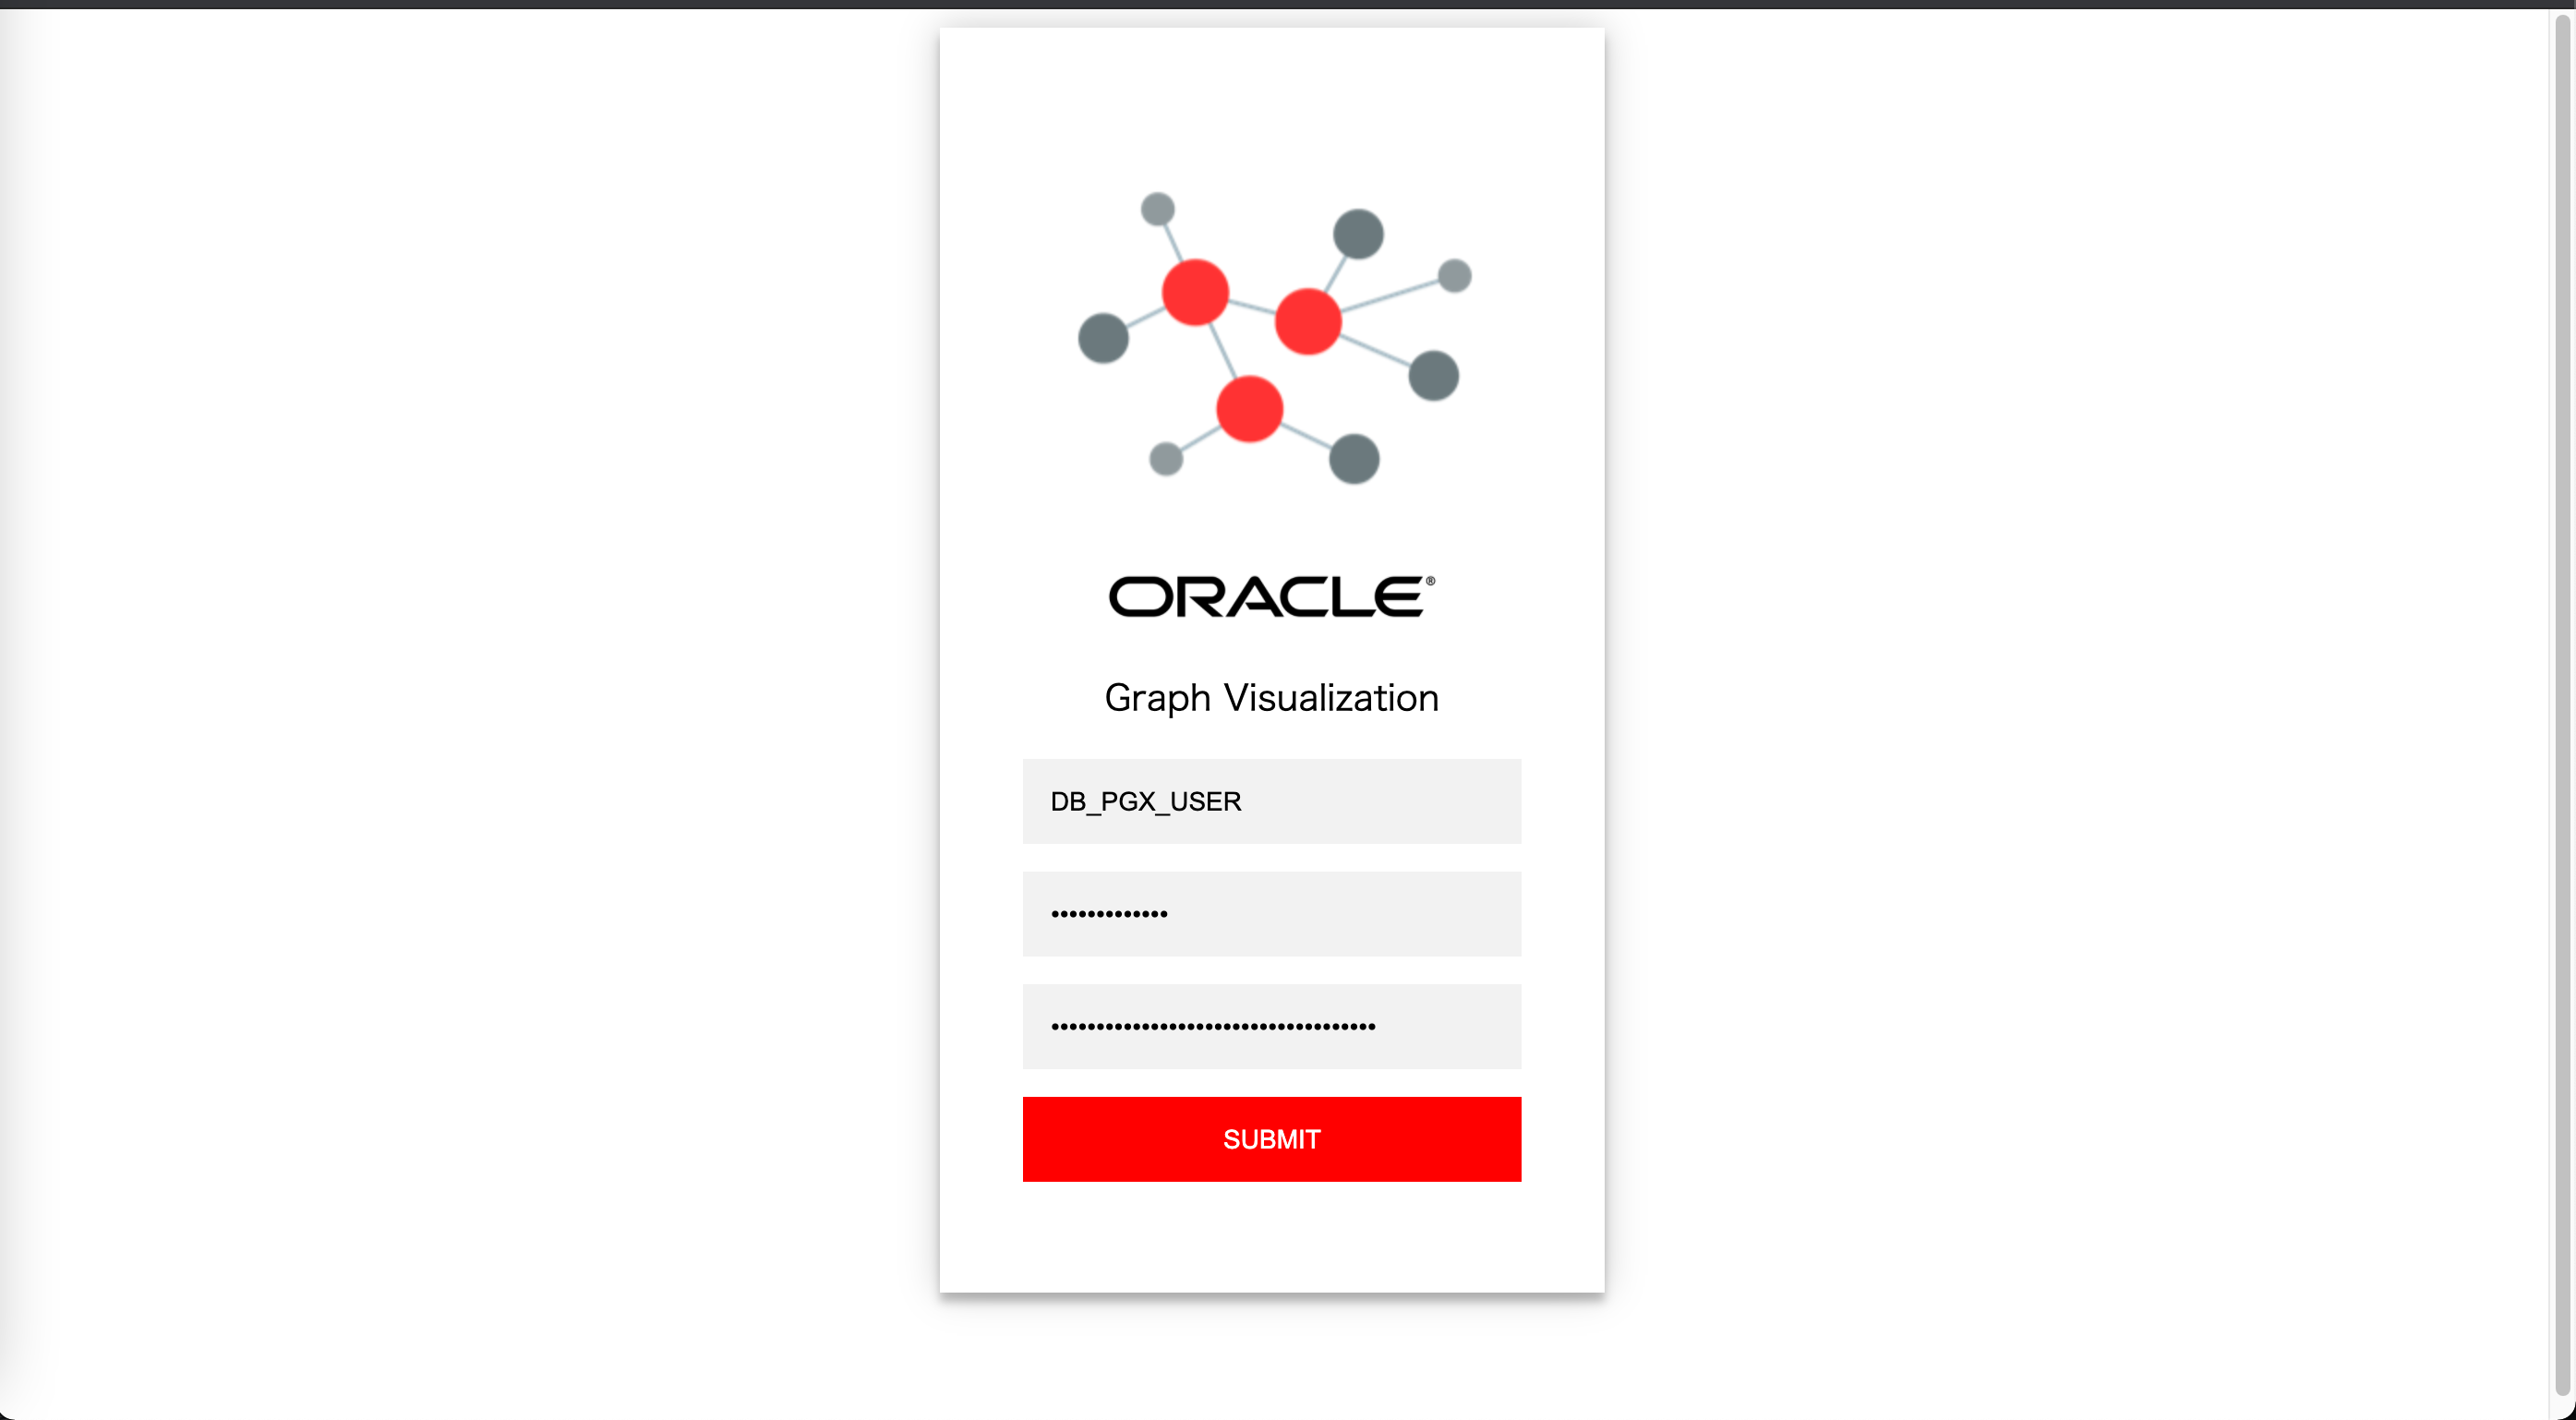
3.3.2 GraphVizへログイン
UserName/Password/SessionID(任意)を入力する。
SELECT node1,edge,node2
  MATCH (node1)-[edge]->(node2)
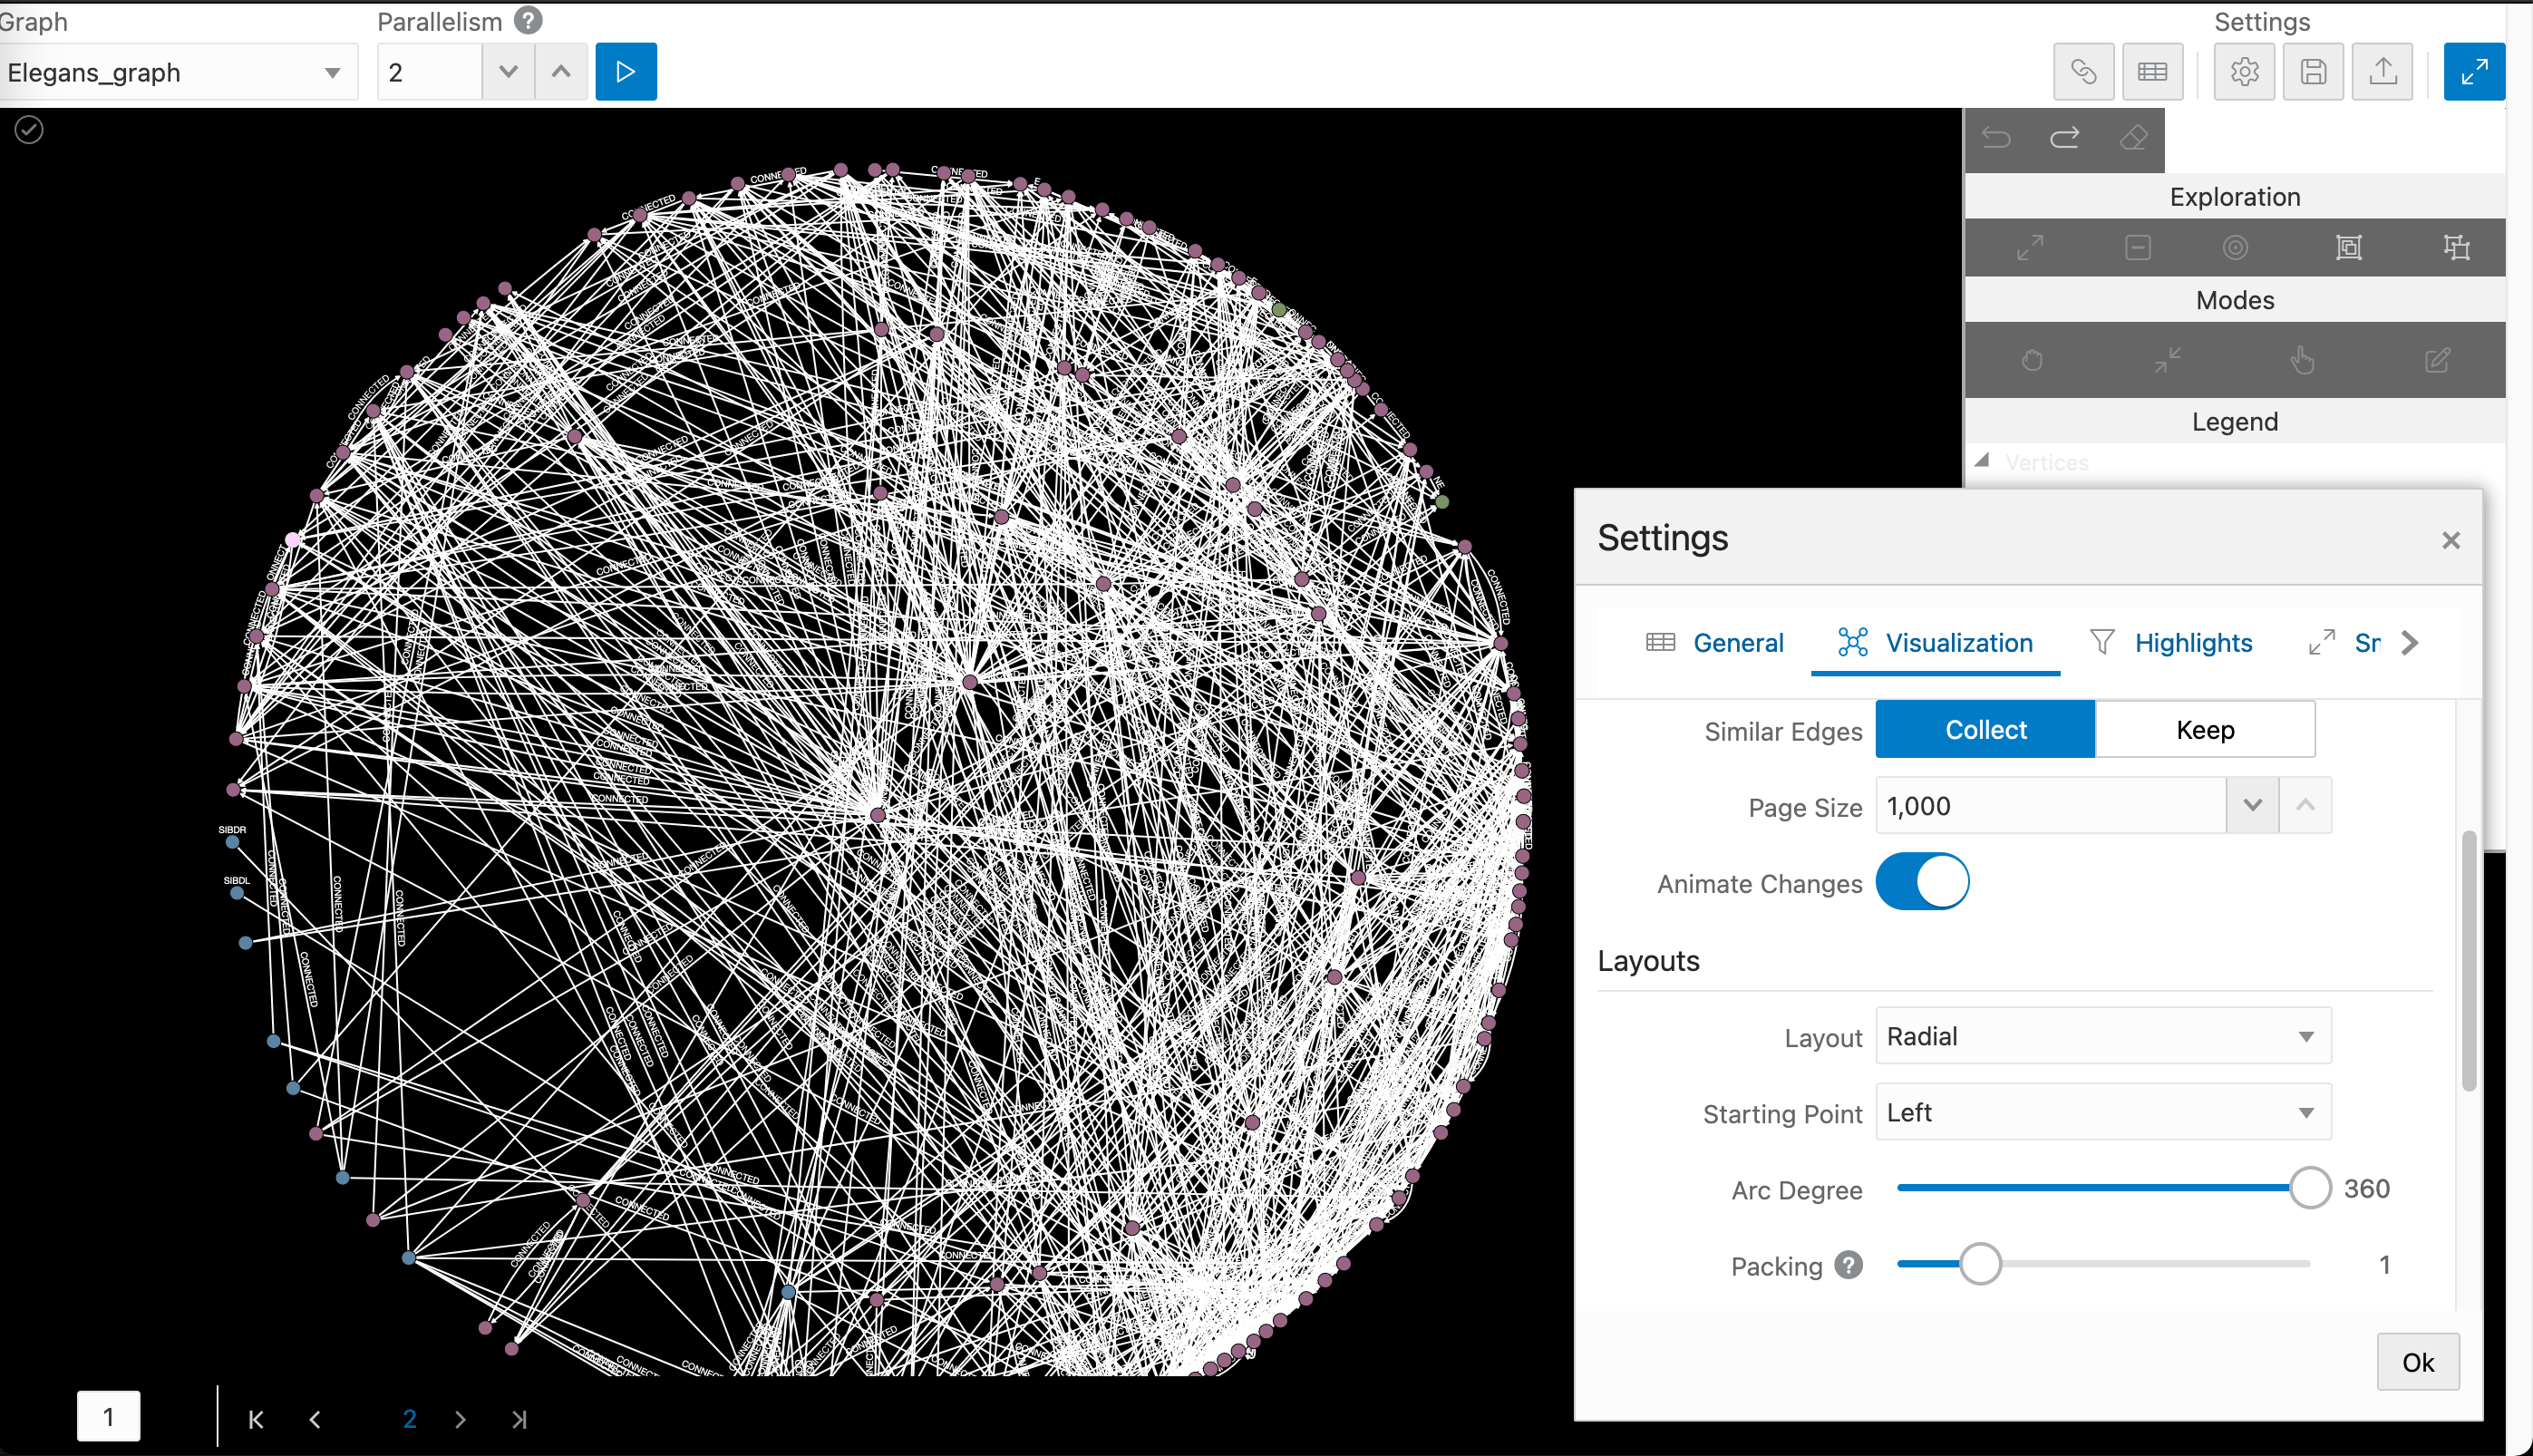
画面右上にてVisualのカスタムができる。
レイアウトを「ランダム」や「放射状」にすることも可能。
3.3.3 PGQLを変えて投げてみる
SELECT node1,edge,node2
MATCH (node1)-[edge]->(node2)-[edge2]->(node3)
WHERE 0.0157 < (node1.POSX*node1.POSX + node1.POSY*node1.POSY)
↓
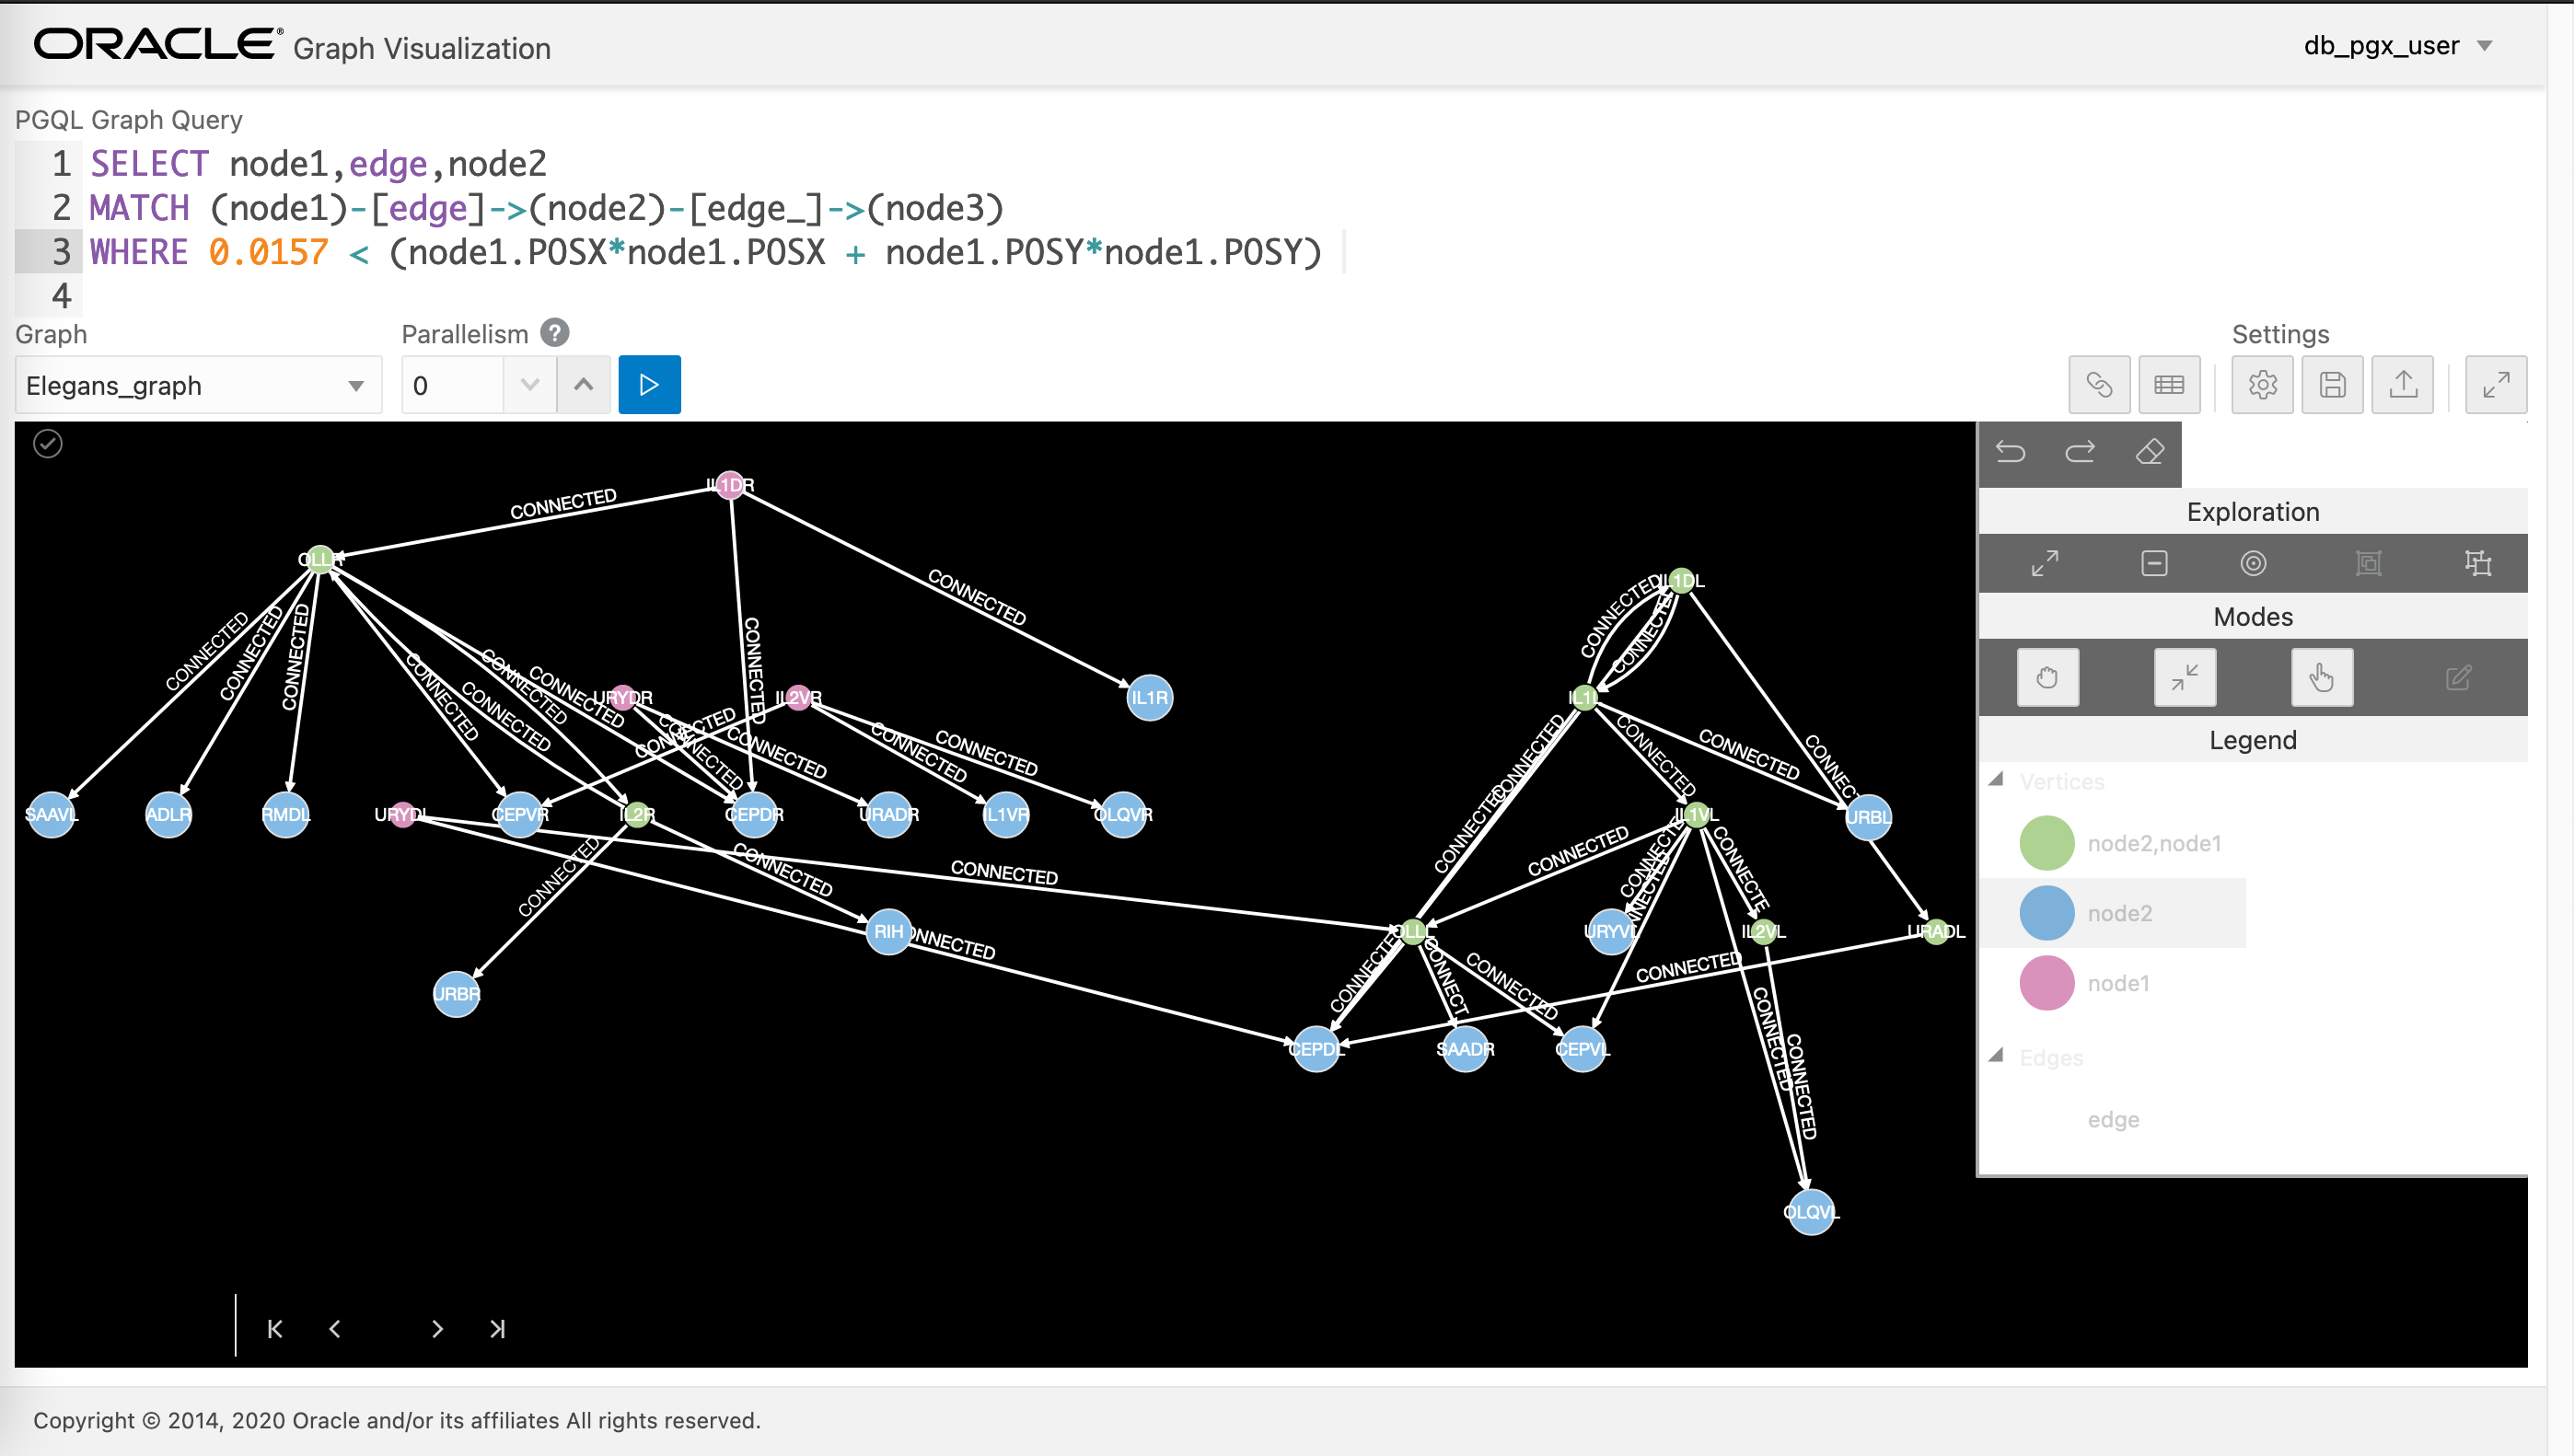
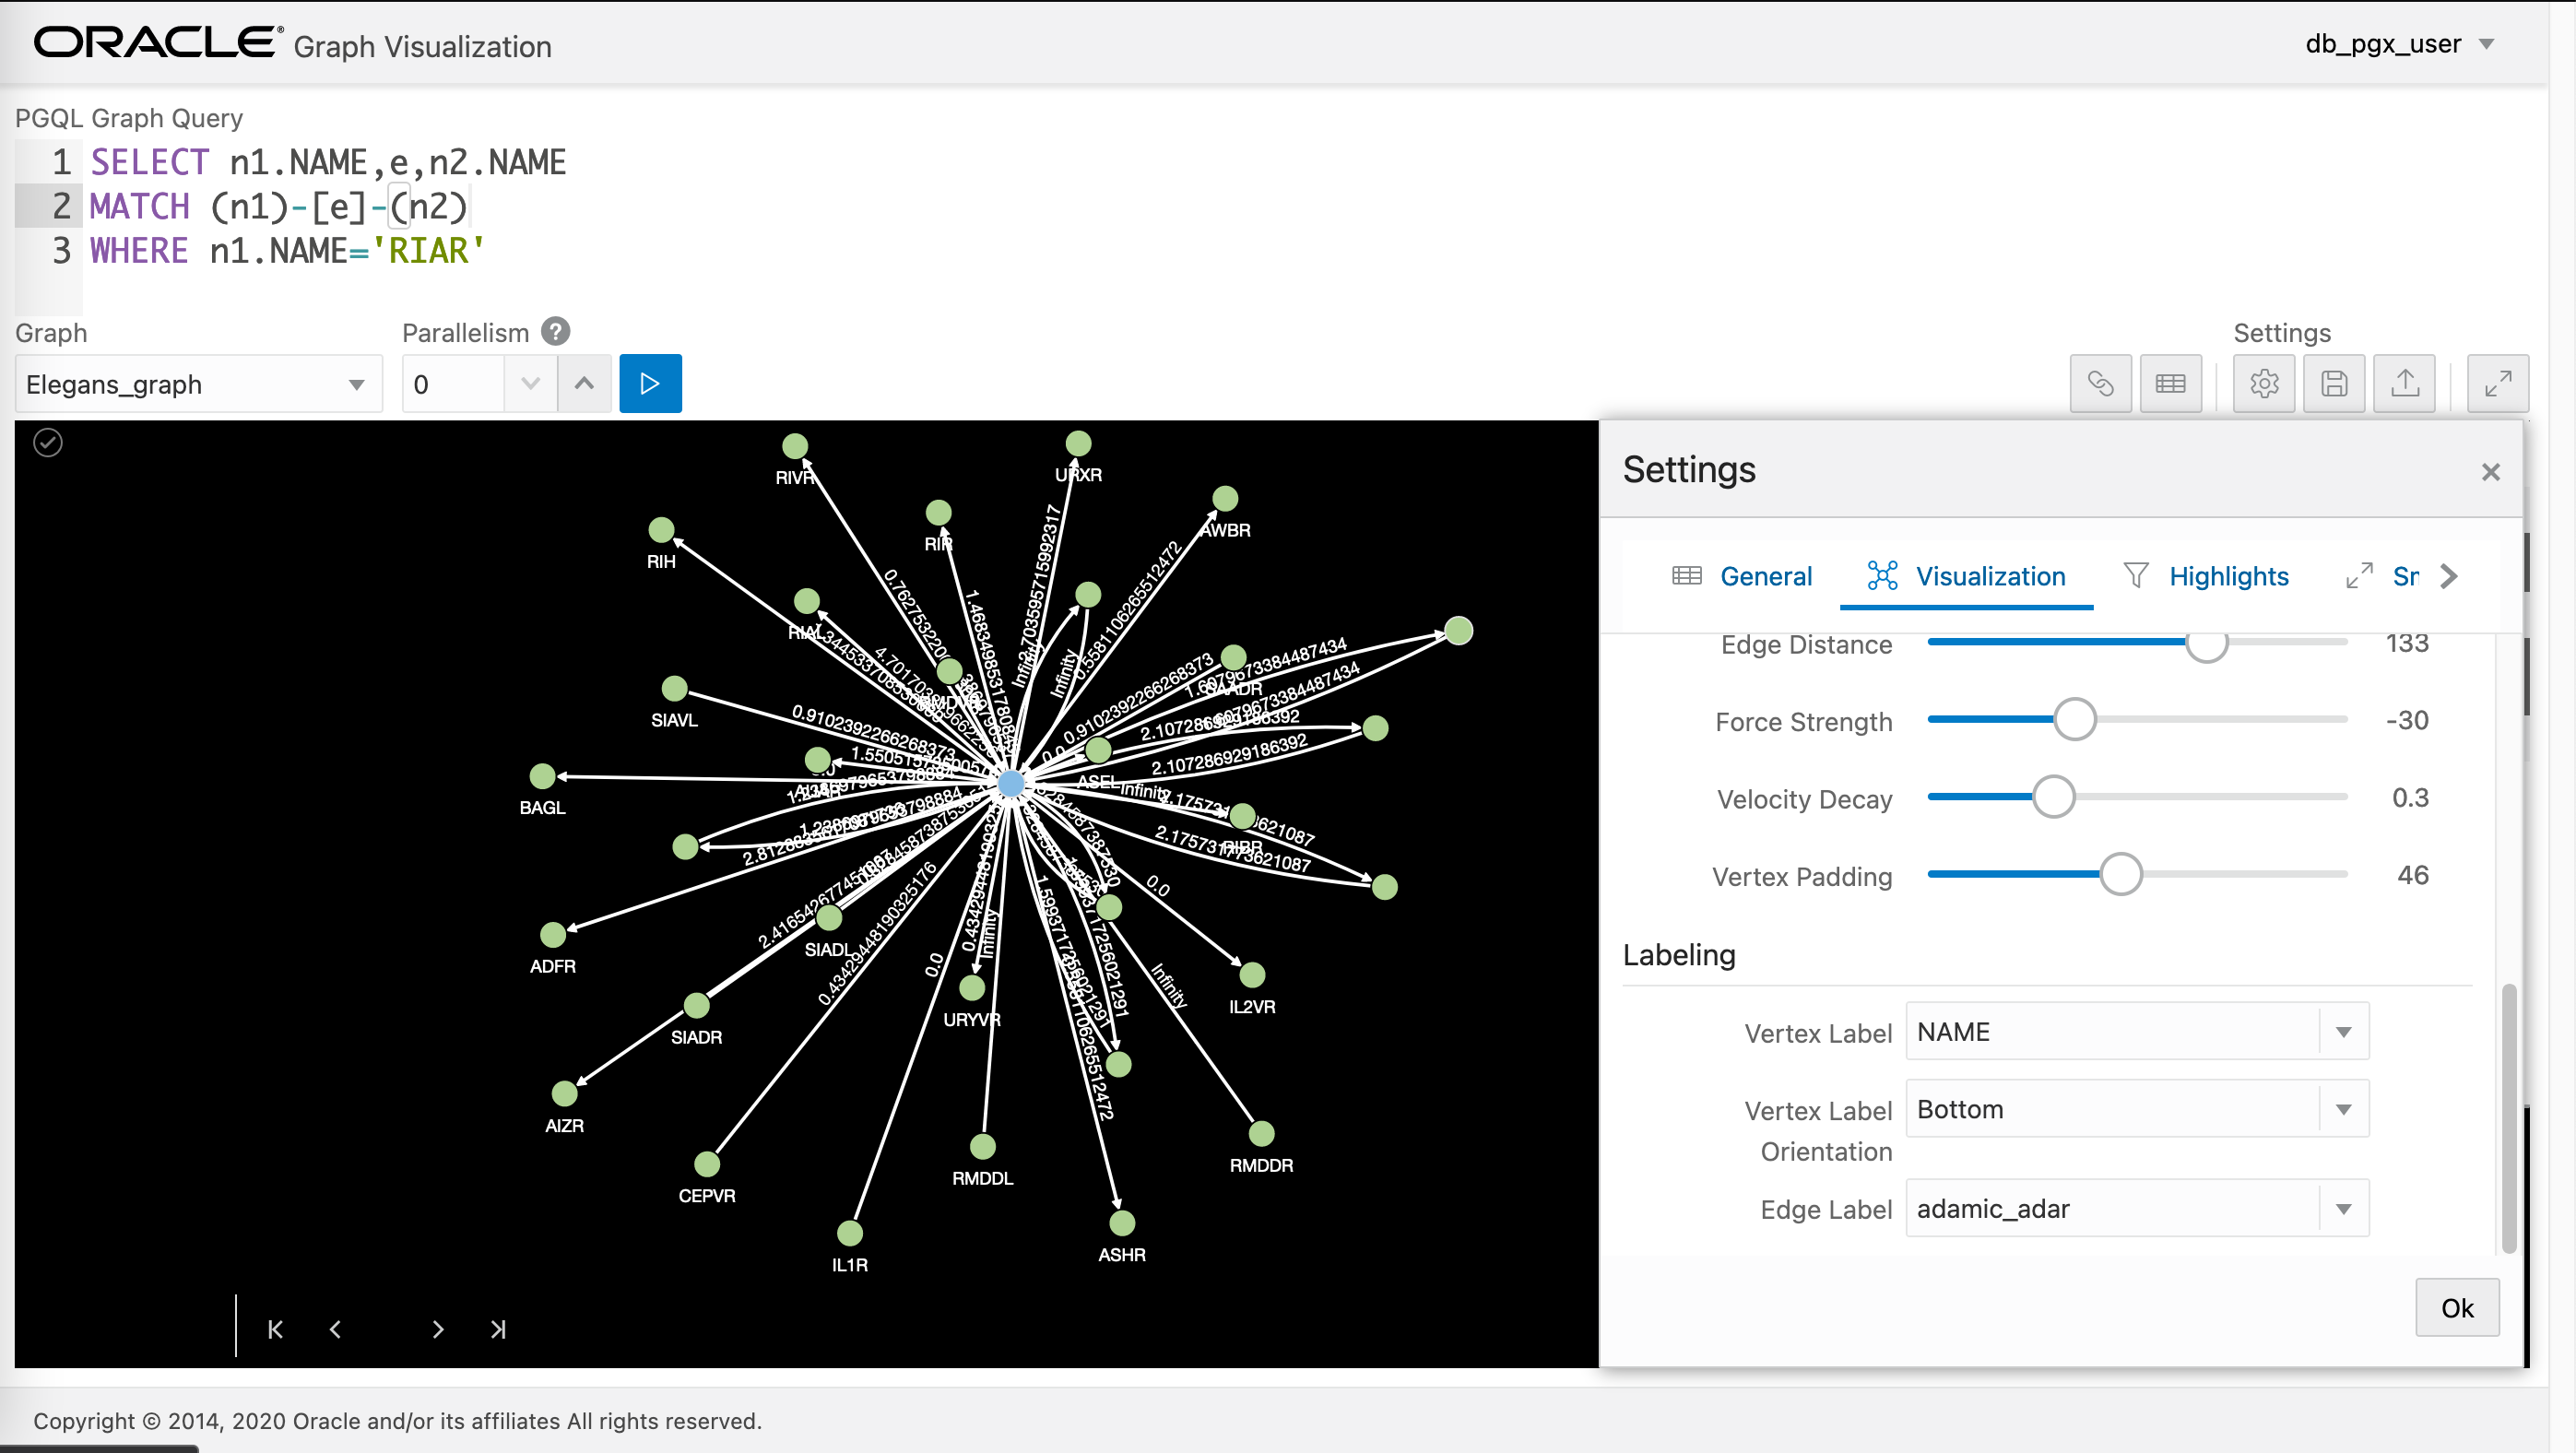
SELECT n1.NAME,e,n2.NAME
MATCH (n1)-[e]-(n2)
WHERE n1.NAME='RIAH'
↓
※21.1においてGraphVizを使う場合、下記を実行すること(備忘録)
# 1. /opt/oracle/graph/graphviz/のgraphviz-21.1.0-pgviz3.24.0-tomcat.warを解凍
# 2. web.xmlの下記を修正
- Session-Configの定義をFalseに修正
<session-config>
    <tracking-mode>COOKIE</tracking-mode>
    <cookie-config>
        <secure>false</secure>
- Contextの定義をhttp版に修正
<context-param>
        <param-name>pgx.base_url</param-name>
        <param-value>http://localhost:7007</param-value>
# 3.  /opt/oracle/graph/graphviz/のgraphviz-21.1.0-pgviz3.24.0-tomcat.warを固めてPGXを再起動
3.3.4 Analystの利用(ページランク)
アルゴリズムを1つだけ試す。ページランクは、ウェブページの重要度を決定するためのアルゴリズム。Googleの創設者のうちラリー・ペイジとセルゲイ・ブリンによって1998年に発明された(参考)。
opg-jshell> analyst.pagerank(graph)
$18 ==> VertexProperty[name=pagerank,type=double,graph=Elegans_graph]

graph.queryPgql("SELECT n.NAME, n.pagerank WHERE (n) ORDER BY n.pagerank DESC ").print(5)
opg-jshell> graph.queryPgql("SELECT n.NAME, n.pagerank WHERE (n) ORDER BY n.pagerank DESC ").print(5)
+-------------------------------+
| n.NAME | n.pagerank           |
+-------------------------------+
| RIH    | 0.04109789438551924  |
| CEPVL  | 0.02105463790978605  |
| OLLL   | 0.02087632956600805  |
| CEPDL  | 0.01996911832888276  |
| ADLL   | 0.018816382801831996 |
+-------------------------------+
$34 ==> PgqlResultSetImpl[graph=Elegans_graph,numResults=131]
3.4.1 AutoRefreshを試す
3.4.1 Autorefleshの設定
Autorefleshは、定期的かつ自動的にGraphをリフレッシュして、インメモリGraph(PGX側)とPGスキーマ表(DB側)の同期化を維持できる機能である。
[root@graphserver ~]# systemctl stop pgx
[root@graphserver ~]# vi /etc/oracle/graph/pgx.conf
...
"allow_user_auto_refresh": true  -- 1行追加する
...
[root@graphserver ~]# systemctl start pgx
opg-jshell> Supplier<GraphConfig> pgxConfig = () -> { return GraphConfigBuilder.forPropertyGraphRdbms()
.setJdbcUrl("jdbc:oracle:thin:@pgxatp_low?TNS_ADMIN=/etc/wallet")
.setUsername("DB_PGX_USER")
.setPassword("WelCome##1234")
.setName("Elegans_graph")
.addVertexProperty("ID", PropertyType.INTEGER)
.addVertexProperty("NAME", PropertyType.STRING)
.addVertexProperty("POSX", PropertyType.FLOAT)
.addVertexProperty("POSY", PropertyType.FLOAT)
.setPartitionWhileLoading(PartitionWhileLoading.BY_LABEL)
.setLoadVertexLabels(true)
.setLoadEdgeLabel(true)
.setAutoRefresh(true)
.setFetchIntervalSec(60)
.setUpdateIntervalSec(1200)
.setCreateEdgeIdIndex(true)
.setCreateEdgeIdMapping(true)
.build();}
opg-jshell> var graph = session.readGraphWithProperties(pgxConfig.get());
graph ==> PgxGraph[name=Elegans_graph,N=131,E=764,created=1610879917577]
3.4.2 AutoRefleshの実施確認
opg-jshell> session.getAvailableSnapshots(graph)
$13 ==> [GraphMetaData [numVertices=131, numEdges=764, memoryMb=0, dataSourceVersion=36983636967145, creationRequestTimestamp=1610879914656 (2021-01-17 10:38:34.656), creationTimestamp=1610879917577 (2021-01-17 10:38:37.577), vertexIdType=long, edgeIdType=long, directed=true]]
SQL> insert into ELEGANS_GRAPHVT$ (VID,VL,K,T,V,VN) values (1000,'NODE','ID',4,1000,1000);
SQL> insert into ELEGANS_GRAPHVT$ (VID,VL,K,T,V) values (1000,'NODE','NAME',1,'ZZZZ');
SQL> commit;
下記結果から、60秒( setFetchIntervalSec(60) )待機した後、Snapshotを取得するとノード数が131 -> 132に自動的に更新されたことが確認できる。
opg-jshell> session.getAvailableSnapshots(graph)
$29 ==> [GraphMetaData [numVertices=132, numEdges=764, memoryMb=0, dataSourceVersion=36983646246803, creationRequestTimestamp=1610881121437 (2021-01-17 10:58:41.437), creationTimestamp=1610881122016 (2021-01-17 10:58:42.016), vertexIdType=long, edgeIdType=long, directed=true], GraphMetaData [numVertices=131, numEdges=764, memoryMb=0, dataSourceVersion=36983636967145, creationRequestTimestamp=1610879914656 (2021-01-17 10:38:34.656), creationTimestamp=1610879917577 (2021-01-17 10:38:37.577), vertexIdType=long, edgeIdType=long, directed=true]]
4. まとめ
- GraphデータベースのNeo4jとPGXに触れてみた
- それぞれGraphServerの構成は非常に似ているので、どちらか一方を経験すればセットアップにはそこまで時間がかからないように思う
- 今回はデータがとてもシンプルである(エッジに数値プロパティ等なかった)ため、複雑な分析はできなさそうだったが、今回一連の手順は纏められたのでもう少しリアリティのある、かつ量の多いデータを使って分析してみたいと思った