[AWS SDK for iOSの設定とDynamoDBのサンプル]
(http://docs.aws.amazon.com/ja_jp/mobile/sdkforios/developerguide/setup.html)です。
普通にXcodeでSwiftの新規プロジェクトを作成します。
作成後、一旦Xcodeは終了しておきます。(CocoaPodsを使用するため。)
Podfile ファイルを作成します。
~/s/AwsDynamoSample ❯❯❯ pwd
/Users/taka/swift/AwsDynamoSample
~/s/AwsDynamoSample ❯❯❯ ls
AwsDynamoSample           AwsDynamoSample.xcodeproj AwsDynamoSampleUITests
~/s/AwsDynamoSample ❯❯❯ pod init
~/s/AwsDynamoSample ❯❯❯ ls
AwsDynamoSample           AwsDynamoSample.xcodeproj AwsDynamoSampleUITests    Podfile
~/s/AwsDynamoSample ❯❯❯
Podfileを下記のように編集します。
Podfile
# Uncomment this line to define a global platform for your project
 platform :ios, '9.0'

target 'AwsDynamoSample' do
  # Comment this line if you're not using Swift and don't want to use dynamic frameworks
  use_frameworks!

  # Pods for AwsDynamoSample
    pod 'AWSAutoScaling'
    pod 'AWSCloudWatch'
    pod 'AWSCognito'
    pod 'AWSCognitoIdentityProvider'
    pod 'AWSDynamoDB'
    pod 'AWSEC2'
    pod 'AWSElasticLoadBalancing'
    pod 'AWSIoT'
    pod 'AWSKinesis'
    pod 'AWSLambda'
    pod 'AWSMachineLearning'
    pod 'AWSMobileAnalytics'
    pod 'AWSS3'
    pod 'AWSSES'
    pod 'AWSSimpleDB'
    pod 'AWSSNS'
    pod 'AWSSQS'

  target 'AwsDynamoSampleUITests' do
    inherit! :search_paths
    # Pods for testing
  end

end
Podインストールします。(とりあえず全部入れておきます。)
$ pod install
プロジェクトを開きます。
$ open AwsDynamoSample.xcworkspace
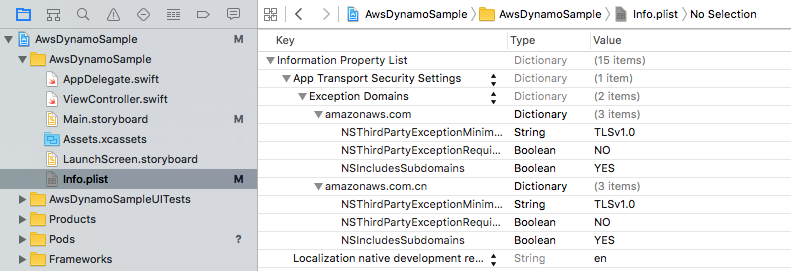
Info.plistにATSの設定を追加します。
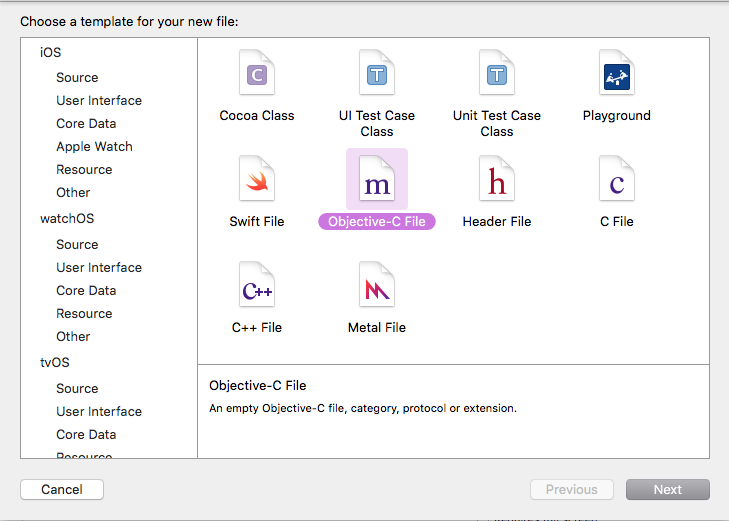
ブリッジヘッダーを作成します。
Objective-C ファイルを適当に新規作成します。
(後で消しますので、適当に名前をつけます。例 dummy.m)
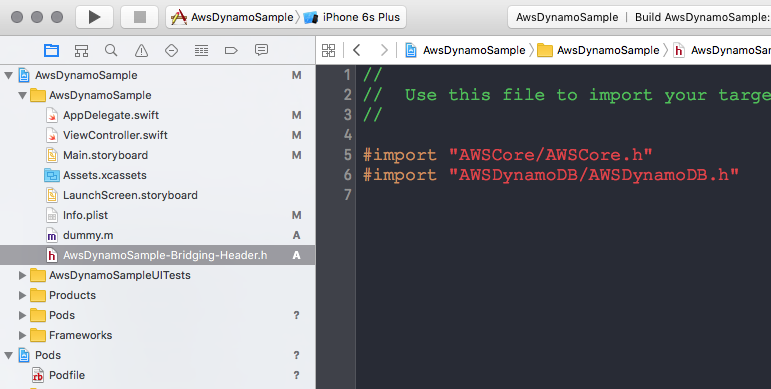
すると、ブリッジヘッダーを作成しますか、と聞いてきますのでYESとします。
スクショのようにブリッジヘッダファイルが自動作成されます。
以下のヘッダーファイルを追加します。
# import "AWSCore/AWSCore.h"
# import "AWSDynamoDB/AWSDynamoDB.h"
AppDelegate.swift と ViewController.swift を以下のように編集します。
AppDelegate.swift
import AWSCore

@UIApplicationMain
class AppDelegate: UIResponder, UIApplicationDelegate {

    var window: UIWindow?


    func application(application: UIApplication, didFinishLaunchingWithOptions launchOptions: [NSObject: AnyObject]?) -> Bool {

        let cognitoIdentityPoolId = "us-east-1:123456-aaaa-bbbb-cccc-ddddeeeeffff" // 自分のCognito IdentityPoolId. DynamoDBへのアクセスロールがあること。

        let credentialsProvider = AWSCognitoCredentialsProvider(regionType: AWSRegionType.USEast1, identityPoolId: cognitoIdentityPoolId)

        let configuration = AWSServiceConfiguration(region: AWSRegionType.USEast1, credentialsProvider: credentialsProvider)

        AWSServiceManager.defaultServiceManager().defaultServiceConfiguration = configuration

        return true
    }
DynamoDBのテーブル一覧を表示します。(もちろんコンソールから、何か適当にテーブルを作成しておきます。)
ViewController.swift
import AWSDynamoDB

class ViewController: UIViewController {

    override func viewDidLoad() {
        super.viewDidLoad()

        invokeDynamo()
    }

    func invokeDynamo() {
        let dynamoDB = AWSDynamoDB.defaultDynamoDB()
        let listTableInput = AWSDynamoDBListTablesInput()
        dynamoDB.listTables(listTableInput).continueWithBlock{ (task: AWSTask?) -> AnyObject? in
            if let error = task!.error {
                print("Error occurred: \(error)")
                return nil
            }

            let listTablesOutput = task!.result as! AWSDynamoDBListTablesOutput

            for tableName in listTablesOutput.tableNames! {
                print("\(tableName)")
            }

            return nil
        }
    }
}
実行します。
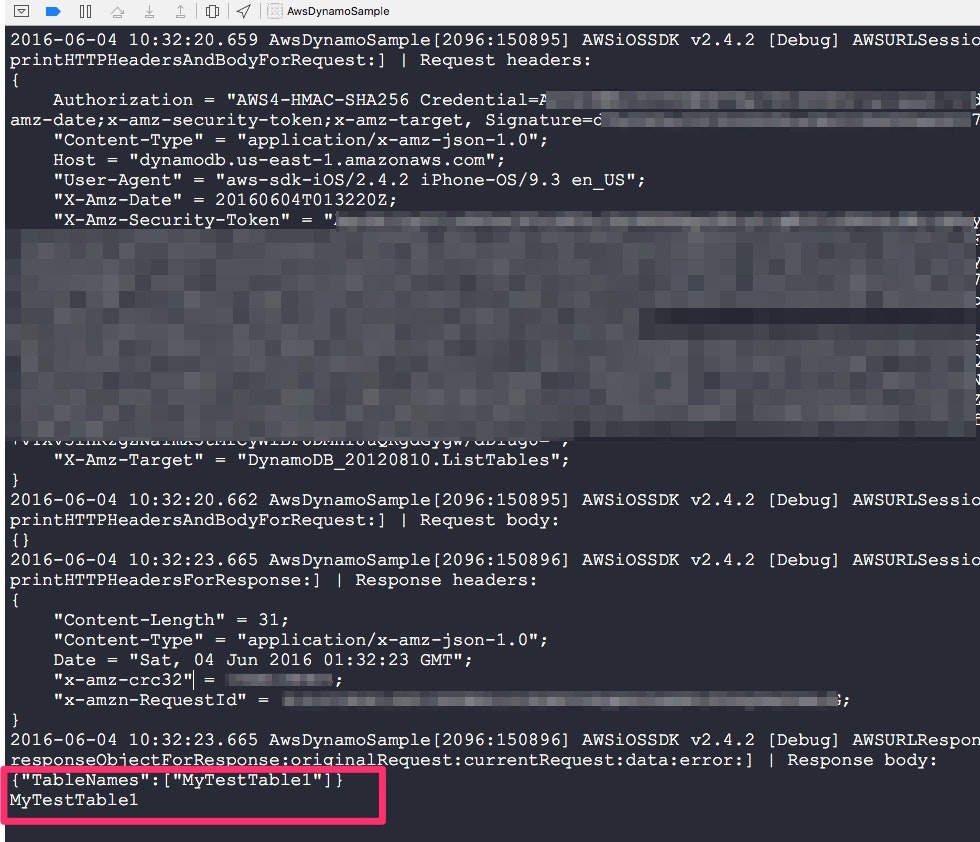
テーブル一覧が表示されます。