このエントリーは、GMOアドマーケティング Advent Calendar 2018
( https://qiita.com/advent-calendar/2018/gmo-am ) の 【12/18】 の記事です。
GMOアドマーケティングとしては初のAdvent Calendar参戦です。
はじめに
Create MLを使用すると機械学習モデルを簡単に作成できるということなので試してみました。
iPhoneのカメラに映った人物が何なのかを画像認識で識別するアプリを作成します。
識別させたいのはサンタクロースです。他はカッパ、ゾンビとしました。
実行環境は以下の通りです。
Mac OS X 10.14.2(mojave)
iOS12
Xcode10
機械学習モデルの作成
画像データを集める
Googleなどの検索エンジンを利用してサンタクロース、カッパ、ゾンビの画像をそれぞれ収集します。
収集した画像を今回利用するAppleの画像認識の仕組みに合わせて分別して格納します。
画像の約80%はトレーニング用のデータセットとして"Training Dataset"フォルダ以下に格納し、残りの画像はテスト用のデータセットとして"Testing"以下のフォルダに格納します。
今回はサンタクロース、カッパ、ゾンビの各種類ごとに20枚の画像を用意しましたのでトレーニング用のフォルダには16枚、テスト用の画像のディレクトリには4枚の画像を格納しました。
機械学習モデルの作成
XcodeでPlaygroundを選択してmacOSのテンプレートを選びます。
エディタに以下のように入力します。
import CreateMLUI

let builder = MLImageClassifierBuilder()
builder.showInLiveView()
コードの入力をしたらPlaygoundの実行アイコンを選択します。
Assistant Editorの表示ボタンを選択すると右側に画像用の機械学習用GUIが表示されます。
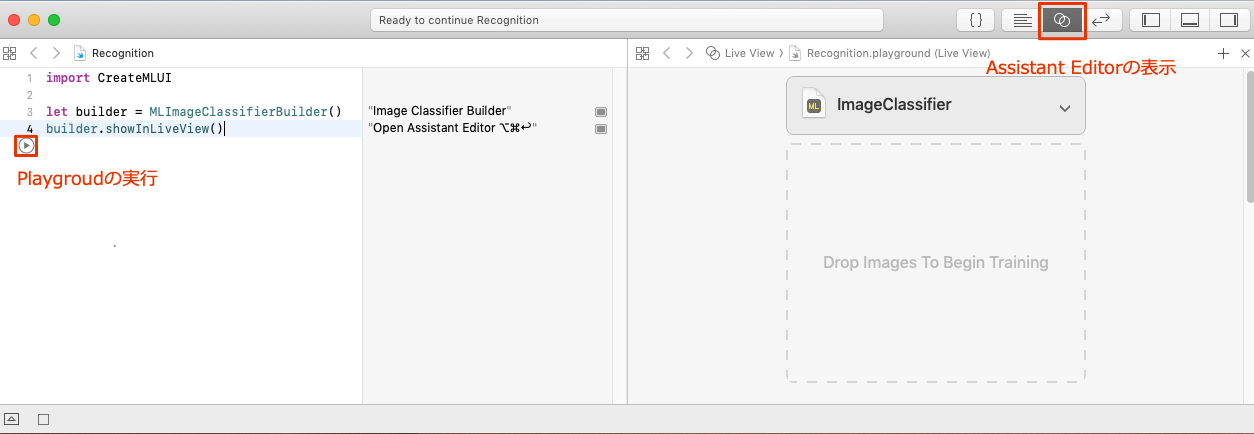
それでは機械学習用のモデルを作成します。トレーニング用の画像を格納したフォルダを"Drop Images To Begin Training"の部分にドラッグアンドドロップします。するとトレーニングが開始されて機械学習モデルが作成されます。
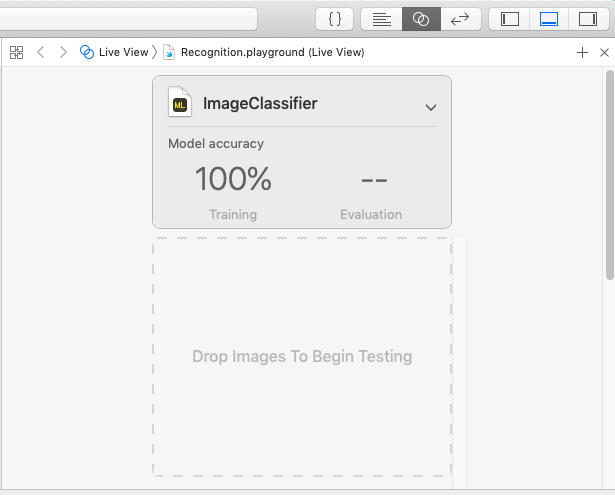
次に機械学習モデルのテストを行います。テスト用の画像を格納したフォルダを"Drop Images To Begin Testing"にドラッグアンドドロップします。先ほど作成された機械学習モデルがテストされ、認識精度が表示されます。
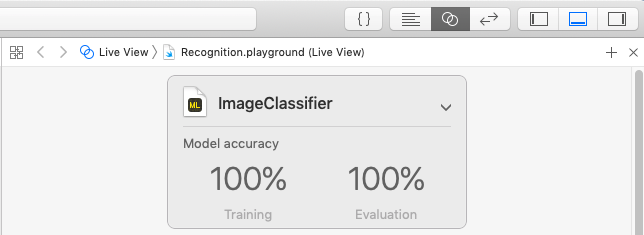
作成した機械学習モデルに名前をつけてファイル保存します。
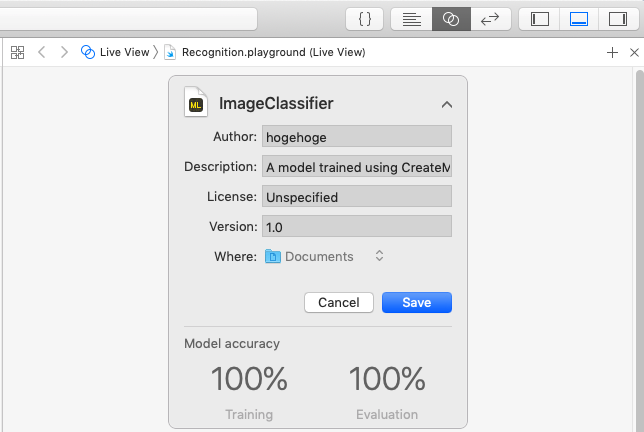
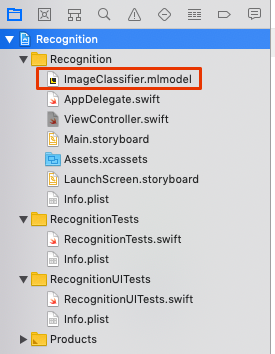
この設定例ですとImageClassifier.mlmodelという名称でファイルが保存されます。
機械学習モデルの組み込み
XCodeでProjectを選択してiOSのテンプレート選びiPhone用のアプリを作成します。
機械学習モデルの追加
Info.plistの編集
カメラを使用するための設定を追加します。
    <key>NSCameraUsageDescription</key>
    <string>カメラでの撮影のため必要です。</string>
プログラム本体の実装
import UIKit
import AVFoundation
import Vision

class ViewController: UIViewController, AVCaptureVideoDataOutputSampleBufferDelegate {

    let recognitionLabel: UILabel = {
        let recognitionLabel = UILabel()
        recognitionLabel.textColor = .white
        recognitionLabel.translatesAutoresizingMaskIntoConstraints = false
        recognitionLabel.text = ""
        recognitionLabel.font = recognitionLabel.font.withSize(24)
        return recognitionLabel
    }()

    override func viewDidLoad() {
        super.viewDidLoad()
        setupCaptureSession()

        view.addSubview(recognitionLabel)
        recognitionLabel.centerXAnchor.constraint(equalTo: view.centerXAnchor).isActive = true
        recognitionLabel.bottomAnchor.constraint(equalTo: view.bottomAnchor, constant: -50).isActive = true
    }

    func setupCaptureSession() {
        let captureSession = AVCaptureSession()

        let availableDevices = AVCaptureDevice.DiscoverySession(deviceTypes: [.builtInWideAngleCamera], mediaType: AVMediaType.video, position: .back).devices

        do {
            if let captureDevice = availableDevices.first {
                captureSession.addInput(try AVCaptureDeviceInput(device: captureDevice))
            }
        } catch {
            print(error.localizedDescription)
        }

        let captureOutput = AVCaptureVideoDataOutput()
        captureSession.addOutput(captureOutput)

        captureOutput.setSampleBufferDelegate(self, queue: DispatchQueue(label: "videoQueue"))

        let previewLayer = AVCaptureVideoPreviewLayer(session: captureSession)
        previewLayer.frame = view.frame
        view.layer.addSublayer(previewLayer)

        captureSession.startRunning()
    }

    func captureOutput(_ output: AVCaptureOutput, didOutput sampleBuffer: CMSampleBuffer, from connection: AVCaptureConnection) {
        // 機械学習モデルの取得
        guard let model = try? VNCoreMLModel(for: ImageClassifier().model) else { return }

        guard let pixelBuffer: CVPixelBuffer = CMSampleBufferGetImageBuffer(sampleBuffer) else { return }

        // 機械学習モデルを利用して画像認識
        let request = VNCoreMLRequest(model: model) { (finishedRequest, error) in
            guard let results = finishedRequest.results as? [VNClassificationObservation] else { return }
            guard let Observation = results.first else { return }

            DispatchQueue.main.async(execute: {
                self.recognitionLabel.text = "\(Observation.identifier)"
            })
        }

        try? VNImageRequestHandler(cvPixelBuffer: pixelBuffer, options: [:]).perform([request])
    }
}
実行イメージ
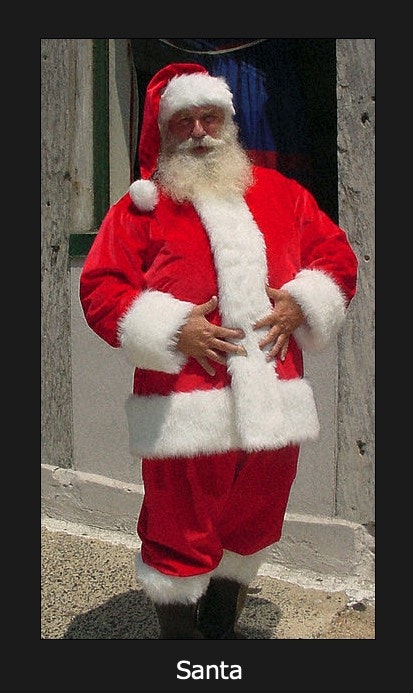
以下のイメージのようにサンタクロースが認識されました。
(アプリで画面キャプチャできなかったため「実行イメージ」と記載しています)
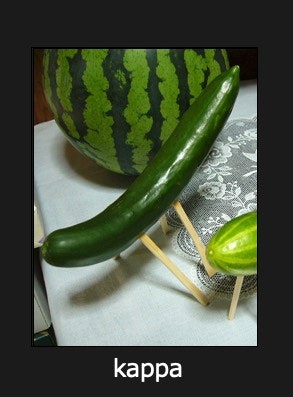
余談ですが。。。今回は作成したモデルがサンタクロース、カッパ、ゾンビの3種類なので、そのうちのいずれかであるように画像認識します。モデル作成時に緑色の画像が多かったせいなのかキュウリはカッパと認識されました。
参考
Classifying Images with Vision/Apple
Create ML
How to build an image recognition iOS app with Apple's CoreML and Vision APIs
次回のAdvent Calendar 2018
明日は、@mnaka1115さんの「Gephiで記事の回遊状況を可視化してみた」についてのお話です。
お楽しみに。
クリスマスまで続くGMOアドマーケティング Advent Calendar 2018
ぜひ今後も投稿をウォッチしてください!
■エンジニアによるTechblog公開中!
https://techblog.gmo-ap.jp/
■Wantedlyページ ~ブログや求人を公開中!~
https://www.wantedly.com/projects/199431
■エンジニア採用ページ ~福利厚生や各種制度のご案内はこちら~
https://www.gmo-ap.jp/engineer/
■エンジニア学生インターン募集中! ~有償型インターンで開発現場を体験しよう~
https://hrmos.co/pages/gmo-ap/jobs/0000027


