これは何?
- **クラウドネイティブな言語らしいBallerina**を試してみたメモです。
- 公式を訳しながら進めたので誤訳あるかもですが、動いたので大体は合っているでしょう。
やったこと
- インストール
- HelloBallerina
-
Quick Tourの中のSEND A TWEET
環境とか
- Windows10 pro 64bit
- ballerina
- 0.990.2 (Dec 30, 2018)
- VSCode
- 拡張機能の
ballerinaはすぐ入れました。
- 拡張機能の
- Windows Subsystem for Linux
- Twitterアカウント:持ってる
- TwitterDevelopersアカウント:作った
- 無い場合はこちらの記事が非常に参考になります。
インストール
インストーラ入手
- ここから入手しましょう。
インストール
- インストーラを実行すればOKです
- Windowsの場合はデフォルトでは
C:\Program Files\Ballerina\ballerina-0.990.2\ -
C:\Program Files\Ballerina\<ballerina-directory>\binが環境変数PATHに追加されるようです。
- Windowsの場合はデフォルトでは
インストールできたことを確認
PS C:\> ballerina -v
Ballerina 0.990.2
プロジェクトの開始
init
- ここでは
C:\dev\ballerina-testをプロジェクトのディレクトリにしています。
PS C:\dev\ballerina-test> ballerina init
Ballerina project initialized
hello_service.balを手動で用意した
- 公式を読むに、
ballerina initを実行すれば自動的にHelloBallerinaできるようにセットアップしてくれると書いてあるのですが、なぜかhello_service.balが作成されませんでした。 - なので、手動で作成しました。
hello_servie.bal
import ballerina/http;

service hello on new http:Listener(9090) {
    resource function sayHello(http:Caller caller, http:Request request) {
        http:Response response = new;
        response.setTextPayload("Hello Ballerina!");
        _ = caller -> respond(response);
    }
}
Hello Ballerina!
-
ballerina runします。- デフォルトではポートは
9090で待ち受けるようです。
- デフォルトではポートは
PS C:\dev\ballerina-test> ballerina run hello_service.bal
Initiating service(s) in 'hello_service.bal'
[ballerina/http] started HTTP/WS endpoint 0.0.0.0:9090
- 別ターミナルで
curlしてみます。
PS C:\> curl http://localhost:9090/hello/sayHello
StatusCode        : 200
StatusDescription : OK
Content           : Hello Ballerina!
RawContent        : HTTP/1.1 200 OK
                    Content-Length: 16
                    Content-Type: text/plain
                    Date: Thu, 10 Jan 2019 21:39:00 +0900
                    Server: ballerina/0.990.2

                    Hello Ballerina!
Forms             : {}
Headers           : {[Content-Length, 16], [Content-Type, text/plain], [Date, Thu, 10 Jan 2019 21:39:00 +0900], [Server, ballerina/0.990.2]}
Images            : {}
InputFields       : {}
Links             : {}
ParsedHtml        : System.__ComObject
RawContentLength  : 16
- できたっぽい。
appendix:build
-
ballerina buildしてみます。- ↑でやった通り、buildしなくても実行はできます。
PS C:\dev\ballerina-test> ballerina build
Compiling sourceina-test>
    hello_service.bal
Generating executables
    ./target/hello_service.balx
-
targetの下にバイナリhello_service.balxが生成されます。-
targetはデフォルトでgitignore対象なので安心。
-
SEND A TWEET
-
公式のQuick Tourにいくつかのコンテンツが紹介されているのですが、
SEND A TWEETをやってみることにします。
TwitterDevelopersのアカウント
- まずはTwitterのアプリを作るのですが、
TwitterDevelopersのアカウントが必要です。- 持っていない場合は、冒頭で紹介させていただいた記事が参考になると思います。
Twitterアプリの作成
- https://developer.twitter.com/en/apps
-
create an appをクリックし、指示に従って進めればアプリが作成できます。- そこまで入れる内容は多くないです。
- 「用途を説明してね」というフォームがありますが、素直に「アプリ試すのに使いたいだけ」みたいに書きました。
API Keyとアクセストークンの取得
- アプリ詳細から
key and access tokensタブに移動し、API keyとAPI secret keyを控えます。 -
Access token & access token secretのcreateを押して生成し、同じく控えます。
Ballerina側の実装
tomlの用意
-
twitter.tomlを作成します。
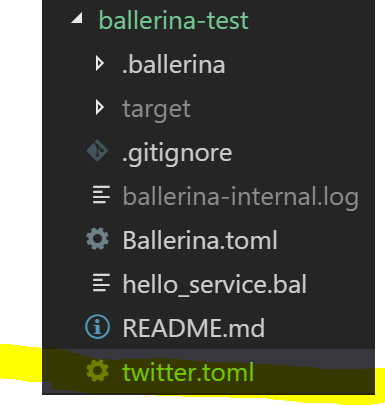
- ↓のように書き、さっきTwitter側で生成した情報を設定します。
- これで、ツイートを送信するようにBallerinaをプログラムすることができます。
twitter.toml
    # Ballerina demo config file
    consumerKey = "控えたConsumer API keysのAPI key"
    consumerSecret = "控えたConsumer API keysのAPI secret key"
    accessToken = "控えたAccess token & access token secretのAccess token"
    accessTokenSecret = "控えたAccess token & access token secretのAccess token secret"
Program Ballerina to Send a Tweet
-
hello_service.balを追記・編集していきます。最後に完成形を載せてます。 -
hello_service.balにballerina/configモジュールをインポートする文を追加します。
import ballerina/config;
- インポート文の後に↓を追加します。Twitterサービスに接続するためのクライアントです。
- これでTwitterにアクセスする用意ができました。
twitter:Client twitterClient = new({
   clientId: config:getAsString("consumerKey"),
   clientSecret: config:getAsString("consumerSecret"),
   accessToken: config:getAsString("accessToken"),
   accessTokenSecret: config:getAsString("accessTokenSecret")
});
-
sayHelloメソッドに↓を追記します。
string status = check request.getTextPayload();
-
response.setTextPayload("Hello Ballerina!\n");を置き換えます。- これで、ツイート機能を呼び出すことによってTwitterから応答を受け取ることができます。
twitter:Status st = check twitterClient->tweet(status);
response.setTextPayload("ID:" + string.convert(st.id) + "\n");
- 完成品は↓のようになります。
hello_service.bal
import ballerina/config;
import ballerina/http;
import wso2/twitter;

twitter:Client twitterClient = new({
   clientId: config:getAsString("consumerKey"),
   clientSecret: config:getAsString("consumerSecret"),
   accessToken: config:getAsString("accessToken"),
   accessTokenSecret: config:getAsString("accessTokenSecret")
});

@http:ServiceConfig {
   basePath: "/"
}
service hello on new http:Listener(9090) {
    @http:ResourceConfig {
        methods: ["POST"],
        path: "/"
    }
    resource function sayHello(http:Caller caller, http:Request request) returns error? {
        string status = check request.getTextPayload();
        twitter:Status st = check twitterClient->tweet(status);
        http:Response response = new;
        response.setTextPayload("ID:" + string.convert(untaint st.id) + "\n");

        _ = caller -> respond(response);
        return ();
    }
}
Ballerinaにツイートしてもらう
- 今度はオプションを追加して
ballerina runします。
PS C:\dev\ballerina-test> ballerina run --config twitter.toml hello_service.bal
Initiating service(s) in 'hello_service.bal'
[ballerina/http] started HTTP/WS endpoint 0.0.0.0:9090
- 同じく
curlします。- powerShellからうまくいかなかったのでWSLで打ちました。
machida@DESKTOP-EP8ECJ4:/mnt/c/dev/ballerina-test$ curl -d "Ballerina" -X POST localhost:9090/
ツイート成功

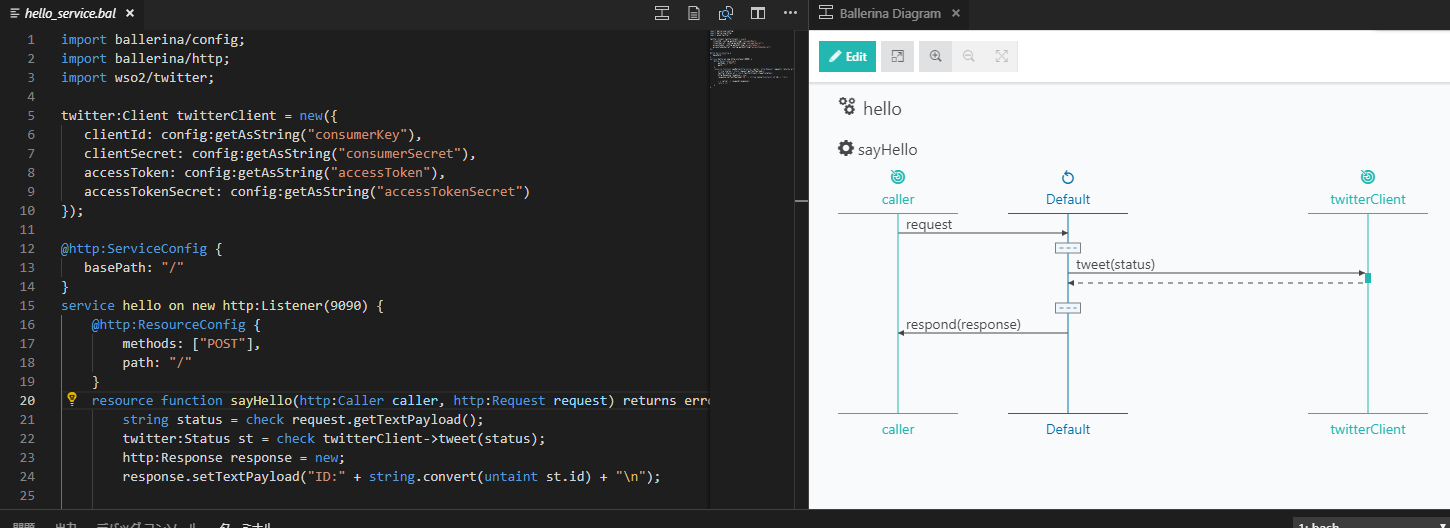
appendix:Ballerina Diagramでシーケンス図を表示
- VSCodeで拡張機能を入れると、
.balのシーケンス図を表示できる。 - コード修正にあわせてリアルタイムで反映される。
所感
- 公式の
Quick TourがもはやQuickじゃない。 - 基本的にインターネットに接続していることを前提にしている言語のようです。
- BallerinaCentralに必要なものを取りにいくようです。
- Windows向けのインストーラでインストールしたのに
hello_service.balが作られなかった。- まだv1.0になってないし、いろいろ完全ではない?
- 拡張機能の
Ballerina Daiagramはとてもイイと思う。