Microsoft Ignite (March 2-4, 2021) で Azure Bicep のことにちょっと興味を持ちました。(後日コンテンツを拝見...![]() )
)
これまでやったことを忘れてしまいそうなので、ここに備忘録として置きます。
Azure Bicep とは
Bicep はシンプルな Azure リソースを宣言によってデプロイするための新しいドメイン固有言語 (DSL) です。Azure Bicep は、デプロイする前に Bicep ファイルから ARM テンプレートにコンパイルされます。
ARM テンプレートは JSON 構文でインフラストラクチャと構成が定義されていますが、冗長になりがちで複雑になりがちなので、ARM テンプレートだけで Infrastructure as Code (IaC) を実現するにはちょっとシンドイですが、Bicep を利用すると冗長で複雑なところが軽減できます。
Bicep のインストール
まずは、環境を準備します。
以下のドキュメントの手順を参考に操作していきます。
まず準備しておくこと
最新の Azure CLI (2.20.0 以降)、または最新の Azure PowerShell モジュール (5.6.0 以降) をインストールしておきましょう。
Bicep CLI のインストール
Biep CLI は、Bicep ファイルを ARM テンプレートにコンパイルするために使用します。
Azure CLI バージョン 2.20.0 以降がインストールされている場合、Bicep CLI は既にインストール済みだそうです。なので、まずは以下のコマンドを実行して Bicep CLI のバージョンが出力されるか確認してみましょう。エラーが出力される場合は、Bicep CLI を手動でインストールするか、az upgrade を実行します。
az bicep version
Bicep CLI を手動でインストールする場合は、以下のコマンドを実行します。
az bicep install
また Bicep CLI が既にインストール済みで最新バージョンにアップグレードする場合は、以下のコマンドを実行します。
az bicep upgrade
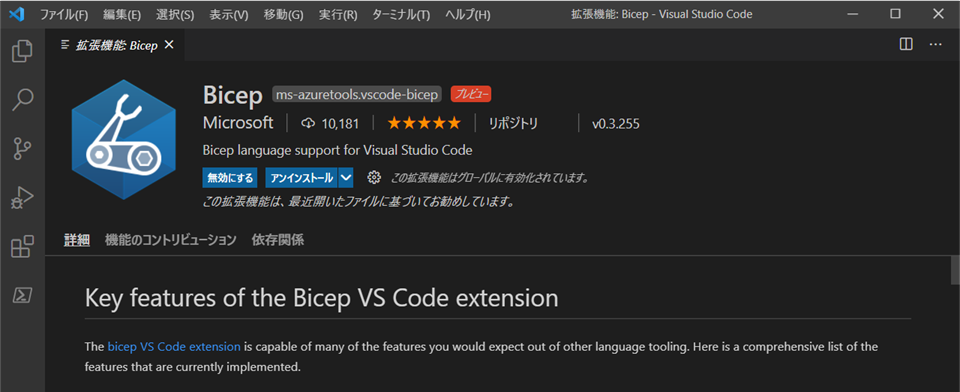
Visual Studio Code の Bicep 拡張機能をインストール
Bicep ファイルを編集するためのエディターとして、Visual Studio Code を利用することができます。また、Bicep ファイルを編集するための拡張機能も用意されています。これをインストールしておくと、インテリセンス、オートコンプリート、構文の検証などの機能が利用できてとても便利です。
Bicep ファイル
では、カンタンな Bicep ファイルの内容を見てみます。
resource stg 'Microsoft.Storage/storageAccounts@2019-06-01' = {
  name: 'tetsuyaooooostg'
  location: 'eastus'
  sku: {
    name: 'Standard_LRS'
  }
  kind: 'StorageV2'
  properties: {
    supportsHttpsTrafficOnly: true
  }
}
resource から始まる部分はリソースを定義しています。続く stg はシンボリック名と呼ばれ、リソースの識別子です (デプロイされるリソースの名前は name プロパティで定義)。そのあとにリソースの種類 (Microsoft.Storage/storageAccounts@2019-06-01) を記します。{...} 内にリソースのプロパティを定義します。
やってみよう
例として、ストレージアカウントをデプロイしてみます。
Bicep ファイルを作成
Visual Studio Code で新しいファイルを開き、以下の内容を記載して保存します。ファイルの拡張子は「.bicep」とします。
@minLength(3)
@maxLength(11)
param storagePrefix string

@allowed([
  'Standard_LRS'
  'Standard_GRS'
  'Standard_RAGRS'
  'Standard_ZRS'
  'Premium_LRS'
  'Premium_ZRS'
  'Standard_GZRS'
  'Standard_RAGZRS'
])
param storageSKU string = 'Standard_LRS'

param location string = resourceGroup().location

var uniqueStorageName = '${storagePrefix}${uniqueString(resourceGroup().id)}'

resource stg 'Microsoft.Storage/storageAccounts@2019-04-01' = {
  name: uniqueStorageName
  location: location
  sku: {
    name: storageSKU
  }
  kind: 'StorageV2'
  properties: {
    supportsHttpsTrafficOnly: true
  }
}

output storageEndpoint object = stg.properties.primaryEndpoints
ターゲット スコープ
Bicep ファイルをどのレベルでデプロイするかを設定することができます。既定値は「リソース グループ」です。Bicep ファイルをリソース グループ レベルでデプロイする場合は、Bicep ファイルでターゲット スコープを省略できます。
// リソースグループレベルでデプロイする場合は省略可
targetScope = 'resourceGroup'
ターゲット スコープで使用できる値は以下のとおり。
- resourceGroup - リソースグループへのデプロイ ※既定値
- subscription - サブスクリプションへのデプロイ
- managementGroup - 管理グループへのデプロイ
- tenant - テナントへのデプロイ
パラメーター
ARM テンプレートと同じようにパラメーターを指定することができます。param からはじまる部分がそれです。パラメーターにはデータ型、パラメーターで使用できる値を定義することができます。また、既定値を定義することができ、そのパラメーターが指定されなかったらこの既定値が使用されます。
// storagePrefix パラメーターの文字列長は 3 ~ 11 文字
@minLength(3)
@maxLength(11)
param storagePrefix string

// storageSKU パラメーターで指定できる SKU
@allowed([
  'Standard_LRS'
  'Standard_GRS'
  'Standard_RAGRS'
  'Standard_ZRS'
  'Premium_LRS'
  'Premium_ZRS'
  'Standard_GZRS'
  'Standard_RAGZRS'
])
param storageSKU string = 'Standard_LRS'

param location string = resourceGroup().location
変数
var からはじまる部分は Bicep ファイル内で利用する変数です。変数は値からデータ型を推測するため、データ型を指定する必要はありません。
var uniqueStorageName = '${storagePrefix}${uniqueString(resourceGroup().id)}'
関数
Bicep ファイルでは、ARM テンプレート関数と作成したユーザー定義関数を利用することができ、動的に値を取得することができます。
// location パラメーターの既定値はリソース グループの Location とする
param location string = resourceGroup().location

// ストレージ アカウント名=プレフィックス+ユニークな文字列
var uniqueStorageName = '${storagePrefix}${uniqueString(resourceGroup().id)}'
出力
デプロイから値を確認したい場合は出力を使います。出力値にはデータ型を指定する必要があります。
output storageEndpoint object = stg.properties.primaryEndpoints
Bicep ファイルをデプロイ
Visual Studio Code で新しいターミナルを開きます。
はじめに Azure サブスクリプションにサインインします。アカウントにたくさんのサブスクリプションが紐づいている場合は該当のサブスクリプションを選択しましょう。
# サインイン
Connect-AzAccount
# サブスクリプションを選択
Set-AzContext [SubscriptionID/SubscriptionName]
# サインイン
az login
# サブスクリプションを選択
az account set --subscription [SubscriptionID/SubscriptionName]
今回は、ターゲット スコープは既定値を使用しますので、デプロイする前にリソース グループをデプロイしておきます。
New-AzResourceGroup -Name myResourceGroup -Location "Central US"
az group create --name myResourceGroup --location "Central US"
そして Bicep ファイルをデプロイします。
New-AzResourceGroupDeployment `
  -Name firstbicep `
  -ResourceGroupName myResourceGroup `
  -TemplateFile "C:\Temp\azuredeploy.bicep" `
  -storagePrefix "store" `
  -storageSKU Standard_LRS
az deployment group create \
  --name firstbicep \
  --resource-group myResourceGroup \
  --template-file "C:\Temp\azuredeploy.bicep" \
  --parameters storagePrefix=store storageSKU=Standard_LRS
しばらくすると正常にデプロイされます。
デプロイ結果を確認
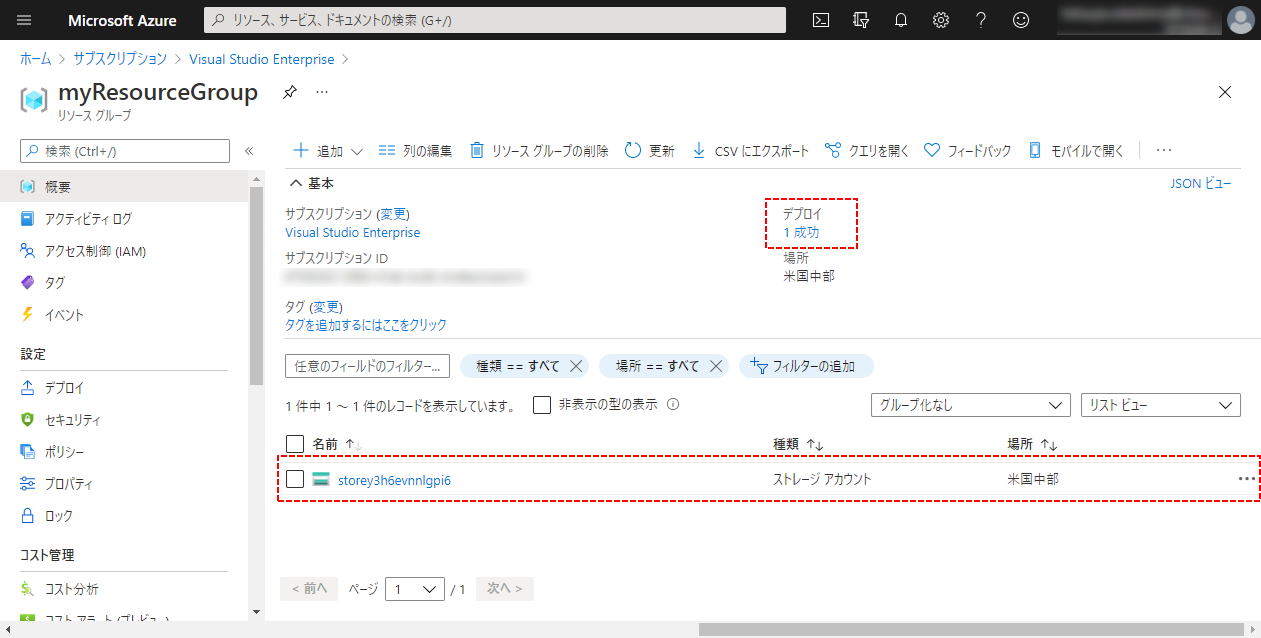
デプロイ結果を Azure ポータルで確認してみると、ストレージアカウントがデプロイされています。
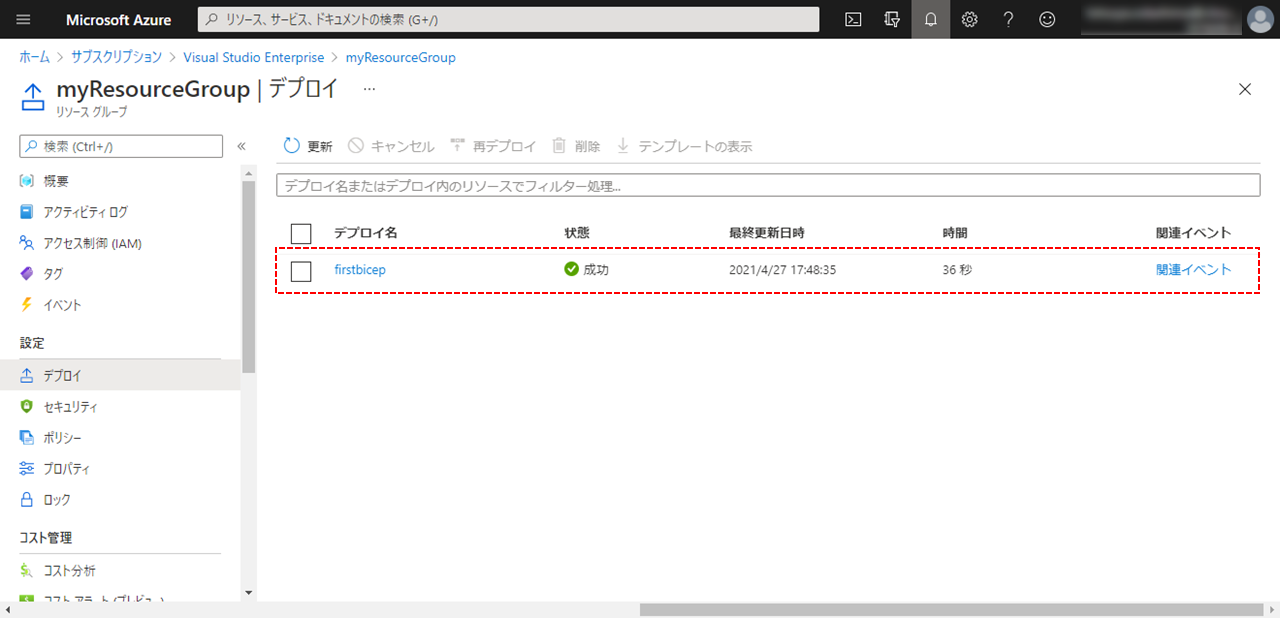
リソースグループのデプロイ履歴を見ると、先ほどのデプロイとその状態を確認することができます。
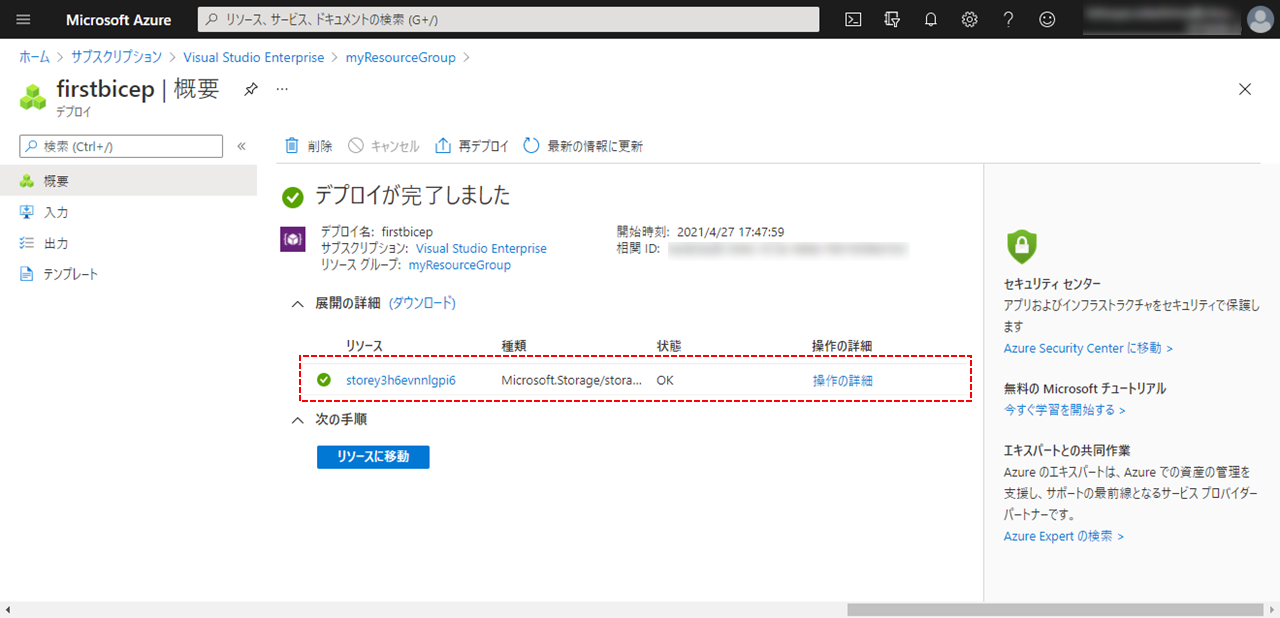
デプロイ名「firstbicep」をクリックして詳細を見てみます。
[概要] ブレードでは、ストレージアカウントがデプロイされたことが確認できます。
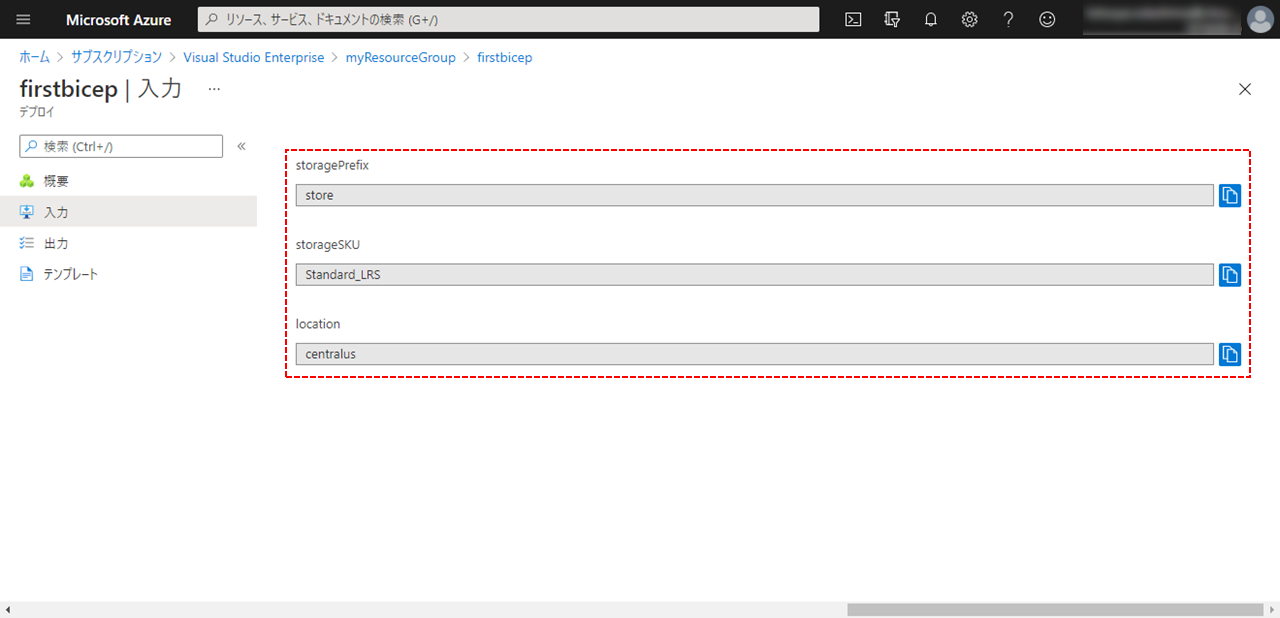
[入力] ブレードでは、デプロイ時に使用したパラメーター storagePrefix, storageSKU, location の値が確認できます。
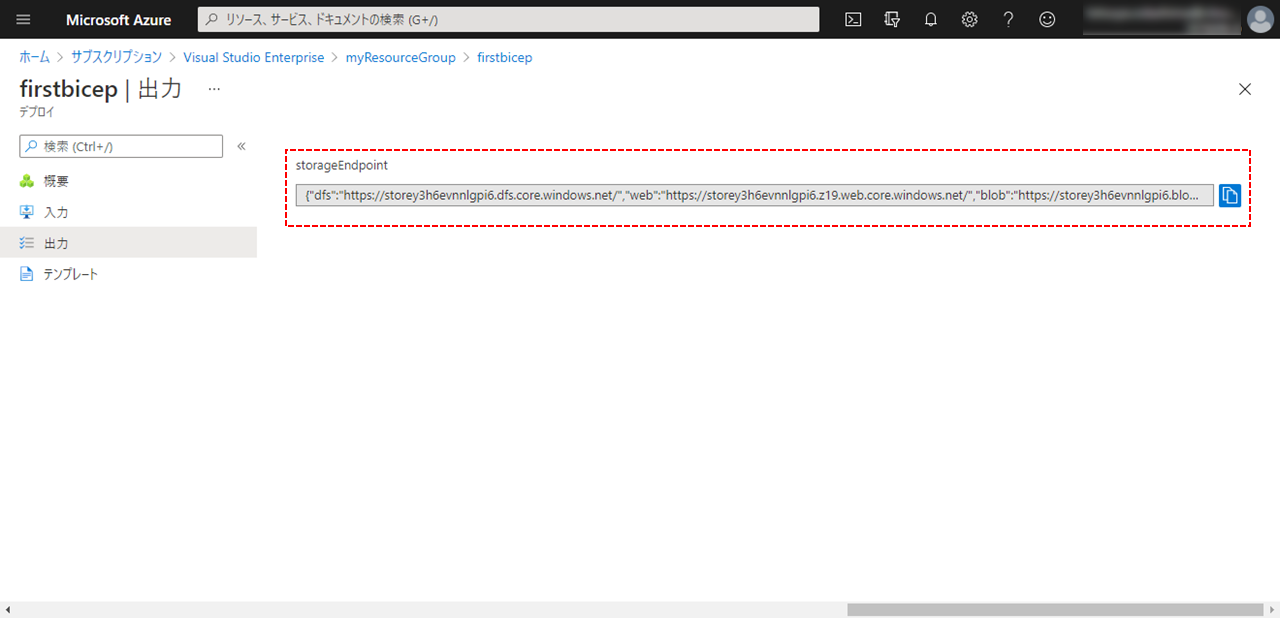
[入力] ブレードでは、output storageEndpoint object = stg.properties.primaryEndpoints の出力結果が確認できます。
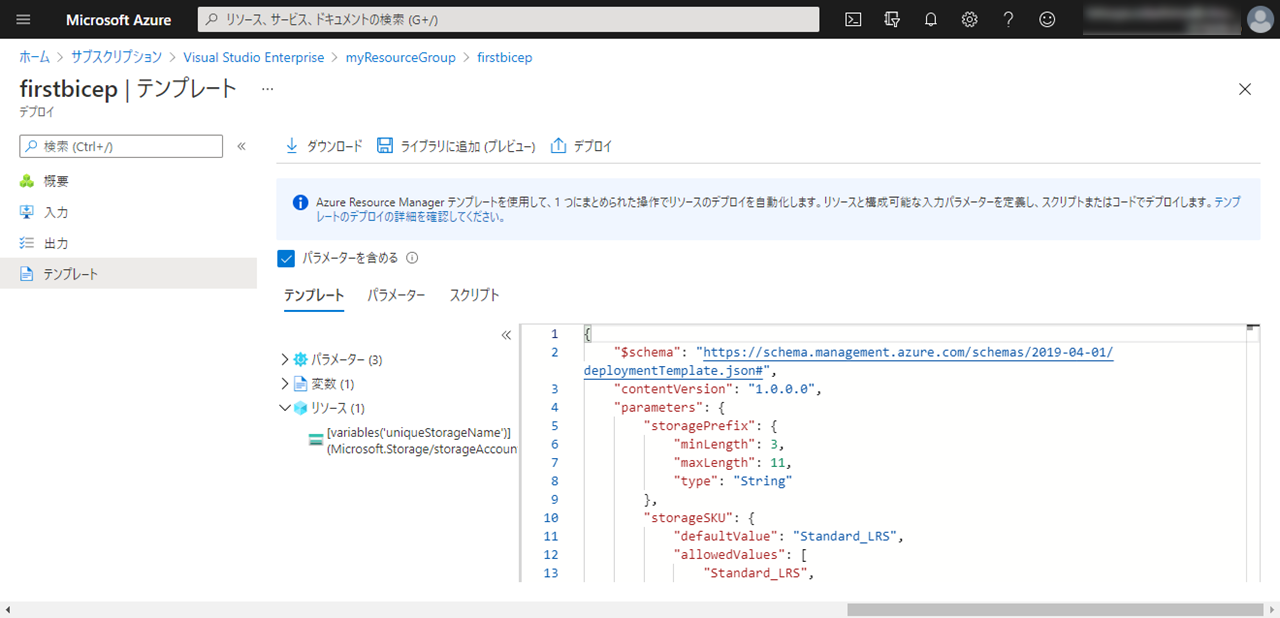
[テンプレート] ブレードでは、デプロイされた ARM テンプレートが確認できます。
ARM テンプレートファイルをダウンロードして内容を見ると、デプロイ時に Bicep ファイルの内容が ARM テンプレートの JSON 形式にコンパイルされていることが確認できます。
コンパイルされた template.json の内容 (クリックすると展開します)
{
    "$schema": "https://schema.management.azure.com/schemas/2019-04-01/deploymentTemplate.json#",
    "contentVersion": "1.0.0.0",
    "parameters": {
        "storagePrefix": {
            "minLength": 3,
            "maxLength": 11,
            "type": "String"
        },
        "storageSKU": {
            "defaultValue": "Standard_LRS",
            "allowedValues": [
                "Standard_LRS",
                "Standard_GRS",
                "Standard_RAGRS",
                "Standard_ZRS",
                "Premium_LRS",
                "Premium_ZRS",
                "Standard_GZRS",
                "Standard_RAGZRS"
            ],
            "type": "String"
        },
        "location": {
            "defaultValue": "[resourceGroup().location]",
            "type": "String"
        }
    },
    "variables": {
        "uniqueStorageName": "[format('{0}{1}', parameters('storagePrefix'), uniqueString(resourceGroup().id))]"
    },
    "functions": [],
    "resources": [
        {
            "type": "Microsoft.Storage/storageAccounts",
            "apiVersion": "2019-04-01",
            "name": "[variables('uniqueStorageName')]",
            "location": "[parameters('location')]",
            "sku": {
                "name": "[parameters('storageSKU')]"
            },
            "kind": "StorageV2",
            "properties": {
                "supportsHttpsTrafficOnly": true
            }
        }
    ],
    "outputs": {
        "storageEndpoint": {
            "type": "Object",
            "value": "[reference(resourceId('Microsoft.Storage/storageAccounts', variables('uniqueStorageName'))).primaryEndpoints]"
        }
    }
}
コンパイルされた parameters.json の内容 (クリックすると展開します)
{
    "$schema": "https://schema.management.azure.com/schemas/2015-01-01/deploymentParameters.json#",
    "contentVersion": "1.0.0.0",
    "parameters": {
        "storagePrefix": {
            "value": "store"
        },
        "storageSKU": {
            "value": "Standard_LRS"
        },
        "location": {
            "value": "centralus"
        }
    }
}
まとめ
Azure Bicep は JSON 形式の ARM テンプレートよりとても見やすく、やる気が湧いてきます。 ![]()
ARM テンプレートの冗長で複雑なところが Bicep を用いることで軽減されていることが分かります。
まだまだ序の口ですので、さらに勉強してこのつづきを書こうと思います。![]()
学習コンテンツの紹介
ARM テンプレートについて、以下のラーニングパスでおさらいしておいたほうが良さそうです。![]()
Azure Bicep については、以下のラーニングパスがありました。 ![]()
