はじめに
PowerShell で、Azure Communication Services を使ってメール送信する方法を模索していました。
やっと見つけた先人の記事。この記事でご紹介いただいているように、Invoke-RestMethod コマンドレットで REST API にリクエストする方法しかないのか...と思っていました。ちょっとめんどくさいです...![]()
注意
こちらの記事のように REST API でメール送信する場合の注意点として、メールの件名や本文などに日本語が含まれる場合は、Invoke-RestMethod コマンドレットの Body パラメーターには、UTF-8 エンコードされたバイト配列を指定 しましょう。これやらないと文字化けしたメールが届きますよ。
# Convert the PowerShell object to JSON
- $body = $apiResponse | ConvertTo-Json -Depth 10
+ $body = [Text.Encoding]::UTF8.GetBytes(($apiResponse | ConvertTo-Json -Depth 10))
が、筆者が求めていた Az モジュールが公開されていました!この「Az.Communication」モジュールがあれば、よりカンタンに開発できますね♪![]()
この投稿では、メール送信するための環境の構築 (メール送信できる仕組みは Azure Automation を利用) から PowerShell スクリプトの実装まで紹介しようと思います。
※執筆時点では、「Az.Communication」モジュールはまだプレビュー段階であるため、今後仕様変更があるかもしれません。ご留意ください。
メール送信するためのセットアップ
メール送信ができるようにするための環境を用意します。
Azure Email Communication Services リソースを作成
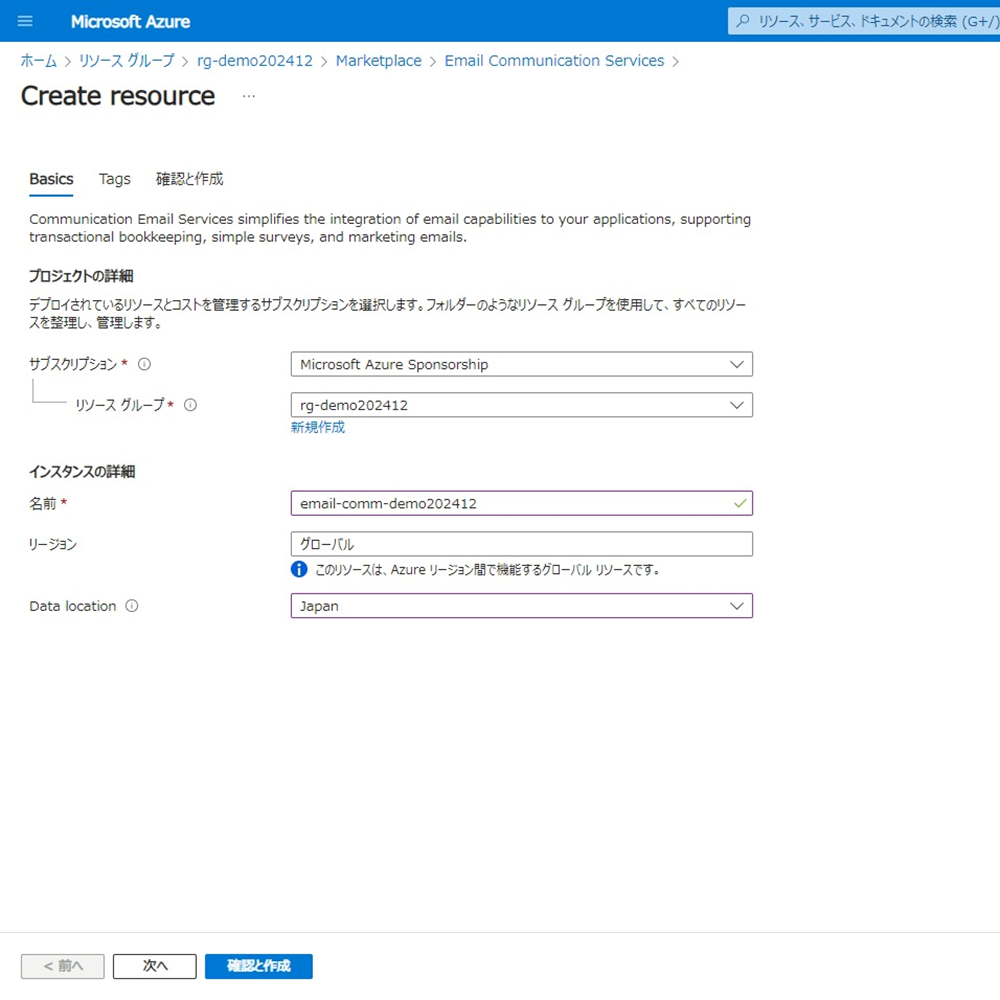
まず、メール通信サービス (Email Communication Services) リソースを作成します。
メールドメインを追加
メールドメインを追加します。
メール通信サービスリソースを開きます。 今回は、Azure サブドメインを使おうと思うので、下図の赤枠にある [1 クリックで追加] をクリックします。
※カスタムドメインを追加する場合は、以下のドキュメントをご参照ください。
メールドメインのプロビジョニングが完了すると、(今回は)「azurecomm.net」のサブドメインが追加されます。
また、メールドメインの [MailFrom address] で、メール送信者アドレスが確認できます。
Azure Communication Services リソースを作成
次に、Communication Services リソースを作成します。
メールドメインを接続
メール送信ができるようにするため、下図の赤枠にある [ドメインを接続する] をクリックします。
赤枠の部分で、メール通信サービスリソースと先ほど作成したメールドメインを選択し、[接続] をクリックします。
メールドメインが接続できました。
これで、メール送信ができるようになりました。
なお、Azure ポータルからメール送信を行うことができます (Try Email)。この機能を使って事前に動作確認することができますね。この操作方法については、以下のドキュメントをご参照ください。
実行環境のセットアップ
今回は、Automation Runbook からメールを送信しようと思います。
マネージド ID にロールを割り当てる
マネージド ID で Azure に接続します。今回は、システム割り当て済みマネージド ID を使い、以下の Azure ロールを割り当てます。
※後述する Runbook を動作確認した結果、これらのロールを割り当てることで正常に動作しました。なお、これは執筆時点のもので、動作については今後変更されるかもしれません。ご留意ください。
割り当てる Azure ロールについては、以下の記事もご参照ください。
ランタイム環境を作成
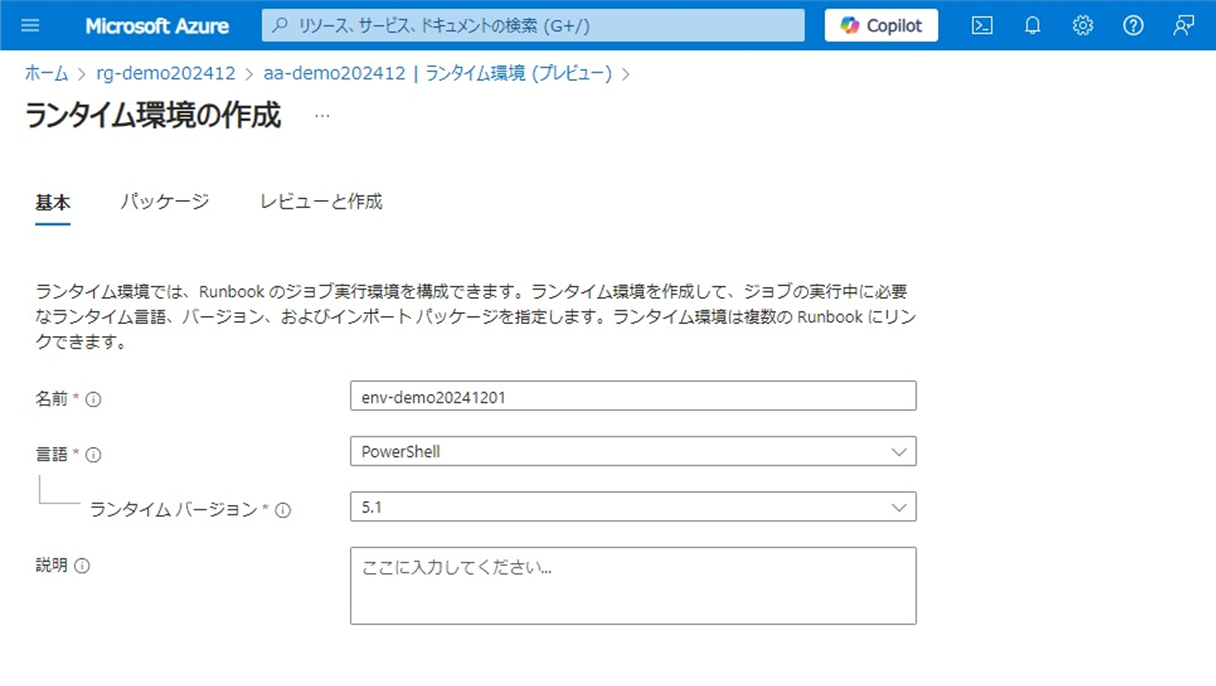
別途パッケージを追加するため、ランタイム環境を用意します。
「パッケージ」タブで、ギャラリーから必要なモジュールを追加します。
「Az.Communication」だけ追加した場合だと、Runbook 実行時に以下のように「Az.Accounts が必要です」というメッセージが出力されるので、併せて追加します。
This module requires Az.Accounts version 3.0.5. An earlier version of Az.Accounts is imported in the current PowerShell session. Please open a new session before importing this module. This error could indicate that multiple incompatible versions of the Azure PowerShell cmdlets are installed on your system. Please see https://aka.ms/azps-version-error for troubleshooting information.
Runbook を作成
Runbook は、前述の「ランタイム環境」上で実行させるので、それを選択して作成します。
Runbook を実装
エンドポイントを取得
まず、Communication Services リソースのエンドポイントを用意します。
エンドポイントは、Get-AzCommunicationService の戻り値の HostName プロパティ (FQDN) を基に URI を作成します。
<#
.DESCRIPTION
Azure Communication Services リソースのエンドポイントを取得します
.PARAMETER ResourceGroupName
リソースグループ名
.PARAMETER CommunicationServiceName
Communication Services リソース名
.OUTPUTS
エンドポイント
#>
function Get-EmailEndpoint {
    param (
        [Parameter(Mandatory=$true)]
        [string]$ResourceGroupName,
        [Parameter(Mandatory=$true)]
        [string]$CommunicationServiceName
    )

    # エンドポイント
    $endpoint = $null

    # Azure Communication Services リソースを取得
    $commService = Get-AzCommunicationService `
        -ResourceGroupName $ResourceGroupName `
        -Name $CommunicationServiceName

    # Azure Communication Services リソースが取得できた場合
    if ($null -ne $commService) {
        # エンドポイントを作成
        $endpoint = "https://$($commService.HostName)"
    }

    return $endpoint
}
メール送信者アドレスを取得
次に、メール送信者アドレスを用意します。
メール送信者アドレスは、Get-AzEmailServiceDomain の戻り値の MailFromSenderDomain プロパティ (メール送信者ドメイン) と、Get-AzEmailServiceSenderUsername の戻り値の Username プロパティ (送信者ユーザー名) を取得して、メールアドレスを作成します。
<#
.DESCRIPTION
メール送信者アドレスを取得します
.PARAMETER ResourceGroupName
リソースグループ名
.PARAMETER EmailServiceName
Email Services リソース名
.OUTPUTS
メール送信者アドレス
#>
function Get-EmailSenderAddress {
    param (
        [Parameter(Mandatory=$true)]
        [string]$ResourceGroupName,
        [Parameter(Mandatory=$true)]
        [string]$EmailServiceName
    )

    # メール送信者アドレス
    $emailSenderAddress = $null

    # Email Services ドメインを取得
    $emailDomains = Get-AzEmailServiceDomain `
        -ResourceGroupName $ResourceGroupName `
        -EmailServiceName $EmailServiceName

    # Email Services ドメインが取得できた場合
    if ($emailDomains.Count -gt 0) {
        # Email Services 送信者を取得
        $emailSenders = Get-AzEmailServiceSenderUsername `
            -ResourceGroupName $ResourceGroupName `
            -EmailServiceName $EmailServiceName `
            -DomainName $emailDomains[0].Name

        # Email Services 送信者が取得できた場合
        if ($emailSenders.Count -gt 0) {
            # メール送信者アドレスを作成
            $emailSenderAddress = `
                "$($emailSenders[0].Username)@$($emailDomains[0].MailFromSenderDomain)"
        }
    }

    return $emailSenderAddress
}
メールを送信
メインロジックは、以下の順番で処理を実行します。
- マネージド ID を使って Azure に接続する
- Communication Services リソースのエンドポイント URI を取得 (用意) する
- メール送信者アドレスを取得 (用意) する
- メッセージを編集する
- メール送信者
- メール受信者
- 件名
- 本文 (HTML 形式 or テキスト形式)
- ユーザー エンゲージメント トラッキングを無効にするかどうか
- など
- メールを送信する (キューに入れる)
# モジュールを読み込む
Import-Module Az.Accounts
Import-Module Az.Communication

# メール件名
$Subject = 'テストメール'
# メール本文
$Body = '<html><body><p>Hello World by メール.</p></body></html>'
# メール受信者 ※複数個の場合はカンマ区切りで指定
$Recipient = 'example@contoso.com'

# リソースグループ名
$ResourceGroupName = 'rg-demo202412'
# 通信サービスリソース名
$CommunicationServiceName = 'comm-demo202412'
# メール送信サービスリソース名
$EmailServiceName = 'email-comm-demo202412'

try {
    # Runbook 内で AzContext を継承しない
    Disable-AzContextAutosave -Scope Process

    # システムに割り当てられたマネージド ID で Azure に接続
    $azContext = (Connect-AzAccount -Identity).context

    # コンテキストの設定と保存
    $azContext = Set-AzContext `
        -Subscription $azContext.Subscription `
        -DefaultProfile $azContext

    # エンドポイントを取得
    $endpoint = Get-EmailEndpoint `
        -ResourceGroupName $ResourceGroupName `
        -CommunicationServiceName $CommunicationServiceName
    Write-Output "Endpoint: $endpoint"

    # メール送信者アドレスを取得
    $senderAddress = Get-EmailSenderAddress `
        -ResourceGroupName $ResourceGroupName `
        -EmailServiceName $EmailServiceName
    Write-Output "SenderAddress: $senderAddress"

    # メール受信者を編集
    $emailRecipientTo = @()
    foreach ($recipient in $Recipient.Split(',')) {
        $recipientItem = @{
            Address = $recipient
            DisplayName = $recipient
        }
        $emailRecipientTo += $recipientItem
    }

    # メッセージを編集
    $emailMessage = @{
        SenderAddress = $senderAddress
        RecipientTo = @($emailRecipientTo)
        ContentSubject = $Subject
        ContentHtml = $Body
        UserEngagementTrackingDisabled = $true
    }
    Write-Output "Message: $($emailMessage | ConvertTo-Json)"

    # メールを送信
    Send-AzEmailServicedataEmail -Endpoint $endpoint -Message $emailMessage

    Write-Output "Done"
}
catch {
    Write-Error "Failed: $_`n$($_.ScriptStackTrace)"
}
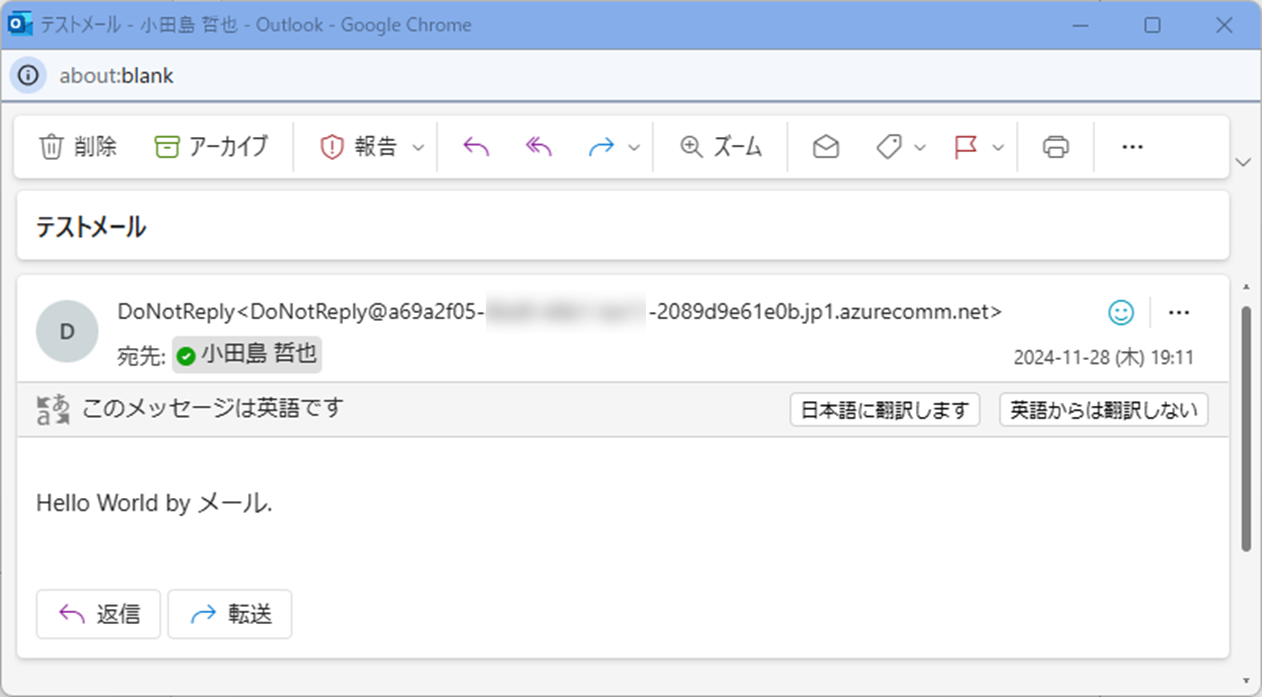
この Runbook を実行すると、下図のようなメールが届きます。
複数の宛先にメールを送信したい場合は、Address と DisplayName プロパティを持つオブジェクトの配列で指定します。この PowerShell スクリプトでは、メール受信者をカンマ区切りで指定した文字列変数 ($Recipient) からオブジェクト配列変数 ($emailRecipientTo) に変換して RecipientTo プロパティに値をセットします。
※CC (RecipientCc プロパティ)、BCC (RecipientBcc プロパティ)、メールの返信先 (ReplyTo プロパティ) も同様
# メール受信者 ※複数個の場合はカンマ区切りで指定
$Recipient = 'user1@contoso.com,user2@contoso.com,user3@contoso.com'

### (中略) ###

# メール受信者を編集
$emailRecipientTo = @()
foreach ($recipient in $Recipient.Split(',')) {
    $recipientItem = @{
        Address = $recipient
        DisplayName = $recipient
    }
    $emailRecipientTo += $recipientItem
}
また、この PowerShell スクリプトでは、メール本文は HTML 形式で ContentHtml プロパティに値をセットしていますが、テキスト形式の場合は ContentPlainText プロパティに値をセットします。
その他に、ファイルを添付したり (Attachment プロパティ)、受信者が届いたメールを返信した時の送付先 (メールの返信先) のメールアドレス (ReplyTo プロパティ) を指定したりすることもできます。
(ここで紹介していないものも含めて) 詳しくは、以下のドキュメントをご参照ください。
まとめ
PowerShell でも Az.Communication モジュールを使えば、カンタンにメールを送信する仕組みを作ることができました。このモジュールがまだプレビュー段階だったり、マネージド ID に割り当てる Azure ロールがちょっと気になりますが、みなさまもぜひお試しいただければと思います。


