1. 概要
以前、Raspberry Pi 3BにBusterをインストールした場合のRTSPサーバーを試した。今回はOSをBullseys 64bitに変更して同様に動作するか確認する。
尚、ハードウェアエンコーダを使うには、omxではなくてv4l2hという情報を事前に得ている。
2. 使用機器
- Raspberry Pi 3B
- OSはBullseys 64bit(Debian 11)
- UVCカメラ: Buffalo BSW500M
- 再生アプリケーション: VLC Player on Windows11
3. OSのインストール
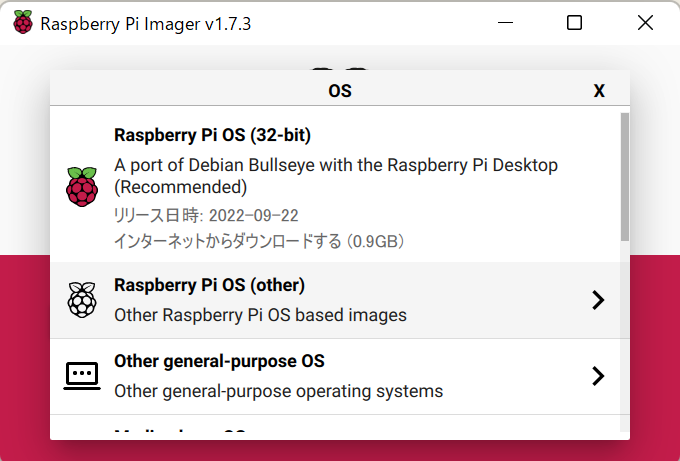
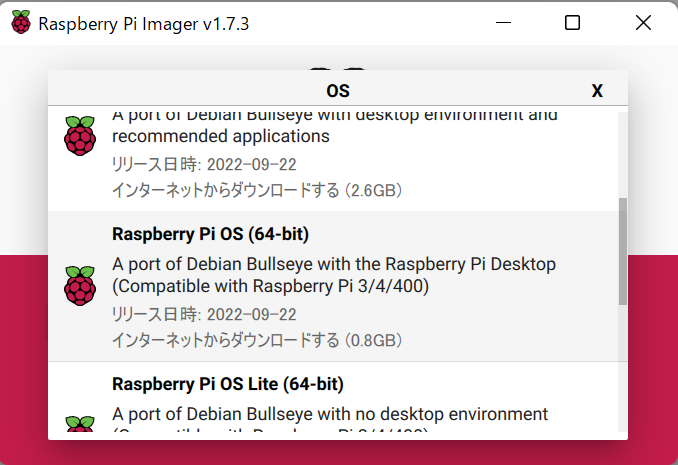
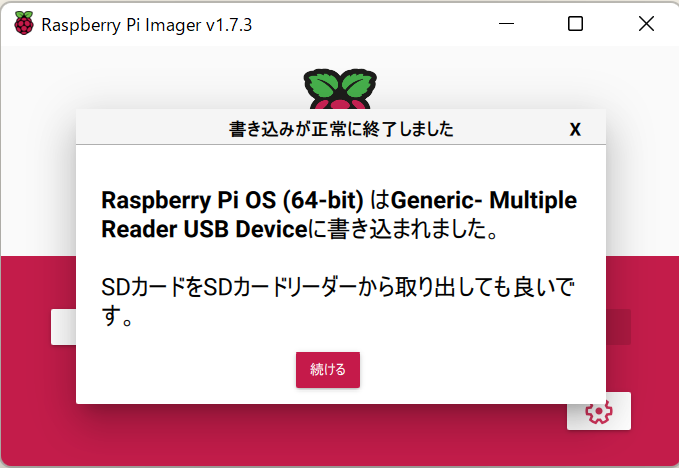
Raspberry Pi Imager imager_1.7.3.exeを使用した。よくある説明なので大まかにだけ書く。
- OSをSDカードに書き込む
- 起動してユーザーを作る
- 地域はJapanを選択、その他は大体そのままNext


終わってから気が付いたが、64bit版である必要もなかったかもしれない。
OS起動後のバージョン確認
user@raspberrypi:~ $ uname -a
Linux raspberrypi 5.15.74-v8+ #1595 SMP PREEMPT Wed Oct 26 11:07:24 BST 2022 aarch64 GNU/Linux
aarch64があるので64bit版
4. Gstreamerのインストール
とりあえずはaptで入る版で試す。ほぼBusterのときと同じだが、一部のライブラリは存在しなかった。
$ sudo apt -y install cmake m4
$ sudo apt -y install libssl-dev libcurl4-openssl-dev liblog4cplus-dev
$ sudo apt -y install libgstreamer1.0-dev libgstreamer-plugins-base1.0-dev libgstreamer-plugins-bad1.0-dev gstreamer1.0-plugins-bad gstreamer1.0-plugins-good gstreamer1.0-plugins-ugly gstreamer1.0-tools
liblog4cplus-1.1-9 はパッケージが存在しなかった。
gstreamer1.0-omx はパッケージが存在しなかった。
v4l2hの確認。表示されたのでよしとする。
$ gst-inspect-1.0 | grep v4l2h

video4linux2:  v4l2h263dec: V4L2 H263 Decoder
video4linux2:  v4l2h264dec: V4L2 H264 Decoder
video4linux2:  v4l2h264enc: V4L2 H.264 Encoder
ついでにGstreamerのバージョン確認。
user@raspberrypi:~ $ gst-launch-1.0 --version
gst-launch-1.0 version 1.18.4
GStreamer 1.18.4
http://packages.qa.debian.org/gstreamer1.0
後から必要になりそうなものを事前にインストールしておく。
$ sudo apt -y install gtk-doc-tools meson libcgroup-dev gir-to-d
5. RTSPサーバーのインストール
前回も使ったGStreamerが提供しているgst-rtsp-serverを使ってみる。
checkoutでバージョンを合わせる。ビルドツールがautogenからmesonになってた。
$ git clone git://anongit.freedesktop.org/gstreamer/gst-rtsp-server
$ cd gst-rtsp-server
$ git checkout 1.18.4
$ meson build/
$ cd build/
$ ninja
6. 試す
出来上がったサンプルアプリのディレクトリに移動しておく。
$ cd examples
6.1 カメラの映像
カメラの映像をモニタに映す。
当たり前だが、デスクトップなしだと表示はされない。Lite版などを使った場合は意味がない。(はず)
$ gst-launch-1.0 v4l2src device=/dev/video0 ! videoconvert ! video/x-raw,format=I420,width=640,height=480,framerate=30/1 ! videoconvert ! ximagesink
6.2 カラーバーをRTSP
カラーバーをRTSPで配信する。再生はVLC Playerでメディアを開くのネットワークに「rtsp://192.168.1.128:8554/test」のように入力する。192.168.1.128はRaspberry Piに割り当てたIPアドレス。
$ ./test-launch '( videotestsrc ! x264enc ! rtph264pay name=pay0 pt=96 )'
とりあえず出たので最低限の動作はしている。
6.3 カメラの映像をRTSP
./test-launch '( v4l2src device=/dev/video0 ! videoconvert ! video/x-raw,format=I420,width=320,height=240,framerate=30/1 ! videoconvert ! x264enc ! rtph264pay name=pay0 pt=96 )'
うまくいかない。コマンドはBusterでもうまくいったパターンだがなぜか駄目。
--gst-debug-level=3をつけてデバッグログを出してみる
バッファのエラーっぽい。
stream ready at rtsp://127.0.0.1:8554/test
0:00:07.772457162  1658   0x7fa000cf00 ERROR         v4l2bufferpool gstv4l2bufferpool.c:683:gst_v4l2_buffer_pool_streamon:<v4l2src0:pool0:src> error with STREAMON 71 (Protocol error)
0:00:07.772596953  1658   0x7fa000cf00 ERROR             bufferpool gstbufferpool.c:559:gst_buffer_pool_set_active:<v4l2src0:pool0:src> start failed
0:00:07.773134608  1658   0x7fa000cf00 WARN                 v4l2src gstv4l2src.c:659:gst_v4l2src_decide_allocation:<v4l2src0> error: Failed to allocate required memory.
0:00:07.773187212  1658   0x7fa000cf00 WARN                 v4l2src gstv4l2src.c:659:gst_v4l2src_decide_allocation:<v4l2src0> error: Buffer pool activation failed
0:00:07.773617158  1658   0x7fa000cf00 WARN                 basesrc gstbasesrc.c:3347:gst_base_src_prepare_allocation:<v4l2src0> Subclass failed to decide allocation
0:00:07.773730282  1658   0x7fa000cf00 WARN                 basesrc gstbasesrc.c:3127:gst_base_src_loop:<v4l2src0> error: Internal data stream error.
0:00:07.773709710  1658   0x7fa8003300 WARN               rtspmedia rtsp-media.c:3250:default_handle_message: 0x7fa80621f0: got error Failed to allocate required memory. (../sys/v4l2/gstv4l2src.c(659): gst_v4l2src_decide_allocation (): /GstPipeline:media-pipeline/GstBin:bin0/GstV4l2Src:v4l2src0:
Buffer pool activation failed)
0:00:07.773798563  1658   0x7fa000cf00 WARN                 basesrc gstbasesrc.c:3127:gst_base_src_loop:<v4l2src0> error: streaming stopped, reason not-negotiated (-4)
0:00:07.773932938  1658   0x55ca4a0860 WARN               rtspmedia rtsp-media.c:3576:wait_preroll: failed to preroll pipeline
0:00:07.774026167  1658   0x55ca4a0860 WARN               rtspmedia rtsp-media.c:3946:gst_rtsp_media_prepare: failed to preroll pipeline
0:00:07.774064760  1658   0x7fa8003300 WARN               rtspmedia rtsp-media.c:3250:default_handle_message: 0x7fa80621f0: got error Internal data stream error. (../libs/gst/base/gstbasesrc.c(3127): gst_base_src_loop (): /GstPipeline:media-pipeline/GstBin:bin0/GstV4l2Src:v4l2src0:
streaming stopped, reason not-negotiated (-4))
0:00:07.779868175  1658   0x55ca4a0860 ERROR             rtspclient rtsp-client.c:1087:find_media: client 0x55ca4ad110: can't prepare media
0:00:07.780993067  1658   0x55ca4a0860 ERROR             rtspclient rtsp-client.c:3346:handle_describe_request: client 0x55ca4ad110: no media
何をやってもうまくいかない。
ちなみに過程において、グラフィックメモリの割り当てを512MBに変更した。今回の成否には多分関係していない。グラフィックメモリの割り当て変更は「Raspberry Piの設定のパフォーマンス」もしくは、/boot/config.txtの編集で出来る。
NGコマンド集
./test-launch '( videotestsrc ! v4l2h264enc ! rtph264pay name=pay0 pt=96 )'  --gst-debug-level=3
./test-launch '( videotestsrc ! v4l2h264enc extra-controls="encode,h264_profile=1,h264_level=12;" ! video/x-h264,stream-format=byte-stream,profile=constrained-baseline ! h264parse config-interval=-1 ! rtph264pay name=pay0 pt=96 )'  --gst-debug-level=3
./test-launch '( v4l2src device=/dev/video0 ! video/x-raw,width=640,height=480,framerate=15/1 ! v4l2h264enc ! video/x-h264,level=(string)3 ! rtph264pay name=pay0 pt=96 )' --gst-debug-level=3
./test-launch '( v4l2src device=/dev/video0 ! video/x-raw,format=I420,width=640,height=480,framerate=30/1 ! v4l2h264enc ! rtph264pay name=pay0 pt=96 )' --gst-debug-level=3
./test-launch '( v4l2src device=/dev/video0 ! video/x-raw,width=640,height=480,framerate=15/1 ! capssetter caps="video/x-h264, colorimetry=bt709" ! v4l2h264enc ! video/x-h264,level=(string)3 ! rtph264pay name=pay0 pt=96 )' --gst-debug-level=3
./test-launch 'v4l2src device=/dev/video0 ! video/x-raw,width=320,height=240,framerate=30/1,format=YUY2 ! videoconvert ! v4l2h264enc ! video/x-h264,level=(string)3 ! h264parse ! rtph264pay name=pay0 pt=96' --gst-debug-level=3
./test-launch 'v4l2src device=/dev/video0 ! image/jpeg,width=320,height=240,framerate=15/1 ! v4l2jpegdec ! videoconvert ! v4l2h264enc ! video/x-h264,level=(string)3 ! h264parse ! rtph264pay name=pay0 pt=96' --gst-debug-level=3
6.4 UDPで配信
6.4.1 最初の失敗手順
方針転換してgst-launch-1.0を使ってみる。そもそもv4l2h264encは動くのかどうか?
gst-launch-1.0 videotestsrc ! v4l2h264enc ! 'video/x-h264,level=(string)3' ! filesink location=test.h264
適当にCtrl+Cで止めて、test.h264を再生してみた。カラーバーが録画されているので、動いているようだ。
Raspberry Piのカメラ映像をUDPで配信状態にする。
gst-launch-1.0 -vvv v4l2src device=/dev/video0 ! 'video/x-raw,width=640,height=480,framerate=15/1,format=YUY2'! videoconvert ! v4l2h264enc ! 'video/x-h264,level=(string)3' ! h264parse ! rtph264pay config-interval=10 pt=96 ! udpsink host=192.168.1.2 port=8554
※192.168.1.2は再生側Windows11のIPアドレス。
テキストでtest.sdpというファイルを作り、中身は以下とする。 test.sdpをVLC Playerで開くと再生となる。
v=0
m=video 8554 RTP/AVP 96
c=IN IP4 192.168.1.128
a=rtpmap:96 H264/90000
これがどうにも不安定で、gst-launch-1.0のコマンドを何回か実行したら配信状態になった。
失敗したときは、「v4l2src0: Internal data stream error.」となってしまう。うまくいけばカウントアップが動く。
6.4.2 設定修正
Wikiとかをみると、H.264のレベルが3の場合、352×480、352×576、720×480、720×576に対応と書いてあった。あまり大きい解像度でなければ悪影響はないだろうと考えていたのが良くなかった。
とりあえず1280x720や1920x1080に対応している4に変更。level=(string)3 --> level=(string)4
また、解像度だけでなくフレームレートもカメラが対応している値でなければならない。UVCカメラが対応している解像度とフレームレートの一覧は、以下で表示できる。
v4l2-ctl -d /dev/video0 --list-formats-ext
これら踏まえたコマンドによって起動が安定し、エラーログは出なくなった。
gst-launch-1.0 -vvv v4l2src device=/dev/video0 ! 'video/x-raw,width=1280,height=720,framerate=10/1,format=YUY2'! videoconvert ! v4l2h264enc ! 'video/x-h264,level=(string)4' ! h264parse ! rtph264pay config-interval=10 pt=96 ! udpsink host=192.168.1.2 port=8554
※videoconvertをv4l2convertに変更しても動かなかった。
7. カメラの映像をRTSP(改めて挑戦)
UVCカメラの解像度、フレームレートとH.264のレベルを合わせる。ハードウェアエンコーダをセットする。などを行い、以下のコマンドで成功した。VLC Playerで再生ができた。
YUV版
./test-launch '( v4l2src device=/dev/video0 ! 'video/x-raw,width=1280,height=720,framerate=10/1,format=YUY2' ! videoconvert ! v4l2h264enc ! video/x-h264,level=(string)4 ! h264parse ! rtph264pay name=pay0 pt=96 )'
遅延は1秒ちょっとか。
MJPEG版
./test-launch '( v4l2src device=/dev/video0 ! 'image/jpeg,width=1280,height=720,framerate=10/1' ! v4l2jpegdec ! videoconvert ! v4l2h264enc ! video/x-h264,level=(string)4 ! h264parse ! rtph264pay name=pay0 pt=96 )'
※「video/x-h264,level=(string)4」をシングルクォーテーションたダブルクォーテーションで括るとエラーがでる。
※デバッグログを出しているとWARNやFIXMEが出るので少し気になる。
8. まとめ
Bullseye 64bit版でもaptでインストールできるGStreamerでRTSPサーバとして動きそうにはみえる。
非常に不安定な動きを見せるv4l2のバッファ処理を安定化できれば使えそうではある。
今後は不安定要因を追求するか、別バージョンのGStreamerでなんとかならないか確認したい。
Bullseye 64bit版でもaptでインストールできるGStreamerライブラリやで追加のアプリケーションでRTSPサーバとして使えそう。今後は別バージョンのGStreamerも確認したい。